Harley Davidson Touring: Transmission Diagnostic Guide
Next to your engine, the transmission is the most important part of your drivetrain. Much love and discussions is given to engines, but did you know transmissions need love as well? In this article we'll discuss signs and symptoms of transmission problems in your Harley Davidson Touring model.
This article applies to the Harley Davidson Touring (2000-2015).
The transmission is a key part of your drivetrain. For the Harley big twins, power starts at the crank shaft and is transferred to the transmission by a enclosed chain primary drive. Power is then sent to the transmission's output shaft via a series of gears. The clutch allows you to connect the motor to the gears at will, and on to the rear wheel via a belt final drive. Serious transmission problems are probably beyond the scope of most DIY'ers, but in this article we'll touch on some common transmission problems and how to diagnose them. A good diagnosis can help you guide a shop to the correct repair, without wasting time and money on professional diagnostic fees. And if you are a more skilled mechanic, you may even be able to fix it yourself.
We'll break this down by types of problems as opposed to in-depth how to fix it information, as that is the scope of the huge factory service manual.

Materials Needed
- Basic set of wrenches and sockets
- Torque wrench
- Mechanic's stethoscope
- Credit card
Step 1 – Creep, stalling or trouble getting in gear/neutral
If the bike grinds when trying to put it in gear, or wants to creep forward or stall at stop light, chances are the clutch isn't disengaging fully. If giving the bike full throttle when under load, it results in the motor revving, but if the bike not gaining speed, the clutch is probably slipping. Either way, the first thing to check is the adjustment at both ends (or the middle, depending on the bike) for the cable, and then the pushrod at the primary case itself.

- Loosen the cable adjustment until there is slack in the clutch cable and free play at the lever.
- Loosen the lock nut under the derby cover that holds the clutch adjusting screw in adjustment.
- Back out the screw with an Allen wrench until it is loose, then turn it inward until you just begin to feel resistance.
- Turn the Allen bolt back out 1/2 turn, then hold it in place and tighten the lock nut.
- Re-adjust the clutch cable so there is only a small amount of play at the lever, less than 1/8' measured where the lever meats the perch.
Step 2 – Hard clutch pull
If you have noticed that your left forearm resembles Popeye's due to an extreme amount of effort to pull the clutch lever, your clutch could be out of adjustment, worn or just in need of lubrication at the linkage and cable. Loosen the clutch cable at the middle and take off the derby cover, and check for resistance in the cable itself. Lubricate with a good penetrating oil, while working the cable back and forth. If it still resists movement, follow the routing and looks for pinch points. Unfortunately, once the metal inner casing is pinched, the only solution is likely a new cable. The video below shows you how to replace the typical Harley Davidson clutch cable.
Featured Video: How to Replace Clutch Cable
Step 3 – Trouble shifting once rolling
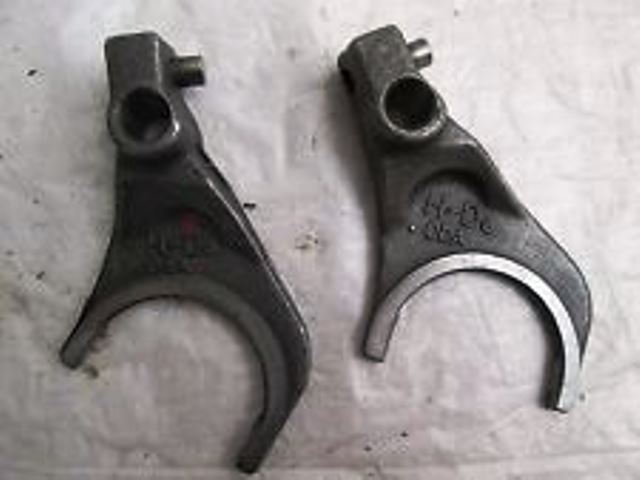
Transmission problems will often manifest as difficulty changing gears whilst underway. Causes can include a bent shift fork, bad bearing on the transmission input or output shaft, or other worn parts. A bad/bent shift fork no longer move the gears the correct distance, which prevents complete engagement of the next gear set. Replacing a bent shift fork requires taking the transmission out and disassembling it. Bent shift forks are usually caused by excessive or abusive force the the shift lever, or sometimes even a minor tip over in a parking lot. A bearing that has too much play in it might allow a gear to move excessively, preventing it from engaging fully as well. The simple things you can do in cases like this are a transmission oil change, a shift linkage adjustment and lubrication, and a shifter pawl adjustment.
- Transmission Oil Change - Remember when we said transmissions need love too? Don't forget to check and change your transmission lubricant regularly. Changing the oil is a simple drain and fill, all the information is in the article How to Change Transmission Fluid.
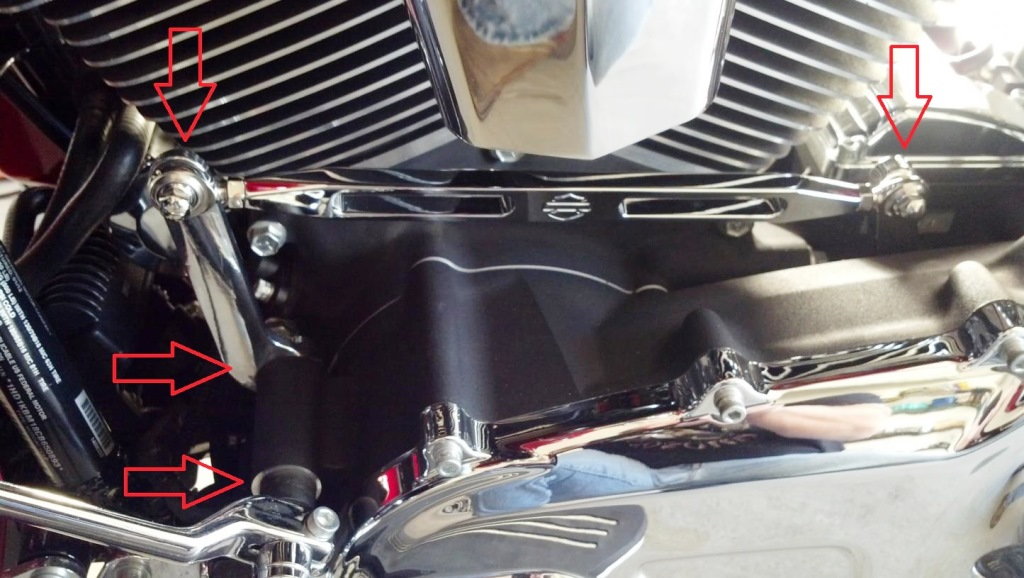
- Linkage Adjustment and Lube - Make sure the linkage moves freely on its pivot points at the shift lever and transmission; also, make sure the lever moves freely where is pivots on the frame/motor. Check the linkage for excessive play in it. Make sure your foot fits where the shifter is positioned, and fine tune it if you find up-shifting requires more than a flex at the ankle to accomplish.
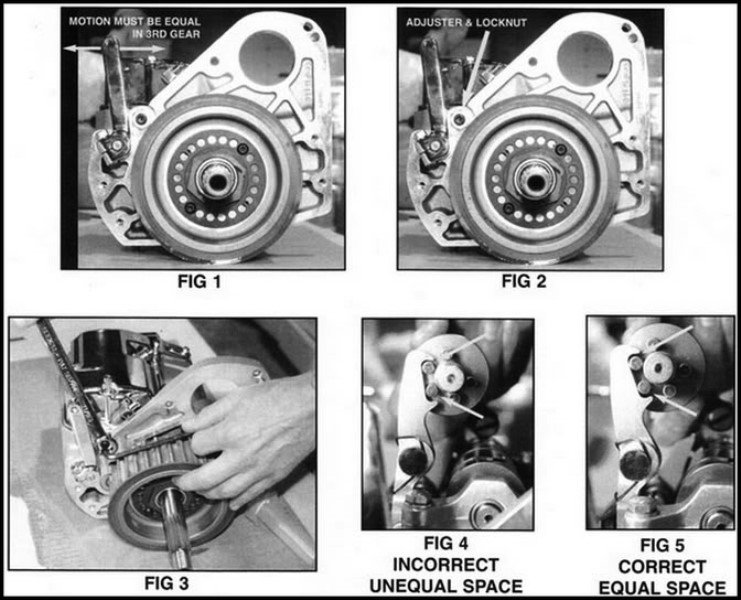
- Shift Pawl Adjustment - If you have a 2001 or earlier bike, the shifter pawl can be adjusted. Put the bike in 3rd gear, and adjust the pawl until the pins are centered as shown in the picture. The lever should then move equally back and forth, to shift the bike up or down to the next gear. The adjustment is at the back, near where the shifter pivots in the transmission. You can adjust it by feel, though the manual suggests you measure the actual clearance on each side.
Step 4 – Can't shift into gears or at all
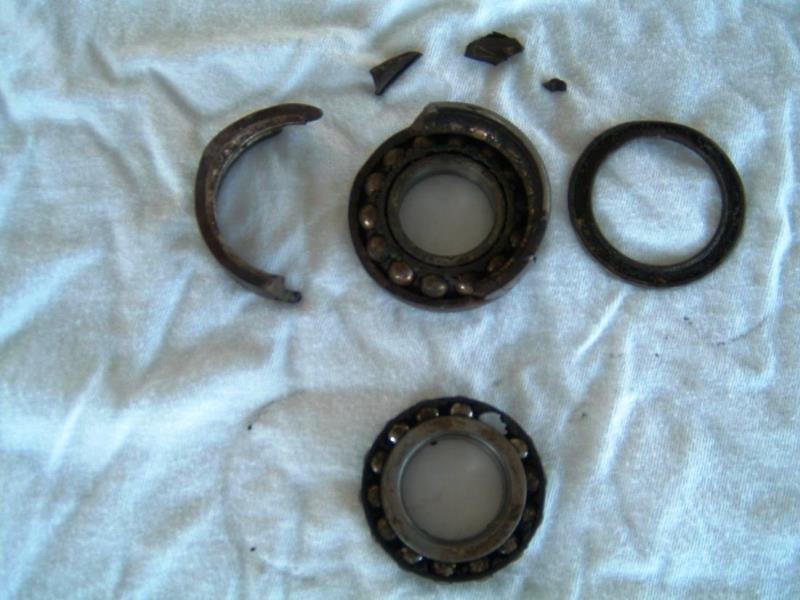
If this is the case, your transmission may have a broken or missing shift pawl or return spring. This shift pawl spring keeps the shifter pawl, which is attached to the external shift lever, engaged with shift drum whilst the return spring puts the shift lever back to its starting position, so the transmission is ready for the next gear change. These problems can often be fixed by just replacing the spring, but it does require digging into the transmission. The good news here is that there is less disassembly required, the springs can often be accessed by removing the top cover. In addition, the new parts are usually only a few dollars.

Pro Tip
If you find a broken or missing spring, the entire spring or a piece of it may have fallen to the bottom of the transmission. Try fishing it out with a magnet, and check your drained transmission oil for pieces of it. The hardened steel spring can cause damage to the transmission gears if not recovered.
Step 5 – Transmission is making funny noises
Transmissions can offer an whole repertoire of strange sounds from a low growling or rumbling sound to a high pitched whine. We'll describe some common sounds that that may be associated with a transmission problem. Unfortunately, unusual transmission sounds generally require disassembly and replacement of bearings, bushing and gears to fix.
Low Grumbling Sound - A low grumbling sound is usually caused by a bad bearing. When a bearing wears out or fails, it can allow the transmission shaft it supports to move a small distance out of position. If this happens, the gears will not mesh correctly and cause the noise as well as excess wear on the gears. Running the transmission with a bad bearing will require removal and disassembly of the transmission to replace not only the bearing, but likely the affected gear set as well. Often an adjacent seal will also be damaged, so make sure to replace any seals as well.
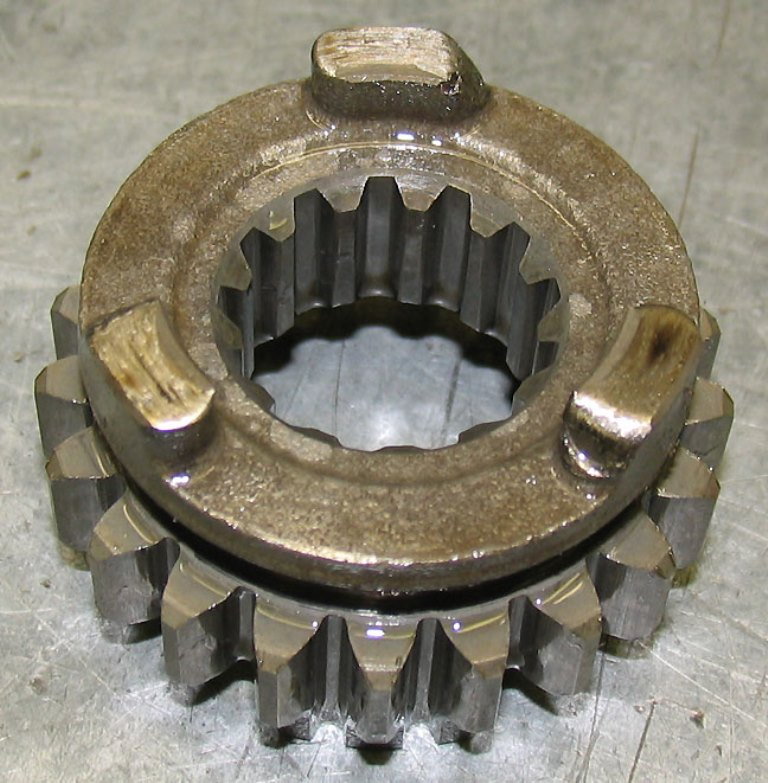
Clunking Sound - A loud clunking sound when the transmission is in a particular gear, usually under acceleration (but can also show up under deceleration too), could be gear with broken or missing teeth on one or more gears. As with a bad bearing, the transmission will have to be removed and disassembled to replace the broken gears, usually as a set.
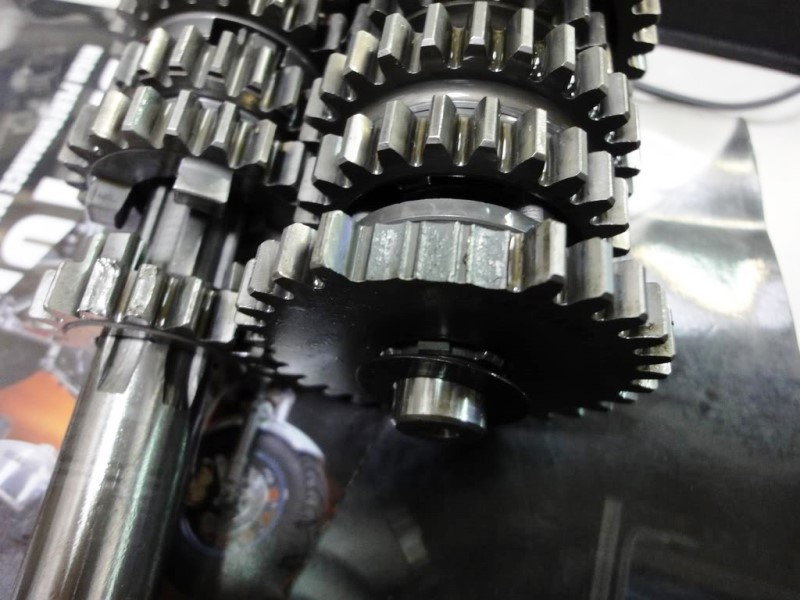
Transmission Pops Out of Gear - The gears are engaged when they slide on the transmission shaft, so dogs on one gear engaged with slots on the adjacent gear. If the dogs or slots become worn and rounded, the dogs will bounce out of the slots when engine load or RPM varies. This will present as the transmission popping out of gear into a false neutral. Bent shift forks can also cause a transmission popping out of gear; though, it typically it results in a bike reluctant to go into gear. A transmission that won't stay in gear means that replacement of the gears, shift forks, or possibly the shift drum are required.
Step 6 – Transmission is leaking
Another common issue is leaks. You can typically find a leak easily, because you can see it leaking. If not, the oil is probably going into the primary chain case, meaning the seal between the two is bad. There are only a few places the transmission can leak, all of them easy to spot. If, after suspecting a transmission leak, you find that the level is normal, you may have a leak from another source such as the primary case or perhaps the transmission was over-filled and expressed some of the excess volume out through the breather valve.
Pro Tip
After thoroughly de-greasing and cleaning your transmission, spraying the areas around the seals, vent, fill and drain plugs can with some powdered spray, such as those available at your local drugstore, can help better pinpoint the source.
Related Discussions
- Diagnosing Various Transmission Problems - HDForums.com
- Tranny Question - HDForums.com