Harley Davidson Touring: How to Reset Check Engine Light
You may think you need an expensive code scanner or computer to check and reset CEL codes on your Harley, but the Motor Company designed a diagnostic mode into the computer. All you need are your ignition keys and a finger, and a pen to write down the stored codes before resetting.
This article applies to the Harley Davidson Touring (2005-2016).
If you own and ride Harley Davidson motorcycles, you may get a check engine light from time to time. It is inevitable. A check engine light can appear for a variety of issues, and rarely is it serious. It is annoying and, at a bare minimum, every rider should be aware of the process to clear the check engine light and be able to retrieve the code to find out what it means. Would you rather take your bike to the dealer, or check the code and reset the light yourself?

Materials Needed
- A finger
- Ignition key
- Pen and paper
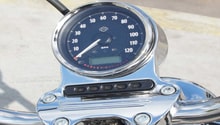
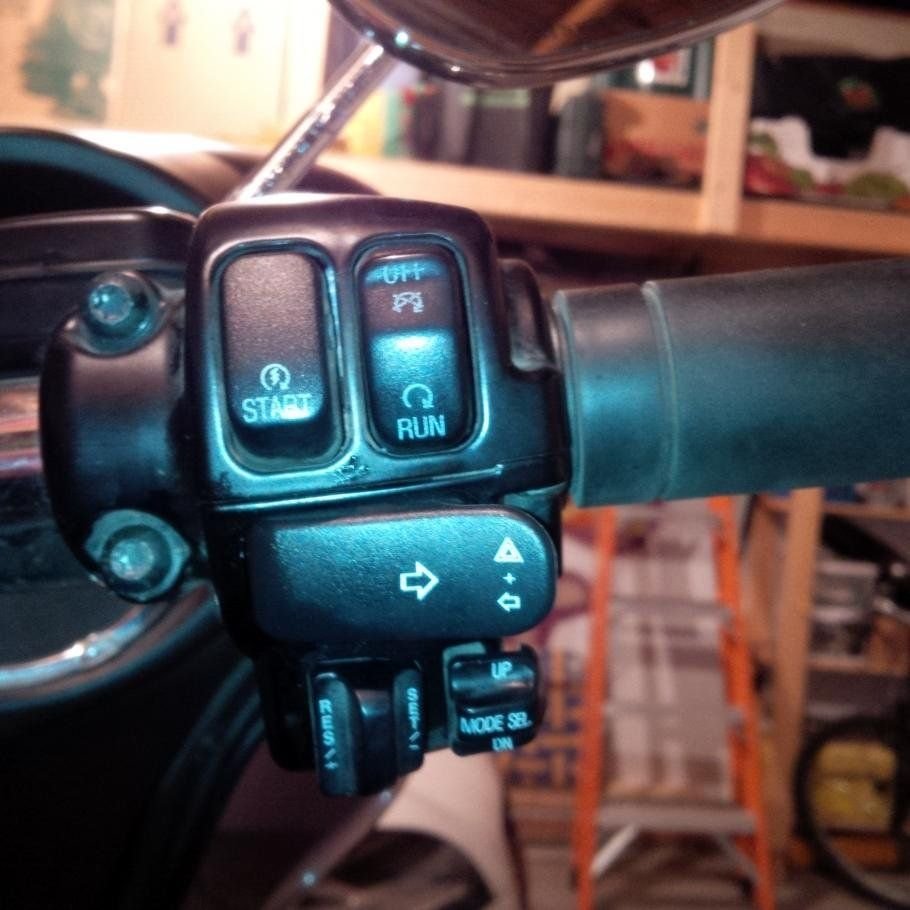
Step 1 – Set switches to appropriate settings
In order to check and reset the code, the first thing you must do is set the ignition switch and the run/stop switch. The ignition switch should be OFF. The run/stop switch should be set to RUN.
Pro Tip
In this instance, just as any other time you work on your motorcycle, make sure your motorcycle is on a level surface and firmly on the kickstand.
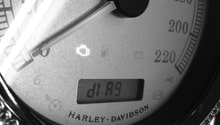
Step 2 – Pull up diagnostic mode
- With the engine switch on the off position and the run/stop switch in the run position, push the odometer trip reset button and hold.
- While holding the reset button, turn the ignition switch to IGNITION, then release the odometer reset button.
- The panel should go through the normal routine, including the speedometer sweep and the indicator lights temporarily illuminating. After this process, the word "dIAg" should appear in the odometer LCD.
- You are now in diagnostics mode.

Pro Tip
Sometimes, the LCD screen can be hard to see in certain light conditions. Make sure you begin this process with lighting condition that are favorable.
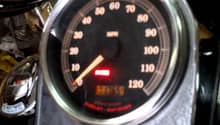
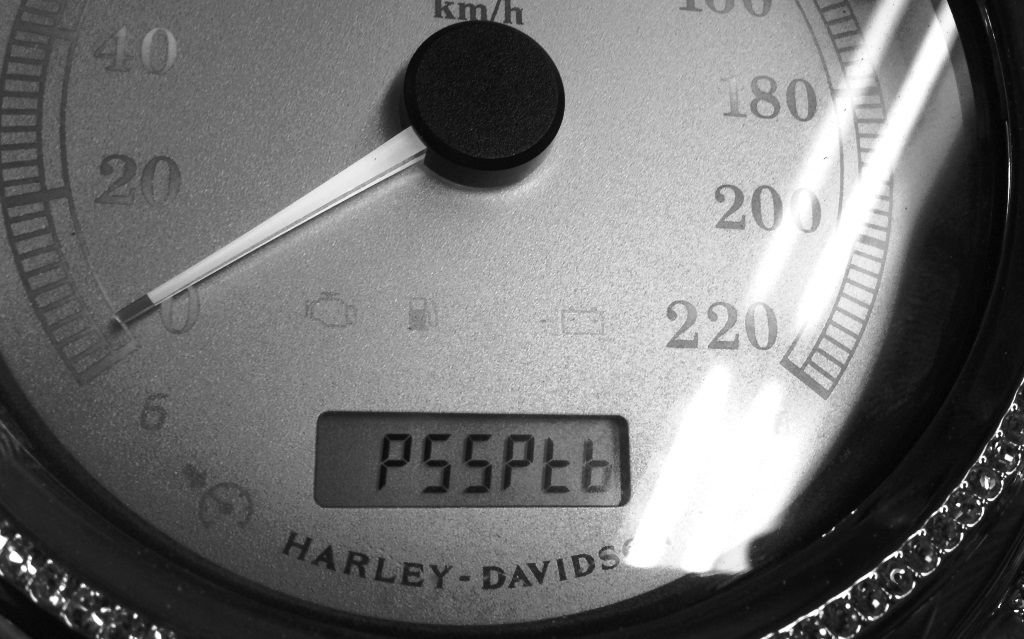
Step 3 – Click through the module menu
Once you are in "dIAg" mode, press the odometer reset button once and the screen will change to PSSPtb, representing the different modules of your bikes electronic system. P = ECM (engine control module), S = security system/turn signal, SP = speedometer, t = tachometer, and b = anti-lock brakes (if your bike has them). One will be flashing, indicating you are in that module, push the reset button and it will cycle through each selection.
Step 4 – Retrieve the codes
Cycle through the different modules by pushing the reset button. Push and hold for five seconds to display the codes for each module. If there are no codes on that module, the word "none" will be displayed. As codes are displayed, make a note of them for later use.
Step 5 – Clear the codes
Once you record the codes, you can clear them if you need to. To do that, press and hold the odometer reset button for longer than five seconds until the word "clear" is displayed. Once you see the word "clear," release the reset button. Repeat these steps as you cycle through the codes. Or, if you don't want to clear the code, click the button until the display reads "END," meaning the end of the codes. One more click will display the part number of the computer on a crawl across the screen, and one click after that gets you back to "PSSPtb."
Pro Tip
A list of all codes can be found by a quick Google search or at the link at the end of this article.
Step 6 – Completing the reset
After resetting the codes, turn the ignition switch to OFF. Afterwards, start and run your motorcycles to ensure that the codes have been reset. Sometimes resetting codes will trigger other codes. If so, repeat the steps as needed.
Pro Tip
Know your limitations! These codes may reveal procedures you may or may not be able to correct. Make the repairs that you feel comfortable with, and consult with a qualified mechanic/technician for those you don't.
Featured Video: Accessing Computer Trouble Codes
Related Discussion
- Harley Diagnostic Codes - HDForums.com