Harley Davidson Touring: How to Replace the Starter
You push the button and instead of roaring to life, your bike makes an awful grinding sound, or turns over but slowly, or just clicks. Replacing a starter is not difficult, this article will show you how it's done.
This article applies to the Harley Touring Models (2006-2015).
The starter is a compact electric motor that turns your Harley V-Twin over when you push the button to bring it to life. It contains electrical windings, gears, and a solenoid, but you don't have to mess with any of that to change it.
For the 2006 model year, Harley Davidson introduced a one-piece starter to the Touring line. Prior years had a separate jackshaft between the starter and ring gear. Those models require removal of the outer primary cover to remove the bolt that attaches the jackshaft to the starter. Those bikes are beyond the scope of this article.

Materials Needed
- 10mm box wrench
- 12mm box wrench
- 1/4" Allen wrench or socket
- Torque wrenches (foot-pounds and inch-pounds)
Warning
Remove the negative (black) battery cable from the battery first. Sparks or a short circuit could cause serious injury!
Step 1 – Remove negative cable from battery
- Remove the seat; also, remove the ECM and cover if applicable. Use your owner's manual for instructions.
- Disconnect the negative (black) cable from battery using 10mm wrench.

Pro Tip
Keep the negative battery cable away from battery post to prevent inadvertent sparks.
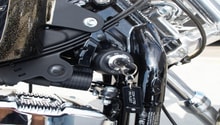
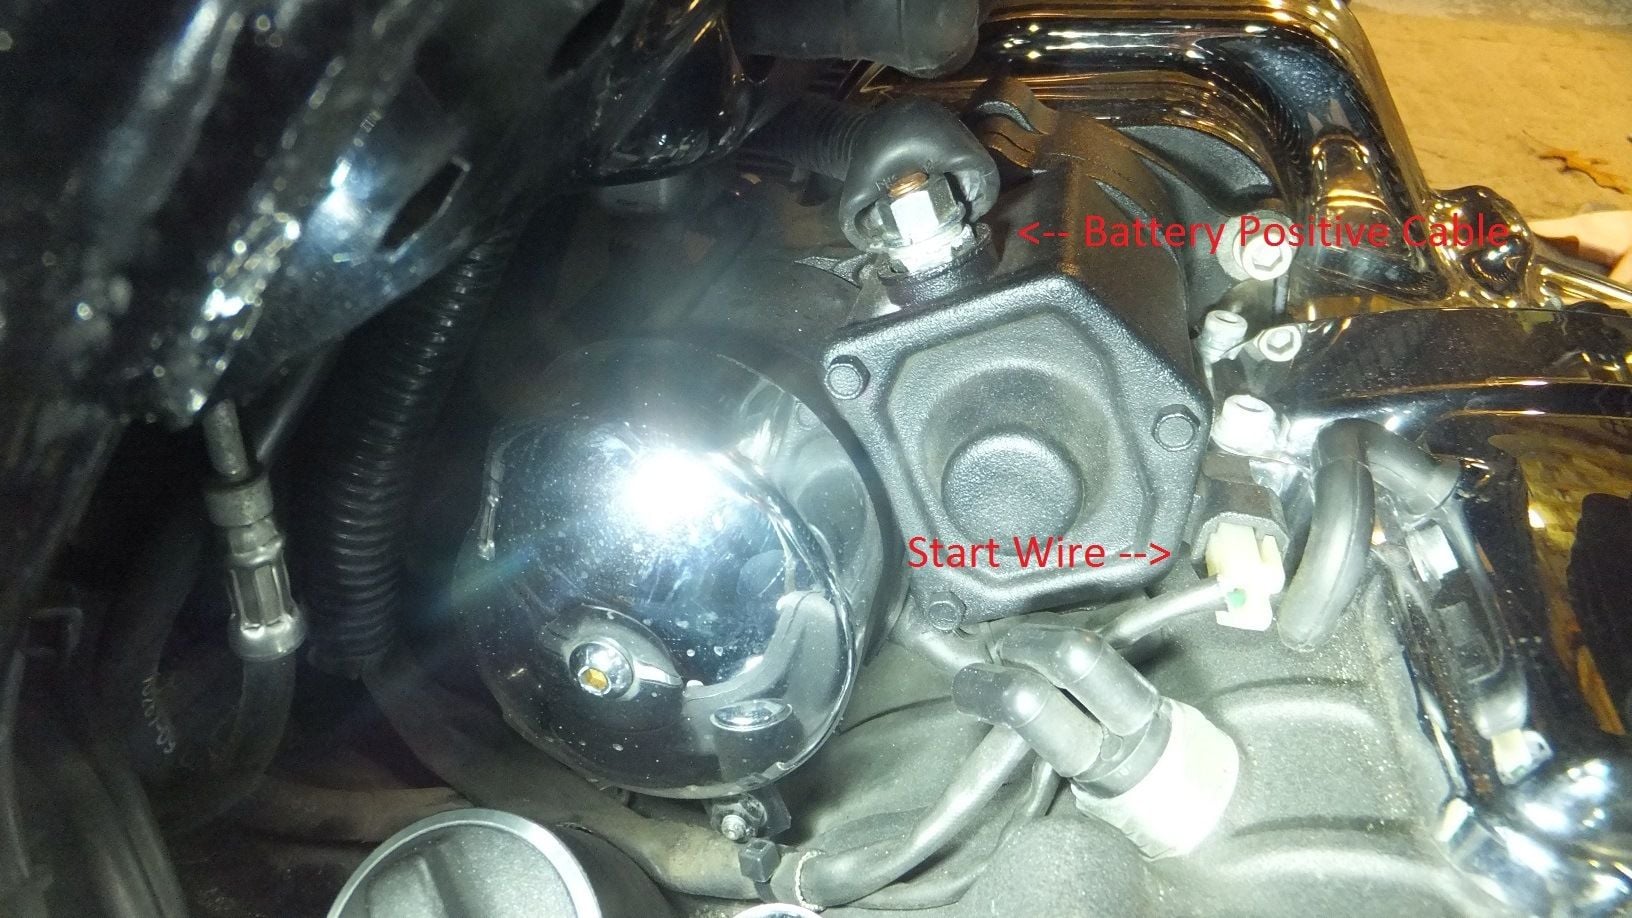
Step 2 – Remove cables from starter
- Lift rubber boot off post on top of starter to expose positive battery cable and nut.
- Remove nut with 12mm wrench and lift positive battery cable from stud.
- Push tab on connector and remove start wire from starter solenoid.
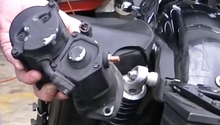
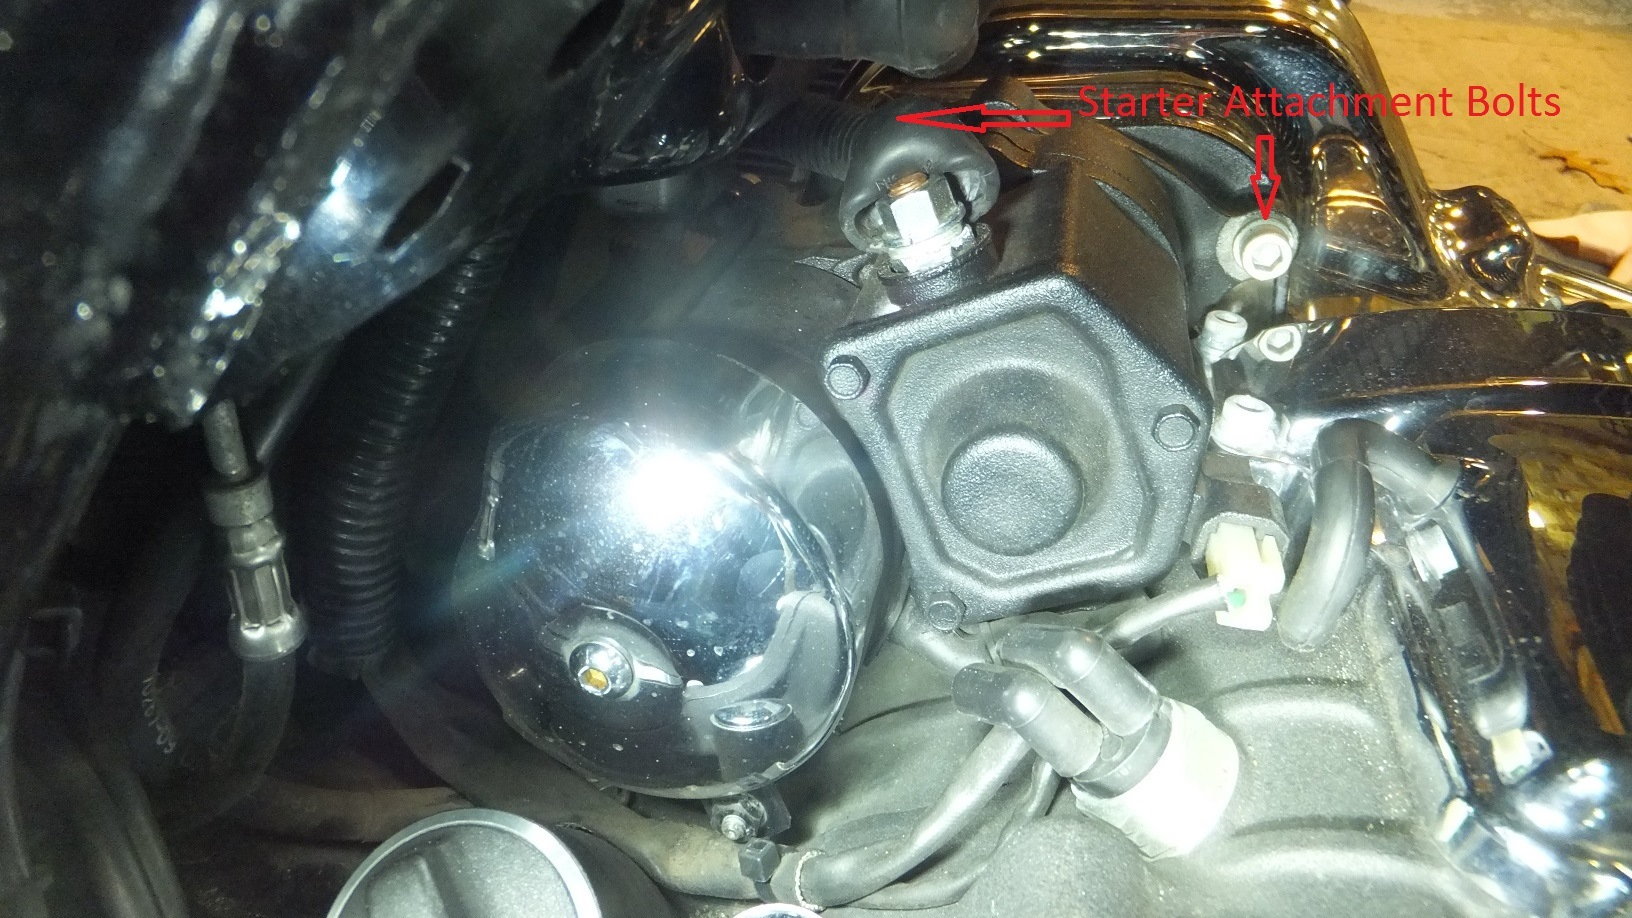
Step 3 – Remove bolts that attach starter to inner primary
- Remove the engine oil filler cap/dipstick and cover the hole with a clean cloth.
- Using 1/4" Allen wrench or socket, remove the two starter mounting bolts.
Step 4 – Remove starter from inner primary
- Pull starter assembly out of inner primary and away from the bike.
- Make sure you don't lose the two metal dowels that align the starter to the primary.

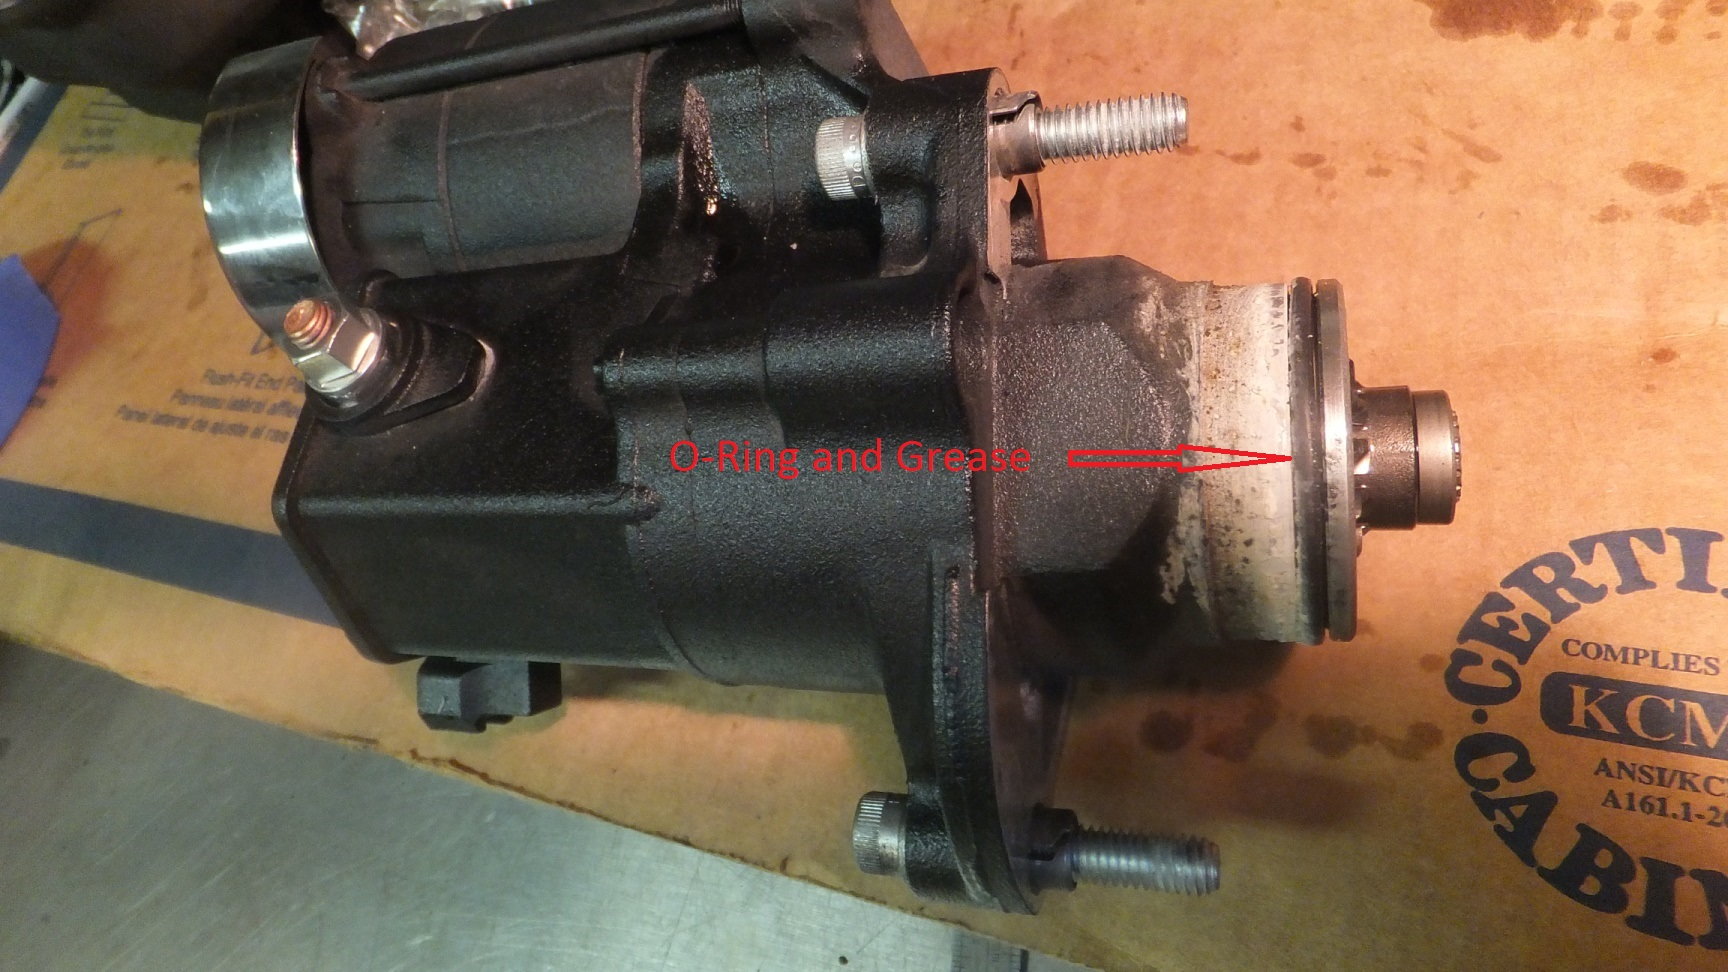
Step 5 – Install new starter assembly
- Lubricate the O-ring on end of starter with white grease or primary oil.
- Slide starter locating dowels into holes in starter. Expanding them slightly will make for a tighter fit.
- Carefully insert starter into inner primary case, making sure not to pinch O-ring or lose dowels.
Step 6 – Install starter mounting bolts
- Add a drop of blue Loctite to the threads of the starter mounting bolts.
- Insert the bolts into the starter and thread into the inner primary.
- Torque bolts to 25-27 foot-pounds.
- Remove cloth and reinstall oil filler cap.
Step 7 – Attach starter wiring
- Slip battery positive cable ring over stud and install nut.
- Torque nut to 70-90 inch-pounds.
- Replace rubber boot over cable stud and nut, engaging into recess on starter.
- Clip start wire into socket on solenoid.

Step 8 – Reattach battery negative cable
- Insert bolt through battery negative cable and attach to battery.
- Tighten bolt to 60-70 inch-pounds
- Reattach the ECM and cover if required.
- Reinstall seat according to your owner's manual.
Related Discussions
- Changing a Starter... Big Job? - HDDorums.com
- Starter, Rebuild or Replace? - HDDorums.com