Harley Davidson Touring: How to Install HID Headlights
Installing an HID headlight is not the easiest mod in the world, but it will make a world of difference in seeing as well as being seen.
This article applies to the Harley Davidson Touring.
One of the most popular modifications for Harley owners is upgrading the headlights and driving lights. The OEM headlights leave a lot to be desired as far as the quality and brightness of the lighting output. Being seen is more than half the battle when we ride, and a super bright headlight is just the thing to helping us stay safe every time we saddle up. Installing the HID bulbs on a Road King is one of the easiest modifications you will ever make. They are nearly plug and play with only the addition of a slim ballast needed. For Ultra and Glide owners, the install is a little more tricky when you have a sealed lens system. The HID bulbs are far superior to the stock lighting, giving you a much wider view and up to a quarter mile further than traditional halogens. This guide will walk you through the straightforward install of a new HID bulb in a Road King. The install is easy enough that a novice DIYer can accomplish the job in a matter of minutes, saving a ton of cash from having a professional do the job for you.

Material Needed
- Phillips head screwdriver
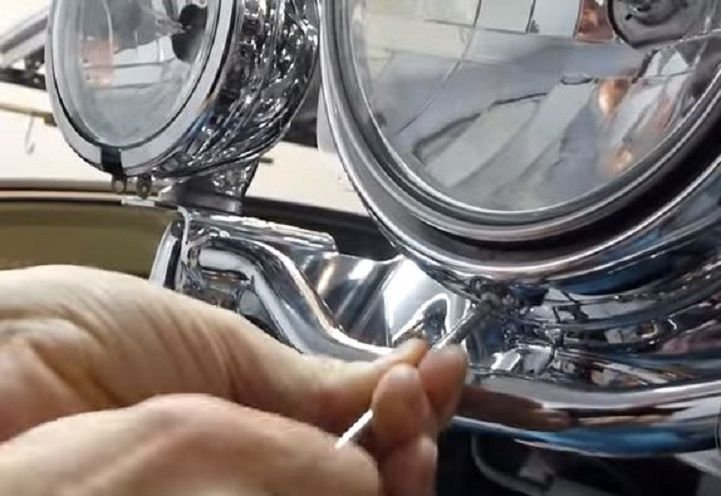
Step 1 – Remove the headlight trim ring
Use a Phillips head screwdriver to remove the screw from the bottom that holds the trim ring in place.
Step 2 – Remove the headlight retaining ring
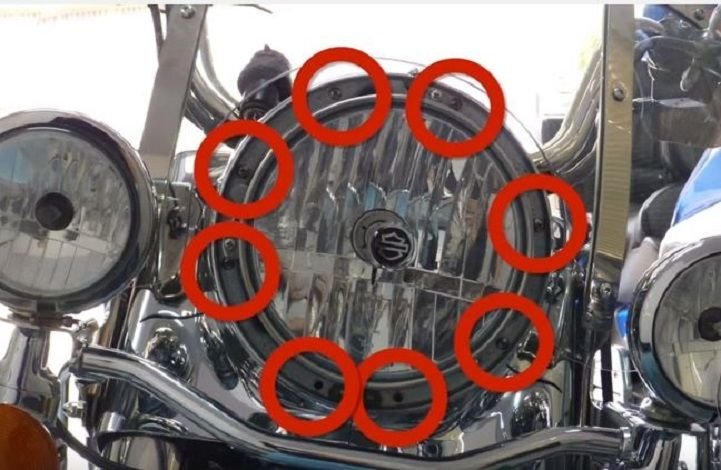
Use your Phillips head screwdriver to remove the eight screws that hold the headlight in place inside the housing.
Step 3 – Disconnect the headlight wiring harness
When removing the last screw from the headlight mount, carefully pull out the headlight and disconnect the wiring harness that plugs directly into the bulb behind the lens.

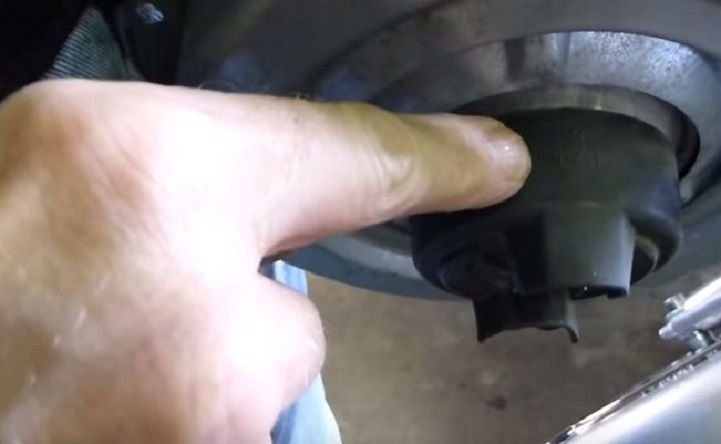
Step 4 – Remove the rubber boot
Remove the rubber boot that is mounted on the backside of the headlamp. This will expose the bulb stem so that it can be removed.
Step 5 – Remove headlight bulb
There is a retaining spring clip that holds the light bulb in place inside the lens housing.
- Press down on the clip and flip it to one side.
- If it is too tight to move, loosen the screw on the latch for the spring clip, but don't remove the screw entirely.
- Once the spring clip is disengaged, pull the bulb straight out.
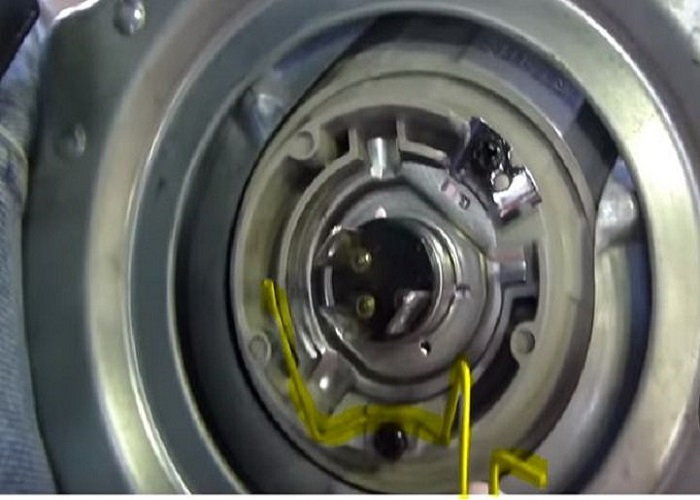
Figure 5. Press as well as flip this spring clip in order to access and remove the bulb. 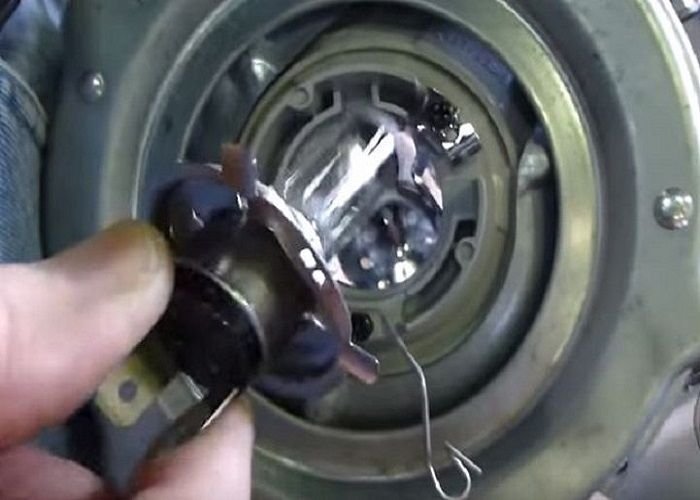
Figure 6. Remove the bulb by pulling it straight out of the lens housing.
Step 6 – Insert HID bulb
Remove the protective foam cover from the HID bulb. Be extremely careful to not touch the HID bulb itself. This will ruin it and those things aren't exactly cheap. Carefully insert it into the lens housing. The bulb will only go in one way because of the tabs on the bulb flange. Once it is in there, replace the spring clip back to its original position. If you had to loosen the screw on the bracket, tighten it back down. Feed the wiring harness through the hole in the rubber boot and reattach the rubber boot.
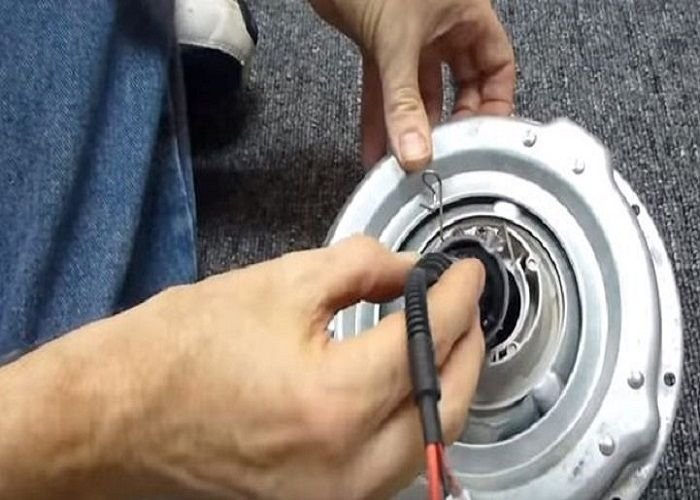
Figure 7. Carefully insert the HID bulb into the lens housing. Be careful to not touch the bulb when installing it. 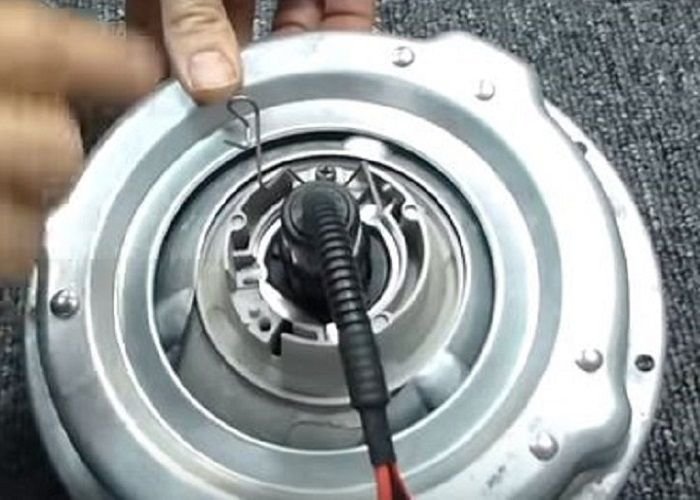
Figure 8. Replace the spring clip back to the locking position and tighten the retaining bracket if you had loosened it previously.
Step 7 – Connect your wires
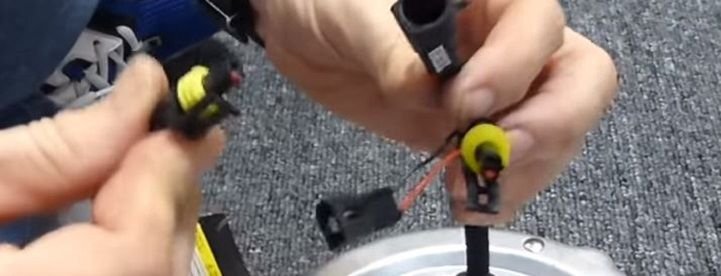
The HID kit you purchased should have included a ballast. There are various wires to connect the HID bulb together, as well as to the ballast. These all should have quick-clip connectors similar to any other type of wiring harness. Each connector is unique and will only connect to its mated connection back to the ballast, so there is no logical way to connect these together incorrectly.
Step 8 – Connect the new headlight
Make the final connection from the new HID wires to your existing headlight connector inside the headlight housing on your bike. Make sure that the wires are completely connected and then test the headlight. If it is working properly, finish the reinstall.
- Place the ballast into the headlight housing as far and as flat as you can get it in there.
- Tuck the wires back inside next.
- Replace the headlight lens back into the housing on the bike.
- Replace all eight Phillips head screws and tighten them down securely.
- Replace the trim ring and secure the Phillips head screw on the bottom.
- Marvel at how much brighter and better your bike looks with your new HID headlight.
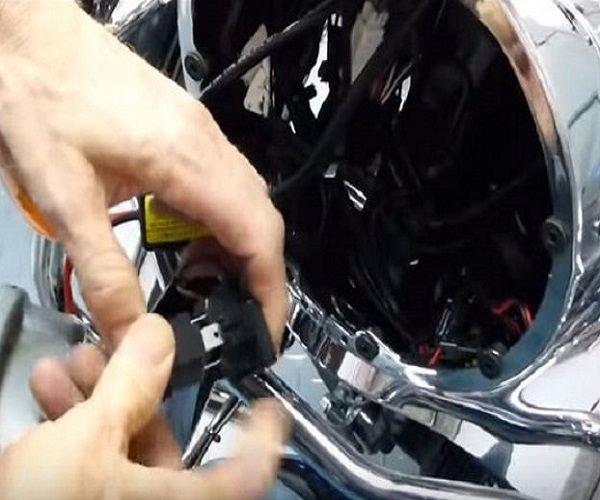
Figure 10. Plug the new headlight into the wiring harness connector inside the housing. 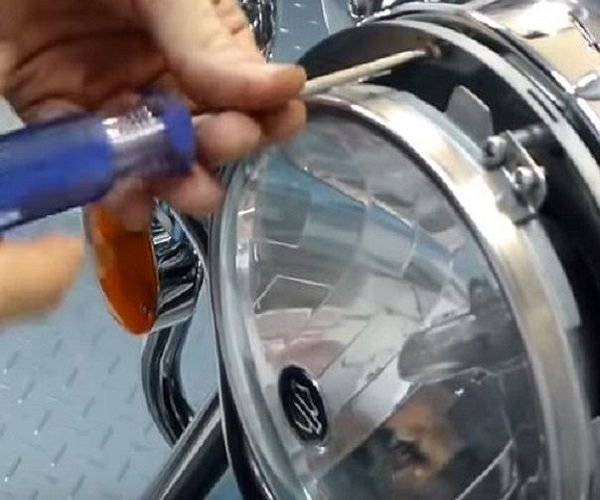
Figure 11. Remount the headlight and tighten down all eight screws. 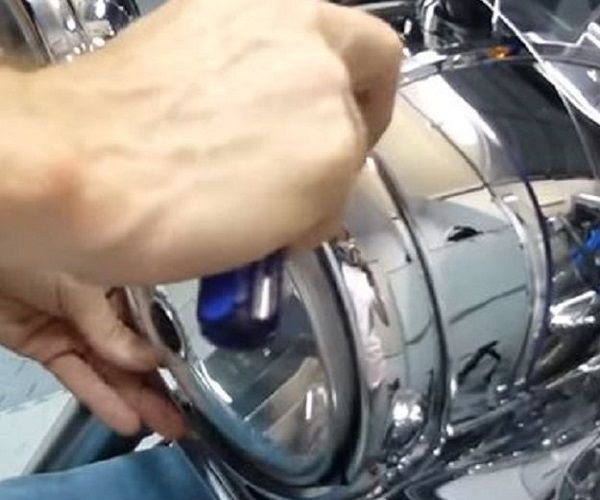
Figure 12. Reinstall the trim ring and secure the lone screw on the bottom.
Featured Video: Harley HID Installation
Related Discussions
- Installed HID Headlight Kit on Ultra - HDForums.com
- Projector Headlight Retrofit - HDForums.com
- Anyone Go HID Headlight? Bulb? - HDForums.com
- HID Install 5 3/4 Dyna Headlight - HDForums.com
- HID Installation Help! - HDForums.com
- HID Install on Fatboy - HDForums.com


