Harley Davidson Touring, Dyna Glide, Softail and Sportster: How to Check Tire Pressure
As the owner of a Harley-Davidson you will want to keep a sufficient level of pressure in your tires all year-round.
This article applies to the Harley Davidson Touring, Dyna Glide, Softail and Sportster.
Tire pressure is just one of those things you have to stay on top of no matter how old or new your Harley-Davidson may be. For the most part, you shouldn't need to carry out weekly checks. However, you will need to check your tire pressure at least once a month and with each oil change (although, your mechanic will most likely do this for you during your regularly-scheduled service appointments). As a reminder, you will also need to pay particular attention to the amount of pressure in your tires as seasonal changes occur (i.e., the weather changes from hot to cold or cold to hot).

Materials Needed
- Tire pressure gauge
- Dish liquid
- Water
Step 1 – Stay below the maximum rating
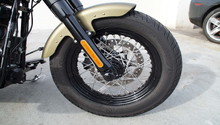
Always follow the manufacturer's rating when it comes to adding tire pressure. Contrary to what some motorcycle enthusiasts might suggest, it's never a good (or safe) idea to simply overload your tires. Such a habit is dangerous and could lead to a blowout. For stock tires, you will need 36 psi in the front and 40 psi in the rear. Stick to this rating and maintain the health of your tires for the safest ride possible.

Pro Tip
Always check your owner's manual as your tires may be able to accommodate 41 psi in the front and 42 psi in the rear during cold winter months.
Step 2 – Check for leaks ahead of a big trip
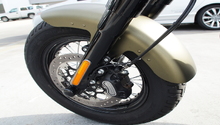
Whenever checking your tires. be sure to inspect the sidewall for damage. If you will be heading out on a big trip, check both tires for leaks as well as wear. Excessive wear could lead to a blowout while you're en route. The tried and true way to check for leaks is to simply look for punctures, such as those found from an embedded nail or other object. Use your other senses as well: look and feel for leaks. Finally, wet your entire tire, including the rim and valve stem, with a mixture of one part dish liquid and three parts water. If you see bubbles, you have just spotted a leak.

Pro Tip
For a leak, either plug it using a sealant or replace the tire.
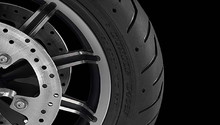
Step 3 – Check tire pressure using a tire pressure gauge
Check both tires for sufficient air pressure using either a manual tire pressure gauge that you can purchase online for as little as $10 to $20, or head down to your local gas station and use the free tire pressure gauge there. To operate this easy-to-use device, simply unscrew the valve cap on your valve stem and press the pressure valve down on the stem using some pressure. It shouldn't take long for the hissing sound you hear to go away and for it to be apparent that air is entering your tire. Check the gauge for a reading. Stop before you reach the maximum allowable load for each tire.

Related Discussions
- Touring Tire Pressure Rating - HDforums.com
- Recommended Ratings - HDforums.com
- Front and Rear Tire Pressure Ratings - HDforums.com