Harley Davidson Sportster: Why is My Bike Vibrating?
If the nature of the vibration coming from your Sportster suddenly changes, or just seems excessive to you, there may be a problem besides the standard Harley unbalanced rumble.
This article applies to the Harley Davidson Sportster (2004-2016).
All Harley Davidson motorcycles vibrate due to the unbalanced design of their narrow angle V-twin motor, and the size/weight of the pistons moving up and down. The Motor Company has come a long way in recent years to make their bikes more comfortable to ride, even as the amount of power and size of the pistons have increased. All Sportsters since 2004 have had a rubber mounted motor to make them less vibration prone, but the way your Sportster transfers vibration to you will be effected by the wheels and tires, ride height, seat style, and engine size, among others. That said, what may be a normal amount of vibration for your Sportster could be a problem for another rider. If the problem seems more serious or the nature of the vibrations suddenly change, read through the steps to determine the cause.

Materials Needed
- Flashlight
- SAE wrench set
- SAE socket set with 3/8" and 1/2" ratchets
- Flat head and Phillips head screwdrivers
Step 1 – Inspect your engine/transmission mounts
The 2004 and later year Sportsters are equipped with rubber engine/transmission mounts to lessen the vibrations. Earlier models rigidly mounted the engine/transmission to the frame and there is not much you can do about the vibration you feel every time you ride; it is part of the Harley character. The rubber mounts can deteriorate when exposed to fluid leaks and hot dry weather. You'll notice increase vibrations felt throughout the frame and especially in the seat area. No matter which style of engine mounting you have, loosened mounting bolts and/or cracked mounts will create excessive vibrations.
Inspect your engine/transmission mounts by:
- Locate the mounts at the front, sides, and back of the engine/transmission.
- Inspect the rubber for cracks and deterioration.
- Check that the mounting bolts are tight; the factory spec is between 40 to 60 ft/lbs.
- If your unsure of the correct torque specification, you can use a bolt size to torque value chart to get an estimation.
- With the bike held upright, wiggle the engine/transmission front to back and side to side. There should be little if any movement independent of the frame.
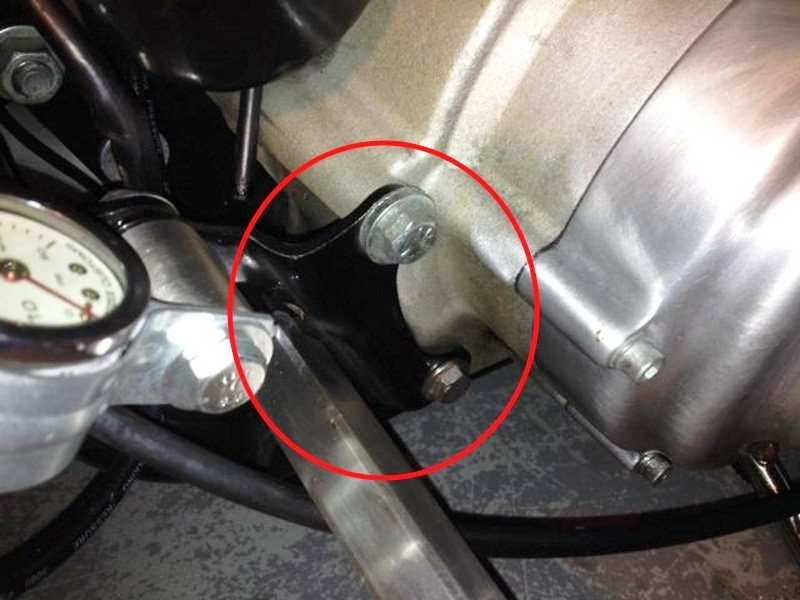
Figure 1. The front motor mount on a 2000 Sportster. 
Figure 2. The rubber has collapsed from the inside of this mount.
Step 2 – Check the drive belt/primary chain
An improperly tensioned drive belt and/or primary chain can create unequal loads through out the drivetrain, increasing vibrations.
If the vibration you feel seems to be at road speed, not engine RPM, you most likely have an issue with the belt or wheels/tires. Feel the belt and you can easily tell if it is too tight or loose; 10lbs of pressure should move the belt less than 1/2 an inch upward. If you can't deflect it that much, it is too tight. The primary chain can be checked by removing the small inspection cover and measuring the slack, which should be 3/8" to 1/2".
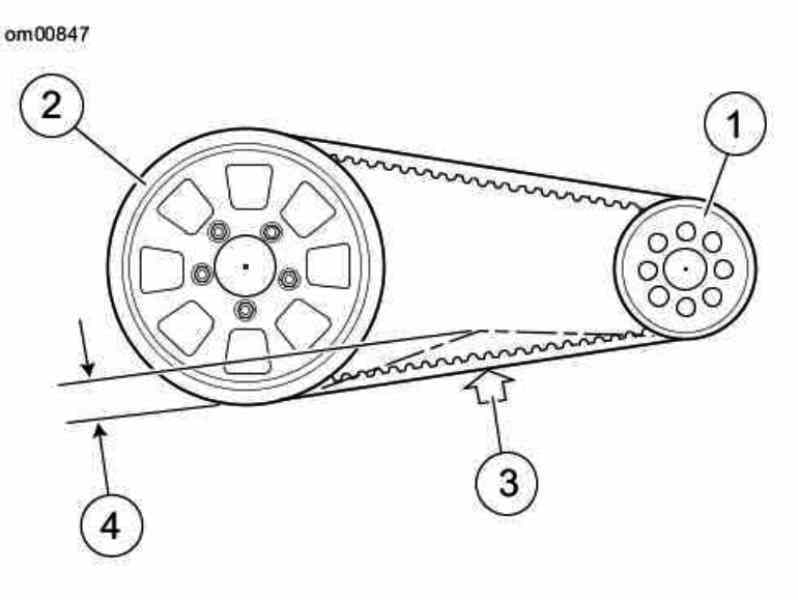
Figure 3. Proper belt tension 1/4" to 5/16" with wheel on ground. 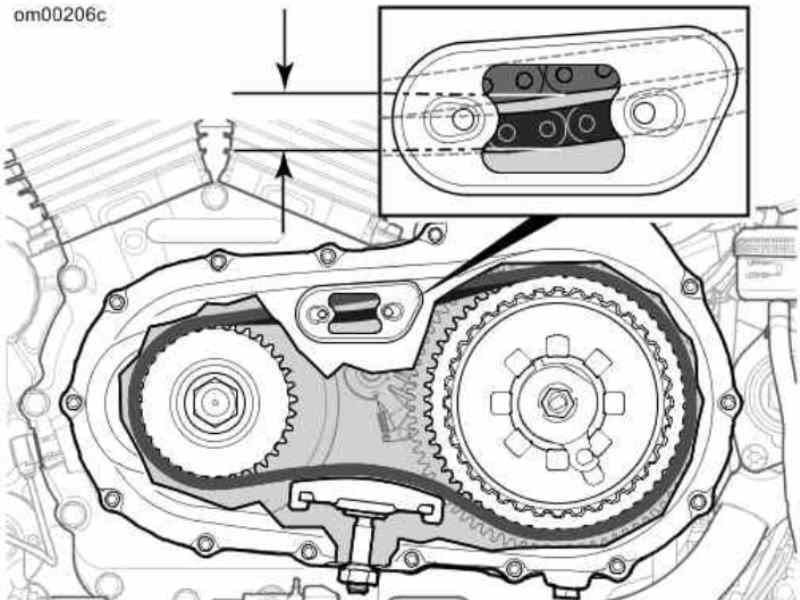
Figure 4. Primary free play should be 3/8" to 1/2".
Refer to the articles How to Adjust Drive Belt and Transmission Diagnostic Guide for primary chain adjustment.
Step 3 – Inspect your wheels and tires
An out of balance, or out of true wheel and tire, will create a wobble at high speeds. This will send vibrations into the handlebars and through the frame. If your rim uses wire spokes, make sure these are correctly adjusted.
Inspect your wheels and tires by:
- Closely examine the tread and sidewall for abrasions, lumps, and bumps. Look at the rims edge where it meets the tire for bent metal.
- Tap wire wheel spokes with a small wrench. If any spoke makes a clunk, it's most likely loose. Harley suggests between 40 to 50 in/lbs of torque on each spoke, but it is more important that it be "true" and that all of them are exactly the same tightness.
- Remove your wheel and tire and have it balanced at a nearby tire shop.
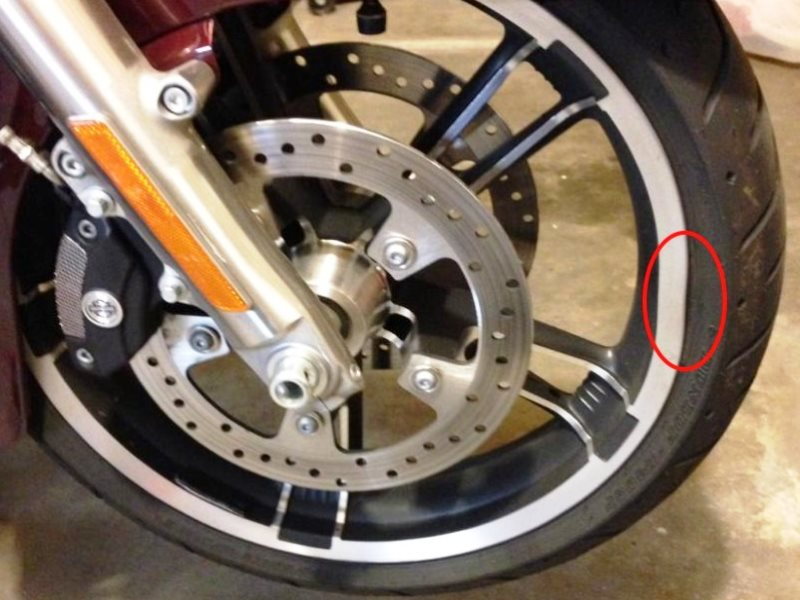
Figure 5. This type of bend can create vibrations at high speeds. 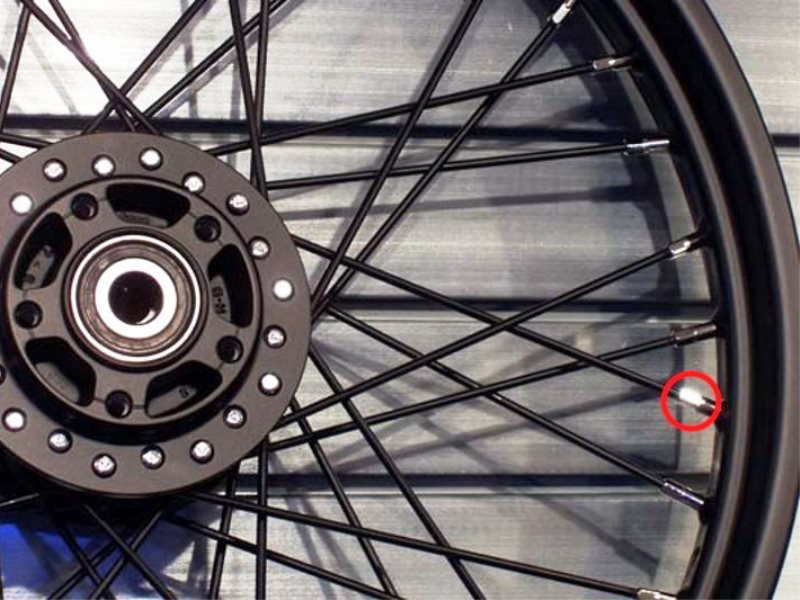
Figure 6. Turn the nut near the rim for spoke adjustment.
Related Discussions
- Why Do Sportys Vibrate? - HDForums.com
- Strange Sportster Vibrations - HDForums.com
- Sportster Vibrations - HDForums.com
- Wheel Truing - HDForums.com