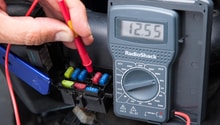
Harley Davidson Sportster: Stereo Sound Diagnostic
Stereo systems use a network of wiring as well as circuitry to transfer and modify the electricity that produces the sound from your speakers. With so much wiring routed throughout the motorcycle, it's easy to see why problems occur. With some basic testing, a complex problem can quickly become a much easier fix.
This article applies to the Harley Davidson Sportster.
Like any electrical component on your motorcycle, it must have a steady voltage supply from the battery and a uninterrupted path to ground (battery negative) for electricity to flow. If the wiring is capable of doing the above, you can be sure you problem lies with the component. Radios, stereos, and speakers use internal circuitry to alter the electricity passing though them. When the circuitry fails, intermittent operation or no operation commonly occurs.

Materials Needed
- Flashlight
- Multimeter
- Fused jumper wires
- Needle nose pliers
- Tools for wiring repair (if needed)
Step 1 – Preliminary inspection
Turn on your Sportster and raise the radio volume to a high level. Inspect for broken/corroded wiring and loose connectors between the radio, speakers, and amplifier. Fluids such as gasoline, oil and transmission fluid will create connection problems when in contact with the wiring. Look for evidence of water damage. You may see a path where water/dirt has been dripping out of the component body/case for an extended period of time.
If any of the three components or the associated wiring feels hot to the touch, there is a problem with that component or high resistance in the wiring. Lightly wiggle/pull the connecting wiring to locate a loose connection.
Try to adjust gain, bass, and treble using the radio. If the speakers don't respond to the changes, but do emit sound, there is a problem with the radio. If the speakers vibrate/rattle especially with an increase in bass, the speaker cone is broken and the speaker must be replaced.
Vibration while riding can break the stereo system components. Place rubber or foam between the component and motorcycle to fix the problem. Make sure all mounting hardware is tight.
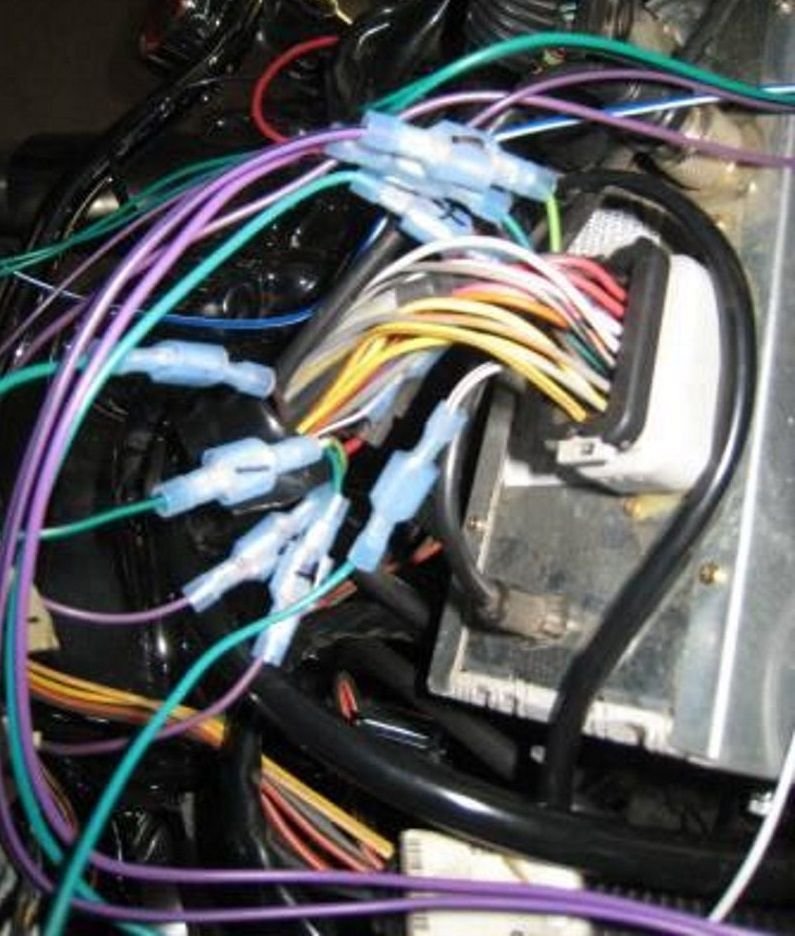
Move to Step 3 if a wiring problem was found during the visual inspection.
Step 2 – Check circuit protection devices
Fuses, relays, and fusible links are usually the first part of a circuit to fail when a short occurs. Even if there's no other problem with the circuit, these devices can still become unusable. Locate the fuse box near the battery (refer to the article How to Replace Battery). Identify which fuse is used to protect your components' circuits. Remove the fuse and inspect it for a break through the plastic window. If a relay is used to control current flow to a component, listen/feel for the relay to click once power is applied to it. Alternatively, you can remove the relay and test the switch for operation by applying battery voltage with jumper wires to each side of the internal coil. With the relay powered on, test for low levels of resistance between the switch terminals with an ohm meter. Normal resistance with the switch closed should be less than 0.5 volts. You can also check for battery voltage at one side of a fuse with the ignition on by placing the positive probe on a fuse terminal, then placing the negative probe against a good ground. No voltage indicates a wiring problem (move to Step 3).
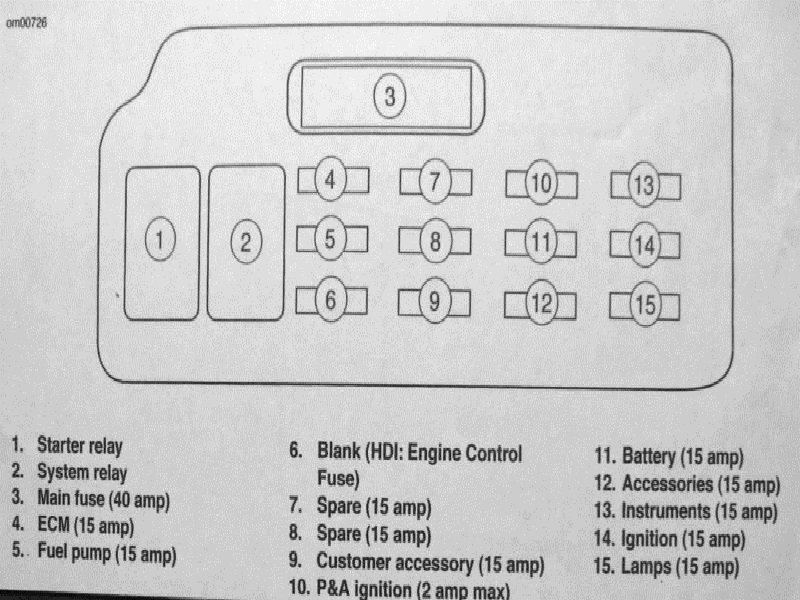
Figure 2. A diagram of the fuse box. 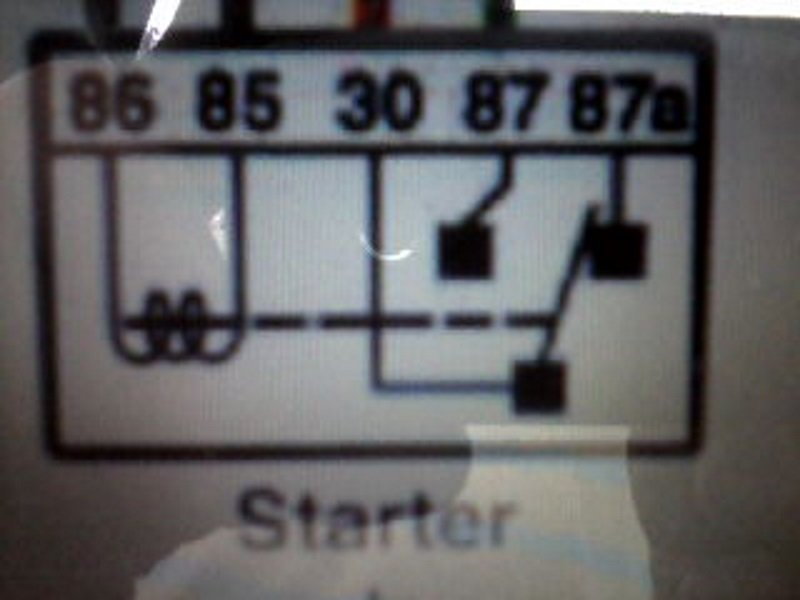
Figure 3. Here's the diagram found on the starter relay. Terminals 86 and 85 can be powered to test its operation.
Step 3 – Test the wiring and speakers
Switch the speaker mounting locations and wiring, then turn on your radio. If your previously non-working speaker now works, you have a wiring problem or problem with another component. Check the wiring between the amp, radio, and speakers with the ignition on. Check power wires at each component for battery voltage and grounds for low resistance (less than 0.5 ohms). You'll need to disconnect the ground wire to measure resistance. Alternatively, you can apply battery voltage and ground to each component with fused jumper wires. Install a fuse with the same rating found in the fuse box that protects the circuit and component. If the stereo components now work properly, you can be sure there is a wiring problem.
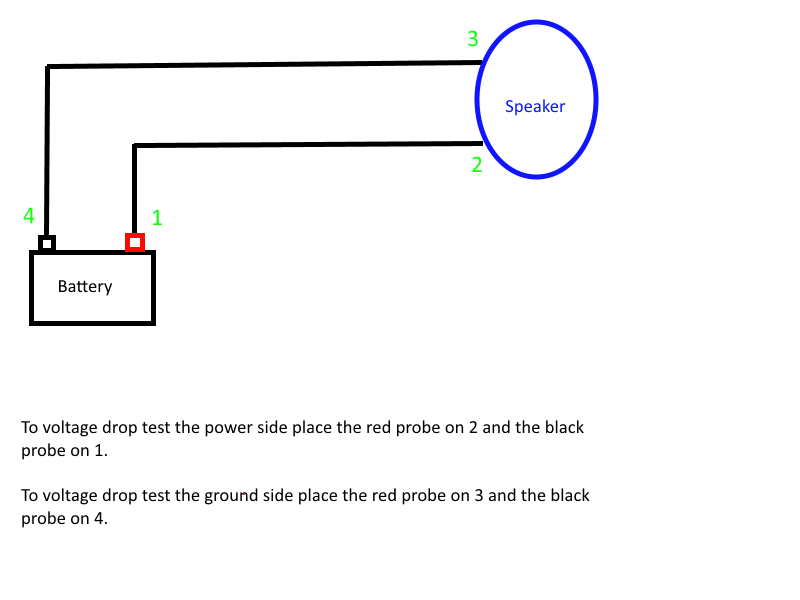
A fool proof test to locate sources of high resistance and loose connections is known as the voltage drop. To perform a voltage drop test:
- Set your multimeter to auto range D.C. volts.
- Connect the red multimeter probe to the power wire of each component with the ignition on. Place the black probe on the battery negative. Anything more than 0.5 volts indicates there is an excessive voltage drop/high resistance in the power side of the circuit. Move the multimeter leads closer together wire by wire until the problem is located.
- To test the ground side, place the red probe onto the ground wire of each component and the black probe to battery negative with the ignition on. Less than 0.5 volts should be present.
Step 4 – Repair the wiring
Wiring found corroded, broken, or shorted will need to be re-insulated and soldered together. Once the repair is complete, check the connection for low resistance.
Refer to the article Harley Davidson Dyna Glide: Stereo Sound System Diagnostic for more information on wiring repair.
Featured Video: Harley Davidson Audio Diagnostic
Related Discussions
- Biketronics Stereo Problems - HDForums.com
- HK Radio Problems - HDforums.com


