Harley Davidson Sportster: How to Replace Front Wheel Bearing
Do you hear squealing noises coming from your Harley Davidson Sportster's wheel when it rotates? It might be time to replace the wheel bearing.
This article applies to the Harley Davidson Sportster.
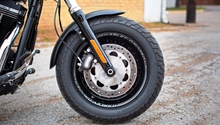
The wheel hub on the Harley Davidson Sportster is the component where the wheel rotates on. The wheel bearing is inside the wheel hub, and it allows the wheel to rotate smoothly. A bad wheel hub or wheel hub bearing can cause a variety of issues: from vibration to wobbles. If you feel your motorcycle is not driving as smoothly as it usually does, or if you feel any vibrations or wobbles, stop driving it immediately and check your wheel hub. The process could be done rather quickly with the right tools. Read on to learn how you can replace your wheel bearing on your Harley Davidson Sportster.

Materials Needed
- Motorcycle jack
- Allan on socket head
- Socket set
- Rubber mallet
- Wheel bearing removal and install tools
- Wrench set (including adjustable)
Step 1 – Remove brake caliper
Raise the motorcycle using your motorcycle jack. Use the center of the bike to do so. Remove the two bolts holding the brake caliper in place, then rest the caliper somewhere. Be sure to not let it hang from the brake line.

Step 2 – Remove wheel
Remove the nut from the left side of the axle, then remove the pinch bolt from the right side of the wheel. Use a rubber mallet to tap the axle from the left side of the bike to make it go through to the other side. Once the axle gets past the left arm, the wheel will come off.

Figure 3. Remove left axle nut. 
Figure 4. Remove right pinch bolt.
Step 3 – Remove wheel bearing
Place your wheel bearing removal tool onto your wheel bearing. Tighten the outer bolt of the tool. Use a 5/8" wrench to hold the shaft of the tool, while using an adjustable wrench to tighten the lower nut on the tool. Once the bearing comes off the wheel, the tool will get loose. Remove the nuts on the tool and simply slide the bearing out of the tool.

Figure 5. Insert tool on bearing. 
Figure 6. Tighten upper nut. 
Figure 7. Tighten lower nut.
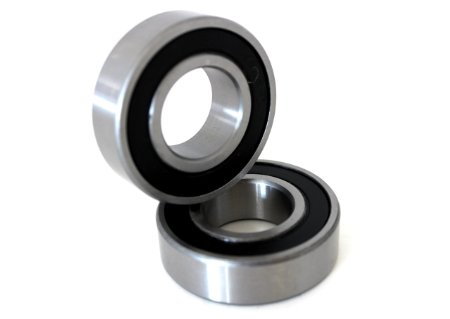
Step 4 – Install new bearing
Clean the surface well before installing the new bearing in. Put the bearing install tool from the bottom of the wheel (opposite side you removed the bearing from), then grease up the new bearing and put it on the wheel where the tool goes through it. With your tool, you will have a piece that goes on top of the bearing, put that on, then put the washer, and tighten the nut all the way down. Use your 11/16" wrench from the other side of the wheel to hold the nut while you tighten the tool's nut on the bearing side. As you tighten, the wheel bearing will go inside the wheel slowly. Once the bearing is flush with the wheel, remove the nut and the tool.

Figure 8. Bearing install tool. 
Figure 9. Put tool through wheel. 
Figure 10. Tighten the nut until bearing is in place.
Step 5 – Re-install wheel
Install the wheel the same way you removed it. Align the wheel in place, and then push the axle through. Tighten the axle's pinch bolt on the right side and the axle nut on the left side. Install the brake caliper and tighten its two bolts.
Featured Video: Harley Davidson Wheel Bearing Change
Related Discussions
- Replace Wheel Bearing - HDForums.com
- Failed Wheel Bearing - HDForums.com
- Wheel Bearings Replacement - HDForums.com