Harley Davidson Sportster: How to Replace Brake Pads, Calipers, and Rotors
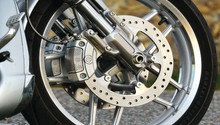
The brake pad and rotor styles changed over the years on the Sportster, but fundamentally have always worked the same. Over time, your brake pads wear linings will shrink until only bare metal remains. The pads must be changed before this point is reached, otherwise damage to the rotors will occur.
This article applies to the Harley Davidson Sportster.
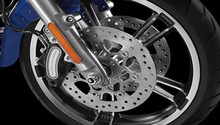
The brake pads are fairly easy to access on the Sportsters. The same is not the case for the rotors. These are mounted between the wheels and shocks, thus requiring wheel and axle removal. Periodically, inspect your pad lining life and rotor thickness to maintain proper braking efficiency. There should not be a large edge on the rotor face, indicating the rotor has most likely been worn past its minimum thickness specification. Regarding calipers, they are a rarely serviced braking component, but it is good to periodically inspect the caliper for functionality, to ensure that the pistons do not stick.

Materials Needed
- Motorcycle floor jack
- Ratchet strap
- Brake cleaner
- Rubber gloves
- Safety glasses
- Rags
- Allen key or Allen head socket set
- Torx head socket set
- Channel lock pliers
- Flat head screwdriver
- Metric socket set (8mm-19mm) (1/2" or 3/8" drive)
- Ratchet
- Floor jack
- 12 point socket set (6mm-15mm) (1/2" or 3/8" drive)
- 24mm or 36mm socket depending on its year
- Mallet
- Anti-seize
- Torque wrench
Step 1 – Jack it up
Slide the jack underneath the middle of the frame. Remember that there's always a chance of failure when using a hydraulic jack. Use a mechanical jack or add a jack stand for safety. Strap your Sportster to the jack to keep it from falling.
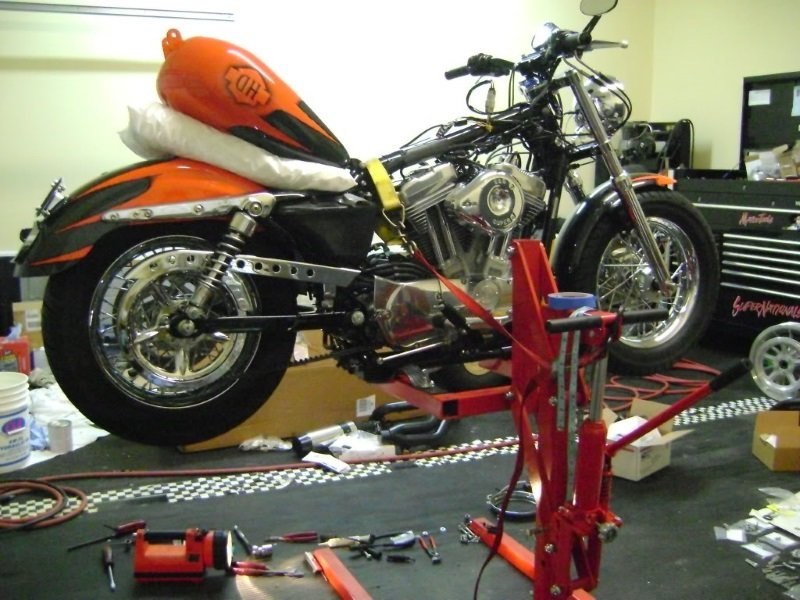
Figure 1. Jacking up and strapping a Sportster. 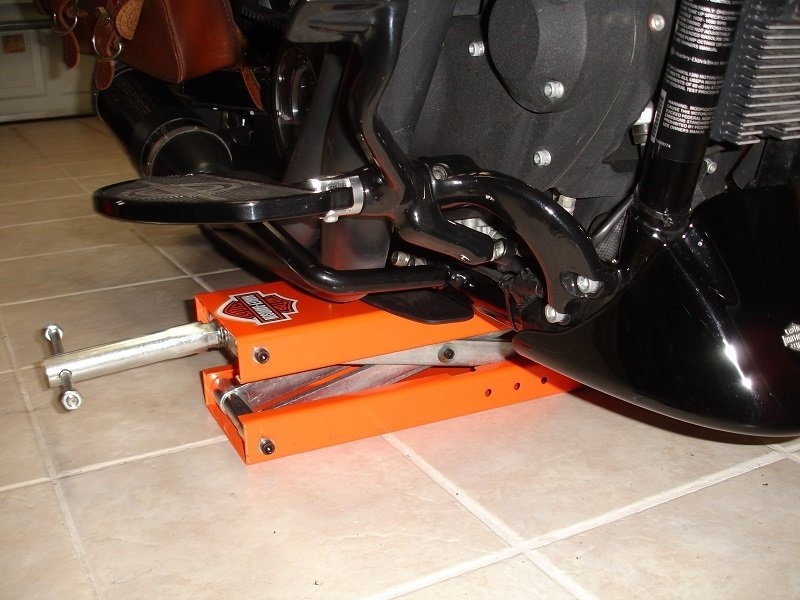
Figure 2. Using a mechanical jack.
Step 2 – Remove rear caliper from swingarm
Now would be a good time to remove your saddle bags and/or belt guard. The type and style of belt guard you have depends on the options you chose. Most belt guards are easily removed by loosening a couple accessible bolts around the swingarm.
Start by removing the slide pin cap. Turn the cap counterclockwise with a flat head screwdriver. Open the rear master cylinder cover and place a rag around the edge to prevent any fluid from spilling onto painted surfaces as you compress the caliper piston. The bolts may be different sizes, so mark them for easy installation. You'll need to create some space between the rotor and brake pads. Carefully grab the caliper with your thumbs, then grab the inner side of the rotor with your fingers. Squeeze the caliper against the rotor to compress the pistons, but don't bend the rotor. You only need about an 1/8th of an inch of compression. Now remove the slide pin with a 3/16 Allen socket. Once removed, the brake pads can be easily slid out of the caliper.
The caliper is held to the bracket by two bolts. Loosen the bolt closest to the engine first with a 9/16" socket. There is a rubber dust boot on the inner side of the bolt. Remove the second bolt with a 1/2" wrench.
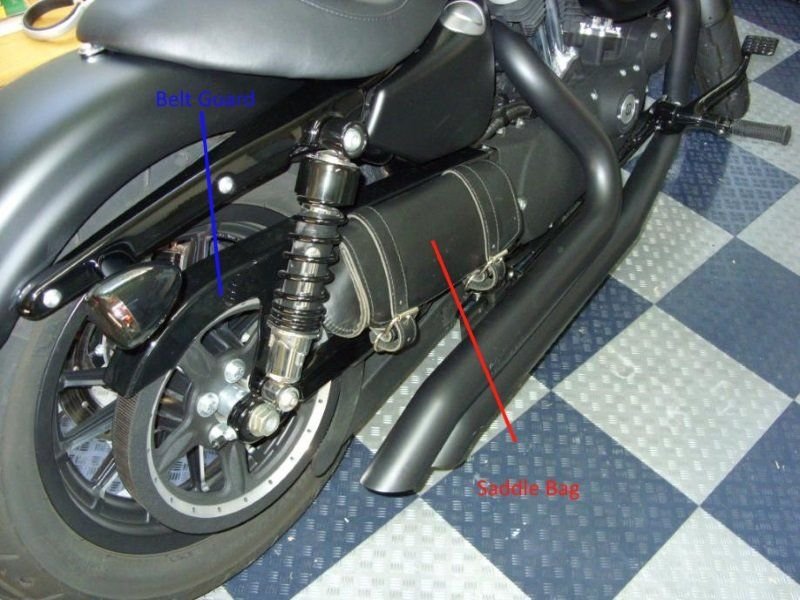
Figure 3. The belt guard and saddle bag. 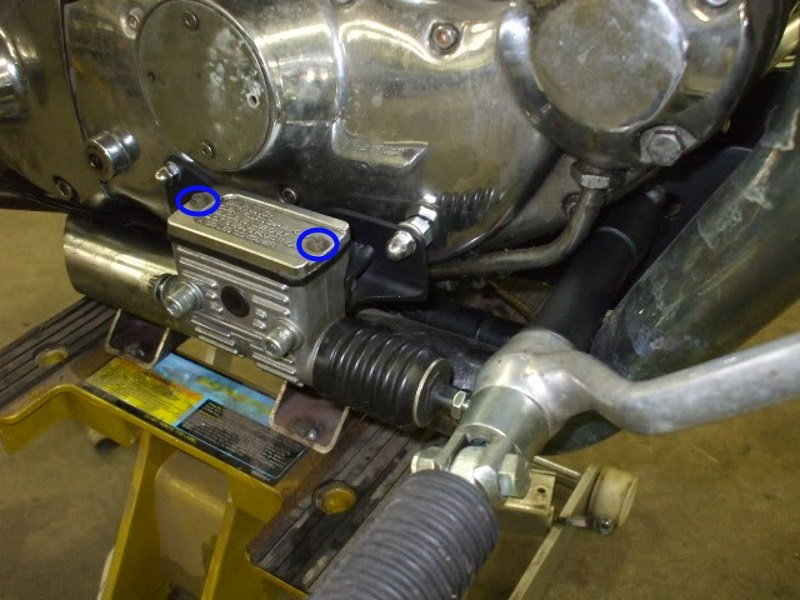
Figure 4. The rear master cylinder cover bolts. 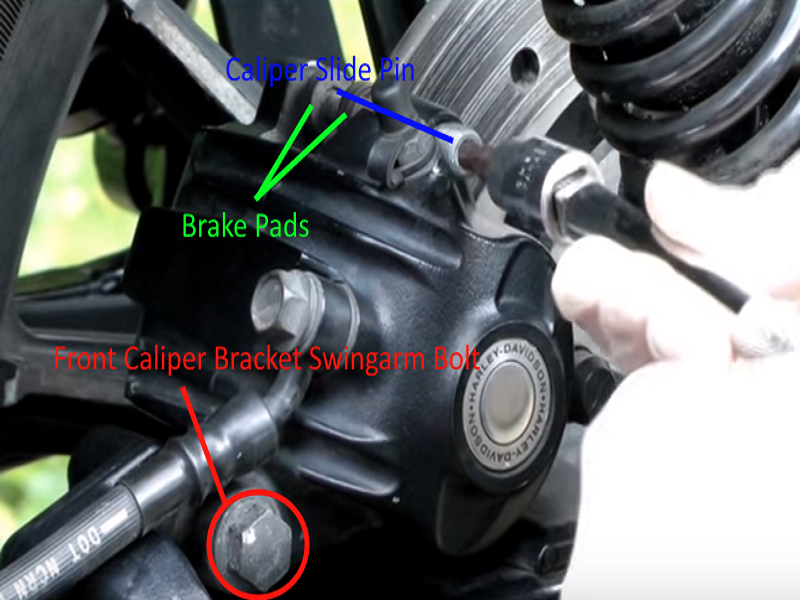
Figure 5. The rear brake caliper. 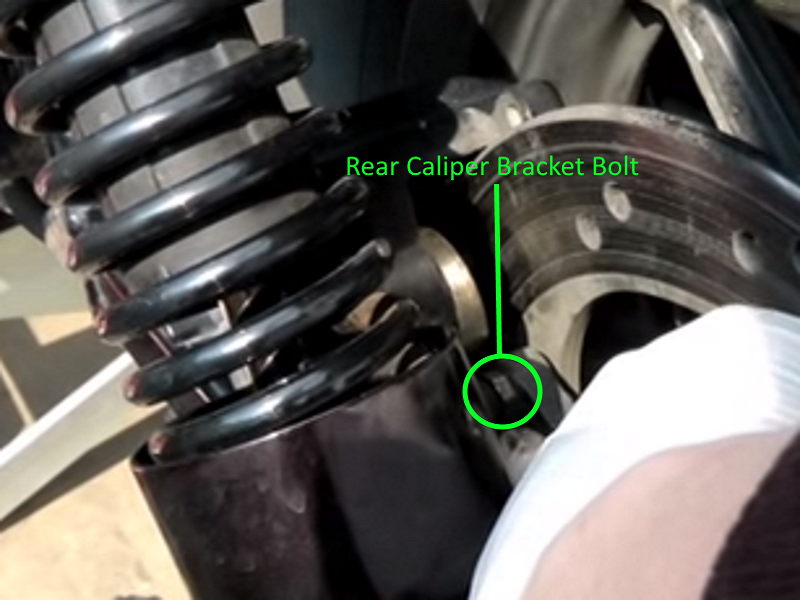
Figure 6. The rear caliper bracket bolt.
Step 3 – Disconnect rear shock and remove rear axle
Remove the lower rear shock bolt. This may be a Torx bolt or Hex bolt depending on your year.
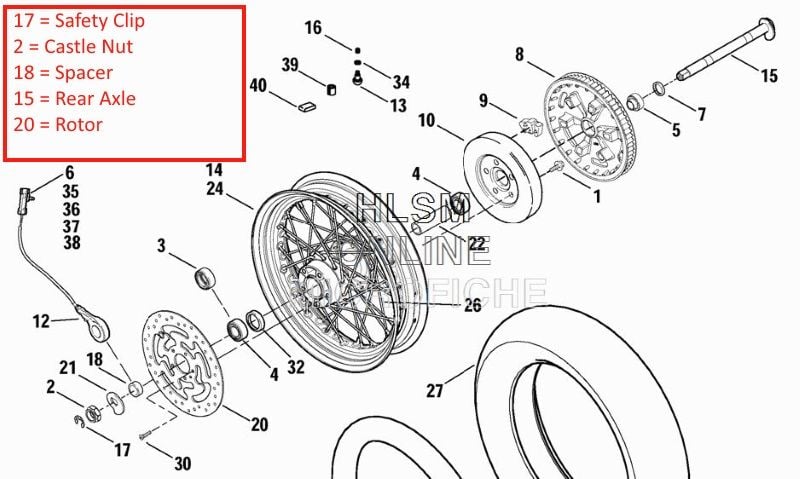
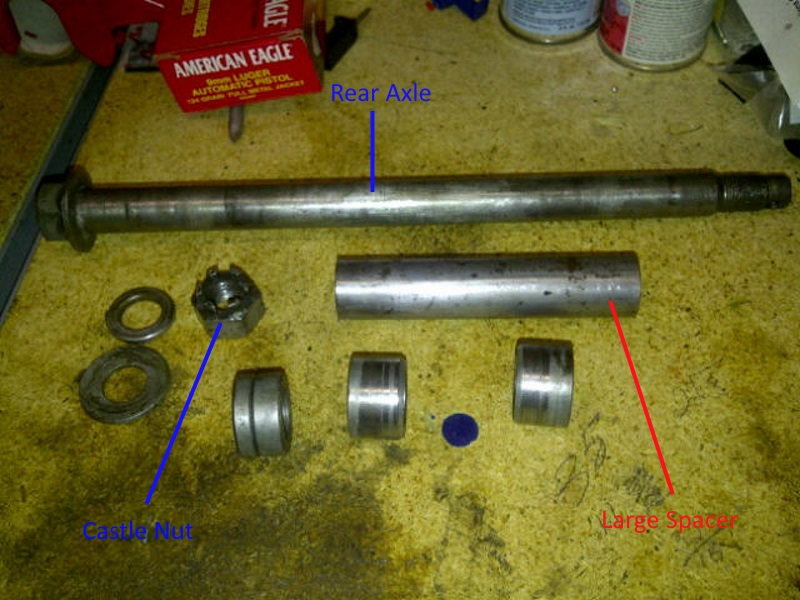
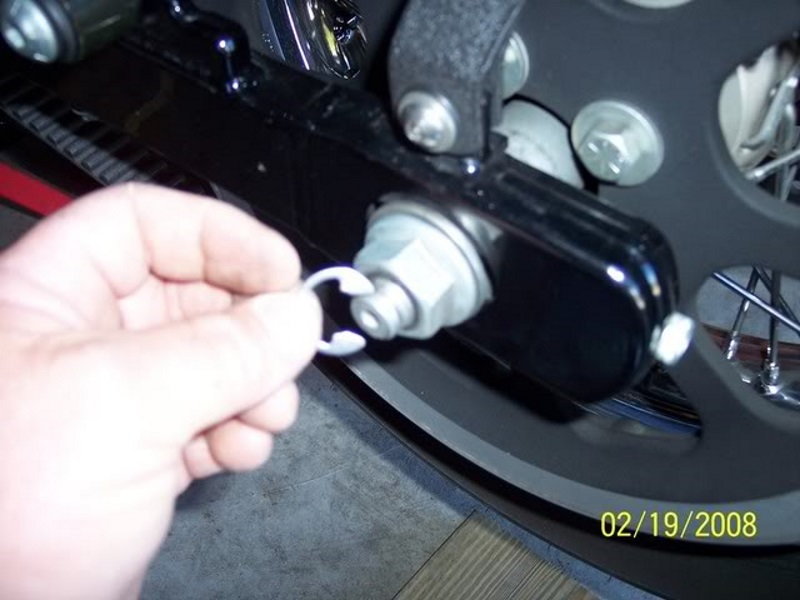
Start removing the rear axle by removing the safety clip from the axle nut. Pry upwards on the safety clip with screwdriver. Lower the bike back down to the ground or apply a slight amount of pressure to the bottom of the tire with a floor jack. You want the weight of the tire off the axle to keep it from binding. Loosen the castle nut with a 24mm or 36mm socket, depending on your year. If the axle begins spinning with the castle nut, hold the Hex side of the axle while loosening the castle nut. Slide off the spacer for the belt adjustment, then tap the end of the axle about an inch towards the Hex head side of the axle. You can lightly tap it with a hammer, but do not use a large amount of force, otherwise the bearings may become damaged. Place a block of wood between the axle and hammer to absorb some impact if it isn't budging.
Step 4 – Remove drive belt
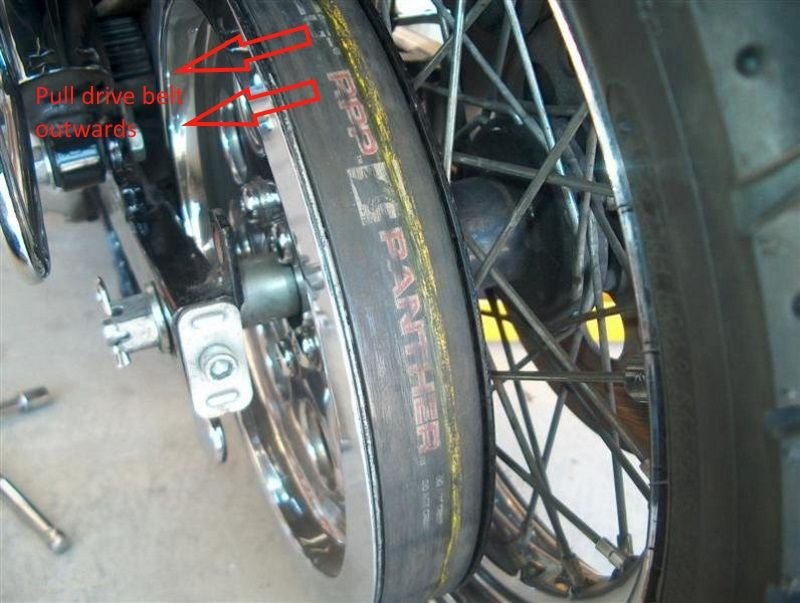
Slide the rear axle slightly forward. This will create slack in the belt. The axle will contact the drive belt adjustment bolt. If you need to adjust the bolt to move the axle further forward, mark the bolt or measure the thread length and record for easy alignment during installation. Grab the belt at the top of the sprocket and pull it outward over the sprocket. Place the transmission into neutral and turn the rear wheel backwards while pulling the belt.
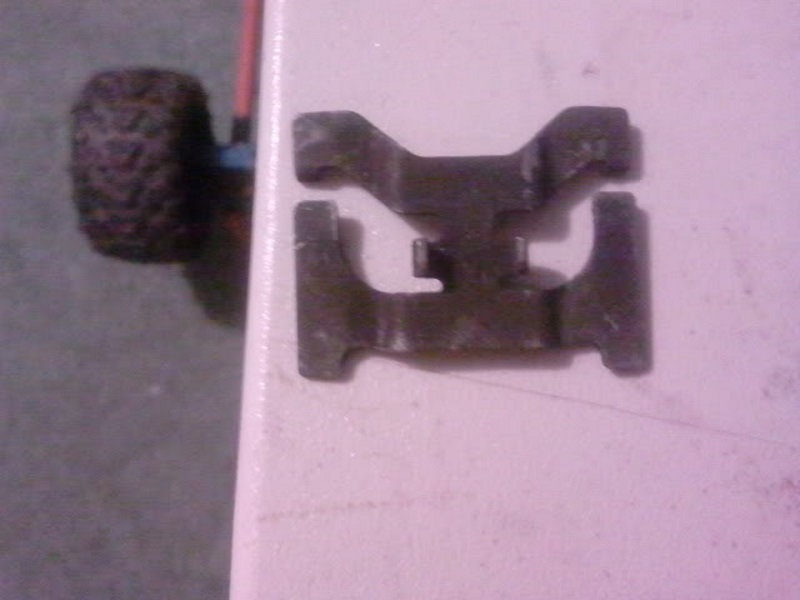
With the belt removed, completely remove the rear axle. Watch for the spacers (number four in Figure 7) while sliding it out of the wheel. If the axle is difficult to remove, vary the weight on the wheel until it's free to slide. The caliper bracket is held in place by the rear axle, so it can be removed as well.
Step 5 – Remove wheel and rotor
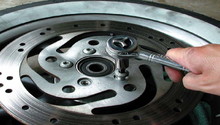
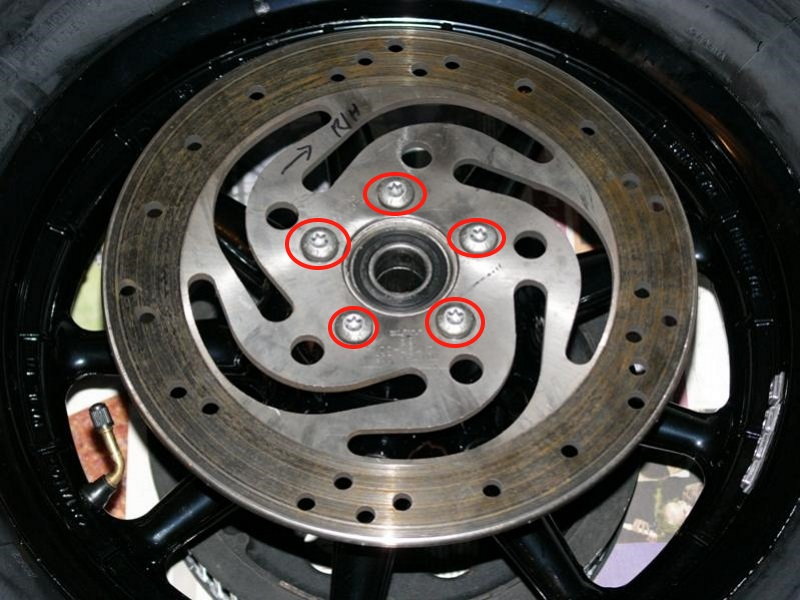
Lower the wheel onto the ground. Remove the five Torx bolts from the rotor using a T-27 or T-40 Torx socket, depending on your year. These bolts are most likely loctited, so be prepared to use some force.
Step 6 – Begin re-installing rear axle
Install the new rotor to the wheel. Torque the rotor bolts to 30 to 45 ft/lbs. Lightly coat the axle surface with anti-seize. Lift the tire using your floor jack and begin re-installing it. Install the large spacer (number 22 in Figure 7) on the side opposite of the axle that is being inserted. To hold the spacer in line with the axle hole, stick a screwdriver threw the spacer into the hole. This step is important because there is not enough room to install the spacer once the axle fully inserted through the wheel. Apply caliper grease to any rubber areas on the caliper bracket, and then slide it into place before the axle passes through the wheel. Make sure the washers and spacers are installed in the same order as removal. Once the axle is passed through the wheel, leave only a small portion pushed through on the belt driven side. You'll need enough room between the axle and alignment bolt to slide the wheel forward, otherwise the belt cannot be installed.
Step 7 – Finish re-installing rear axle
The procedure to install the belt is the same as removal. Pull the belt onto the belt guide grooves and turn the wheel backwards while feeding the belt into the grooves. Move the wheel backwards to tighten the belt and slide the axle completely through the wheel. You may need to lower or raise your floor jack against the tire during this process to keep weight off the rear axle. Once the axle is fully pushed through, you can remove the jack and install the adjuster washer. This washer has a notch that the alignment bolt fits into. Place the regular washer against it and install the castle nut. The rear axle castle nut torque depends on which year model you have. The specs are as follows:
- Early 1990's to 2005 use a 3/4" axle. Torque it to 62 ft/lbs.
- 2005 to 2007 use a solid axle. Torque it to 75 ft/lbs.
- 2008 and up use a hollow axle. Torque it to 100 ft/lbs.
Make sure the castle nut slot lines up with the safety pin hole in the rear axle and slide the safety pin through the slot. The castle nut can be tightened slightly past the spec if need be.
Re-install the rear shock to the swingarm.
Step 8 – Re-install rear caliper
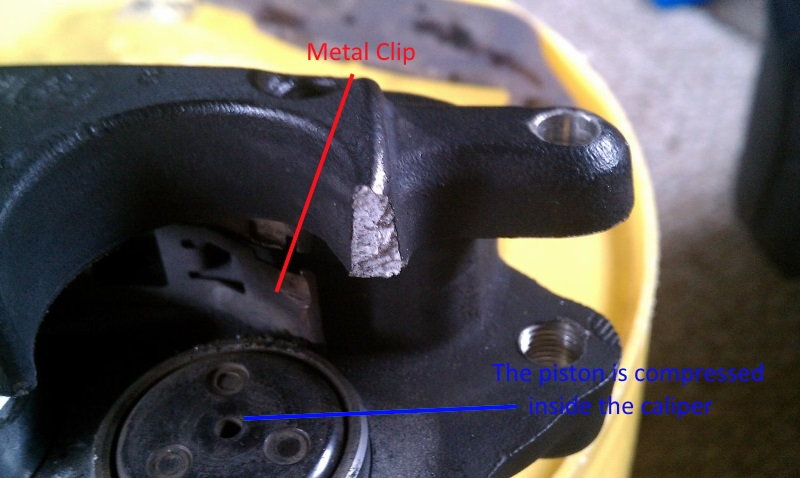
Before installing the caliper, clean the area around the pistons with a brake cleaner and rag. You'll need to compress the piston(s) to create enough room for the pads to slide around the rotor during installation. This can be done by hand or with channel lock pliers. Place an old pad against the piston(s) and apply an even force against the pad. Remove and replace the metal clips on your caliper and caliper bracket if new ones are provided with your brake pads. Lightly apply caliper grease to surface of the brake pads where the caliper piston makes contact. Also, apply it to the brake pad notch edges. These notches contact the metal clips on the caliper and bracket. Slide the caliper back over the rotor, and then slide the outer-side brake pad into the caliper. You'll feel the brake pad notch slip into the notch on the brake caliper bracket. Apply a small amount of caliper grease to the slide pin and slide it through the brake pad hole. Repeat the process for the inner-side brake pad. Torque the the caliper mounting bolts to 22 ft/lbs. Torque the caliper slide pin(s) to 12 ft/lbs. Install the rubber boot over the caliper mounting bolt and the slide pin cap over the slide bolt. Re-install your brake master cylinder cover, belt guard, and saddle bag if equipped. Your now ready to move to the front!
Step 9 – Remove front caliper
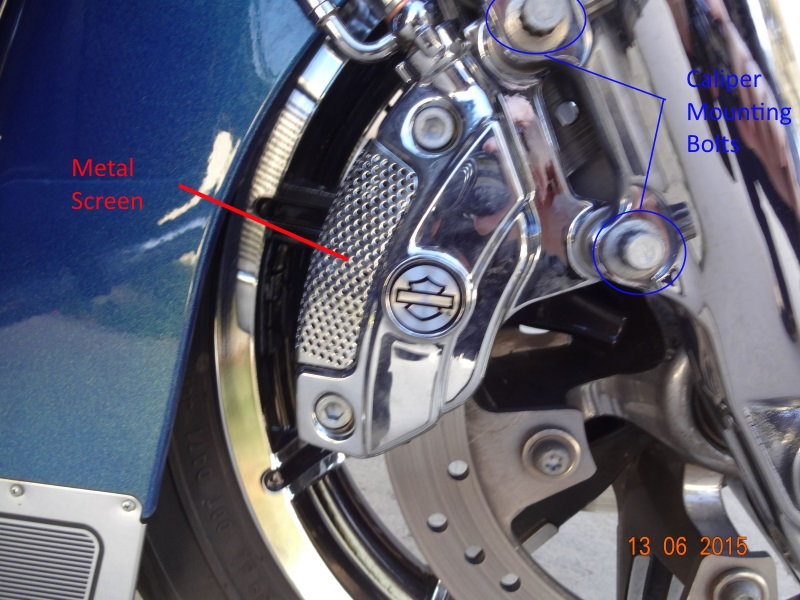
Begin by removing the front master cylinder reservoir cover. Wrap several rags around the reservoir to keep fluid away from painted surfaces. Remove the two 12 point bolts with a 10mm socket or wrench. Be ready to stop the caliper from falling. Tie the caliper to the shock tower, fender, or rim. You want the calipers weight to stay off the rubber brake line.
Step 10 – Remove and install front brake pads
The newer models have a screen that snaps onto the top of the caliper. Pull it off and locate the retaining clip attached to the caliper slide pin. Remove the brake pad retaining clip with needle nose pliers, and then the caliper pin with a 5mm Allen key.
Earlier models don't have a retaining clip and use a set screw over the caliper pin. Remove the caliper pin set screw with a flat head screwdriver if equipped, then remove the caliper slide pin with an Allen socket or key. Pull the pin out and remove the brake pads. Replace the metal clip inside the caliper if a new one is provided. Clean the metal clip and area around the pistons with brake cleaner and a rag. Compress the caliper pistons into the caliper using the procedure described in Step 8.
Slide the new pads into the caliper. Apply a small amount of caliper grease to the caliper piston to brake pad mounting surface. Also, apply a small amount of caliper grease to the edges of the brake pad notches and surface of the slide pin. Line up the slide pin hole notch with the slide pin hole in the caliper and press the brake pad into the caliper until you feel the metal clip compress onto the notch. Repeat the process for the other pad.
Step 11 – Remove front wheel
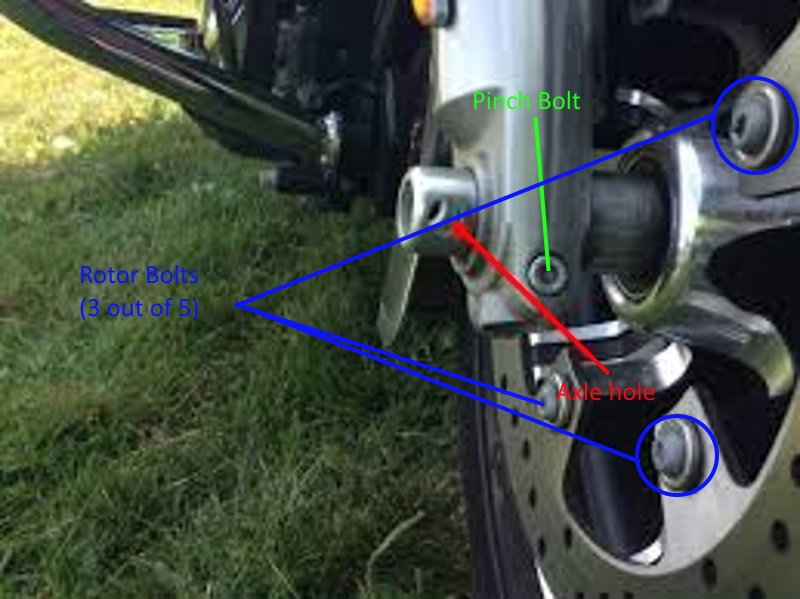
Loosen the front axle nut with a 15/16" socket, but don't completely remove it. Move to the other side of the wheel and loosen as well as remove the pinch bolt with an Allen head socket and 9/16" wrench. Once loose, raise the wheel off the ground. Completely remove the axle nut and pull the axle through the wheel, making note of the spacer orientation on each side of the wheel. You can place a screwdriver through the axle hole to create more leverage while pulling. If the axle is binding, lightly lift up on the front wheel while pulling the axle to remove the wheels weight from the axle. Keep the wheel from falling and lie it down onto a soft surface.
Step 12 – Replace rotor and re-install wheel
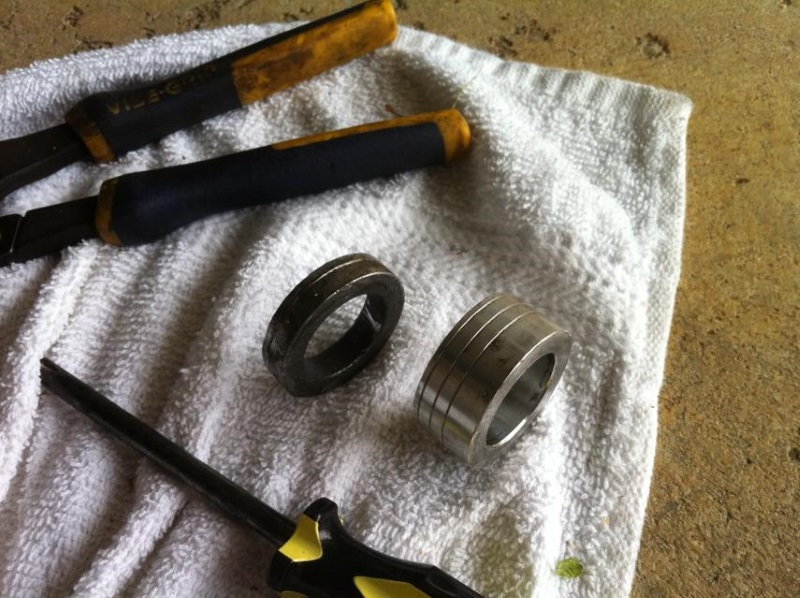
Remove the five Torx bolts holding the rotor to the wheel and torque the new rotor down to 18 ft/lbs. Lightly coat the axle surface with anti-seize. Begin re-installing the wheel by placing the small spacer between the wheel and shock. The spacer lines face closest to the shocks. Slide the axle about three quarters through the wheel, then pivot the wheel to install the large washer between the shock and wheel. Place a screwdriver into the axle hole while tightening the axle nut to keep it from turning. Tighten the axle nut to 50 ft/lbs, and then the pinch bolt to 20 ft/lbs. Make sure the front wheel spins freely.
Step 13 – Re-install front caliper
Slide the caliper back onto the rotor, making sure the brake pads are still installed properly. Slide the caliper slide pin through the pads and torque it to 12 ft/lbs. Slide the caliper back onto the rotor and install the two mounting bolts. Torque them to 22 ft/lbs. Re-install the master cylinder cover, making sure the brake fluid level is near the max mark. Double check your work on the bike and check your brakes function at a slow speed.
Featured Videos: How to Replace Harley Brake Pads
-
How to Replace Front Brake Pads
-
How to Replace Rear Brake Pads
Related Discussions
- Replace Rear Brake Pads - HDForums.com
- Replacing Rear Brake Pads - HDForums.com