Harley Davidson Sportster: Brake Diagnostics Guide
The braking system must maintain correct amounts of fluid and be free of air to work properly. Brake levers trigger brake switches, which signals the brake light and opens the valve to the ABS unit. This article will cover the components in the braking system and what problems may arise.
This article applies to the Harley Davidson Sportster (2004-2015).
Always start your diagnostic process with the quick and easy checks. These include checking the computer for trouble codes, and inspecting the brake fluid level as well as condition. Ask yourself what made you aware of a braking problem during your last ride? Was it a hard to operate lever? A bad noise? Or an inoperative brake light? With the problem condition known, you can move right to the affected system and already have a small list of possible problem causes.

Materials Needed
- SAE wrench set
- Phillips and flat head screwdrivers
- Paper clip
- 3 feet of rubber hose (5/16" diameter)
- Rubber gloves
- Shop rags
- Safety glasses
- DOT 4 or 5 brake fluid
- 1/2 gallon sized container
Step 1 – Check brake fluid level and condition
A low fluid level and dirty brake fluid can create a spongy brake lever. Air may also be present in the system.
Remove the front and rear master cylinder covers by removing the two screws with a Phillips head screwdriver. Some year models instead use Hex head bolts. Try to keep the bike level and have rags ready to absorb any spilled fluid. Protect your skin with rubber gloves. Brake fluid will damage paint if allowed to drip on it. You can place a block of wood below the kickstand to level it out. You may want to connect a strap to a sturdy object to keep it from falling.
Read the master cylinder covers to see which type of fluid your year model requires. You can also find this information in your owner's manual. DOT 4 fluid will have a gold/brown color when new, while DOT 5 will be purple. Replace the brake fluid if the fluid appears dirty or contaminated. Refer to the article How to Replace Brake Fluid for more information. You may not need to replace all the fluid, and instead just bleed the air from the system.
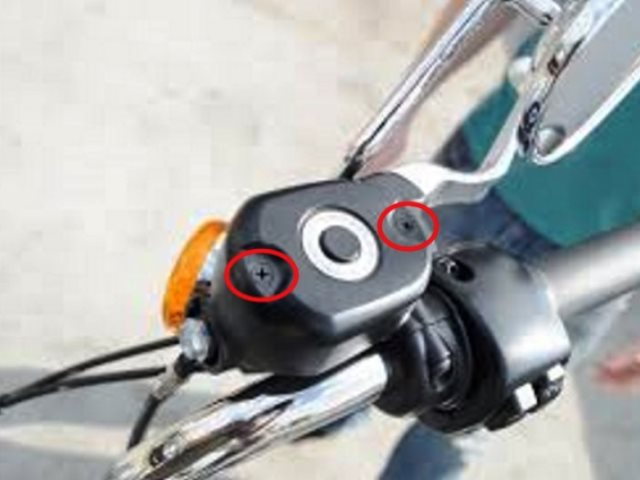
Figure 1. The front master cylinder cap screws. 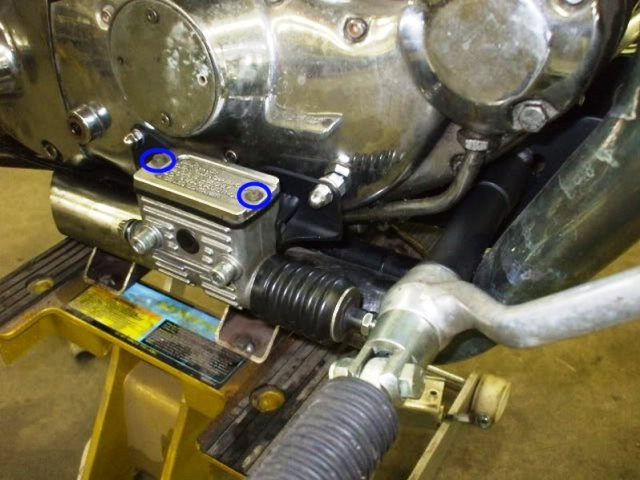
Figure 2. The rear master cylinder cover bolts. 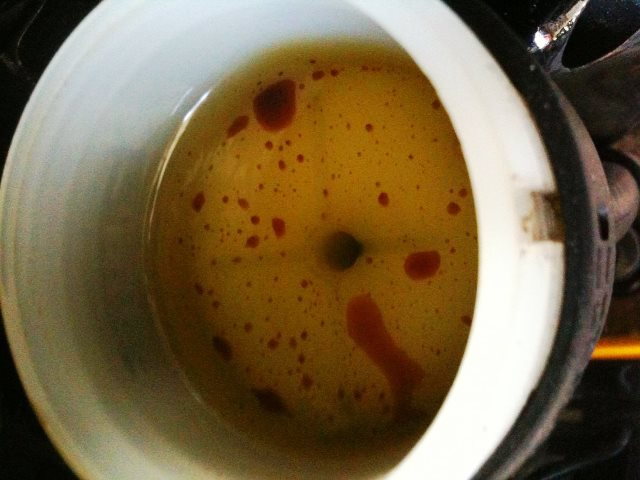
Figure 3. Contaminated DOT 4 brake fluid.
Step 2 – Check for diagnostic trouble codes
Diagnostic trouble codes can indicate a problem with the ABS system and brake lights.
Your diagnostic trouble codes can be viewed on the odometer readout using a simple procedure covered in the article Harley Davidson Softail: How to Read Diagnostics Trouble Codes. You basically turn the key to on while holding the odometer reset button, and the bike will enter "Diag" mode, allowing you to read and clear codes.
If your ABS system feels oversensitive and you have no trouble codes, you still may have a speed sensor on one of the wheels that is out of spec, or some other electrical or computer related issue. The ABS light should light when you first turn the key on, then flash when you ride away, until the bike hits 3 mph and the system calibrates.
If the ABS system and the brake light is not working when either brake lever is used, perform this step.
Step 3 – Test the brake light switches
A faulty brake light switch will prevent the ABS system from activating.
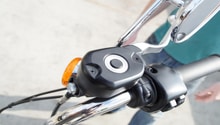
On non-ABS bikes the brake light switches control just the brake light at the bake of the bike, but on ABS bikes they also signal the computer. Remove the electrical connectors from the brake light switches and jump the connectors with a paper clip. This creates a complete circuit between power and ground, and the brake lamp should illuminate. If the brake lamp now works, replace the jumped switch. The front brake light switch is built into the master cylinder at the handlebars.
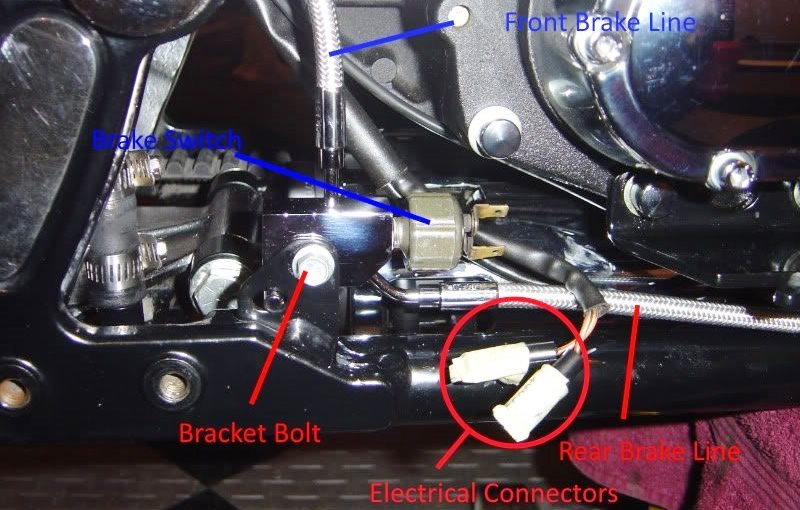
Figure 4. Rear brake switch. 
Figure 5. The front brake switch.
Step 4 – Check for brake fluid restrictions
A restriction will create a hard brake lever.
If your brake lever feels hard to operate, you'll need to locate the blockage in the system. There are several areas where a blockage may occur.
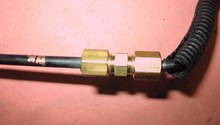
- Brake Line: Hard metal lines can get crimped, and soft rubber lines can look fine on the outside and come apart inside. Any brake line can get pinched and cause a restriction.
- Caliper Piston: The caliper piston may be corroded and stuck in its housing. A rubber boot protects the caliper piston from dirt and debris. If the rubber boot becomes torn, it can wrap around the piston and prevent its movement.
- ABS Unit: The ABS unit contains a series of valves that open and close to quickly apply and release the brakes. A broken or stuck valve will not allow fluid to pass by it.
To locate a blocked line, you'll need to disconnect the brake lines from each component one at a time. Once disconnected, place the line into a container and actuate the brake lever. Once the lever becomes easy to operate again, you've found where the restriction is on the circuit. If you can't get any fluid out of a line, that line itself may be bad. Replace the restricted line or component.
Refer to the article How to Replace Brake Fluid for information on bleeding the brakes once the restriction is found.
Related Discussions
- Front Brake Light Switch Sticking - HDForums.com
- Front Brake Problem - HDForums.com
- Rear Brake Problem - HDForums.com