Harley Davidson Sportster: Aftermarket Sound System Modifications
The Sportster is a minimal bike, without a radio from the factory, leaving owners searching for options when a sound system is wanted. Many brands and types of radios, speakers, and amplifiers are made to create varying levels of sound that reflects both design and value.
This article applies to the Harley Davidson Sportster (1994-2016).
There are three basic pieces to any bike sound system: heat unit, speakers, and amplifier. The Sportster is a much smaller bike than some in the Harley lineup, and therefore has a lot less places to hide audio components. Luckily, modern technology has created weatherproof amps that are very small, yet high powered, and the head units can be just the size of a cell phone, or even an iPod Nano. Speakers still take up a good amount of space, but the smaller ones are only about the size of your fist and mount to the handlebars. With the basic features and some product design knowledge in mind, you'll be able to make an educated decision and match up components to create a stereo system that satisfies you every time the volume knob is turned up.
Stereo System Components
#1 Head Unit
DIY Cost – $0-$400+
Professional Cost – $100-$500+
Skill Level – Easy; it's just as easy as using your phone or an MP3 player.
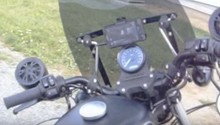
Head units can be as simple as using your existing phone or MP3 player and plugging it into an amp, or they can be a fully self contained AM/FM/satellite radio, Bluetooth receiver, and iPod controller. The simplest way to get music is with a handlebar or tank mount for your smartphone, and a cord that connects to an amplifier.
If you are using a dedicated iPod or MP3 player that is small enough, like the iPod Nano, you can easily mount is next to your handlebar switches in any number of different mounts. Depending on the unit though, you may not be able to control it or even adjust the volume once you are rolling. Slipping your phone into a dedicated pouch on the tank is also a great idea, but controlling it is also an issue, especially with gloves on. Combining your phone with a simple Bluetooth remote controller is a great and inexpensive way to use it on the road.
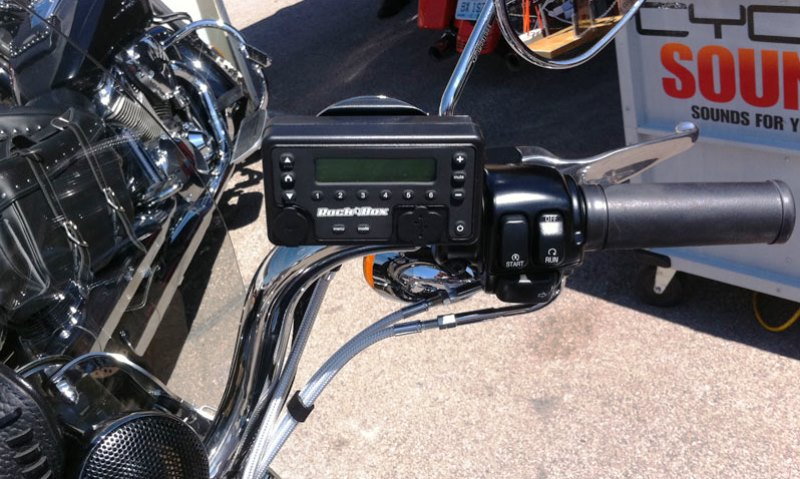
The Rock Box head unit, and other similar dedicated motorcycle systems, can be mounted to the handlebars, or the triple tree near the speedo. It integrates a radio, including satellite stations, with controller for volume and your phone. Some even work with the optional HD factory stereo control switch gear.
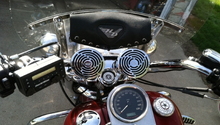
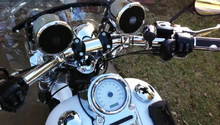
#2 Speakers
DIY Cost – $40-$300+
Professional Cost – $40-$300+ for part cost
Skill Level – Moderate; you will be working with the electrical system.
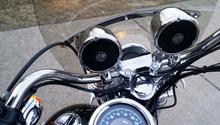
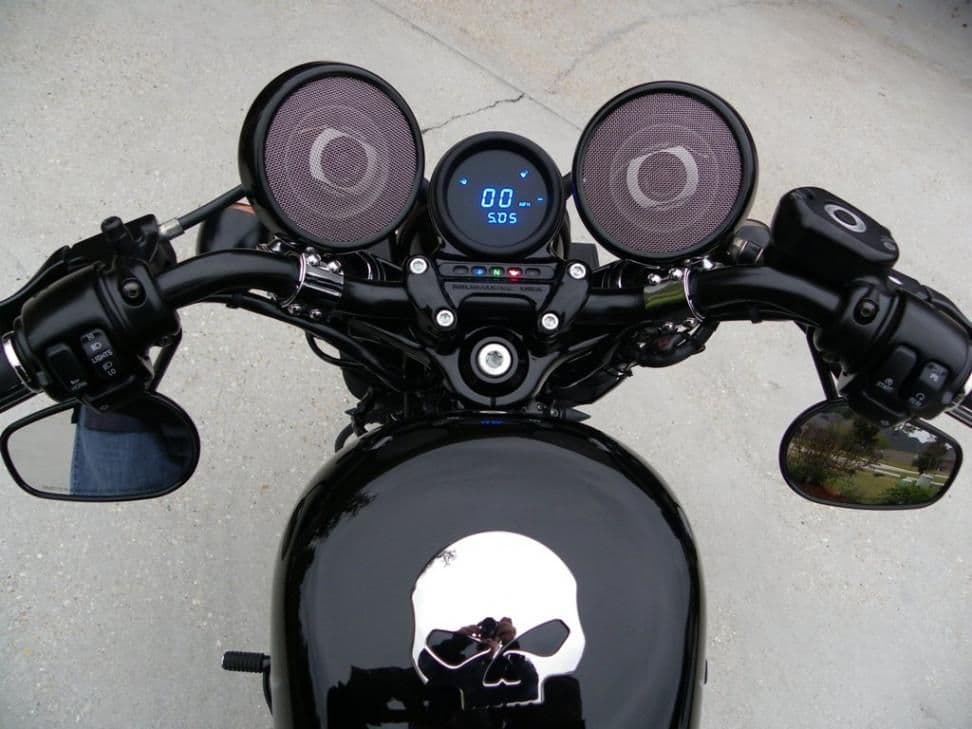
With the Sportster, your speaker options are somewhat limited because you don't have a fairing to mount them in. Plenty of small waterproof speaker exists that are installed to the handlebars and deliver plenty of sound. Some of the best are the Harley Davidson Boom speakers, but good ones are also available from Uniq, Cycle Sounds, and many others. Sizes range from tiny, all the way up to 6" diameter speakers.
Another option is a small windshield with a dedicated windshield speaker. HD Boom also has one of these that fits perfectly with their accessory windshields. Other companies, such as Twisted Audio, make integrated head unit/speaker/amp setups in a plastic housing that may be small enough for use on a Sportster.
Yet another option, if you have highway bars, is a set of lower mounter speaker cans. HD Boom has a set with a built-in amplifier that can fit almost any bike.
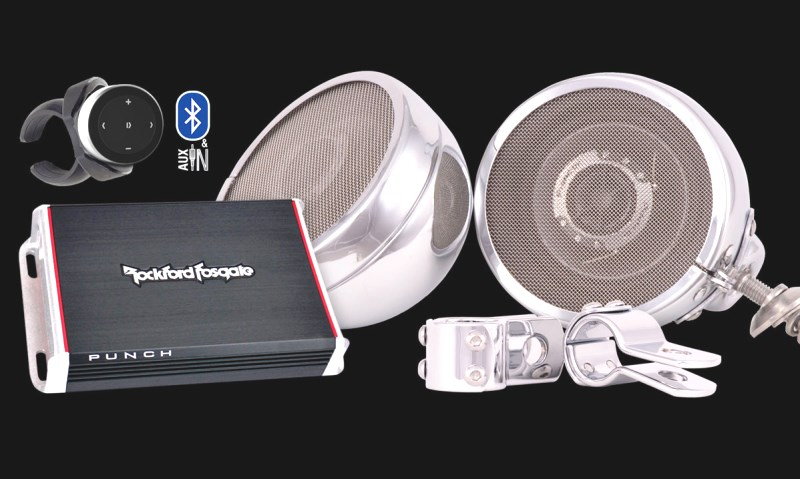
#3 Amplifier

DIY Cost – $50-$300+
Professional Cost – $100-$300+ for part cost
Skill Level – Difficult; this will require custom work.
The hardest part of a stereo system on a Sportster is finding a place to mount an amplifier. Luckily, there are waterproof option from companies like Cycle Sounds that can be mounted to the frame under the tank, right out there in the wind and weather.
Electronics have gotten so small these days you may even be able to fit a mini amp, like the one from Uniq in the crowded space under the seat, near the battery and oil tank. Before buying an amp, you may want to poke around on your bike and see where you are going to put it.
Related Discussions and Videos
- Audio on a Sportster - HDForums.com
- Fork Bag Stereo - HDForums.com
- Stereo Suggestions for a Nightster - HDForums.com
- Sportster 1200 with Cycle Sounds stereo system - YouTube.com
- Iron 883 Sportster with Shark Audio System - YouTube.com