Harley Davidson Softail: Suspension Diagnostic Guide
Between shock absorbers, bushings, wheels/tires, and alignment, the suspension and steering system can create a number of problems. Being on two wheels makes a properly operating suspension and steering system very important to your safety. Even if the problem is not making riding unsafe, it should be inspected and tested as soon as possible. With the help of this guide, you'll be able to go straight to the common causes for suspension issues on the Softail.
This article applies to the Harley Davidson Softail (All Years).
The suspension system is designed to compress and absorb the unevenness in the road's surface to create a comfortable position for the rider. The steering system is a solid link to the front wheel to control side-to-side movement. Problems such as broken bushings and unbalanced wheels make steering difficult, as you're being excessively shaken while going down the road. Your shocks could be mis-adjusted and worsen the problem by not compressing fully. To keep your Softail's ride quality like new, it's wise to periodically perform some basic maintenance along with a quick inspection to spot a problem before one unexpectedly occurs.

Materials Needed
- Flashlight
- Tire pressure adjustment tool
- Silicone spray
- Spanner wrench (HD 94448-82B)
- Motorcycle jack
- Ratchet strap
- Torque wrench
- 1 1/2" socket
- Owner's manual
Step 1 – Perform preliminary inspection
During this inspection you will cover the basic, quick-to-check components. This includes tire air pressure, engine/transmission mounts, and front to rear wheel alignment.
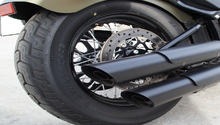
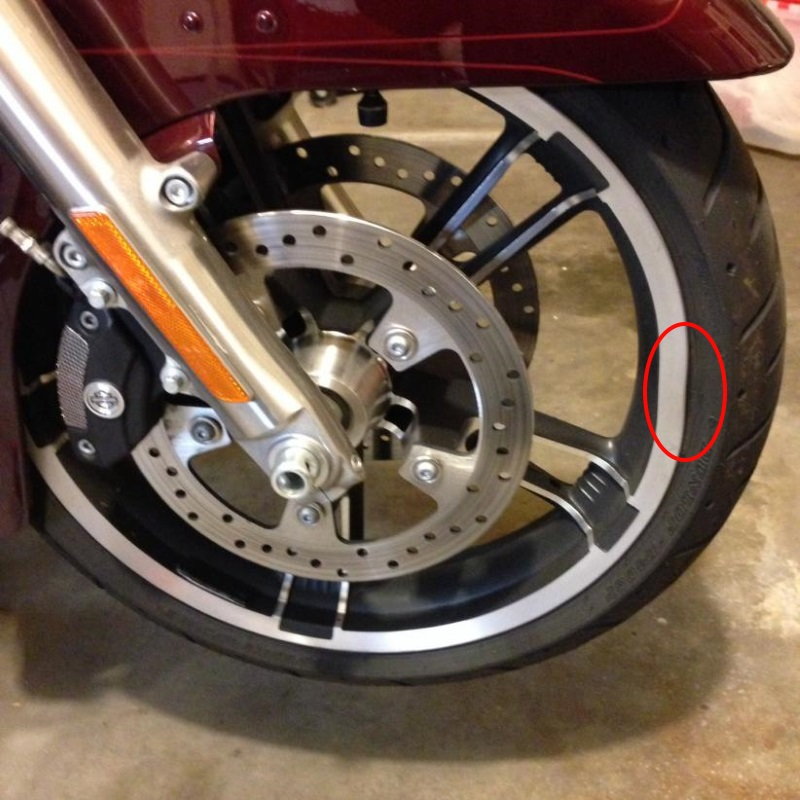
Examine the tires for unusual wear patterns, such as cupping (bumpy tread) and wear only on one side, both sides, or the middle. Excessive wear on the middle indicates an over-inflated tire. Excessive wear on both sides, compared to the middle, indicates an under-inflated tire. Wear on one side indicates incorrect rear wheel alignment. It may also indicate a problem with the bearing assembly if the wear gets excessive on the outer edge when the tire leans.
Measure both tires' pressure and set them to Harley's specification. You can find this information in your owner's manual. A copy can be downloaded here. If the tire is unoriginal, you'll need to set it to the tire manufacturer's spec. If you have spoke wheels, make sure each spoke is tight by pulling up and down on it. Take a close look at the wheel for any bends.
Sit on your bike and jostle the suspension. Listen for creaks and moans and try to isolate the location. Often times, creaks originate on bushings where the lubrication has been removed. Spraying some silicone spray on bushings, such as the front/rear shocks and swing arm, may cure the noise as well as lengthen bushing life. As you jostle the bike, watch the engine and transmission's movement. The Softail uses solid engine mounts, unlike other models, so the powertrain should move together with the frame. Start the engine and give it a couple quick revs. Once again, no engine/transmission movement should exist. If there is movement, check the mounts for cracks, bends, and/or loose bolts.
Checking the wheel alignment is easy; although, it may require removal of your saddlebags if equipped. Refer to the article How to Adjust Drive Belt for saddlebag removal.
If you're complaining of a ride that is too firm or soft, try adjusting the shock preload. You'll need a spanner wrench (part number HD 94448-82B). You'll need to raise your bike on a jack to gain clearance to the rear shock. Make sure your bike is strapped to the lift.

Figure 1. This tire is wearing excessively on the edges, indicating under-inflation. 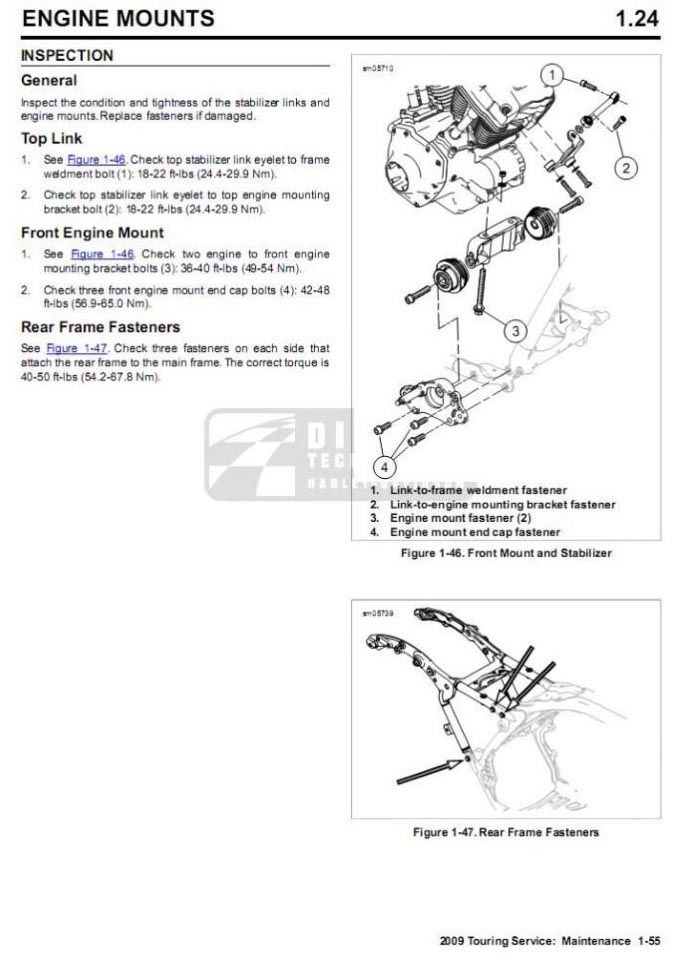
Figure 2. Service information regarding the motor mounts.
Step 2 – Check the wheel bearings
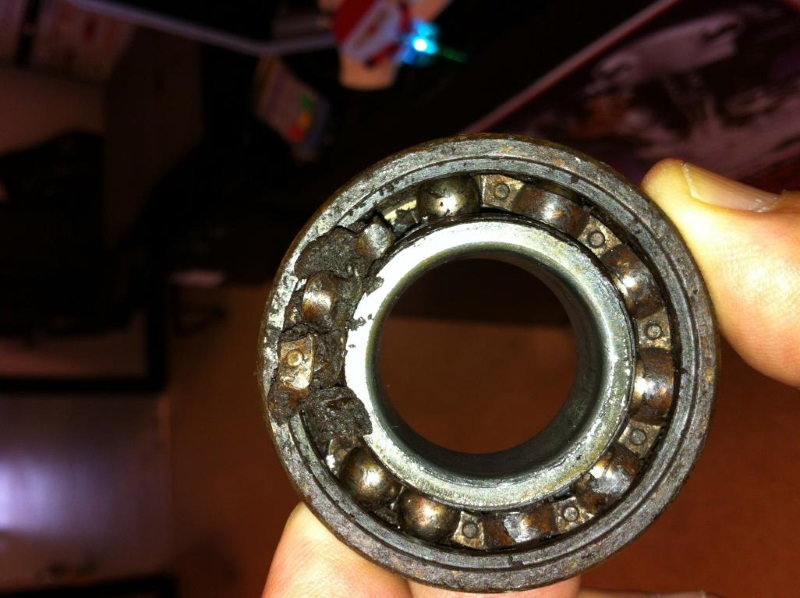
Faulty wheel bearings often result in noise and vibration. You may hear a growling or rumbling sound that increases as your speed increases. Depending on where the vibration is felt (the handlebars or seat), it will indicate which wheel bearings are faulty. If the problem is severe enough, a condition known as "death wobble" can occur, resulting in a violent shake when traveling at high speeds.
Raise the front and rear wheels off the ground. Grab the wheels at the nine and three o'clock positions, then push/pull to try to move the wheel to the right and left. Repeat at the six and 12 o'clock positions. Any free play in the wheel indicates faulty wheel bearings. If you've adjusted your axle nut recently, make sure it was correctly torqued to specification.
Step 3 – Adjust the steering neck bearings
Mis-adjusted steering neck bearings may cause a shimmy and wobble. You may also notice looseness or tightness while turning the handlebars. Adjust the bearings by jacking the front tire off the ground, and tighten the adjustment nut until the handlebars become hard to turn. Now turn the handlebars from stop-to-stop several times. You should feel the steering become easier. Back off the adjustment nut to a loose fit, and tighten the nut to 15 ft/lbs. If you still have the wobble/shimmy, tighten the adjusting nut 5 ft/lbs more.
Step 4 – Balance the wheel/tire assembly
Wheels and tires must be balanced within several grams to avoid wobbling and vibration as the wheel rotates. It's not likely to see a small bend in the wheel by eye, so you'll need to remove your wheels and take them to a shop with a balancing machine. If you can remove your wheels yourself and bring them to the shop, you should have both wheels balanced in less than an hour.
Related Discussions
- High Speed Wobble - HDForums.com
- Suspension Issue - Need Guidance - HDForums.com
- Found the Cause of My Death Wobble - HDForums.com