Harley Davidson Softail: How to Replace Wheel Bearings
Many owners omit a bearing inspection with their regular maintenance items. Don't be that guy. Inspecting and replacing your wheel bearings is too simple of a job for you to disregard them.
This article applies to the Harley Davidson Softail (2000-2015).
If your bike wheels are making one heck of a racket when you ride, it could be indicative of dry or worn out wheel bearings. Don't let these go any longer than possible. Your wheel bearings keep your bike rolling and tracking well. If they become totally worthless, they will cause your bike to wobble as well as weave while riding down the road, potentially causing your handlebars to violently shake, and down you go. Don't ignore the telltale sounds or feelings that you get when wheel bearings start going bad. Replacing them is super easy with the right tools, and should take less than an hour per wheel. You should include wheel bearing inspection at 10,000 miles or at least with every new tire. You can save yourself a lot of cash from taking this simple job on yourself and avoid having the pro do it for you.

Materials Needed
- Wheel bearing puller/installer
- 1/2" drive ratchet with 1/2" and 15/16" sockets
- 1 7/16" box wrench
- Super high quality bearing grease (such as HD bearing grease)
- Rubber mallet
- Towel or soft mat
- Sandpaper or file (optional)
These steps include the use of a bearing puller because it is the safest, easiest as well as correct way to remove your bearings and avoid damaging your ride. Yes, you can remove and install bearings without the special tool, but you risk damaging your wheels, which cost hundreds of dollars, in order to save $60 on a tool.

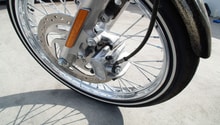
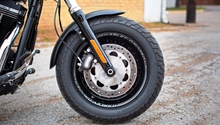
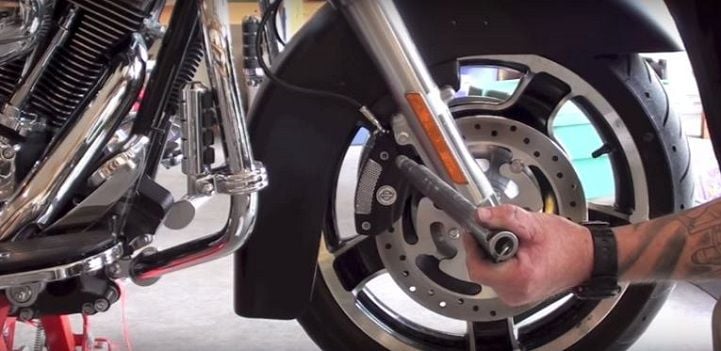
Step 1 – Remove front wheel
The wheels obviously have to be off the bike to change the bearings, and the wheel needs to be off the ground to do that. Harley uses sealed wheel bearings now, so you typically just pull them and replace them when they go bad. Some guys have been known to repack the grease inside of them when they are good, but just dry and noisy, which it isn't recommended.
- Place a towel or other soft mat down on your work surface to protect your rims.
- Use your ratchet and 15/16" socket to remove the axle nut on the left side of the fork. Remove the nut and its washer.
- Move to the right side and remove the two 1/2" nuts on the very bottom of the forks. These include regular and lock washers, so make sure to keep track of all the pieces.
- With the nuts removed, the bottom bracket can be slid off the lower front forks so that the axle can be removed.
- After the axle bracket have been removed, use a big rubber mallet and smack the axle from the left side until it pops free.
- Remove the axle, collect the spacers and set them to the side.
- Take the wheel and lay it down on your towel or other padded surface.
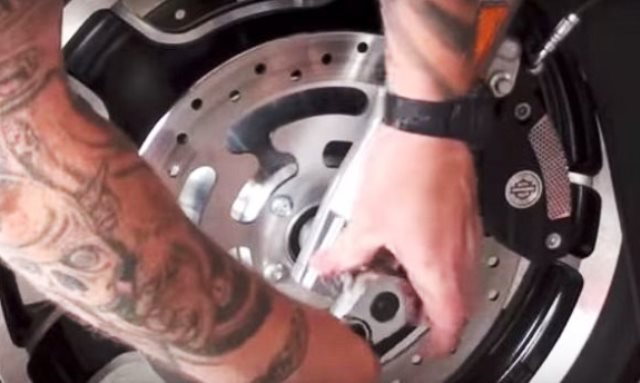
Figure 2. Remove the 15/16" nut from the front left fork. 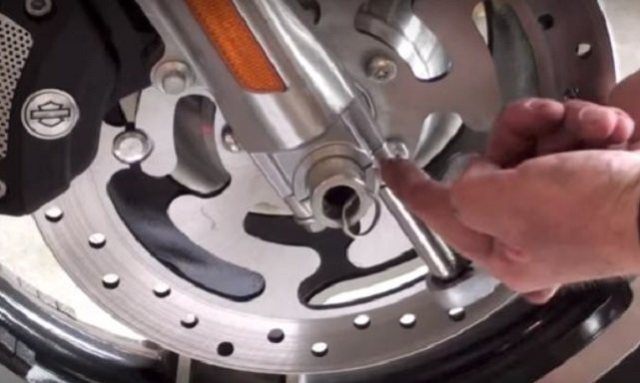
Figure 3. Remove the 1/2" nuts from the lower front fork on the right-hand side. 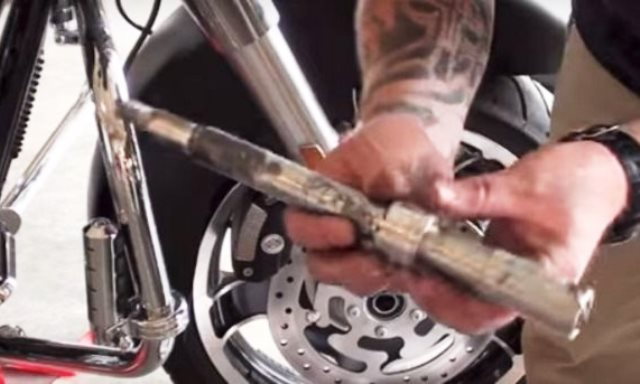
Figure 4. Pull the axle and make sure you keep the spacers with it.
Step 2 – Remove bearings from wheel
With the blind bearing puller, you simply insert the tool into the hole the axle came out of, tighten it to expand inside the hole, and then tighten the large bolt to pull it outward. They sell for less than $100, and you may even be able to rent one from your local chain auto parts store for less or even free.
- Insert the bearing puller into the axle hole and tighten the nut so it expands.
- Turn the large bolt head on the puller to pull out the bearing.
- Pull out the spacer that rides between the two bearings on either side. Set it aside and don't lose it.
- Pull the bearing from the other side.
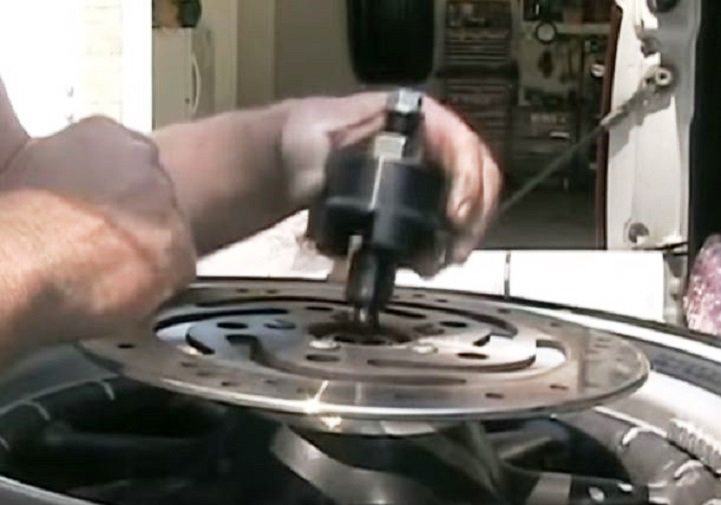
Figure 5. Insert the bearing puller into the hole for the axle where the bearings are located. 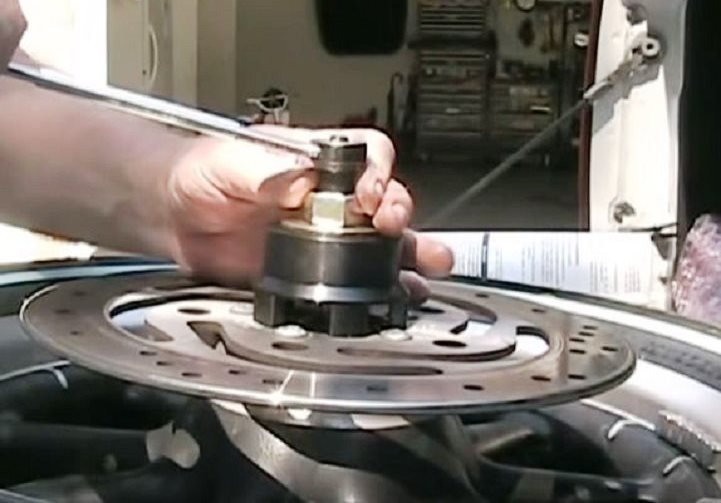
Figure 6. Tighten the top nut so the bottom shaft of the puller will expand and pull the bearings right out. 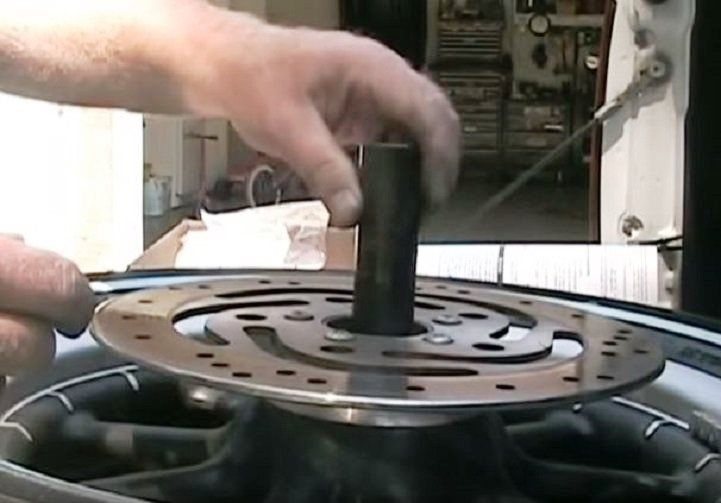
Figure 7. Pull the spacer out and make sure it is cleaned up and in pristine condition.
Pro Tip
Putting the new bearings in the freezer to chill while you take the old ones out will make them much easier to get in. The cold will shrink them by a microscopic amount, but enough to make a difference.
Step 3 – Install new bearings
Once the old bearings are out, putting the new ones back in is fairly easy. Follow the instructions on the puller to set it up for installation of the new bearings. Don't just beat them in with a hammer, or you may end up needing to replace them again right quick.
- Make sure the bearing area of the wheel is free from nicks and dirt. Clean up with sandpaper or a file if needed.
- Reconfigure the puller to install the bearings, and pull the new bearing into place on one side of the wheel.
- Don't forget the center spacer! Insert the center spacer before installing the other bearing.
- Install the bearing on the other side.
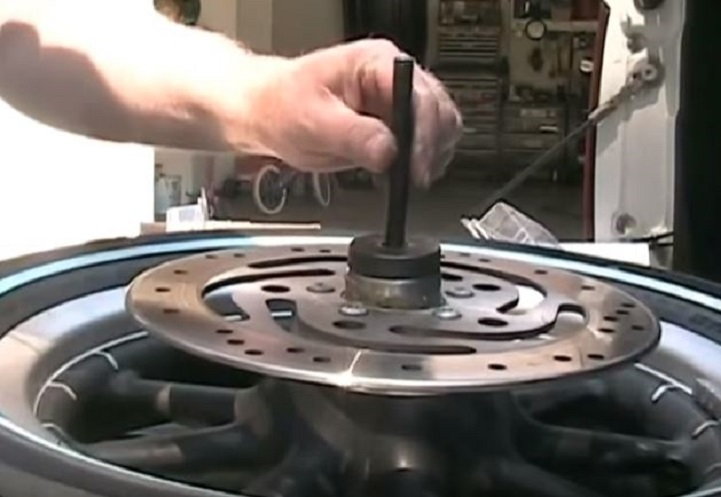
Figure 8. Drop the bearing and guide back into its home. Use a liberal amount of HD bearing grease. 
Figure 9. Hold the opposite end while tightening the seating nut until the wheel bearings are flush inside the axle shaft.
Step 4 – Replace wheel
Once the bearings have been replaced, the wheel can go back on the bike. Reassembly is just the reverse of taking it off.
- Make sure the left spacer is in place first.
- Slide the axle through the wheel and into the forks, and replace the spacer on the right-hand side.
- Replace the 1/2" nuts and the 15/16" nut on the other side. Make sure to replace the flat washers and lock washers as well.
- Torque the wheel nuts to spec.
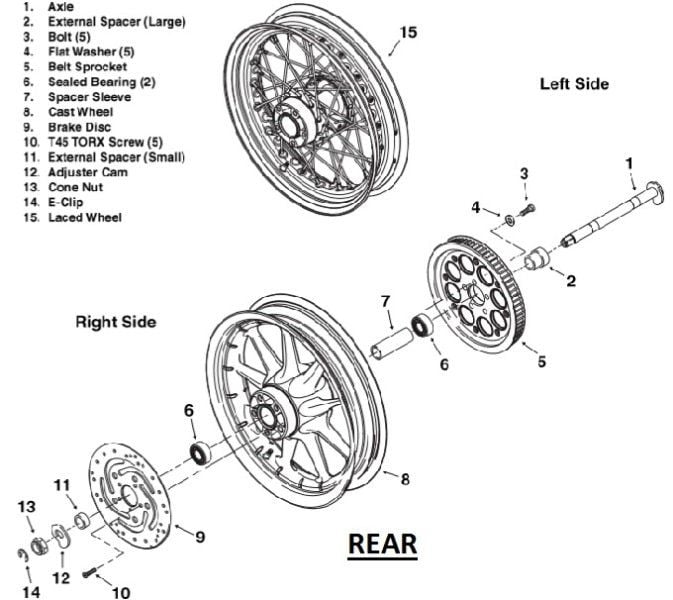
Step 5 – Remove/replace rear wheel and bearings
The process to remove the rear wheel is basically the same as the front. You will be dealing with two 1 7/16" axle nuts on either side and a locking clip. Remove the clip and then remove the nuts. Pull the rear wheel and remove the bearings in an identical process as you did for the front wheel. Replace the bearings and then remount the rear wheel.
Featured Video: How to Remove/Install Rear Wheel Tire
Related Discussion
- Front Wheel Bearing Replacement - HDForums.com