Harley Davidson Dyna Glide: How to Replace Headlight Bulb
Every rider should know how to maintain their motorcycle. This article explains how to replace one of the most used lighting accessories.
This article applies to the Harley Davidson Dyna Glide.
Like any vehicle, one of the most common components that needs to be maintained is the headlight. Stock units can generally last over 2,000 hours of use. Since it is inconvenient to keep track of the amount of hours each light is used, it is important to pay attention to how bright the bulb is. If the light begins to dim, then it is a good time to replace it. Unlike cars, you only have one headlight on your Dyna Glide, and light failure on an evening ride can be very dangerous. Fortunately, you can use the following instructions to quickly replace the headlight bulb on your Dyna Glide.

Materials Needed
- Screwdriver
- Replacement bulb
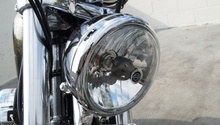
Step 1 – Loosen the headlight ring
Almost every Harley has a lock ring for its headlight housing, and the Dyna Glide is no different. While holding the lock-nut, loosen the screw and release the ring.

Figure 1. Loosen the lock screw. 
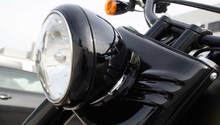
Figure 2. Remove the chrome ring.
Step 2 – Take out the headlight housing
- With the headlight lock ring removed, you will be able to grab the complete assembly.
- Pull the assembly outwards.
- Disconnect the headlight bulb while maintaining a hold on the assembly.
- Remove the plastic bulb housing piece.

Figure 3. Remove the headlight assembly. 
Figure 4. Disconnect the wire connector.
Step 3 – Replace the bulb
Once you flip the assembly over, you should notice either a lock-ring or set-screw, depending on your production model. Newer Dyna models will require the set-screw to be loosened, while the older generations' can come off with pressure. Replace the bulb and reinstall the locking assembly.

Figure 5. Remove the set-screw. 
Figure 6. Install the new bulb.
Step 4 – Install the headlight assembly
It's always recommended that you connect the headlight to the motorcycle and check the light. If the bulb is turning on properly, proceed to reassemble the assembly. Use the following instructions listed below for reference.
- Install the rear cap.
- Reconnect the wire connector.
- Install headlight assembly back into the frame.
- Tighten the chrome trim for the headlight cover.

Related Discussions and Video
- Change the Headlight on your Harley Davidson Sportster - HDforums.com
- 5.75 led headlight - HDforums.com
- Replace an H4 Headlight Bulb on Harley-Davidson by J&P Cycles - Youtube.com