Harley Davidson Dyna Glide: How to Obtain, Identify, and Clear Trouble Codes
Glancing at a check engine light is not the best feeling in the world. But the good news is finding out problems is actually pretty easy to do.
This article applies to the Harley Davidson Dyna Glide.
Diagnostic trouble codes, simply known as DTCs, are groups of characters which are triggered when something on the vehicle is not working properly. These codes can range from a number of issues; some being as small as a damaged sensor to others indicating a faulty injector. When a code is triggered, the Check Engine Light (CEL) appears on the motorcycle dashboard. You can use the instructions listed here to enter into diagnostics, read and clear the codes. Until the codes are clear, the light will not turn off.

Material Needed
- Ignition Key
Earlier Dyna models may differ in terms of accessing the DTC module.
Step 1 – Access the diagnostic menu
The diagnostics menu is all accessed and read from the digital odometer. Accessing the menu requires inputting a special code using the following buttons and switches.
- Turn the key ignition to OFF, and Run/Stop switch is to Run.
- Press and hold the odometer reset button.
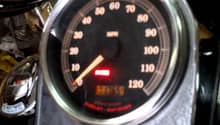
- Turn the key to "on" and the speedometer will then twist full range, while the rest of the dash lights up.
- Once the word "diag" shows up, your are in the diagnostic menu.
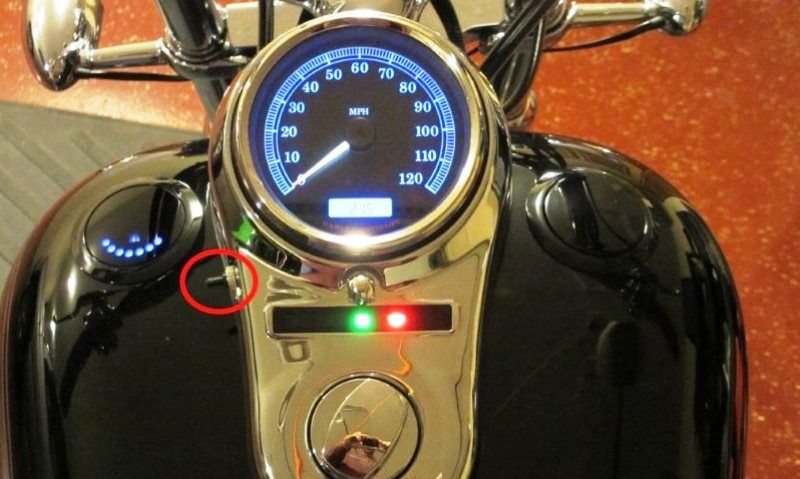
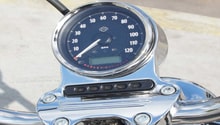
Figure 1. The location of the odometer reset button on tank mounted speedometer models. 
Figure 2. Odometer reset button on handlebar mounted speedometer.
Step 2 – Check the flashing module
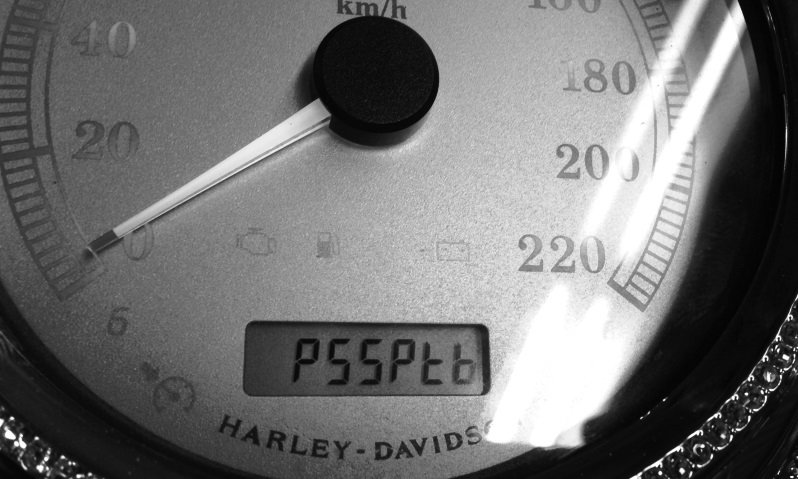
Press the odometer reset button and you'll see the letters PSSPT, each of which represents a system module of the bike. If one of the modules is flashing, it means there is a triggered diagnostic code. To choose between each one, press the reset button until the flashing letter is high-lighted. Then press and hold the reset button for five seconds to enter that module.
- P = ECM (Electronic Control Module [EFI motors]) or ICM (Ignition Control Module [Carbureted motors])
- S = TSM/TSSM (Turn Signal Module or Turn Signal Security Module)
- SP = Speedometer
- T = Tachometer
Step 3 – Read and compare the codes
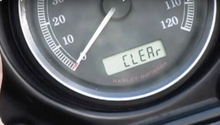
After you choose the module, every triggered code will appear. Write down each of the codes and you can either use some of the threads on the forums, or a service manual to compare each one. If by chance there are no codes, the word "none" will appear. If you want to make sure the codes on your Dyna are recent, press and hold the reset button for an additional five seconds, until the word "Clear" comes up. Then run the bike until the CEL lights again and redo the steps. If the codes are still present, check the steps required to troubleshoot them. The troubleshooting process differs according to the affected part and may require replacing worn out or malfunctioning components.
Code Designation
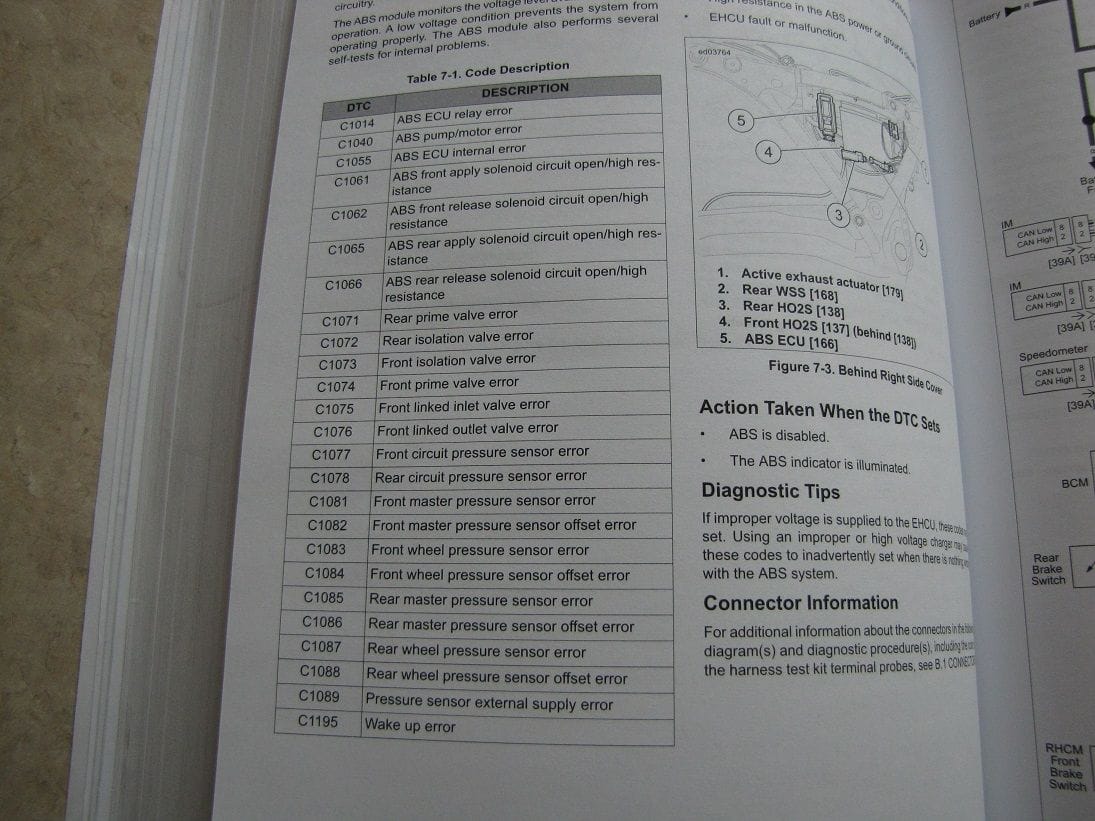
As mentioned above, there are different codes used on all the modules of the motorcycle. Each code uses a letter in front of the number set that determines where the problem is stemming from.
- P are codes that relate to the ECM.
- C are codes that indicate issues with the ABS.
- B are codes that relate to the radio and accessories.
- U are codes that show problems with the modules.
Related Discussion
- Identify Trouble Codes and Clear Them - HDForums.com