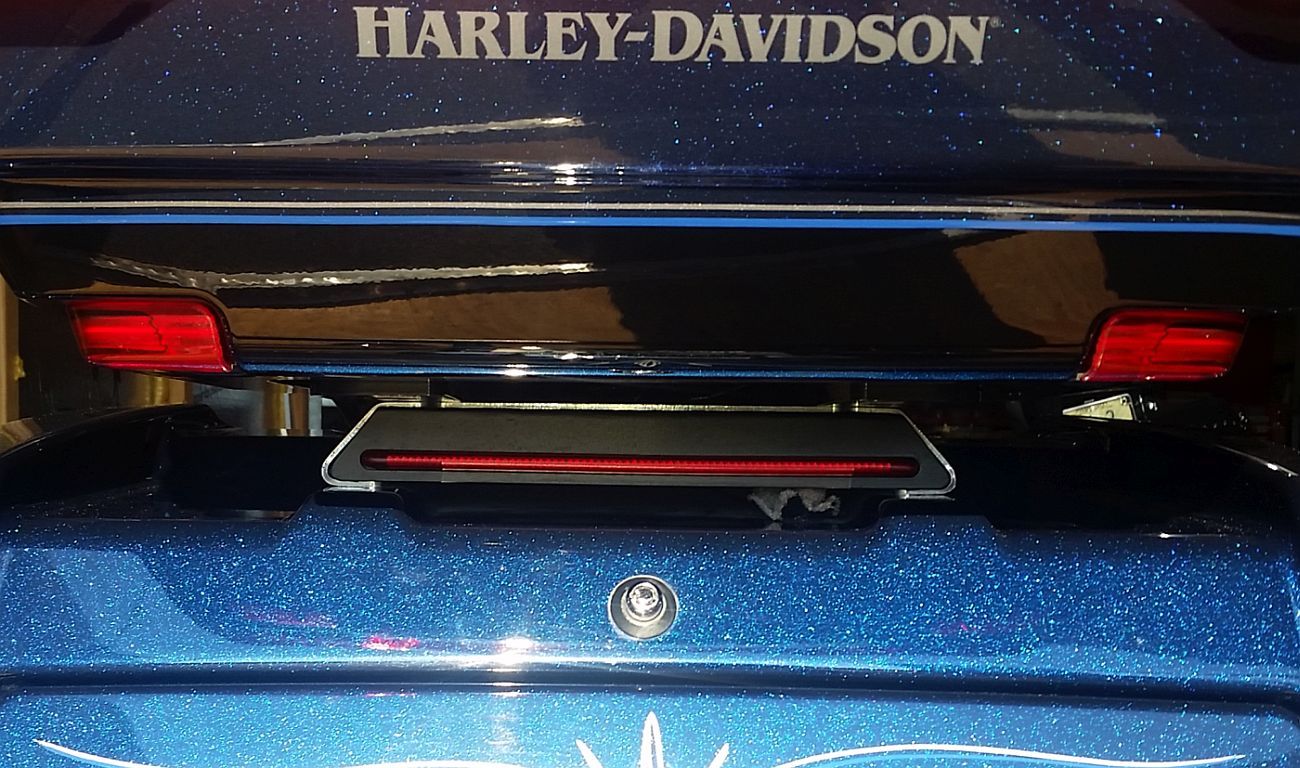
So I have to ask, where did that center light come from? Been thinking about adding something in back.
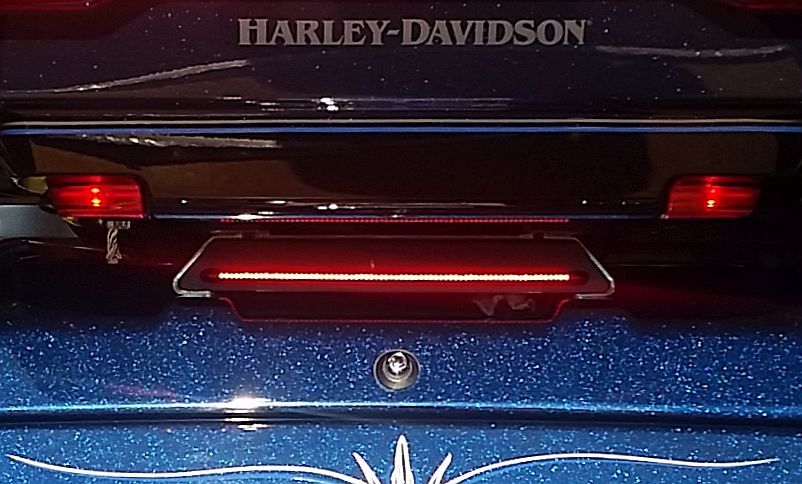
I made that to fit the hitch receiver. I welded a thin steel plate to a piece of square tube that fit the receiver. The light came from a web search. I wired a plug to fit the Bushtec wiring on the trike.
Excellent report on everything! But it made my to-get list longer. Definitely going to get those wind deflectors.
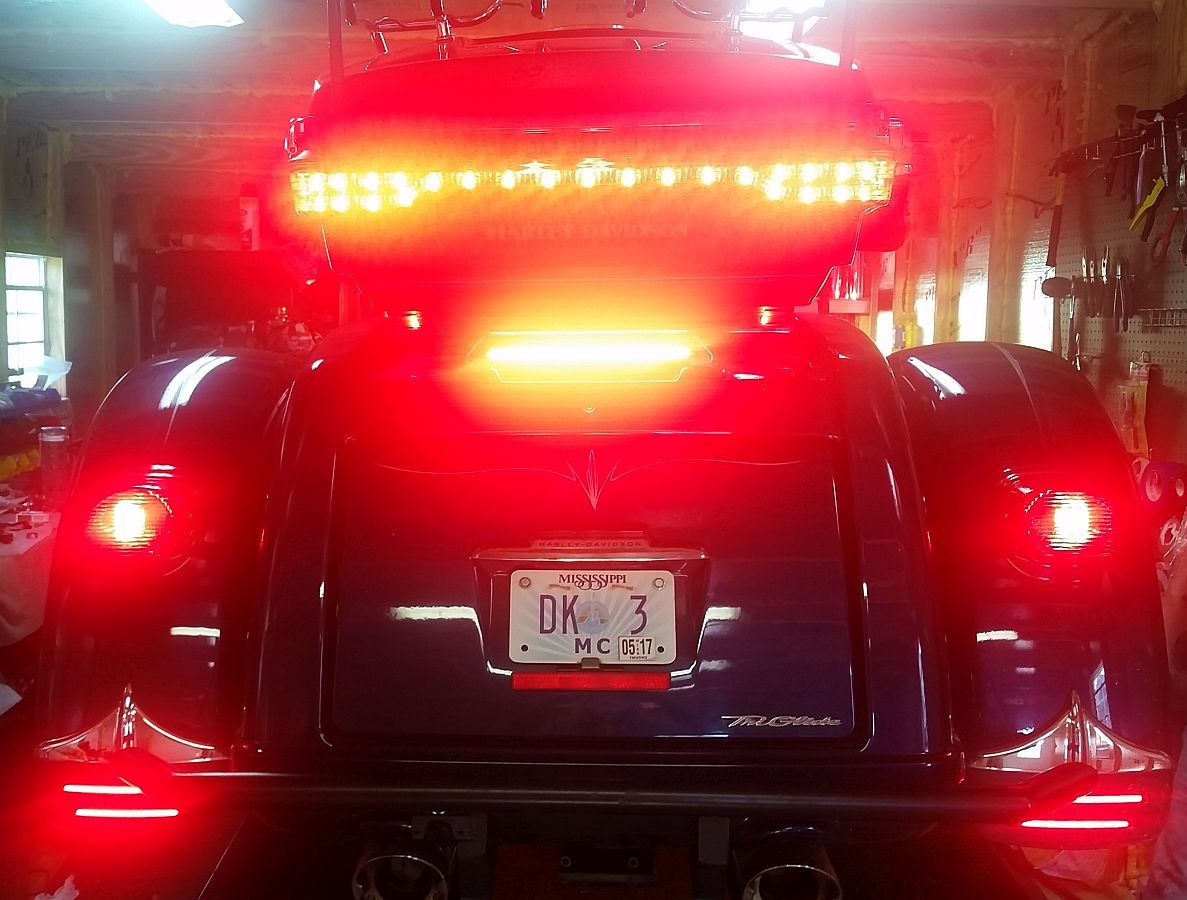
I'd also added a rear light; I curved some aluminum angle to match the Rivco bumper, and screwed it into four RivNut threaded inserts installed in the pre-existing holes in the bumper, added two 12" LED strips to the angle piece. Works pretty good.
This doesn't show how bright they are.
Not sure why the yellow glow, the LEDs are very red.
Added some sideways-firing LED strips to the body, facing up towards the tour pack, too.
When you installed the bolt-on Tour-Pak Relocator, did you have to do anything with the wiring for the Tour-Pak lights, radio and CB antenna wires when moving the Tour-Pak back 3 inches?
I'm sure interested in the Tour-Pak relocator for my 2016 Tri-Glide.
Thanks
Jim
[QUOTE=DK Custom;15126316]We did a few things
Friday I went ahead and installed a bolt-on Tour-Pak Relocator. It has 3 choices, 1", 2" or 3" further back. I went ahead with the 3" further back. So Mary has a bit of room, and I have a bit more room between the TP and the top of the trunk body. The Relocator move the TP up about .75 of an inch.
The wires are long enough, but sometimes you have to cut some of the zip ties under the seat to free up the extra length. If you email the shop at Support@DKCustomProducts.com they can email you back the instructions so you can see how easy it is to do.
[QUOTE=6bull;15484660]Kevin
When you installed the bolt-on Tour-Pak Relocator, did you have to do anything with the wiring for the Tour-Pak lights, radio and CB antenna wires when moving the Tour-Pak back 3 inches?
I'm sure interested in the Tour-Pak relocator for my 2016 Tri-Glide.
Thanks
Jim
Originally Posted by DK Custom
We did a few things
Friday I went ahead and installed a bolt-on Tour-Pak Relocator. It has 3 choices, 1", 2" or 3" further back. I went ahead with the 3" further back. So Mary has a bit of room, and I have a bit more room between the TP and the top of the trunk body. The Relocator move the TP up about .75 of an inch.
 08-18-2016, 11:50 AM