
Install help with progressive 444
#1
 02-28-2013, 07:30 PM


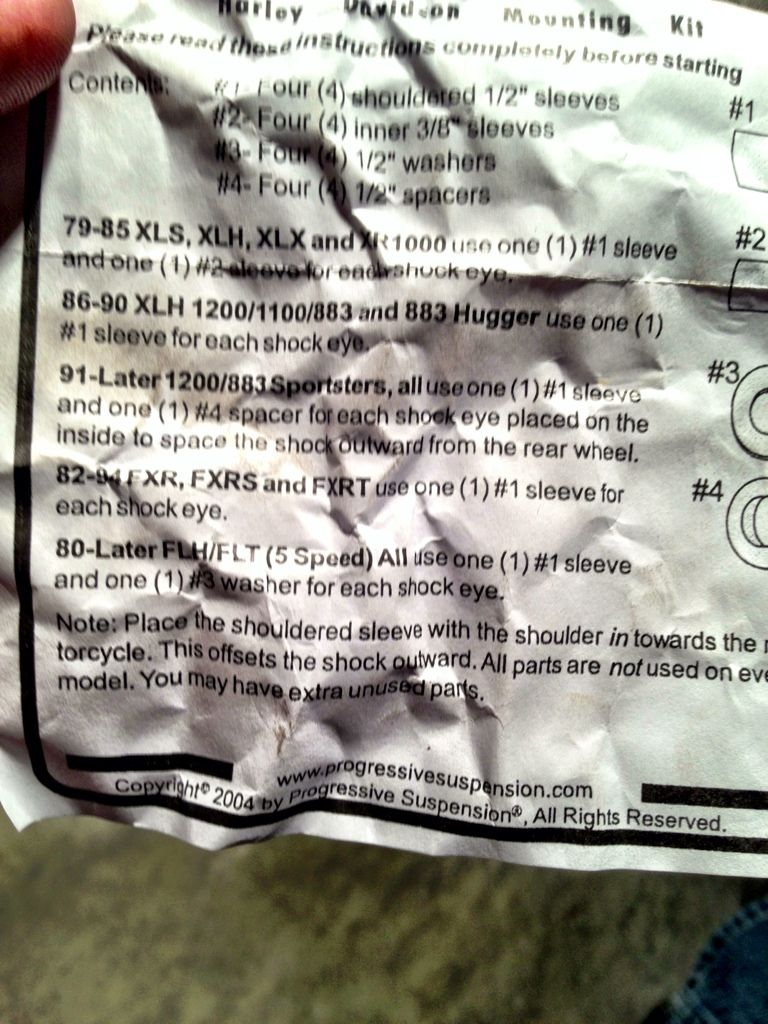
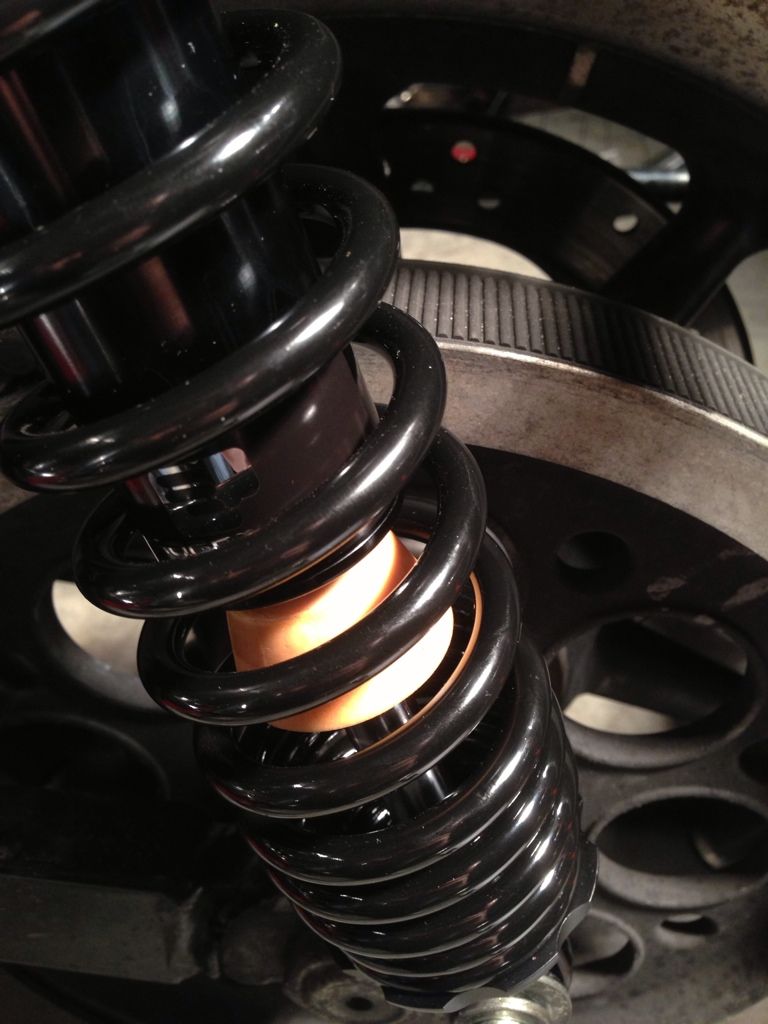
Ok so this may be a silly question, but I want to be sure I'm doing it right and the tech support is closed so I am asking the real experts! You will see from the pics below that the instructions call for 80 and later (5 speed) all to use two spacers with on each eye. Problem is the bolts are not long enough for the spacers and they seem they will be too far away even if the bolts were long enough. They looked fine with me bolted on without the spacers. They seem to have the same clearance as the stock ones. Also, beige thing inside the coils stay there? It's kind of unsightly. Yes I know the bikes dirty! Ill be standing by in the garage with a cold one! Thanks!


#2
02-28-2013, 07:45 PM
My 744 used just the one longer bushing. Put the bushing and shock in a vise and squeezed it until the bushing was all the way in the shock, doing the top and bottom.
Then bolt them up!
I don't know about the 444, but they look the same
There is a ton of extra hardware for other applications, so don't be confused by seeing other items..........
Then bolt them up!
I don't know about the 444, but they look the same
There is a ton of extra hardware for other applications, so don't be confused by seeing other items..........
#4
02-28-2013, 07:52 PM
#5
02-28-2013, 07:53 PM

Advanced
Join Date: Feb 2012
Location: North Carolina
Posts: 53
Likes: 0
Received 0 Likes
on
0 Posts
I put these on an 01 RK just as the instructions said. Not that it really matters I also have the same Swingarm as your bike. Your pict#3 shows spacer before it is pressed into eye of shock. Are you saying that the bolt is short because of this? If I remember correctly I had to use a little wd40 or PB to get it seated. I also pressed the sleeve in so it was between the bike frame and shock just as it is shown in Fig 2 instructions. This should work for you. I also did PS Monotubes on the front and and really like this setup over the stock.

#7
02-28-2013, 09:29 PM

Cruiser
Trending Topics
#8
03-01-2013, 03:34 AM
I just installed mine last night. Install the shouldered bushing top and bottom and the will face inwards when you mount them. It's tight but you can push them in by hand. And use one of the silver washers top and bottom next to the shouldered bushing you just installed. Remove both you old shocks then with a jack you can position the bike where you need to so you can install the bolts.
#9
03-01-2013, 05:25 AM
Thanks guys. I think I was overthinking it while constantly staring at it. I'll put putting it on after work!
It's kinda funny that I took out my cams changed the tensioner shoes and put in adjustable pushrods with no problem but this simple project confused the crap out of me!
It's kinda funny that I took out my cams changed the tensioner shoes and put in adjustable pushrods with no problem but this simple project confused the crap out of me!
Last edited by CGLTD; 03-01-2013 at 05:34 AM.
#10
06-05-2013, 04:10 PM
Tourer
I just got the 444 for my 2013 SG, haven't installed them yet, but I have a question. What about the part on the top of the stock shock where the quick disconnect (back rest etc) slips on? When you put on the progressive is it still there? Or does it come off with the stock shock? If so then you loose the QD feature?