(Hopefully) helpful handlebar installation thread
#1
Just completed putting my new 11" Santee mini-apes with internal wiring on the 2013 RKC because like everyone else, I HATED the stock bars. I liked these because i didn't think i would like the look of full apes at 12" or higher with the Classic. Not saying anything is wrong with them, just not part of what I was looking to do to my bike aesthetically. Hopefully these will do the trick. If not, I might just end up doing the 12" apes later as everyone I talk to says I eventually will anyway. Everyone I talk to says they never went high enough of their first set of apes.
Went for a decent ride today since it was pretty nice in the St. Louis area and so far, I am real pleased with the new fit comfort wise. Never had much doubt I would be happy from a looks perspective because most of the 11" - 14" apes look pretty cool in my book on the RKC with the shiny chrome and the 1 1/4" tubing and you just can't go wrong with internal wiring and polished stainless cables and brake lines.
I did everything myself and it took me a while to figure things out along the way. I armed myself with a service manual, some heat shrink, soldering iron and dawn dish soap and eventually got it done and everything worked right off the bat. No tracking down bad connections or anything like that.
Hopefully some of these pointers can help some folks looking to do their own bars.
I had some pretty significant issues threading the wires through the bars initially until I finally settled on using Dawn dish soap as a lubricant and reworking my TGS wiring.
I tried baby powder initially, but the inside of the bars is a lot rougher finish and much less "slippery" than the outside finished chrome, so I thought I needed something a little thicker and more viscous. Next up I tried white lithium spray grease. I tried this because i did some reading and it looked like it wouldn't break down any of the wiring insulation or the heat shrink tubing over time and wouldn't run on really hot days and make a mess on the nacelle. It was pretty messy and smelly though. Since I wasn't completely satisfied with the soldering job I did, i decided to rip the wires out and start over with my wiring junctions. After doing this, I decided to try the Dawn dish soap and it worked perfectly.
Another big problem I had was trying to squeeze everything in there with the mid tube connectors used on the TGS for the TBW and heated handgrips. It just created too much bulk and made things a bit too tight when pulling on the pull-through wire to feed everything through. I was also afraid of either damaging the connector or dislodging one of the pins. I was a bit concerned about cutting the connectors out and soldering in some wire in place of the connectors because I wasn't sure if I would create a problem for the TGS with a different resistance or something since the TGS is essentially a rheostat. Hopefully that doesn't sound too silly to anyone with a bit more automotive electrical work under their belt than me. After doing some more reading, it didn't look like this would be the case, so I gave it a shot and everything works just fine.
I would STRONGLY recommend to anyone looking to run their own wiring to either cut the connectors out and solder some extensions in or as another option, get the what's commonly referred to as the "screamin eagle TGS", which is P/N 32310-08, if i remember correctly. This one comes with longer wires and no internal connectors, which will make things a ton easier. I think it costs about 70-80 bucks. If I remember correctly, the stock sensor is P/N 32305-08. I am sure anyone at the parts counter could get you squared away if you just asked either for the "screaming eagle" version or the straight wired version with no connectors other than the ones that plug into the main harness inside the nacelle. I have screamin eagle in quotes because I don't think this part is necessarily for the limited bikes and have all the screamin eagle mods on them.
Materials used:
Have a ton of wire and heat shrink I bought off Amazon about a year ago, so I had most of what I needed. I used 18 ga wire and 1/8" heat shrink. Since I ended up running the wires through the bars a couple times due to my not being satisfied with my soldering technique on the first run, I found that it was easier to remove the original wire loom and heat shrink each wire individually after soldering. I found this to be much more flexible and easier to run than the whole bundle at one time. I also found it easier than running four or five wires at a time in two smaller bundles. I figured this will still keep the wires nice and protected from abrasion. I reused some of the original wire loom at the bottom where the wires have pretty good bend in them coming out of the bars and over the triple tree into the nacelle. Even though Santee did a great job of chamfering the holes, it was still quite a bit of pressure at the bend exiting the handlebars, so i figured a little extra protection wouldn't hurt. I just used the standard 35W soldering iron that I have had for years with some 60/40 solder for the connections. I would recommend that if you haven't soldered in a while, take the time to practice on a four or five 8-12 inch lengths of wire to brush up. It has been a while for me, and after about 3 practice runs, i had nice shiny solder joints with no burning and nice fill in the wires for some really strong junctions. If anyone has the skill and the patience, i would highly recommend this route versus spending the money on the wiring and TBW extensions. May not be for everyone, but if you have any soldering experience, are patient and are looking to save a few bucks, i would recommend making your own extensions.
Brake bleeding if you need to add longer lines:
I did some reading and there seems to be quite a bit of debate out there on whether or not you should bleed your own ABS system or have it done with the digi-tech at the dealership. I did some asking around at a couple dealerships in the St. Louis area and they said most of the time when they replace the brake lines, they don't need to hook it up. They just perform a normal brake bleed and if the ABS light goes off like it should at 3 MPH, then you are good to go. I don't want to put this out there as gospel, just letting everyone know what a couple service managers told me. Incidentally, my brakes seem to work just as they did before and my ABS light does extinguish properly after hitting 3 MPH, but I may end up having them do it at my next free service. If I have to pay the difference because the brake bleed isn't part of the free service, then so be it. Worth it to me just for the piece of mind and as a double check of my bleeding work.
Clutch cable and brake line lengths:
There is often the question in the handlebar threads about "which length cables did you need for your bars". Hopefully this will help some folks. The rise on my original bars was about 7.5 inches, they had about 5 inches of pullback (I think this is what I remember, I lost my notes) and are about 32 inches wide. One of the reasons I went with the Santee bars was because they were the same width as the stock bars, which was something I wanted. I looked really hard at the Wild One bars, but wasn't sure i wanted something that wide as their apes are usually 35-36 inches wide. Anyway, since my new bars were about 4 inches taller and had a few more inches pullback, and were only about an inch wider. I was thinking +6 might be a bit tight when I did the math, but since I thought there was quite a bit of extra slack in the clutch cable, I figured I would be alright and it worked out just fine. I also have enough slack that I could put on the 12" apes if I decided to later and won't have any problems with the clutch cable length. The brake line was very easy. I only did the line from the master cylinder to the ABS controller and decided to wait to do the lower caliper lines later to keep from getting yelled at too much by the wife. Magnumshielding makes very nice cables and for the brake line, they do something pretty cool. They split the mid line from the ABS controller to the master cylinder inside the nacelle. This allows you to by a shorter or longer line from nacelle to the master cylinder should you need to for either shorter or taller bars at a later time. Makes things a lot cheaper. It only ends up being about 40 bucks or so for that short line from the nacelle to the master cylinder if you need a different length rather than another 80 bucks for the the entire length from the master cylinder to the ABS module.
I would NOT recommend trying to get away with stock cable lengths on these bars. I just didn't see enough flexibility and slack on the clutch cable and brake line to make me comfortable. I probably wouldn't even try it on 10 inch bars, but maybe if there was less pullback and not much more width on 10 inch bars, it could be done. Better safe than sorry I say, when it comes to things like this.
Polyurethane riser bushings:
My bike was brand new, so i didn't really notice much play in the handlebars but I have been on other people's Harleys and on some of them, you could really feel the play on the bars. I bought a 10 dollar set (vs $40 from the dealer) of bushings from Easternperformance and they were a piece of cake to put in since I already had the front end apart to do the bars and wiring. Some folks say there is more vibration felt after installing these since they are harder, but i didn't notice any difference but that could be because my stock rubber ones were brand new and hadn't been stressed much yet and given a chance to wear out from fatigue. Shouldn't have that problem with these though as the material should last much longer than regular rubber. I read a lot of threads and posts that mentioned some problems with the bushings being too tall after installation and people were having a hard time putting the decorative cover on that covers the handlebar clamp. I found an easy way to do this without resorting to cutting or "shaving" any material off the bushings or the risers to reduce the height about 1/8" inch or so. I simply torqued them about 4 times instead of just once. I think the service manual said 90-110 ft-lbs torque, so i started with about 25 ft-lbs, let things rest there for about 10 minutes to let the bushings compress, moved up to about 50 ft-lbs, gave it another ten minutes, then went to 75 ft-lbs, and finally a final torque to spec. Handlebar clamp cover went on with no issues at all. I also found that Dawn dish soap came in very handy here as well with lubricating the bushings to make installation easier in the triple tree.
Quality of the Santee bars:
I was very pleased with the bends and finish on these bars. No wrinkles at the bends in the tubing and the chrome was very polished with no graying or brown areas anywhere on the bars. Another nice touch with the Santee bars is the fact that they come with pull-through wires already installed inside the bars when you unbox them. No need to go looking for rope or some other materials to use for pull-through wires.
Time and cost:
I bought the bars from J&P Cycles and paid $115 with free shipping. The J&P P/N is 502-191 in case anyone is interested. 10 bucks for the bushings, about 10 bucks for the wire, about 20 bucks for the heat shrink and about 5 bucks for the solder.
All told the whole job took my a full weekend (about 16 hours) to get everything dismantled on the bike, redo the wiring and get it all put back together. I really took my time by reading all the different areas of the service manual that were relevant, ended up soldering the wires together a couple times and had the issues with running the wires the first time, which attributed to the extended time needed to finish. If I had it to do all over again, I really don't see why I couldn't do this in about 6-8 hours no problem with what I learned along the way and still take my time and have a few beers. I think the quote for the dealer to do this was right about $1000 dollars. It cost me quite a bit of time which is of course valuable to me, but I usually prefer to do things myself and learn new things and this was something I had never done before and now I know how, so I am quite satisfied. I also subscribe to the notion that the more I do to the bike myself, the more it becomes uniquely mine. With the money saved, now I can move on to the next mod(s) to make it even more "my" RKC.
I have attached some before and after pics. i was a moron and didn't have my camera out while doing the work, but hopefully some folks still find this helpful. Anyway, sorry for being so long winded in the post.
The day after I bought it:
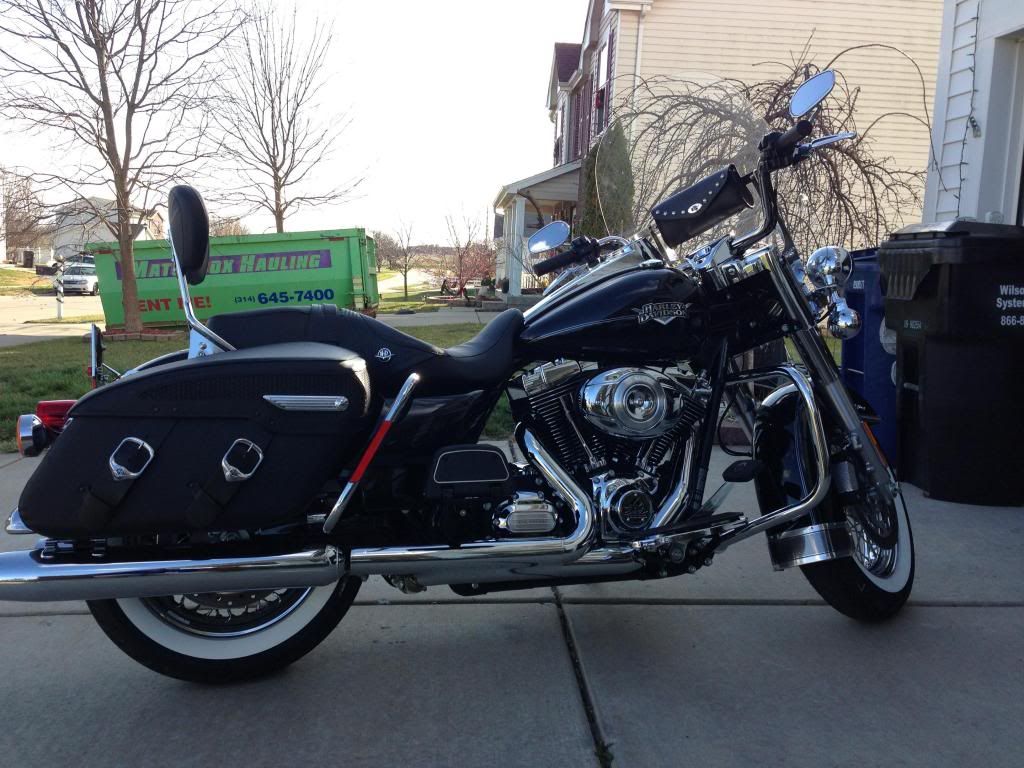
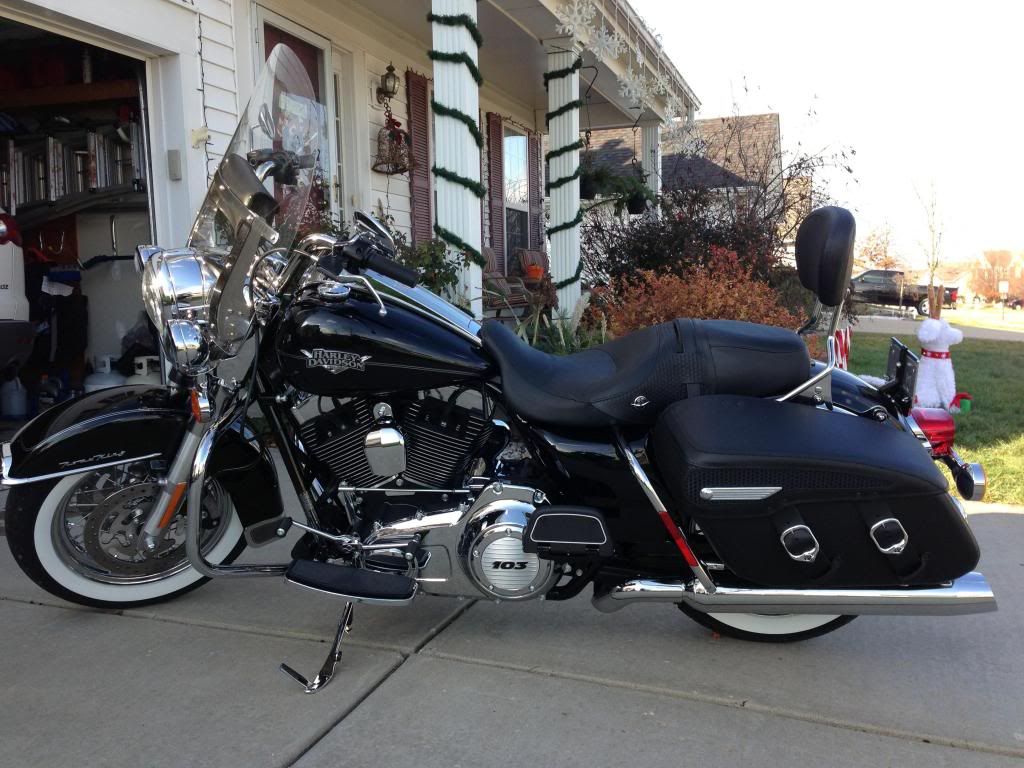
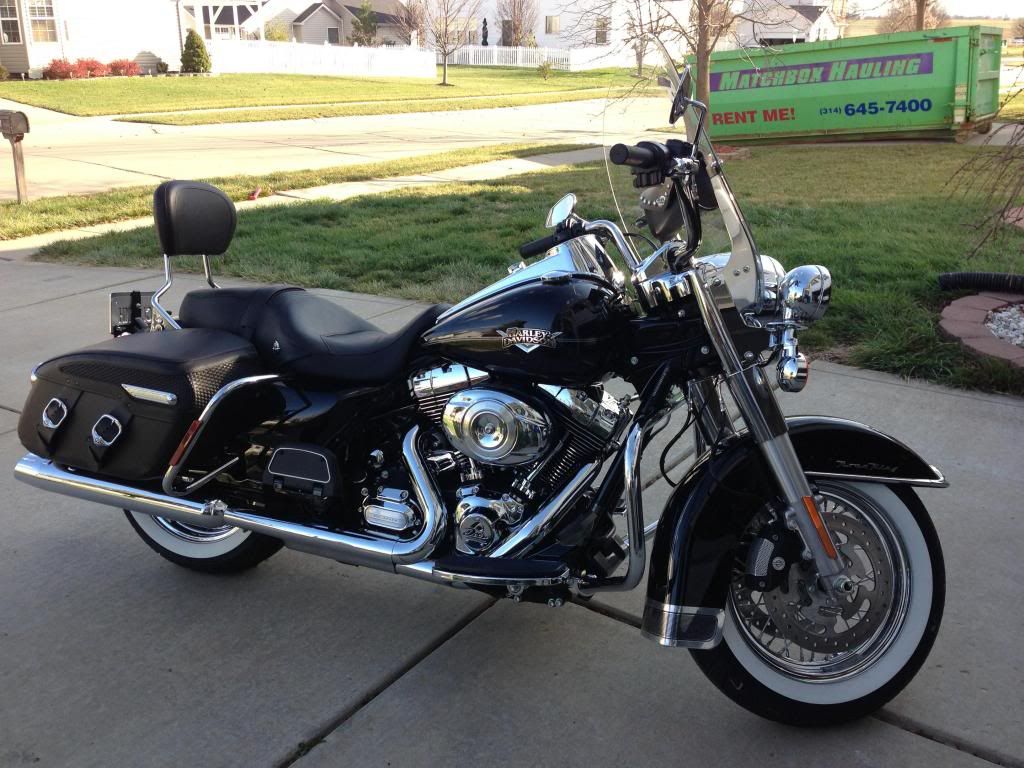
First ride after getting everything put back together:
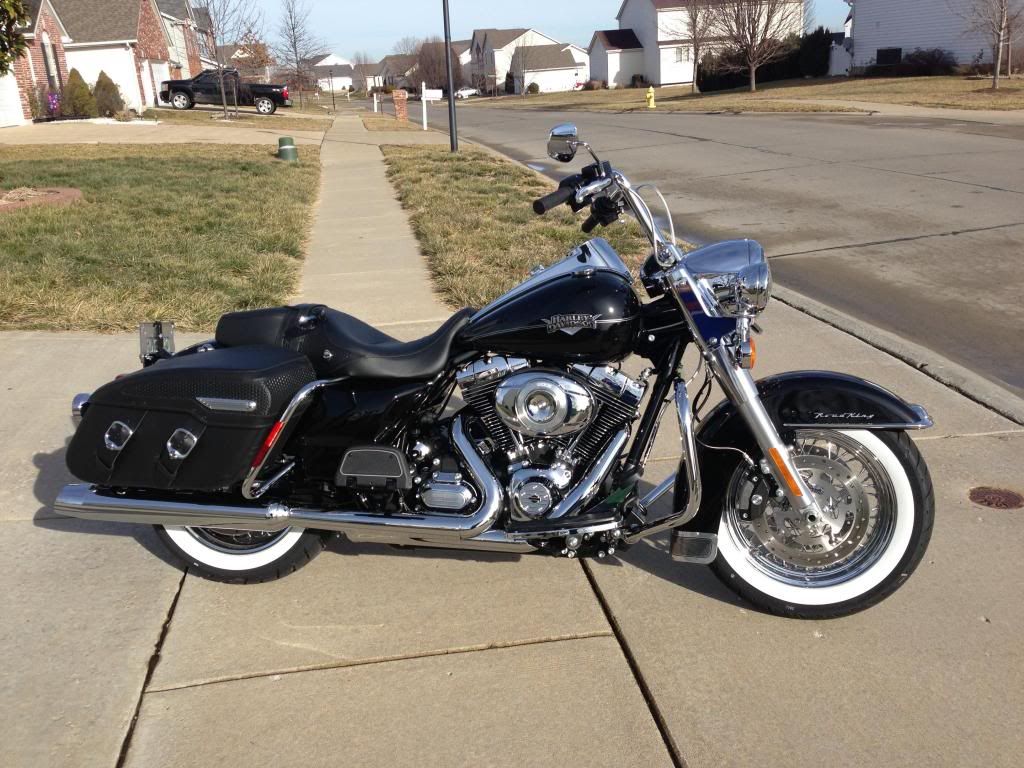
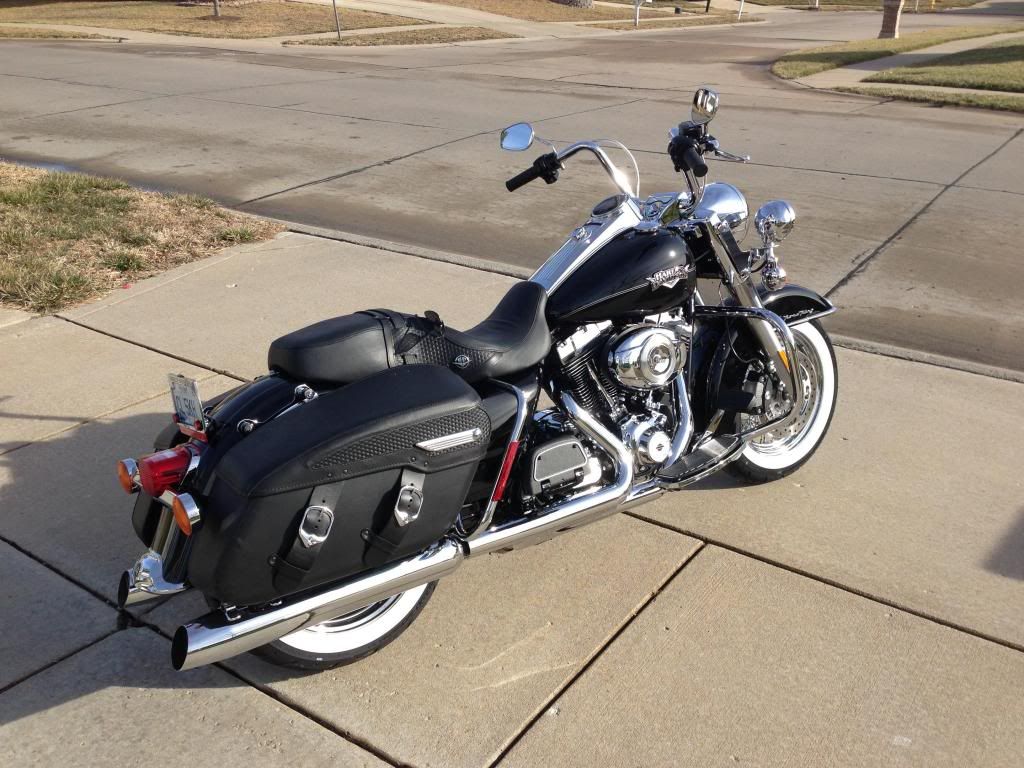
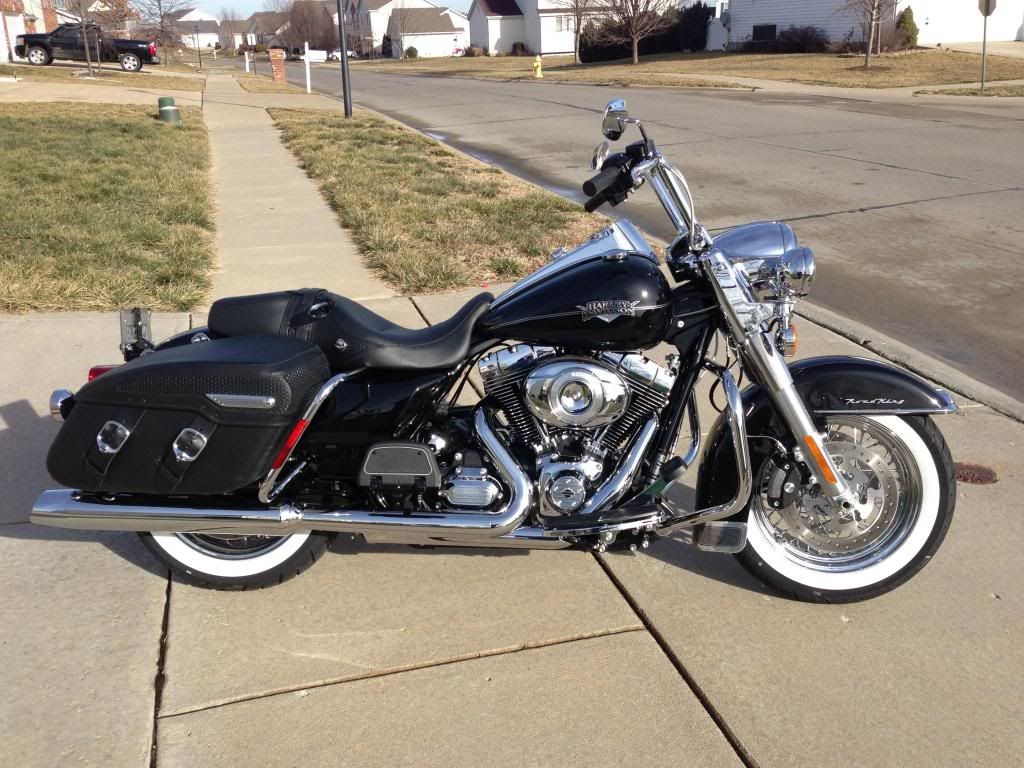
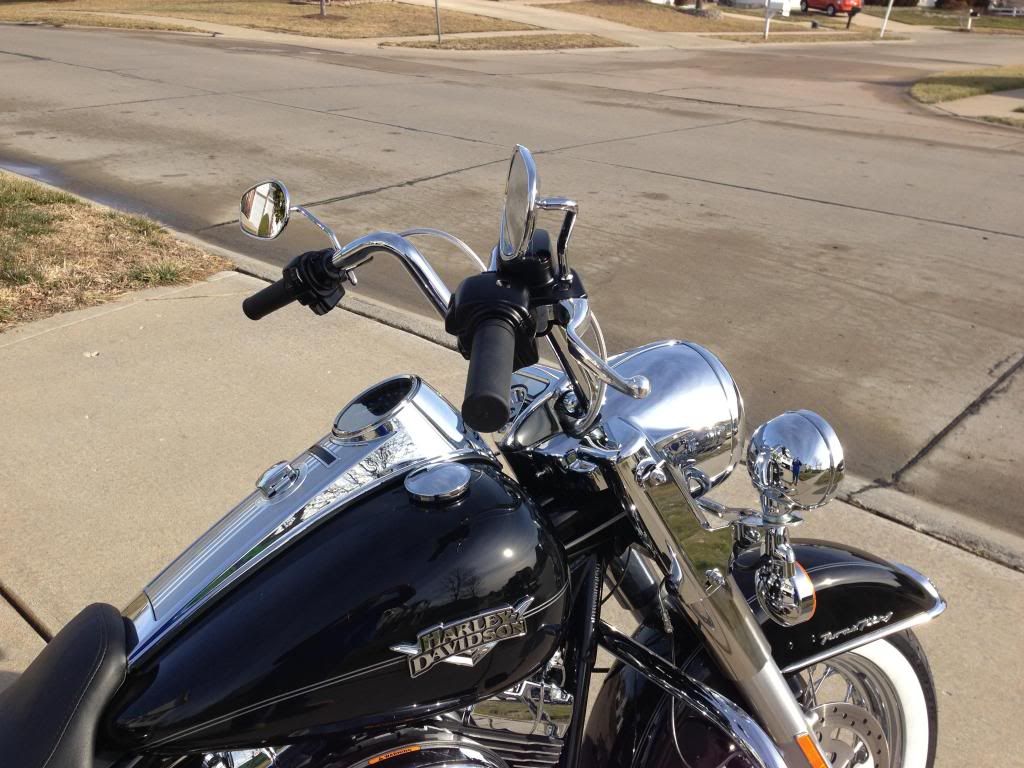
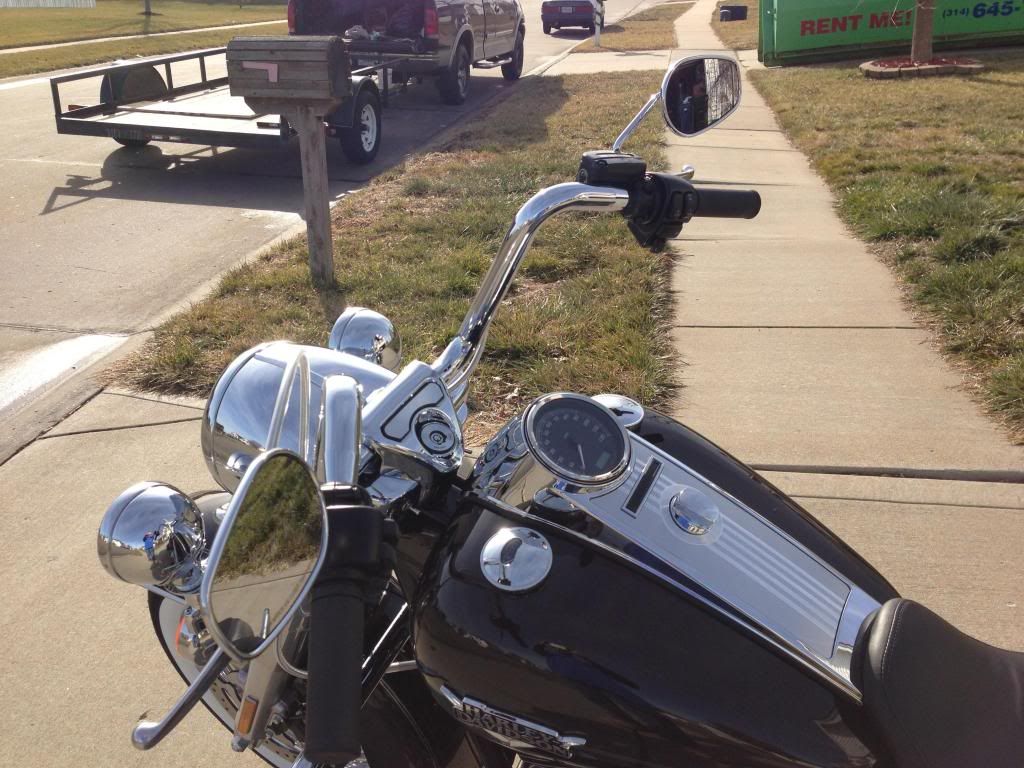
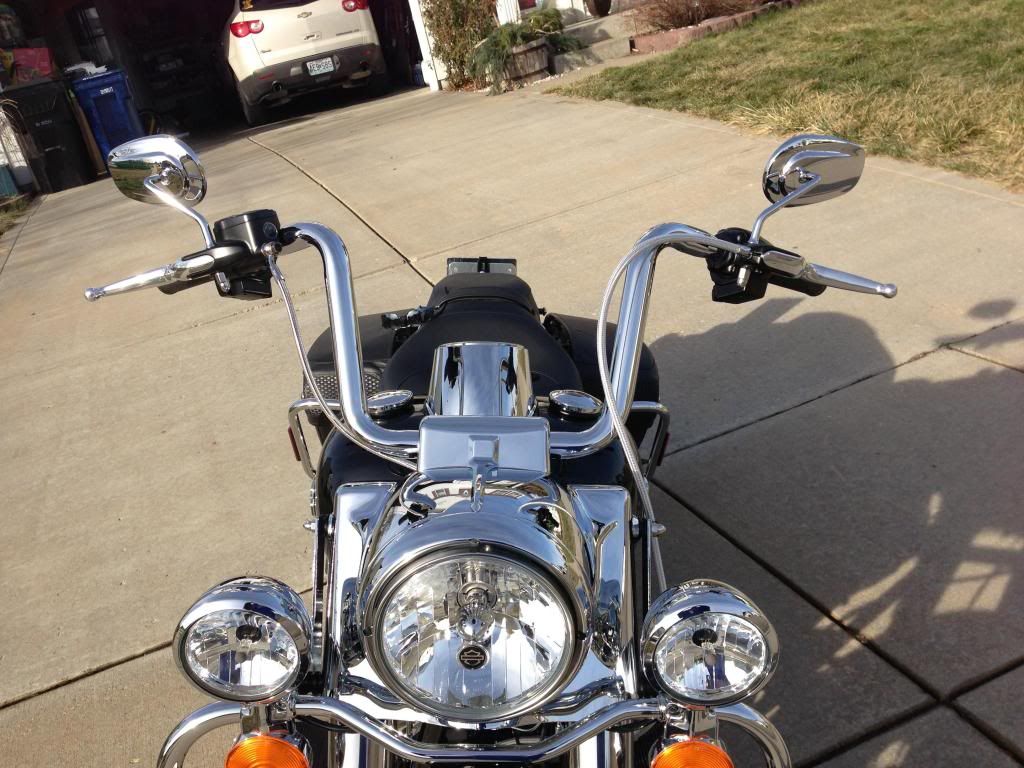
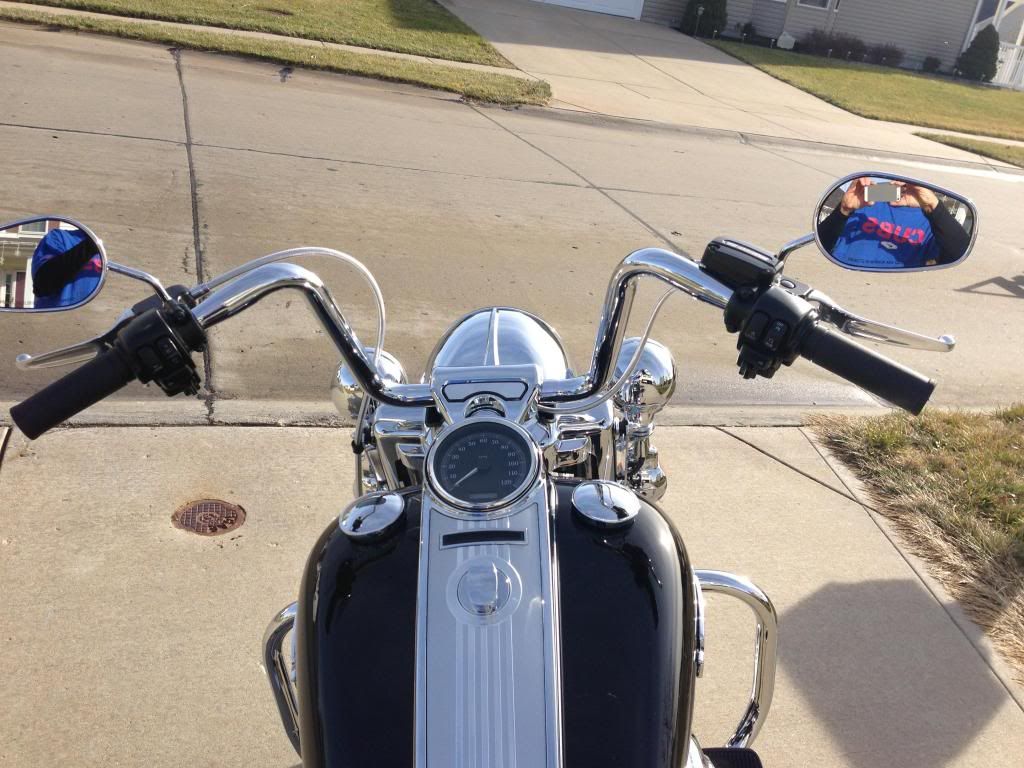
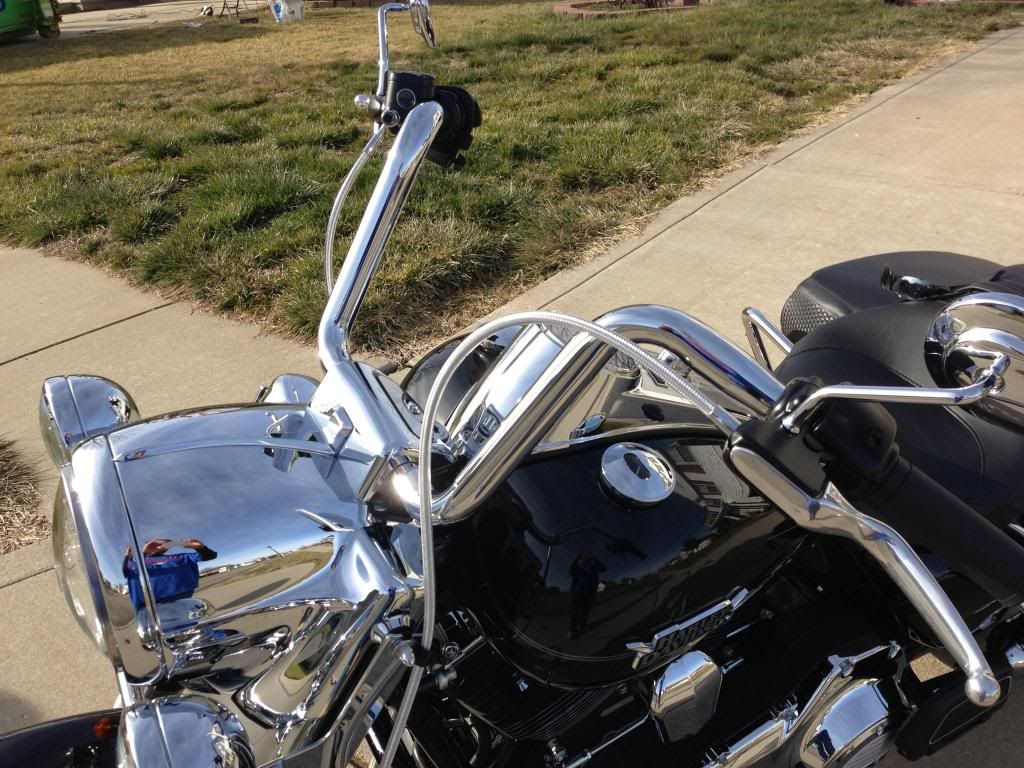
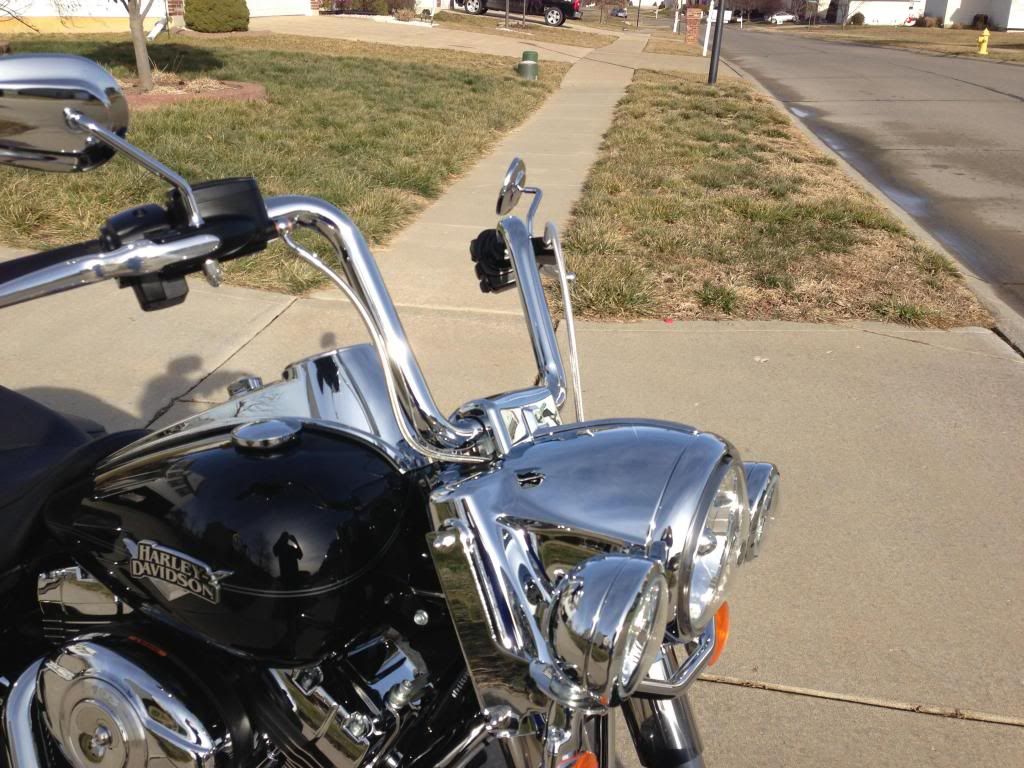
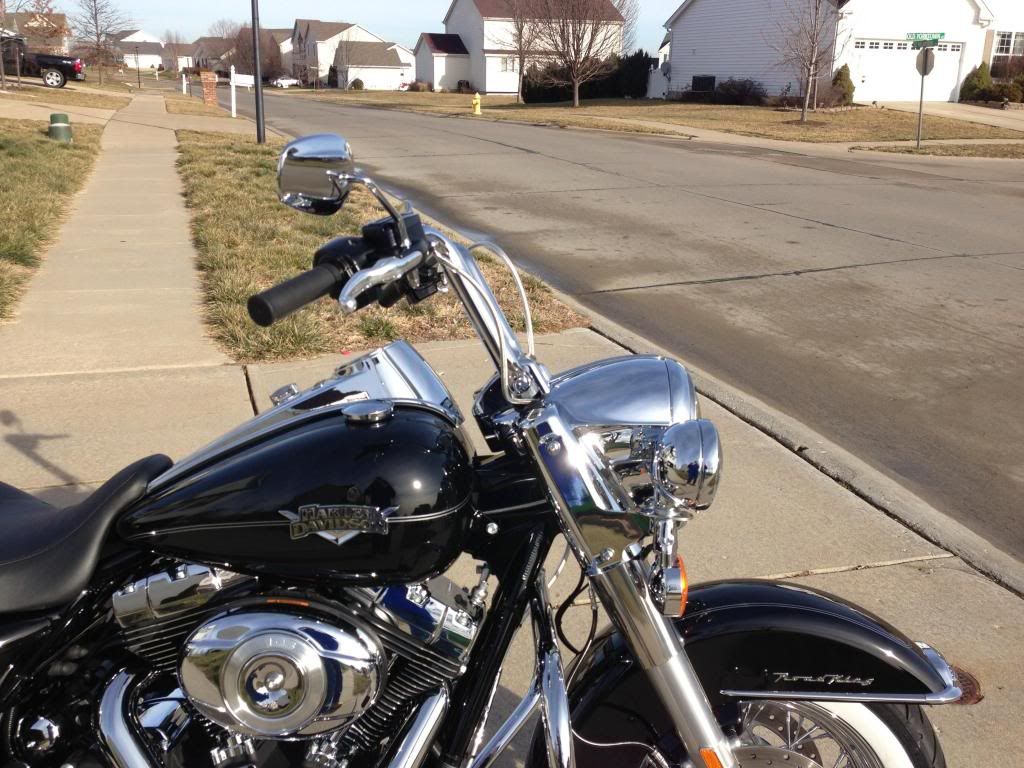
Went for a decent ride today since it was pretty nice in the St. Louis area and so far, I am real pleased with the new fit comfort wise. Never had much doubt I would be happy from a looks perspective because most of the 11" - 14" apes look pretty cool in my book on the RKC with the shiny chrome and the 1 1/4" tubing and you just can't go wrong with internal wiring and polished stainless cables and brake lines.
I did everything myself and it took me a while to figure things out along the way. I armed myself with a service manual, some heat shrink, soldering iron and dawn dish soap and eventually got it done and everything worked right off the bat. No tracking down bad connections or anything like that.
Hopefully some of these pointers can help some folks looking to do their own bars.
I had some pretty significant issues threading the wires through the bars initially until I finally settled on using Dawn dish soap as a lubricant and reworking my TGS wiring.
I tried baby powder initially, but the inside of the bars is a lot rougher finish and much less "slippery" than the outside finished chrome, so I thought I needed something a little thicker and more viscous. Next up I tried white lithium spray grease. I tried this because i did some reading and it looked like it wouldn't break down any of the wiring insulation or the heat shrink tubing over time and wouldn't run on really hot days and make a mess on the nacelle. It was pretty messy and smelly though. Since I wasn't completely satisfied with the soldering job I did, i decided to rip the wires out and start over with my wiring junctions. After doing this, I decided to try the Dawn dish soap and it worked perfectly.
Another big problem I had was trying to squeeze everything in there with the mid tube connectors used on the TGS for the TBW and heated handgrips. It just created too much bulk and made things a bit too tight when pulling on the pull-through wire to feed everything through. I was also afraid of either damaging the connector or dislodging one of the pins. I was a bit concerned about cutting the connectors out and soldering in some wire in place of the connectors because I wasn't sure if I would create a problem for the TGS with a different resistance or something since the TGS is essentially a rheostat. Hopefully that doesn't sound too silly to anyone with a bit more automotive electrical work under their belt than me. After doing some more reading, it didn't look like this would be the case, so I gave it a shot and everything works just fine.
I would STRONGLY recommend to anyone looking to run their own wiring to either cut the connectors out and solder some extensions in or as another option, get the what's commonly referred to as the "screamin eagle TGS", which is P/N 32310-08, if i remember correctly. This one comes with longer wires and no internal connectors, which will make things a ton easier. I think it costs about 70-80 bucks. If I remember correctly, the stock sensor is P/N 32305-08. I am sure anyone at the parts counter could get you squared away if you just asked either for the "screaming eagle" version or the straight wired version with no connectors other than the ones that plug into the main harness inside the nacelle. I have screamin eagle in quotes because I don't think this part is necessarily for the limited bikes and have all the screamin eagle mods on them.
Materials used:
Have a ton of wire and heat shrink I bought off Amazon about a year ago, so I had most of what I needed. I used 18 ga wire and 1/8" heat shrink. Since I ended up running the wires through the bars a couple times due to my not being satisfied with my soldering technique on the first run, I found that it was easier to remove the original wire loom and heat shrink each wire individually after soldering. I found this to be much more flexible and easier to run than the whole bundle at one time. I also found it easier than running four or five wires at a time in two smaller bundles. I figured this will still keep the wires nice and protected from abrasion. I reused some of the original wire loom at the bottom where the wires have pretty good bend in them coming out of the bars and over the triple tree into the nacelle. Even though Santee did a great job of chamfering the holes, it was still quite a bit of pressure at the bend exiting the handlebars, so i figured a little extra protection wouldn't hurt. I just used the standard 35W soldering iron that I have had for years with some 60/40 solder for the connections. I would recommend that if you haven't soldered in a while, take the time to practice on a four or five 8-12 inch lengths of wire to brush up. It has been a while for me, and after about 3 practice runs, i had nice shiny solder joints with no burning and nice fill in the wires for some really strong junctions. If anyone has the skill and the patience, i would highly recommend this route versus spending the money on the wiring and TBW extensions. May not be for everyone, but if you have any soldering experience, are patient and are looking to save a few bucks, i would recommend making your own extensions.
Brake bleeding if you need to add longer lines:
I did some reading and there seems to be quite a bit of debate out there on whether or not you should bleed your own ABS system or have it done with the digi-tech at the dealership. I did some asking around at a couple dealerships in the St. Louis area and they said most of the time when they replace the brake lines, they don't need to hook it up. They just perform a normal brake bleed and if the ABS light goes off like it should at 3 MPH, then you are good to go. I don't want to put this out there as gospel, just letting everyone know what a couple service managers told me. Incidentally, my brakes seem to work just as they did before and my ABS light does extinguish properly after hitting 3 MPH, but I may end up having them do it at my next free service. If I have to pay the difference because the brake bleed isn't part of the free service, then so be it. Worth it to me just for the piece of mind and as a double check of my bleeding work.
Clutch cable and brake line lengths:
There is often the question in the handlebar threads about "which length cables did you need for your bars". Hopefully this will help some folks. The rise on my original bars was about 7.5 inches, they had about 5 inches of pullback (I think this is what I remember, I lost my notes) and are about 32 inches wide. One of the reasons I went with the Santee bars was because they were the same width as the stock bars, which was something I wanted. I looked really hard at the Wild One bars, but wasn't sure i wanted something that wide as their apes are usually 35-36 inches wide. Anyway, since my new bars were about 4 inches taller and had a few more inches pullback, and were only about an inch wider. I was thinking +6 might be a bit tight when I did the math, but since I thought there was quite a bit of extra slack in the clutch cable, I figured I would be alright and it worked out just fine. I also have enough slack that I could put on the 12" apes if I decided to later and won't have any problems with the clutch cable length. The brake line was very easy. I only did the line from the master cylinder to the ABS controller and decided to wait to do the lower caliper lines later to keep from getting yelled at too much by the wife. Magnumshielding makes very nice cables and for the brake line, they do something pretty cool. They split the mid line from the ABS controller to the master cylinder inside the nacelle. This allows you to by a shorter or longer line from nacelle to the master cylinder should you need to for either shorter or taller bars at a later time. Makes things a lot cheaper. It only ends up being about 40 bucks or so for that short line from the nacelle to the master cylinder if you need a different length rather than another 80 bucks for the the entire length from the master cylinder to the ABS module.
I would NOT recommend trying to get away with stock cable lengths on these bars. I just didn't see enough flexibility and slack on the clutch cable and brake line to make me comfortable. I probably wouldn't even try it on 10 inch bars, but maybe if there was less pullback and not much more width on 10 inch bars, it could be done. Better safe than sorry I say, when it comes to things like this.
Polyurethane riser bushings:
My bike was brand new, so i didn't really notice much play in the handlebars but I have been on other people's Harleys and on some of them, you could really feel the play on the bars. I bought a 10 dollar set (vs $40 from the dealer) of bushings from Easternperformance and they were a piece of cake to put in since I already had the front end apart to do the bars and wiring. Some folks say there is more vibration felt after installing these since they are harder, but i didn't notice any difference but that could be because my stock rubber ones were brand new and hadn't been stressed much yet and given a chance to wear out from fatigue. Shouldn't have that problem with these though as the material should last much longer than regular rubber. I read a lot of threads and posts that mentioned some problems with the bushings being too tall after installation and people were having a hard time putting the decorative cover on that covers the handlebar clamp. I found an easy way to do this without resorting to cutting or "shaving" any material off the bushings or the risers to reduce the height about 1/8" inch or so. I simply torqued them about 4 times instead of just once. I think the service manual said 90-110 ft-lbs torque, so i started with about 25 ft-lbs, let things rest there for about 10 minutes to let the bushings compress, moved up to about 50 ft-lbs, gave it another ten minutes, then went to 75 ft-lbs, and finally a final torque to spec. Handlebar clamp cover went on with no issues at all. I also found that Dawn dish soap came in very handy here as well with lubricating the bushings to make installation easier in the triple tree.
Quality of the Santee bars:
I was very pleased with the bends and finish on these bars. No wrinkles at the bends in the tubing and the chrome was very polished with no graying or brown areas anywhere on the bars. Another nice touch with the Santee bars is the fact that they come with pull-through wires already installed inside the bars when you unbox them. No need to go looking for rope or some other materials to use for pull-through wires.
Time and cost:
I bought the bars from J&P Cycles and paid $115 with free shipping. The J&P P/N is 502-191 in case anyone is interested. 10 bucks for the bushings, about 10 bucks for the wire, about 20 bucks for the heat shrink and about 5 bucks for the solder.
All told the whole job took my a full weekend (about 16 hours) to get everything dismantled on the bike, redo the wiring and get it all put back together. I really took my time by reading all the different areas of the service manual that were relevant, ended up soldering the wires together a couple times and had the issues with running the wires the first time, which attributed to the extended time needed to finish. If I had it to do all over again, I really don't see why I couldn't do this in about 6-8 hours no problem with what I learned along the way and still take my time and have a few beers. I think the quote for the dealer to do this was right about $1000 dollars. It cost me quite a bit of time which is of course valuable to me, but I usually prefer to do things myself and learn new things and this was something I had never done before and now I know how, so I am quite satisfied. I also subscribe to the notion that the more I do to the bike myself, the more it becomes uniquely mine. With the money saved, now I can move on to the next mod(s) to make it even more "my" RKC.
I have attached some before and after pics. i was a moron and didn't have my camera out while doing the work, but hopefully some folks still find this helpful. Anyway, sorry for being so long winded in the post.
The day after I bought it:


First ride after getting everything put back together:


#3
looking forward to your post of when you go to 16'' bars soon... we all know it'll happen lol
looks better with new bars and good write up. just curious, did you have to remove the exhaust to install clutch cable? i didnt on my SG but i helped on a RK and we had too. not sure why they were diff lol
looks better with new bars and good write up. just curious, did you have to remove the exhaust to install clutch cable? i didnt on my SG but i helped on a RK and we had too. not sure why they were diff lol
Thread
Thread Starter
Forum
Replies
Last Post


