2012 Ultra Limited 1200 Watt Sound Sytem install
#1
Ok, I am making a new thread for this with a proper tittle so other can find it when they search the forum for info on this subject.
I know I did quite a bit of research when I started planning this and some of the threads where I found my most valuable information, were threads that unless you scrolled thru them, you would not know it was in there.
That said, i have another thread on this called "Something Wicked this way Comes". For those who were following that thread, it's still there but I want to clean it up and do it up right.
I want to start by thanking all of you in these forums who posted all the information on your own installations and reviews on components. Without that, i would still be lost and undecided on what way to go.
Special thanks to GLACIERPEARL for putting up with all my questions and steering me in the right direction!
So I had decided on the following components for my sound system....
Pioneer AVH-P6300BT 7" flip up LCD head unit
Two Alpine PDX-F6 600 watt 4 channel amplifiers
4 Polk MM6501 6.5" component speakers
4 Polk MM691 6x9 component speakers
Arc Audio 6.5" adapter rings
Hawg Wired Install kit
And a slew of high end Monster 400 and 300 series RCA, power kit and speaker wire.

I started last Thursday and thought that this would all take just 2 days working at a casual pace. Well, it took 7 days total and some of those days were dusk to dawn tinkering, sawing, fabricating, cutting and drilling.
Thursday was tear down day. Took off the outer fairing, gas tank, seat, side covers and glove boxes. To my surprise, the tank was easy to remove. Four bolts and unplug the harness and hose then release the quick disconnect fuel line.
The only problem I had was the stripped out torqs head screws holding the glove compartment boxes on. Took an hour to get 2 of the screws out and another 2 hours finding replacement screws and putting the CVO lower speaker pods on.


That was the end of Thursday. Now I have the next five days off. So Friday. I start off by removing the HK radio and OEM speakers. The install of the new radio with the Hawg Wired install kit went easy and smooth.
One of the questions I had and could not find online was just =exactly what all was involved in installing an aftermarket radio and what was involved with the install kit. Do I have to find and splice wires, ect?
Well I can tell you that there are no wires to hunt down and everything is completely plug and play! Connect the Hawg Wited adapter to the bikes harness, plug the new head unit power, ground and illumination wired to the adapter and your done. Set the switch in the proper positions for your brand radio and BAM, your done!
I know I did quite a bit of research when I started planning this and some of the threads where I found my most valuable information, were threads that unless you scrolled thru them, you would not know it was in there.
That said, i have another thread on this called "Something Wicked this way Comes". For those who were following that thread, it's still there but I want to clean it up and do it up right.
I want to start by thanking all of you in these forums who posted all the information on your own installations and reviews on components. Without that, i would still be lost and undecided on what way to go.
Special thanks to GLACIERPEARL for putting up with all my questions and steering me in the right direction!
So I had decided on the following components for my sound system....
Pioneer AVH-P6300BT 7" flip up LCD head unit
Two Alpine PDX-F6 600 watt 4 channel amplifiers
4 Polk MM6501 6.5" component speakers
4 Polk MM691 6x9 component speakers
Arc Audio 6.5" adapter rings
Hawg Wired Install kit
And a slew of high end Monster 400 and 300 series RCA, power kit and speaker wire.

I started last Thursday and thought that this would all take just 2 days working at a casual pace. Well, it took 7 days total and some of those days were dusk to dawn tinkering, sawing, fabricating, cutting and drilling.
Thursday was tear down day. Took off the outer fairing, gas tank, seat, side covers and glove boxes. To my surprise, the tank was easy to remove. Four bolts and unplug the harness and hose then release the quick disconnect fuel line.
The only problem I had was the stripped out torqs head screws holding the glove compartment boxes on. Took an hour to get 2 of the screws out and another 2 hours finding replacement screws and putting the CVO lower speaker pods on.


That was the end of Thursday. Now I have the next five days off. So Friday. I start off by removing the HK radio and OEM speakers. The install of the new radio with the Hawg Wired install kit went easy and smooth.
One of the questions I had and could not find online was just =exactly what all was involved in installing an aftermarket radio and what was involved with the install kit. Do I have to find and splice wires, ect?
Well I can tell you that there are no wires to hunt down and everything is completely plug and play! Connect the Hawg Wited adapter to the bikes harness, plug the new head unit power, ground and illumination wired to the adapter and your done. Set the switch in the proper positions for your brand radio and BAM, your done!
#2
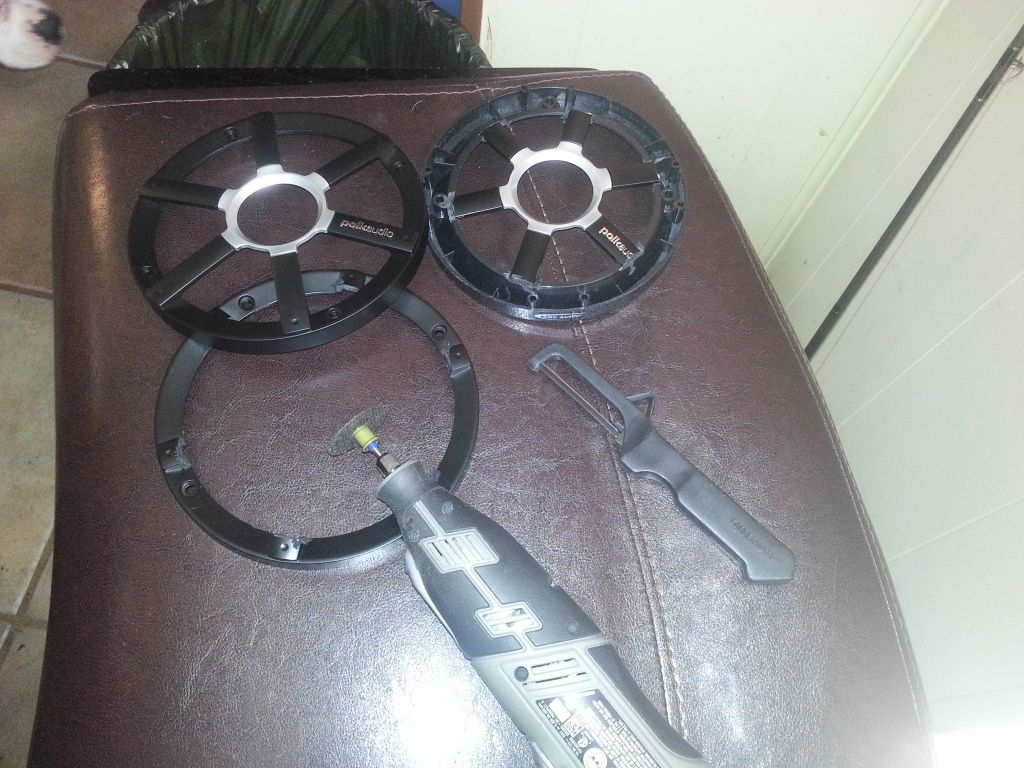
Next up is installing the faring speakers. I did not want to reuse the OEM cloth grills and had the idea to cut down the Polk grill to fit in the smaller faring holes. It worked out well and I also reamed out the center holes to fit the Polk tweeters. i think it turned out pretty good!


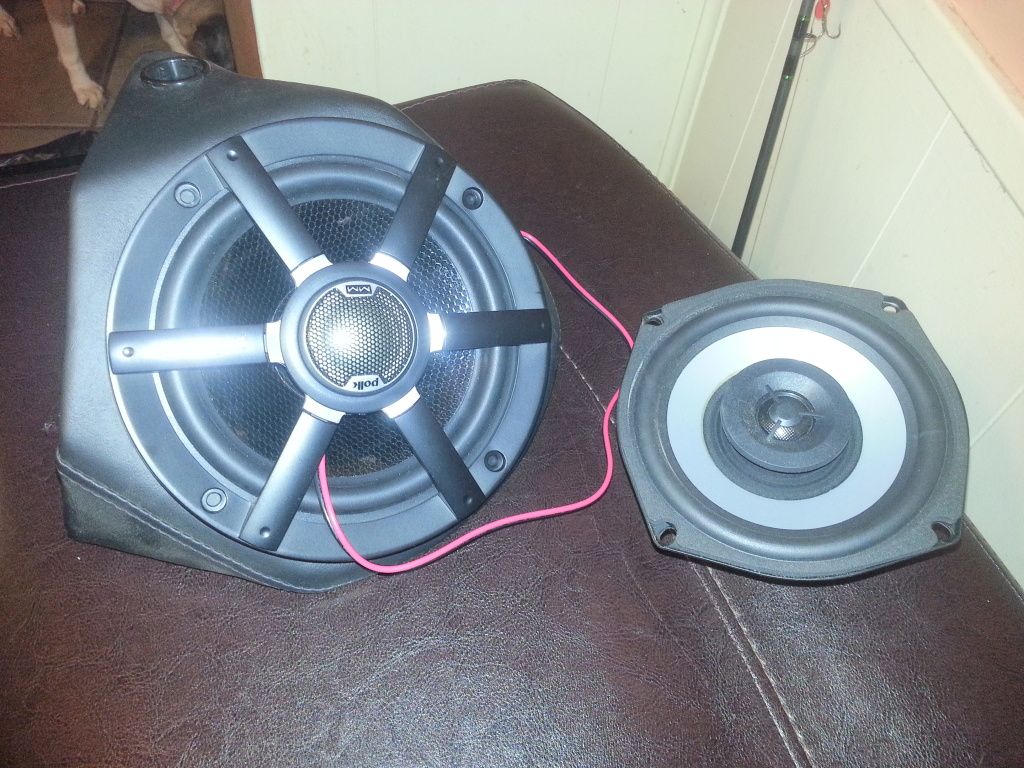
I also found by accident that the Polk MM6501 will fit in the rear speaker pods with not modifications. I am thinking now about adding a set back there!

Here is the new head unit and speakers before putting the faring back on.......


I also found by accident that the Polk MM6501 will fit in the rear speaker pods with not modifications. I am thinking now about adding a set back there!

Here is the new head unit and speakers before putting the faring back on.......

#3
Now it was time to run the RCA connectors, remote wire and speaker wire from the front to the tour pack where the Amp's will be installed.
This is where I hit a brick wall! I went all out and bought the best wire I could find. I went with the Monster 402 speaker wire. It is basically 14 gage wire wrapped in a 1/2" diameter isolator and covered in a protective mesh. This stuff was somewhere between 1/2" to 5/8" diameter! As you can see in the picture, there was no way I could stuff all that wire under the tank!
To install this sytems, you need 2 seats of RCA from the radio to the amp's, a remote wire from the radio to the amp's and 4 pairs of speaker wire running from the amp's back up to the front 4 speakers.
I had to run buy some regular 14 gage wire to get it all to fit.

#4
So now that I have wires hanging all over the bike and parts scattered across the garage and patio. It is time to start on the side bags.
I had originally had a speaker shop make the spacer rings for the 6x9's but I would up having to modify them my self.
I decided on speaker placement and started drilling. Once I was done, I decided it needed more hols so I had to go back and do them again. After the holes were done, I used gasket sealer and sealed the adapters in place, installed the speakers and tightened everything down.
The Polk 6x9's are components and have connections for the tweeter and woofer separately and comes with a crossover.
I have the X-overs velcro taped to the front side of the bags.


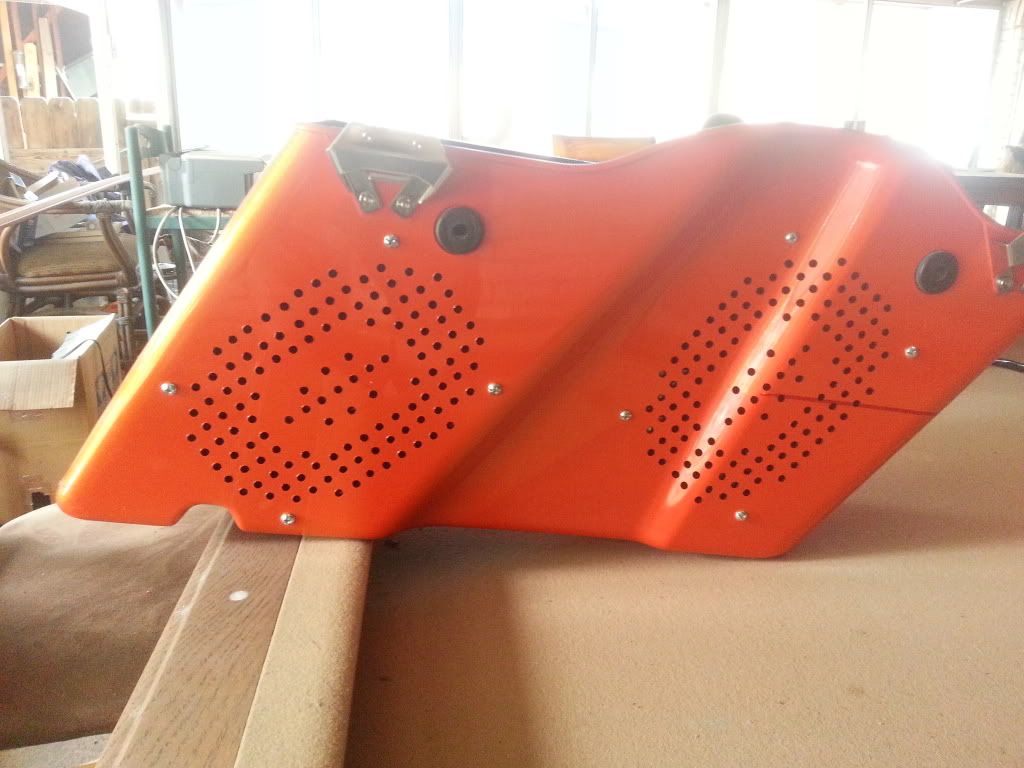
Here you can see where I went back and re drilled the bags. There are over 300 holes per speaker!

here are the speakers mounted before painting the spacers and sealing them.

I had originally had a speaker shop make the spacer rings for the 6x9's but I would up having to modify them my self.
I decided on speaker placement and started drilling. Once I was done, I decided it needed more hols so I had to go back and do them again. After the holes were done, I used gasket sealer and sealed the adapters in place, installed the speakers and tightened everything down.
The Polk 6x9's are components and have connections for the tweeter and woofer separately and comes with a crossover.
I have the X-overs velcro taped to the front side of the bags.


Here you can see where I went back and re drilled the bags. There are over 300 holes per speaker!

here are the speakers mounted before painting the spacers and sealing them.

#5
Started getting frustrated at this point so not many more pictures were taken. But I decided on Amp placement in the tour pack and went about installing those.
Several more trips to the hardware store later, i had all I needed to complete it. All that was left was make the quick connects for the hard bags and finalize the connections to the amps and hide the cables somehow.
Here are the amps. they take up less than 3" in depth of the tour pack so i still have full use of space minus the 3" off the bottom. Not bad for hiding 2 600 watt amplifiers!


#7
Trending Topics
#8
please don't take this the wrong way as i appreciate the dedication, passion, and effort that you put into this system. And i am sure that it sounds as good as it looks. But i have to ask why? you purchased a touring bike to use the pak and bags for sound equipment? i am not chopping on you or your right to do it. i am just confused as to why? show maybe? as i said though, nice setup!
#9
please don't take this the wrong way as i appreciate the dedication, passion, and effort that you put into this system. And i am sure that it sounds as good as it looks. But i have to ask why? you purchased a touring bike to use the pak and bags for sound equipment? i am not chopping on you or your right to do it. i am just confused as to why? show maybe? as i said though, nice setup!
#10
theres always one in the crowd! you are right sir and i apologize for my curiosity and did not mean to offend his style or presentation. although i must say i thought i was clear with words like his dedication passion etc being admired. i will not make the mistake again. please forgive me and ignore my curiosity! sometimes i just dont see the obvious like others do! to much war time maybe, i dont know. have a great day! to the poster i apologize!


