
Adding Custom Dynamics Plasma Rods to 09 FLHX, Part-1
#1
 03-20-2012, 06:57 PM


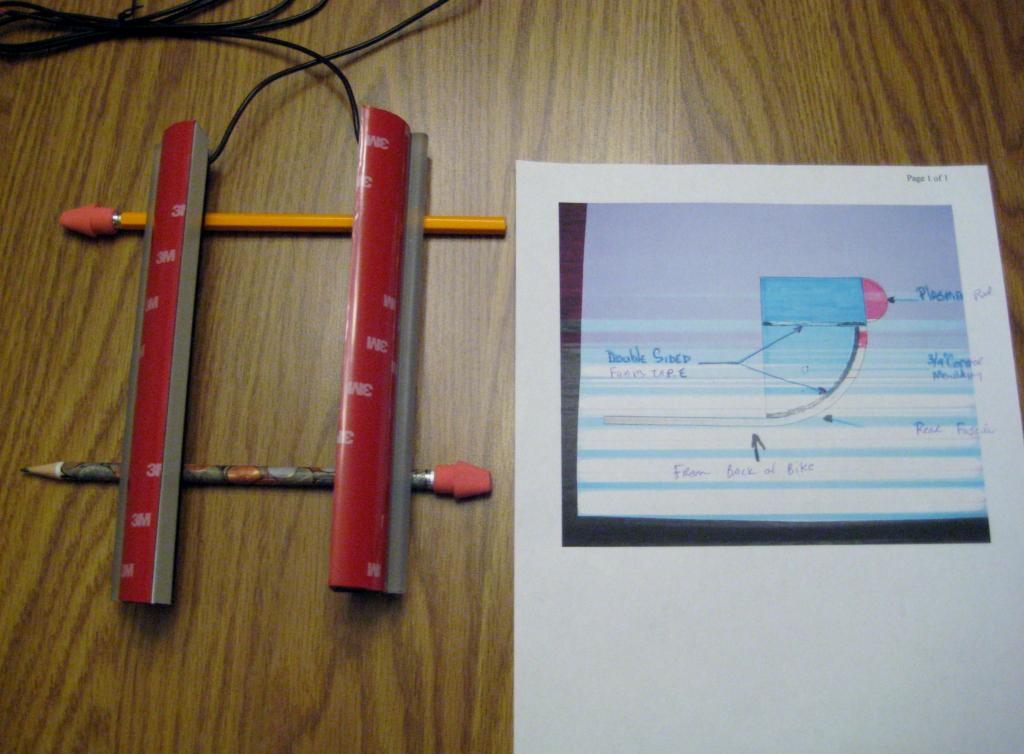
1. Kit includes Plasma Rods (2), dual controller modules (2), wiring harness(1). Added parts to mount on fascia = 8” ľ PVC corner round molding (2) & roll of auto adhesive tape.

2. Rods & PVC corner round cut to length (8”).

3. Auto molding adhesive applied to rounded surfaces on PVC molding.

4. Rods mounted to PVC molding & diagram (another member design). Ensure curve side matches rear fascia surface(s) (definite Left/Right w/wires @ top).

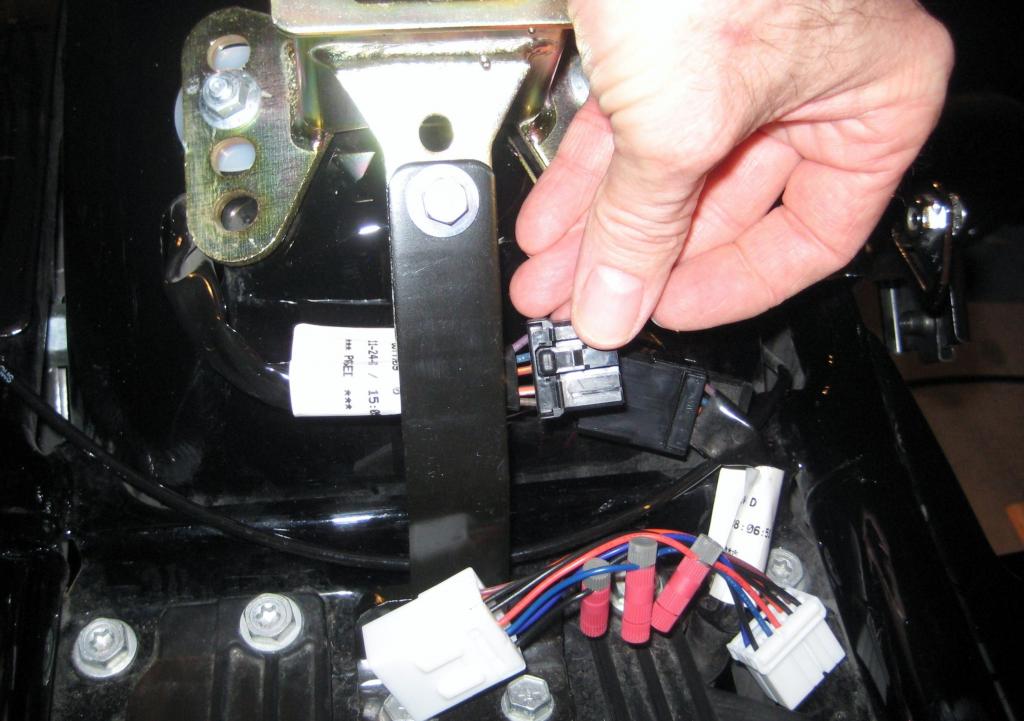
5. Rear lighting wire harness location is under seat (09 FLHX).


2. Rods & PVC corner round cut to length (8”).

3. Auto molding adhesive applied to rounded surfaces on PVC molding.

4. Rods mounted to PVC molding & diagram (another member design). Ensure curve side matches rear fascia surface(s) (definite Left/Right w/wires @ top).
5. Rear lighting wire harness location is under seat (09 FLHX).
#2
03-20-2012, 07:01 PM
6. Harness w/in-line tappets to connect Plasma Rods to bike wiring. Wire Plasma Rod black to harness black & Plasma Rod red to harness red.

7. Harness plugged into bike.

8. Plasma rod mounted & ready for install @ rear/fascia.

9. Right-side mounted (prep w/pad (included) & press firmly).

10. Left-side mounted (prep w/pad (included) & press firmly).

7. Harness plugged into bike.

8. Plasma rod mounted & ready for install @ rear/fascia.

9. Right-side mounted (prep w/pad (included) & press firmly).

10. Left-side mounted (prep w/pad (included) & press firmly).

#3
03-20-2012, 07:04 PM
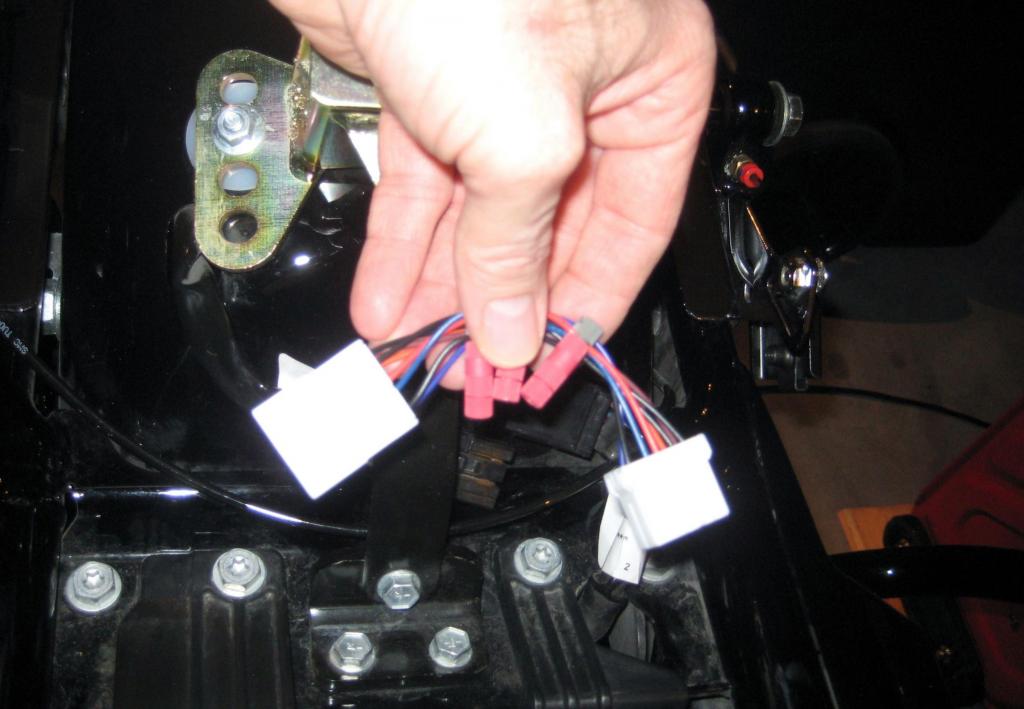
11. Dual controller module – taps into Plasma Rod (red) & harness wires (orange to blue & red to red).

12. Wiring finished – turn ignition & test proper operation. Can trim wires a bit to reduce length & I dabbed dot of silicone on each tappet end to make water-tight (optional).

13. Run (illuminated w/tail light).

14. Brake (illuminated w/brakes).

Total cost = $156.56 + ~2-hrs time (if you go slow)...enjoy!
#4
03-20-2012, 07:06 PM

I have done this mod 3 times. Once for my self, then my Step Mom and my Uncle. It was easy but i hope i dont have to go it again. Its getting boring. What I did chose to do and I hope my family doesn't copy is to get some 8inch leds from custom dynamics and run them along my saddle bag support bracket facing the ground at a 45 degree angle and wire them into my turn signals before the run/turn/brake module so that they light up only when my turn signal is on. I did this because on my way to work in the dark a guy that works with me was behind me and said that if he didn't know my bike, he wouldn't know where i was going because my plasma rods were too close to my brake light. I didn't know if he was pulling my leg or not so i let my step mom lead one day and i saw exactly what he was talking about. I mounted my plasmas to the fender so it looked like it was blending in. When I did the led mod it clearly identifies which direction I am intending to go.
#5
03-20-2012, 10:14 PM
Cruiser
Join Date: Jan 2012
Location: North Carolina
Posts: 169
Likes: 0
Received 0 Likes
on
0 Posts
#6
03-21-2012, 05:36 AM
#7
03-21-2012, 06:50 AM
Cruiser
Join Date: Jan 2012
Location: North Carolina
Posts: 169
Likes: 0
Received 0 Likes
on
0 Posts
Trending Topics
#9
04-17-2012, 11:15 AM
Road Warrior
#10
04-17-2012, 12:57 PM