
Unbelievable! Trim rings on with NO gap

#12
 01-14-2012, 07:59 AM
Road Captain
#13
01-14-2012, 08:02 AM
Elite HDF Member

#14
01-14-2012, 08:09 AM
#15
01-14-2012, 09:18 AM

Advanced
Join Date: Mar 2006
Location: Kansas
Posts: 82
Likes: 0
Received 0 Likes
on
0 Posts
Here's a trick to modify the headlight bezel if you're using a "french" or "visor" trim ring. Harley wants you to install the OEM trim ring underneath the new trim ring. I find this to be a crappy way to do it. However, the new trim ring is too loose without it.
So, what I did was install a series of small screws around the headlight mounting bezel. With a small nut on each side, I can "extend" the screws out as much as needed. These screws fit inside the lip of the new trim ring, locking it onto the bezel. Now the new trim ring installs cleanly with absolutely no gap at the bottom while completely eliminating the "inner" OEM trim ring.
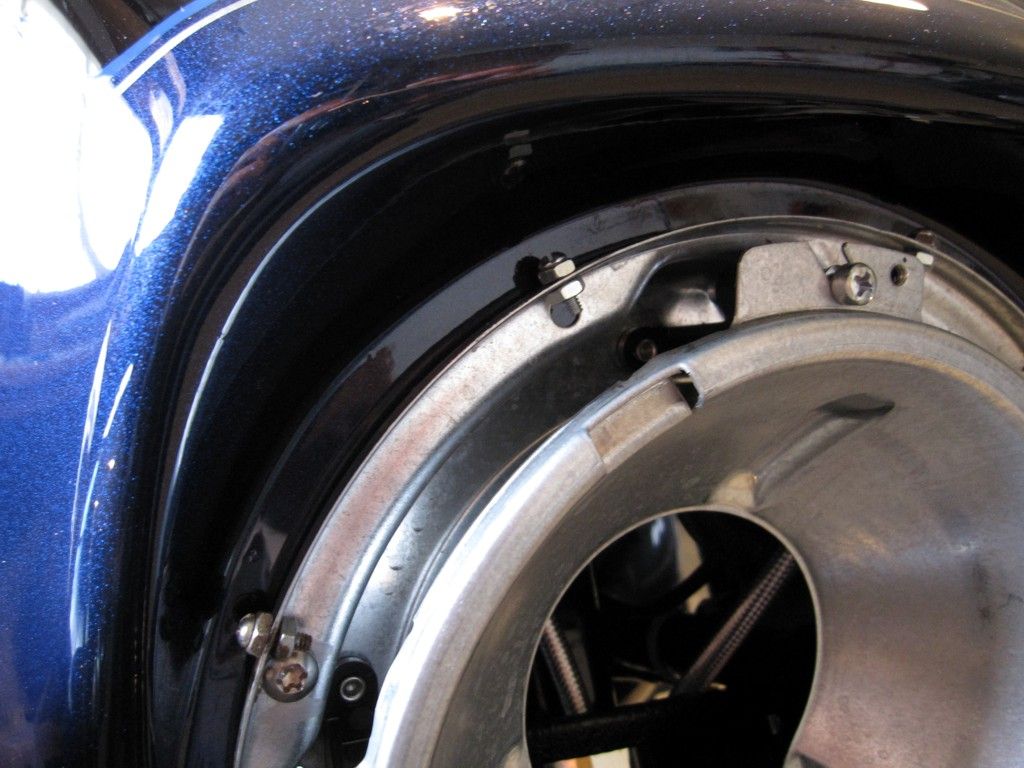
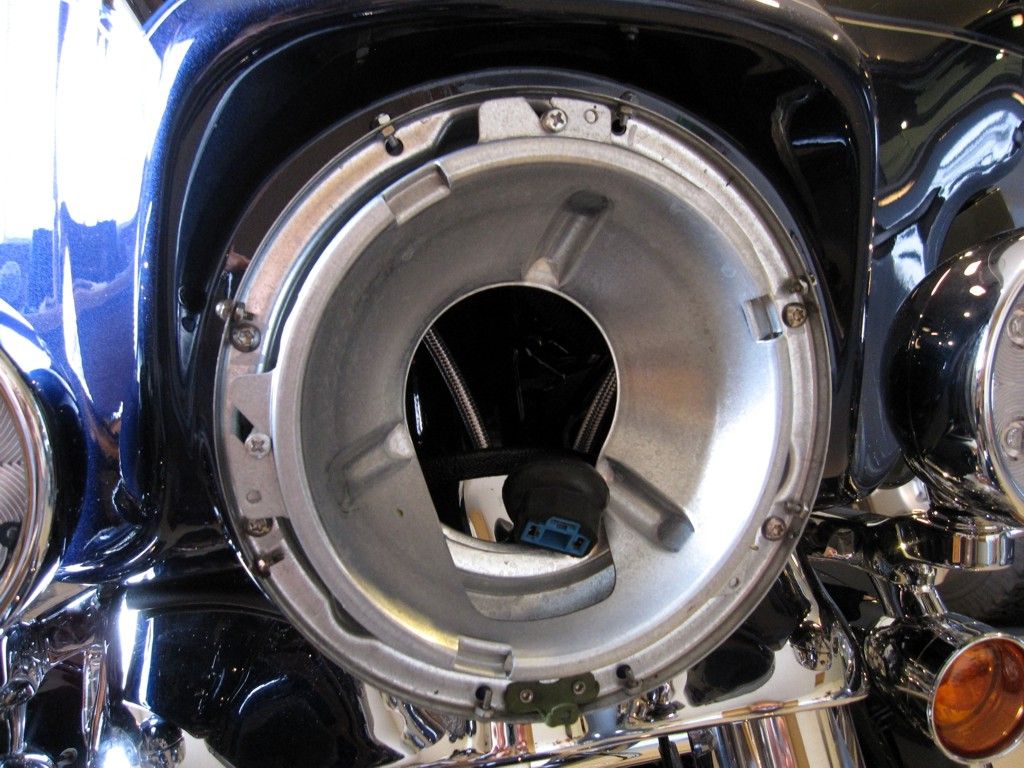
So, what I did was install a series of small screws around the headlight mounting bezel. With a small nut on each side, I can "extend" the screws out as much as needed. These screws fit inside the lip of the new trim ring, locking it onto the bezel. Now the new trim ring installs cleanly with absolutely no gap at the bottom while completely eliminating the "inner" OEM trim ring.
#16
01-14-2012, 09:29 AM
Seasoned HDF Member
Join Date: Oct 2007
Location: Western South Dakota
Posts: 55,900
Received 72,302 Likes
on
21,842 Posts
#17
01-14-2012, 02:22 PM
DJK
The following users liked this post:
RJ69 (01-11-2022)
#18
01-14-2012, 02:36 PM
Elite HDF Member
Here's a trick to modify the headlight bezel if you're using a "french" or "visor" trim ring. Harley wants you to install the OEM trim ring underneath the new trim ring. I find this to be a crappy way to do it. However, the new trim ring is too loose without it.
So, what I did was install a series of small screws around the headlight mounting bezel. With a small nut on each side, I can "extend" the screws out as much as needed. These screws fit inside the lip of the new trim ring, locking it onto the bezel. Now the new trim ring installs cleanly with absolutely no gap at the bottom while completely eliminating the "inner" OEM trim ring.
So, what I did was install a series of small screws around the headlight mounting bezel. With a small nut on each side, I can "extend" the screws out as much as needed. These screws fit inside the lip of the new trim ring, locking it onto the bezel. Now the new trim ring installs cleanly with absolutely no gap at the bottom while completely eliminating the "inner" OEM trim ring.
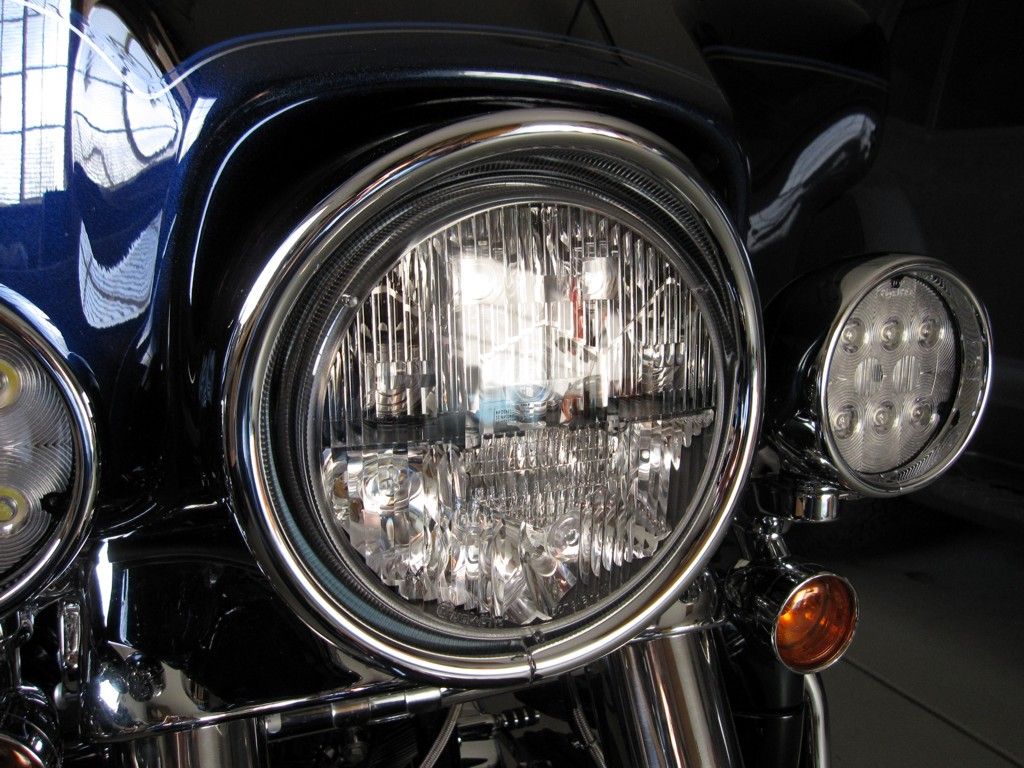
By the way, my method for completely eliminating the gap between the 2 ends of the trim ring is to loosen the stock ring, place the trim ring over it, and then tighten the 2 alternatively, a little bit of each at a time, until there's barely enough room for a screwdriver to reach the stock ring screw between the 2 ends of the trim ring. Tighten the stock ring completely and you should now have no problem tightening the trim ring to completely close the gap. It worked for me.
Last edited by frenchbiker; 01-14-2012 at 02:45 PM.
#19
01-11-2022, 01:17 PM

Great. Now, please find a good solution to move the trim ring flush with the glass. I'm tired of fishing for dead bugs inside the ring. <g>
By the way, my method for completely eliminating the gap between the 2 ends of the trim ring is to loosen the stock ring, place the trim ring over it, and then tighten the 2 alternatively, a little bit of each at a time, until there's barely enough room for a screwdriver to reach the stock ring screw between the 2 ends of the trim ring. Tighten the stock ring completely and you should now have no problem tightening the trim ring to completely close the gap. It worked for me.
By the way, my method for completely eliminating the gap between the 2 ends of the trim ring is to loosen the stock ring, place the trim ring over it, and then tighten the 2 alternatively, a little bit of each at a time, until there's barely enough room for a screwdriver to reach the stock ring screw between the 2 ends of the trim ring. Tighten the stock ring completely and you should now have no problem tightening the trim ring to completely close the gap. It worked for me.
I've got a '14 SG and have been battling with this scenario for 5 years only....each time I deal with it I end up giving up....my last trip to the dealership the parts guy saw it and insisted that it's just not right....he pulled the instructions out and they match your description here...like mentioned in this thread earlier, this parts guy took off my stock ring and put it inside the trim and there's no way that trim ring can close because of the stock rings diameter ---- Also mentioned here already is the fact that the trim ring also seems too deep with 1/4"-3/8" of space between it and the face of the bulb----My trim ring is 5 years old and the new ones are the same - How can this be?...It just doesn't add up that HD would make something so off when the fixes to make it right seem so simple...........
#20
01-11-2022, 01:35 PM

Join Date: Jan 2007
Location: along the shore of Mishigami
Posts: 15,693
Received 4,483 Likes
on
2,428 Posts
For HD_Rider, did you use any blue Loctite on those screws and nuts inside the bucket? I didn't see any mechanical means (lock washers) of preventing the hardware coming loose, ultimately, I'm sure the screws and nuts will loosen causing a rattle that will drive you crazy if you forget about the hardware behind the headlight. Not meant to bust your chops on a good job, Harleys have vibrations, and some rattles can drive you crazy.