
HOW TO: Street Glide rear fascia install

#52
 01-05-2011, 10:06 PM
Extreme HDF Member
Carl
#54
01-06-2011, 02:02 AM
Road Master
Join Date: Dec 2007
Location: Tellico Plains, Tenn.
Posts: 878
Likes: 0
Received 0 Likes
on
0 Posts
#55
01-06-2011, 05:38 PM
Extreme HDF Member
Carl
Last edited by Harleypingman; 01-06-2011 at 05:41 PM.
#56
01-21-2011, 08:32 PM

Novice
Join Date: Dec 2010
Location: Cocoa Florida
Posts: 20
Likes: 0
Received 0 Likes
on
0 Posts
EDIT - This thread applies to the newer bikes with the updated frame. If you have a 08 or older bike, the facsia part number will be different. The tri-light and related parts are the same.
I just completed the install on my 2011 FLTRU. The rear fascia is available in the same color as my bike due to the fact that HD makes a Merlot Sunglo Street Glide. I wanted to give everyone here a complete HOW TO with pictures and video to help you if you decide to do this upgrade to your bike.
I think of the rear fascia is one of the best upgrades a person can do both for looks and for added lights for safety.
PM ME IF YOU HAVE ANY QUESTIONS.
DISCLAIMER - If I screwed up and listed a part incorrectly, I'm sorry. Use this HOW TO at your own risk. If I made a mistake in the directions, please let me know so I can edit this post. I am human and I do make mistakes (sometimes daily) LOL
Here is a compete parts list:
EDIT - added Lakeshore prices.LAKESHORE
(1) 59739-10DCE (DCE=Merlot Sunglo) - Rear Fascia - $78.36
(1) 68358-07A - Tri-bar light assembly with run/brake function - $78.36
Do not buy the newer light because it is made for the bikes that do not have a center rear taillight. That light requires a separate wiring loom. I made the mistake and bought that light and could not figure out how to make it work. BTW, the old style and new style lights are exactly the same size. You will be wiring the tri-bar light into the taillight as you will see later.
(2) 59818-09 - Stud Plates
I chose to drill my fender and bolt the fascia on. On my last bike, I used 3M tape and it worked fine.
(6) 7499 - Nut
For stud plates
(2) 59749-06 - Plug
To plug the oval holes in the fascia
(1) 73153-96bk - Pin housing - 3 place
(3) 73191-96 - Terminal - socket
Buy extra in case you screw one up. I crimp mine and then solder them for a better connection.
(2) 2995 - screw to mount tri-bar light.
HOW TO -
1. Remove both saddlebags.
2. Remove the saddlebag to fender support bracket. It is the U-shaped piece that goes behind the fender.
3. Cover the sides of the fender with blue tape. Position the fascia on the fender and mark the location of the 6 holes you will drill in the fender. Take your time and use a felt pen.
4. Hold the stud plate up to the marks to make sure you have the holes marked in the correct locations.
5. Center punch the holes to insure the bit doesn't skate.
6. Drill the holes. I drilled mine slightly larger than 1/4 so I could easily install the stud plates.
7. I applied some Rustolium paint to the raw metal edges of the holes with a Q-tip. This might help stop any future rusting.
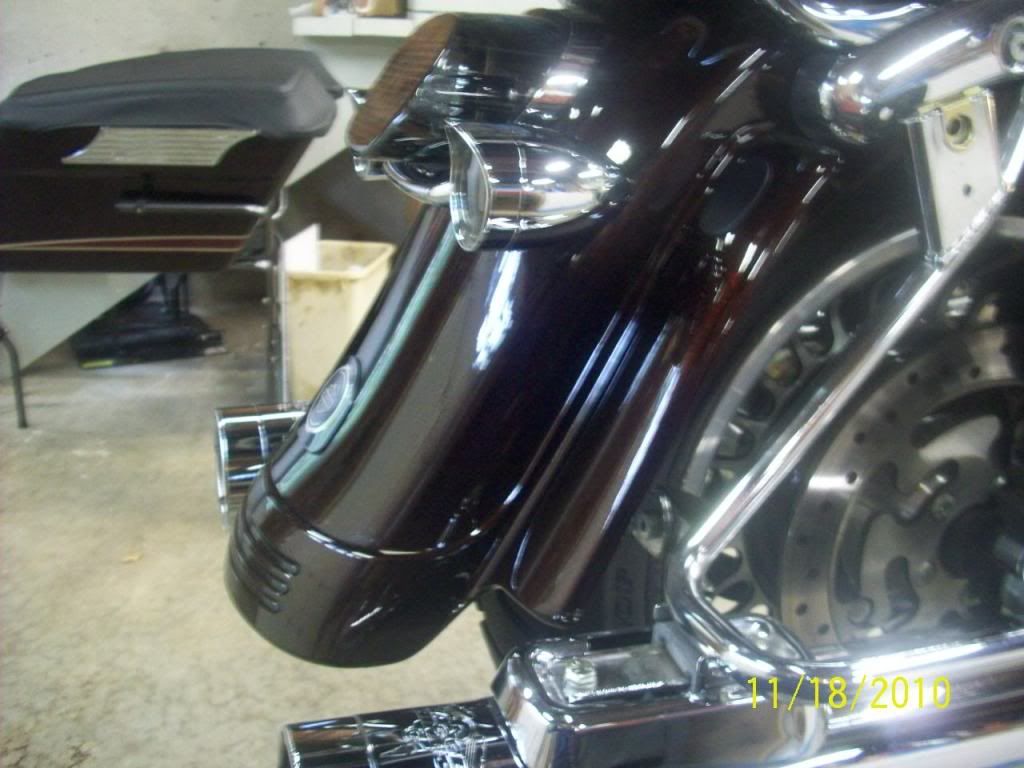
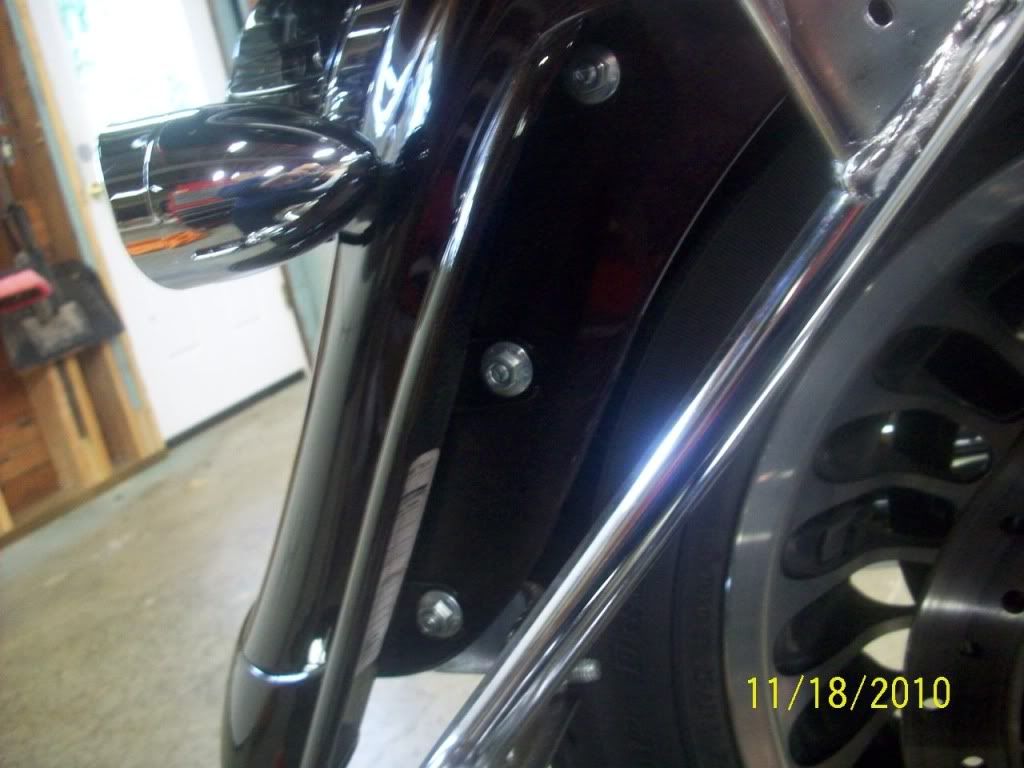
8. Install both stud plates through the fender.
9. Install the Fascia and loosely snug all 6 nuts. Once it's positioned correctly, snug all 6 nuts - careful - it's plastic.
10. Replace the fender support bracket.
Sorry, I don't have pictures of every step.
The light . . .
1. Remove the taillight
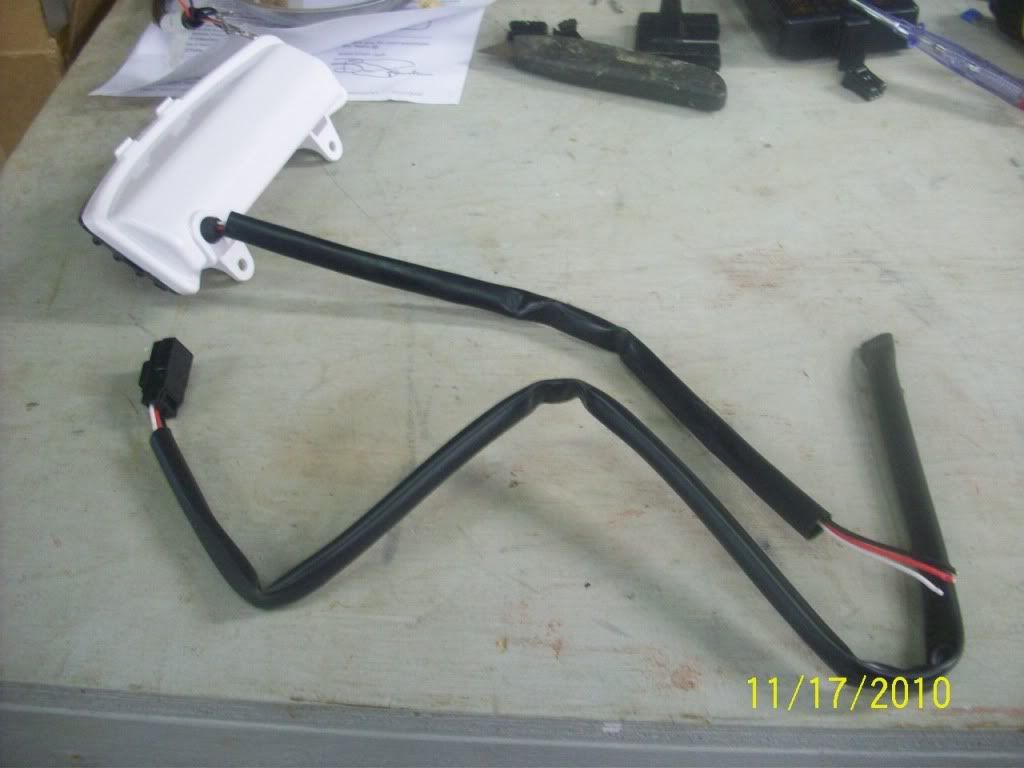
2. Temporarily fit the light to determine how much of the wiring to cut off. Feed the wire up the inside of the fender and out the hole in the fender behind the taillight.
4. Mark the loom for length and remove the light.
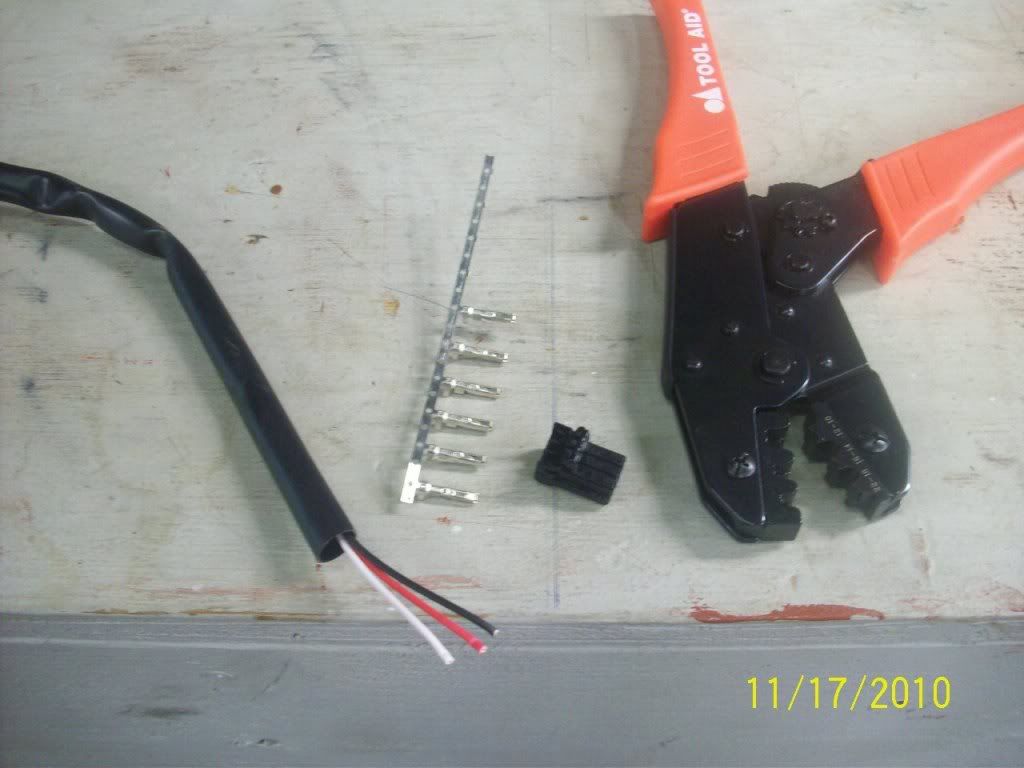
3. Cut the wires and install the 3 female terminals. Install the terminals into the 3 place connector. Note the location of the wires. Black on the left, Red at center, and white on the right.
4. Install the light with the 2 screws.
5. Install a P clamp on the loom and secure it to the 1/4 stud at the bottom of the fender.
6. Route the wire up through the fender and secure with the stock wire clamp on the inside of the fender.
7.Plug in the wires and test.
8. Replace the taillight and you are good to go!
EDIT - You may want to mount the light before you mount the fascia because there is not a lot of room between the back of the light and the tire.
Note how much I cut off the loom.
Parts and crimping tool - I also soldered the connectors.
Finished plug
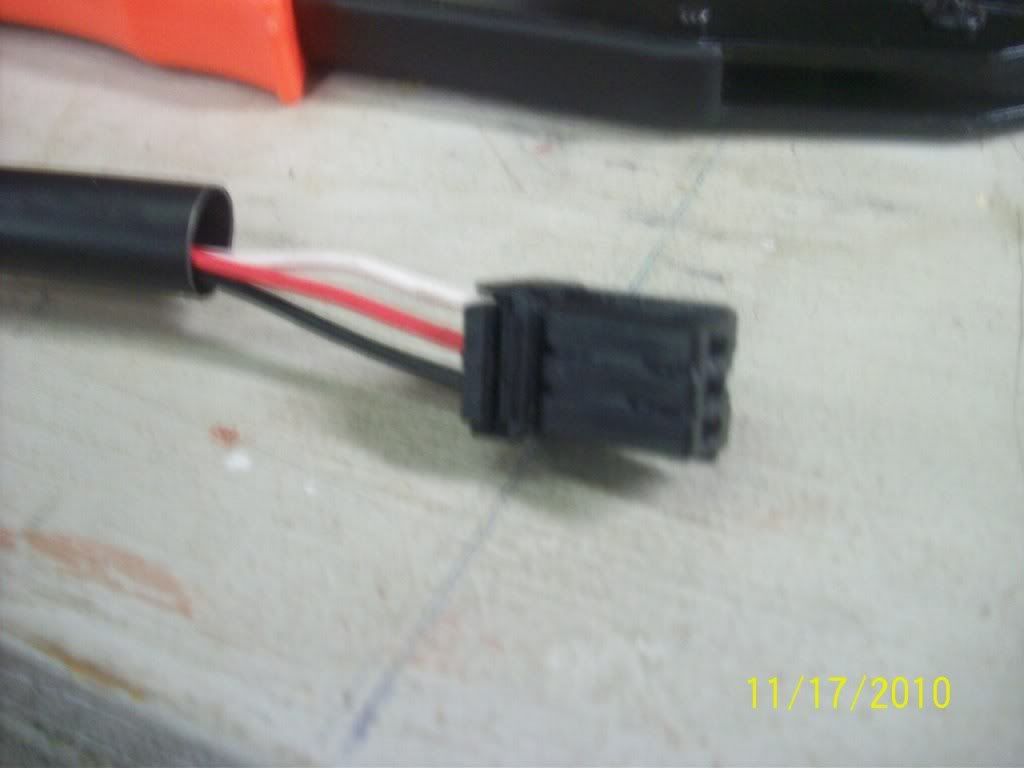
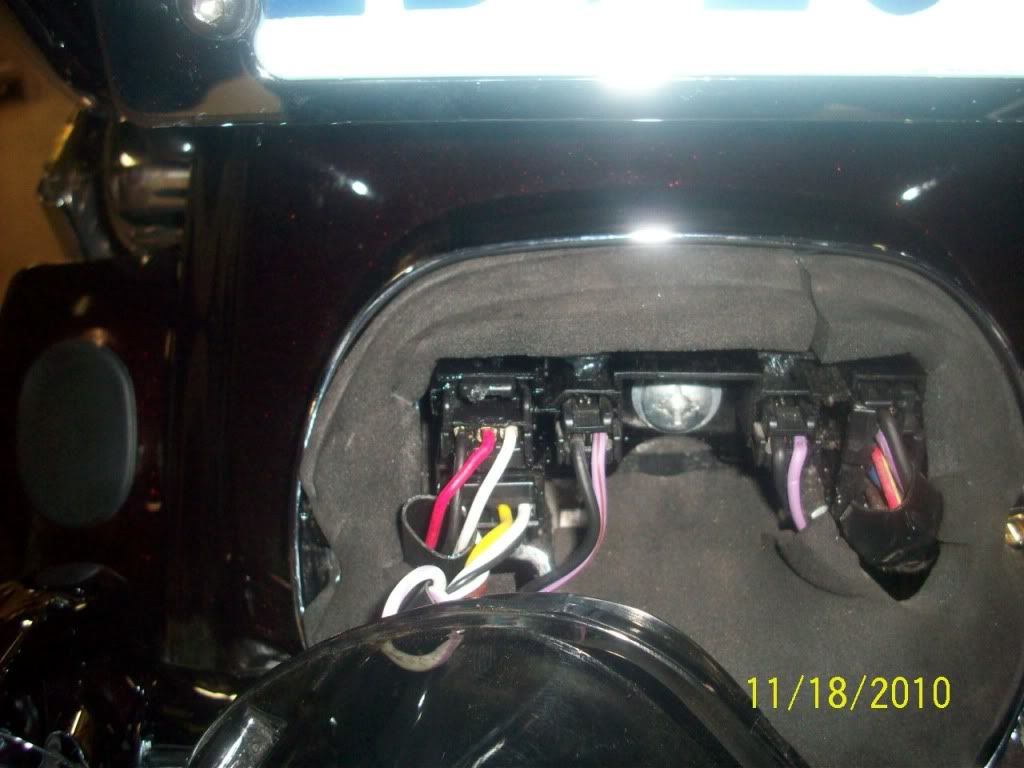
Location of the plug-in. Top left 3 wire plug.
Finished job - Run mode
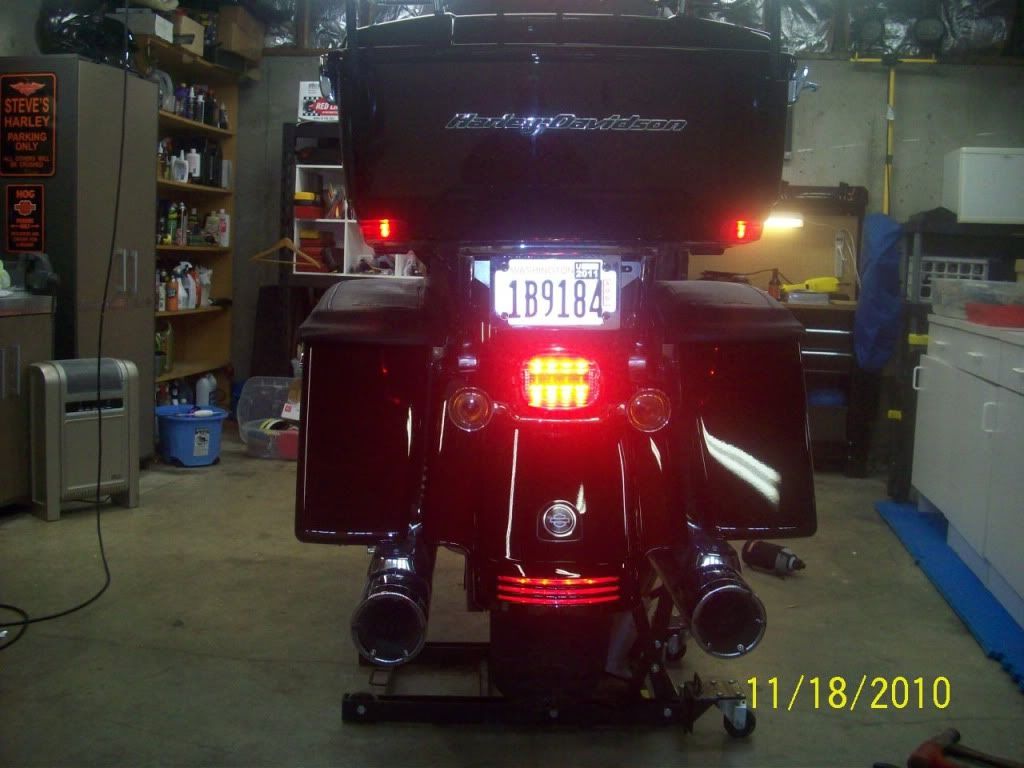
Brake mode

Video of the Fascia light

Video of all the lights on the rear

I just completed the install on my 2011 FLTRU. The rear fascia is available in the same color as my bike due to the fact that HD makes a Merlot Sunglo Street Glide. I wanted to give everyone here a complete HOW TO with pictures and video to help you if you decide to do this upgrade to your bike.
I think of the rear fascia is one of the best upgrades a person can do both for looks and for added lights for safety.
PM ME IF YOU HAVE ANY QUESTIONS.
DISCLAIMER - If I screwed up and listed a part incorrectly, I'm sorry. Use this HOW TO at your own risk. If I made a mistake in the directions, please let me know so I can edit this post. I am human and I do make mistakes (sometimes daily) LOL
Here is a compete parts list:
EDIT - added Lakeshore prices.LAKESHORE
(1) 59739-10DCE (DCE=Merlot Sunglo) - Rear Fascia - $78.36
(1) 68358-07A - Tri-bar light assembly with run/brake function - $78.36
Do not buy the newer light because it is made for the bikes that do not have a center rear taillight. That light requires a separate wiring loom. I made the mistake and bought that light and could not figure out how to make it work. BTW, the old style and new style lights are exactly the same size. You will be wiring the tri-bar light into the taillight as you will see later.
(2) 59818-09 - Stud Plates
I chose to drill my fender and bolt the fascia on. On my last bike, I used 3M tape and it worked fine.
(6) 7499 - Nut
For stud plates
(2) 59749-06 - Plug
To plug the oval holes in the fascia
(1) 73153-96bk - Pin housing - 3 place
(3) 73191-96 - Terminal - socket
Buy extra in case you screw one up. I crimp mine and then solder them for a better connection.
(2) 2995 - screw to mount tri-bar light.
HOW TO -
1. Remove both saddlebags.
2. Remove the saddlebag to fender support bracket. It is the U-shaped piece that goes behind the fender.
3. Cover the sides of the fender with blue tape. Position the fascia on the fender and mark the location of the 6 holes you will drill in the fender. Take your time and use a felt pen.
4. Hold the stud plate up to the marks to make sure you have the holes marked in the correct locations.
5. Center punch the holes to insure the bit doesn't skate.
6. Drill the holes. I drilled mine slightly larger than 1/4 so I could easily install the stud plates.
7. I applied some Rustolium paint to the raw metal edges of the holes with a Q-tip. This might help stop any future rusting.
8. Install both stud plates through the fender.
9. Install the Fascia and loosely snug all 6 nuts. Once it's positioned correctly, snug all 6 nuts - careful - it's plastic.
10. Replace the fender support bracket.
Sorry, I don't have pictures of every step.
The light . . .
1. Remove the taillight
2. Temporarily fit the light to determine how much of the wiring to cut off. Feed the wire up the inside of the fender and out the hole in the fender behind the taillight.
4. Mark the loom for length and remove the light.
3. Cut the wires and install the 3 female terminals. Install the terminals into the 3 place connector. Note the location of the wires. Black on the left, Red at center, and white on the right.
4. Install the light with the 2 screws.
5. Install a P clamp on the loom and secure it to the 1/4 stud at the bottom of the fender.
6. Route the wire up through the fender and secure with the stock wire clamp on the inside of the fender.
7.Plug in the wires and test.
8. Replace the taillight and you are good to go!
EDIT - You may want to mount the light before you mount the fascia because there is not a lot of room between the back of the light and the tire.
Note how much I cut off the loom.
Parts and crimping tool - I also soldered the connectors.
Finished plug
Location of the plug-in. Top left 3 wire plug.
Finished job - Run mode
Brake mode
Video of the Fascia light
Video of all the lights on the rear
#57
01-21-2011, 09:13 PM
Extreme HDF Member
If you want to avoid cutting the LED tri-bar harness, adding sockets, and the connector so that it can be plugged into the tail light circuit board, use p/n 68074-07.
The reason sifularson is cutting the harness, etc. is because that's the SG run/brake LED and on the SG, the tri-bar light is connected to the bike's tour pak harness. On the RGU, that harness is used for the tour pak lights, and the chamber behind the tail light lens is used instead, but requires a different connector when using the run/brake LED intended for the SG.
The p/n above is the same run/brake LED in sifu's post, but it has a different connector, i.e. one that is compatible with the chamber behind the tail light lens because it's the LED used in HD's tri-bar fender extension kit that replaces the fender tip light on EG's pre-'09 model year.
Of course, the above p/n works on the RGU, but not the '09 RG because the '09 RG uses a turn signal bar with LED's in it for lighting the license plate (i.e. same one used by the SG), and the license plate LED's use the chamber behind the tail light lens that the RGU uses for the tri-bar LED mod made by sifularson. On the '09 RG, the tri-bar LED referenced in sifu's post should be used; it's the same run/brake LED that would be used on the SG, and would use the tour pak wiring harness; i.e., it would be wired the same as an SG.
These are not new issues peculiar to '11 model year bikes. Since this SG fascia with tri-bar light has been made on non-SG's since 2006, these wiring/connector issues have arisen. Additional issues occur when, for example, one has the SG turn signal bar (i.e. LED's to light the license plate) and a lighted tour pak on the bike, in which case the chamber behind the tail light is occupied by the license plate LED's and the tour pak harness is used by the tri-bar LED. In that case, a Y harness can be fabbed to use the tour pak harness for both the tri-bar LED and the tour pak lights; the license plate harness can be spliced to accommodate the tri-bar light (which is how my bike is wired); or, the tour pak light or tri-bar light can be wired to the accessory connector under the seat. If the tour pak is detachable, the wiring can be modified to accept quick disconnects.
This isn't intended to be a difinitive post on "how to" install the tri-bar light on non-SG bikes; rather, it's simply to point out that sifularson's excellent post is specific to the RGU and may or may be accurate with respect to the tri-bar light to use when other, non-RGU bikes are getting the SG fascia/LED mod.
Carl
#58
01-22-2011, 02:07 AM
If you want to avoid cutting the LED tri-bar harness, adding sockets, and the connector so that it can be plugged into the tail light circuit board, use p/n 68074-07.
The reason sifularson is cutting the harness, etc. is because that's the SG run/brake LED and on the SG, the tri-bar light is connected to the bike's tour pak harness. On the RGU, that harness is used for the tour pak lights, and the chamber behind the tail light lens is used instead, but requires a different connector when using the run/brake LED intended for the SG.
The p/n above is the same run/brake LED in sifu's post, but it has a different connector, i.e. one that is compatible with the chamber behind the tail light lens because it's the LED used in HD's tri-bar fender extension kit that replaces the fender tip light on EG's pre-'09 model year.
Of course, the above p/n works on the RGU, but not the '09 RG because the '09 RG uses a turn signal bar with LED's in it for lighting the license plate (i.e. same one used by the SG), and the license plate LED's use the chamber behind the tail light lens that the RGU uses for the tri-bar LED mod made by sifularson. On the '09 RG, the tri-bar LED referenced in sifu's post should be used; it's the same run/brake LED that would be used on the SG, and would use the tour pak wiring harness; i.e., it would be wired the same as an SG.
These are not new issues peculiar to '11 model year bikes. Since this SG fascia with tri-bar light has been made on non-SG's since 2006, these wiring/connector issues have arisen. Additional issues occur when, for example, one has the SG turn signal bar (i.e. LED's to light the license plate) and a lighted tour pak on the bike, in which case the chamber behind the tail light is occupied by the license plate LED's and the tour pak harness is used by the tri-bar LED. In that case, a Y harness can be fabbed to use the tour pak harness for both the tri-bar LED and the tour pak lights; the license plate harness can be spliced to accommodate the tri-bar light (which is how my bike is wired); or, the tour pak light or tri-bar light can be wired to the accessory connector under the seat. If the tour pak is detachable, the wiring can be modified to accept quick disconnects.
This isn't intended to be a difinitive post on "how to" install the tri-bar light on non-SG bikes; rather, it's simply to point out that sifularson's excellent post is specific to the RGU and may or may be accurate with respect to the tri-bar light to use when other, non-RGU bikes are getting the SG fascia/LED mod.
Carl
The reason sifularson is cutting the harness, etc. is because that's the SG run/brake LED and on the SG, the tri-bar light is connected to the bike's tour pak harness. On the RGU, that harness is used for the tour pak lights, and the chamber behind the tail light lens is used instead, but requires a different connector when using the run/brake LED intended for the SG.
The p/n above is the same run/brake LED in sifu's post, but it has a different connector, i.e. one that is compatible with the chamber behind the tail light lens because it's the LED used in HD's tri-bar fender extension kit that replaces the fender tip light on EG's pre-'09 model year.
Of course, the above p/n works on the RGU, but not the '09 RG because the '09 RG uses a turn signal bar with LED's in it for lighting the license plate (i.e. same one used by the SG), and the license plate LED's use the chamber behind the tail light lens that the RGU uses for the tri-bar LED mod made by sifularson. On the '09 RG, the tri-bar LED referenced in sifu's post should be used; it's the same run/brake LED that would be used on the SG, and would use the tour pak wiring harness; i.e., it would be wired the same as an SG.
These are not new issues peculiar to '11 model year bikes. Since this SG fascia with tri-bar light has been made on non-SG's since 2006, these wiring/connector issues have arisen. Additional issues occur when, for example, one has the SG turn signal bar (i.e. LED's to light the license plate) and a lighted tour pak on the bike, in which case the chamber behind the tail light is occupied by the license plate LED's and the tour pak harness is used by the tri-bar LED. In that case, a Y harness can be fabbed to use the tour pak harness for both the tri-bar LED and the tour pak lights; the license plate harness can be spliced to accommodate the tri-bar light (which is how my bike is wired); or, the tour pak light or tri-bar light can be wired to the accessory connector under the seat. If the tour pak is detachable, the wiring can be modified to accept quick disconnects.
This isn't intended to be a difinitive post on "how to" install the tri-bar light on non-SG bikes; rather, it's simply to point out that sifularson's excellent post is specific to the RGU and may or may be accurate with respect to the tri-bar light to use when other, non-RGU bikes are getting the SG fascia/LED mod.
Carl
#59
01-22-2011, 10:28 AM
Nice write up. I have two problems though. Knowing what I know about drilling & exposing the raw metal, I'm likely to chicken out and wait until I can grab an SG fender. Sometimes that metal prep, regardless of type, is a hit-or-miss proposition as the whether it'll protect it from rusting. My luck, it would rust in the not-to-distant future. Hell, even regular exposed bolts need to be tended to around here. That's why I wash the bike after every ride near the beach roads.
The other more important thing is, I notice nobody here has done that with a bike that two things installed; 1) CB with normal antenna, and 2) the saddlebag guards. The SG & Roadie don't come with saddlebag guards and when you add them HD provides you with a newer antenna mount for the radio, but not for the CB. The provisions for those mounts are different on the saddlebag supports from those that are on the supports that come OE on the bike. It's a REALLY stupid set-up HD came up with.
My girl has an SG and merely added the CB. The antenna mounts are too high and jam the antenna bases up against the underside of the fascia. HD has no proper mounts to remedy the situation. SO, as I'm about to install the fascia on my Roadie I'm faced with the same issue because my bike has the same CB set-up. Disregarding the fender drilling concerns I have, I still have that dual antenna bike problem.
The only "correct" solution is to take the antenna mount brackets and cut a piece out of them, re-weld together and powdercoat them. A pricey alternative to **** poor engineering on HD's part. I have hunted and tried different brackets (so did the dealer) and the problem persists. So here I am with all the parts and I'm waiting to do it "right".
If anybody runs what I have and found a proper solution, please share.
In the mean time, can I put a paint chip under my pillow in hopes the paint fairy can come in the middle of the night and put that beautiful Merlot color on my bike?!! Damn nice color.
#60
01-22-2011, 11:16 AM