
Street Glide Fascia on 04 Road Glide
#1
 11-30-2007, 09:30 AM


Join Date: Jul 2007
Posts: 240
Likes: 0
Received 0 Likes
on
0 Posts
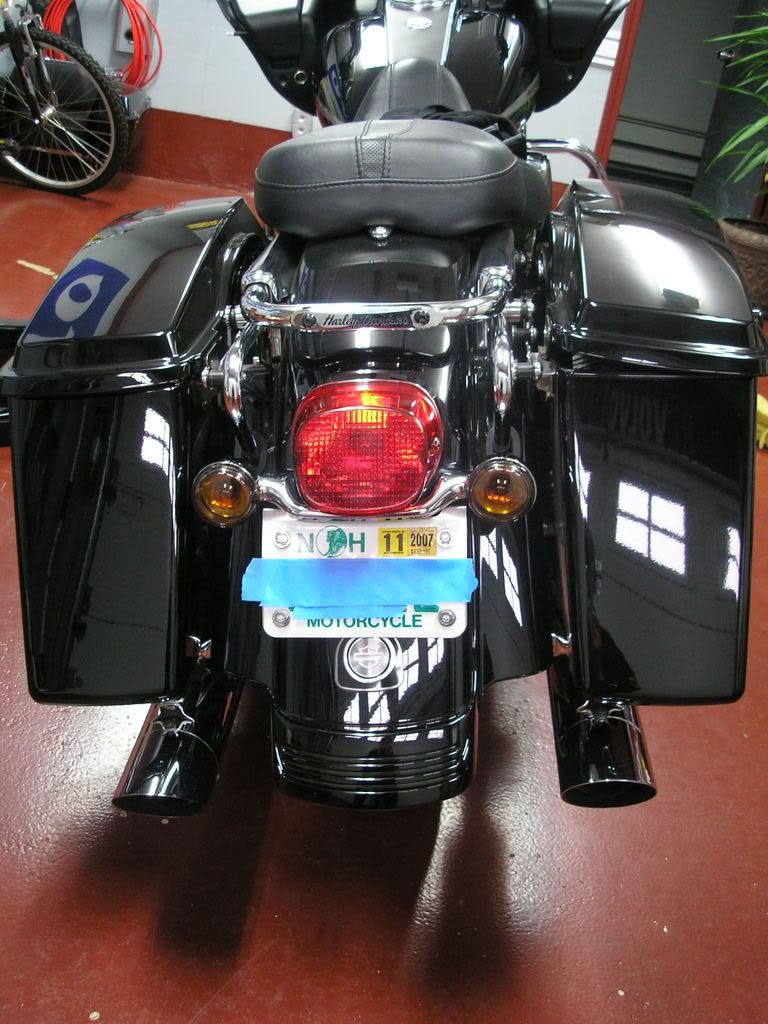
Spend a few hours and a few beers putting together the following
1. Street Glide Fascia (special thanks to Chicago Spike, Rocket Jockey, Harley Ping Man, and Montermile for all their responses to my questions)
2. Weekend concepts License plate bracket (looks good but mine was a PITA to install)
3. Supper trapp slash cut exhaust tips for Screaming Eagle pipes
4. Lay down tail light with clear on bottom from Ebay
5. Harley filler piece to fill in the holes where the plate used to go on the support tube. (by the way it does not come with the screws. I found that out the hard way) Also put on black saddle bag latches and found that they do not come with the reflectors. This upset me as nothing is mentioned in the 2008 catalog about needing to order that part seperatly and shows it as one unit on line.
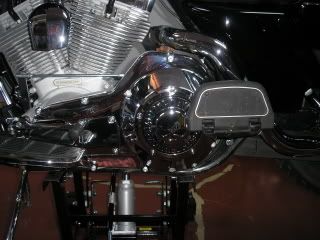
6. ***** G Derby Cover
Pic of old

Pic of New Derby cover
Pic of new rear complete
Here is the break down of how the night went.
Parts Used for the Street Glide Fascia conversion (to convert 2004 RG) Zanotti
2 screws 3596 (screw light to fascia) $1
1 fascia 59739-06dh $63.64
2 grommets for fascia holes for two up detach tour pac 59778-06 $3.30
1 support fascia 59790-06 $6.98
2 stud plates 59818-06 $15.12
1 tip light assy 69375-06 $49.34
6 nut flange 7499 $6.60
1st removed bags, two up supports for tour pack, and fender bracket under fender. Then put blue tape on the fender to protect paint. Removed antenna as I had installed the eglide goodies hidden antenna in the fairing a few nights prior. Placed antenna in box of extra harley parts
2nd attach light to fascia with the two screws, then attach the fascia and support fascia under fender and reattach fender bracket holding the fascia up. Install grommets into fascia holes
3rd start to mark up fascia with the fascia installed at the bottom of the fender and reinstalled two up support for tour pack through the two grommet now installed in the fascia (helps mark up the fascia location to help ensure it is straight before drilling holes in the fender.
4 finish marking up (dry fitting the fascia in place)
5 once it looks good, tape fascia into place measure 2-4 times to make sure even and marke fascia mounting holes with a pen or marker over the blue tape that is covering your fender.
6. remove fascia and everything again
7. place a scrap piece of wood between the fender and the rear tire. This will protect the tire from the drill bit (when it goes through the metal fender) and stable the rear fender for drilling. Check you six pen markings to make sure the spacing is correct with the stud plates (look like a metal bar with three evenly spaced threaded bolt welded to it). Once you are sure you have the spacing correct continue to step 8
8 carefully Drill out the holes one at a time with a small drill bit. The painter's tape will help the bit from wandering. If you need more security you can tape a small washer over your drilling point and the inside diameter of the washer will keep the drill bit from moving around.
9 increase bit size to one that will allow bolts welded to the stud plates to fit through the rear fender.
10 after the 6 holes are drilled check with stud plate to make sure holes line up with stud plate bolts. If not, file holes a little till the stud plate fit. Touch up bare metal with touch up paint to protect against rust.
11 removed the painter's tape and reinstalled the fascia as in step 2 and 3. Open
1. Street Glide Fascia (special thanks to Chicago Spike, Rocket Jockey, Harley Ping Man, and Montermile for all their responses to my questions)
2. Weekend concepts License plate bracket (looks good but mine was a PITA to install)
3. Supper trapp slash cut exhaust tips for Screaming Eagle pipes
4. Lay down tail light with clear on bottom from Ebay
5. Harley filler piece to fill in the holes where the plate used to go on the support tube. (by the way it does not come with the screws. I found that out the hard way) Also put on black saddle bag latches and found that they do not come with the reflectors. This upset me as nothing is mentioned in the 2008 catalog about needing to order that part seperatly and shows it as one unit on line.
6. ***** G Derby Cover
Pic of old
Pic of New Derby cover
Pic of new rear complete
Here is the break down of how the night went.
Parts Used for the Street Glide Fascia conversion (to convert 2004 RG) Zanotti
2 screws 3596 (screw light to fascia) $1
1 fascia 59739-06dh $63.64
2 grommets for fascia holes for two up detach tour pac 59778-06 $3.30
1 support fascia 59790-06 $6.98
2 stud plates 59818-06 $15.12
1 tip light assy 69375-06 $49.34
6 nut flange 7499 $6.60
1st removed bags, two up supports for tour pack, and fender bracket under fender. Then put blue tape on the fender to protect paint. Removed antenna as I had installed the eglide goodies hidden antenna in the fairing a few nights prior. Placed antenna in box of extra harley parts
2nd attach light to fascia with the two screws, then attach the fascia and support fascia under fender and reattach fender bracket holding the fascia up. Install grommets into fascia holes
3rd start to mark up fascia with the fascia installed at the bottom of the fender and reinstalled two up support for tour pack through the two grommet now installed in the fascia (helps mark up the fascia location to help ensure it is straight before drilling holes in the fender.
4 finish marking up (dry fitting the fascia in place)
5 once it looks good, tape fascia into place measure 2-4 times to make sure even and marke fascia mounting holes with a pen or marker over the blue tape that is covering your fender.
6. remove fascia and everything again
7. place a scrap piece of wood between the fender and the rear tire. This will protect the tire from the drill bit (when it goes through the metal fender) and stable the rear fender for drilling. Check you six pen markings to make sure the spacing is correct with the stud plates (look like a metal bar with three evenly spaced threaded bolt welded to it). Once you are sure you have the spacing correct continue to step 8
8 carefully Drill out the holes one at a time with a small drill bit. The painter's tape will help the bit from wandering. If you need more security you can tape a small washer over your drilling point and the inside diameter of the washer will keep the drill bit from moving around.
9 increase bit size to one that will allow bolts welded to the stud plates to fit through the rear fender.
10 after the 6 holes are drilled check with stud plate to make sure holes line up with stud plate bolts. If not, file holes a little till the stud plate fit. Touch up bare metal with touch up paint to protect against rust.
11 removed the painter's tape and reinstalled the fascia as in step 2 and 3. Open


#3
11-30-2007, 09:45 AM

Elite HDF Member
#4
11-30-2007, 02:25 PM
Extreme HDF Member
#6
11-30-2007, 09:50 PM
Join Date: Jul 2007
Posts: 240
Likes: 0
Received 0 Likes
on
0 Posts
#7
12-01-2007, 05:15 AM

Outstanding HDF Member
Trending Topics
#9
12-01-2007, 06:46 AM
Stellar HDF Member
Join Date: Aug 2006
Location: Between Chicago & Milwaukee
Posts: 3,045
Received 125 Likes
on
50 Posts
ORIGINAL: crashbike310
5. Harley filler piece to fill in the holes where the plate used to go on the support tube. (by the way it does not come with the screws. I found that out the hard way) Also put on black saddle bag latches and found that they do not come with the reflectors. This upset me as nothing is mentioned in the 2008 catalog about needing to order that part seperatly and shows it as one unit on line.
5. Harley filler piece to fill in the holes where the plate used to go on the support tube. (by the way it does not come with the screws. I found that out the hard way) Also put on black saddle bag latches and found that they do not come with the reflectors. This upset me as nothing is mentioned in the 2008 catalog about needing to order that part seperatly and shows it as one unit on line.
(where did you get it ?)
Looks great !
#10
12-01-2007, 08:08 AM

Road Captain
Join Date: May 2007
Location: Manchester, England.
Posts: 654
Likes: 0
Received 0 Likes
on
0 Posts
It comes as part of kit 53702-04A, not sure if you can buy it on it's own or not.
However I have removed that bar completely and installed lights from auto-gem, that are intended specifically to replace that whole bar and light when you apply the brakes.
Hope to post pictures soon!

However I have removed that bar completely and installed lights from auto-gem, that are intended specifically to replace that whole bar and light when you apply the brakes.
Hope to post pictures soon!