
"DIY MODS" and TRICKS to SAVE $$$$$$

#652
 08-31-2010, 07:50 AM
#653
09-02-2010, 08:04 AM

u can adjust the sensitivity of the alarm. I never have. my owners manual has a long schpeal on it. u adjust it via blinkers and radio readout. I installed the radio shack siren in my 05 glide. when I juggle the bike it warns me. but if u stand the bike up or twist the switch it is going to go off till you hit the fob twice. it will not start while this is going on. $5.76 for the siren. mine looks factory installed. no cutting no soldering drilled one little whole in the stock plug cap. highly recommended mod. I live where flashing lights aren't going to keep anyone from f'n w ur bike. the siren might tho....
#654
09-02-2010, 08:26 AM
he used a cheap *** cigarette lighter style compressor. he tore it apart and bolted it to where the sidecar would bolt on on the right side. u would have to be pretty stupid to f ur suspension up w one of these pumps it is slow and gutless. perfect for this job. he even used the pressure readout from the pump so he can always tell what his suspension is set on. he rigged a momentary toggle he can adjust his ride on the freeway I intend to copy him so I will post pics and problems when I do it. he said his next trick was to rig it so he could fill his tires w the same pump... wish i had that kin of time on my hands.
#655
09-12-2010, 08:04 PM
I have a 2009 rkc and i want to move the license plate under the tail light but i cant find anything i like too cover the holes from the original mounting bracket. I was thinking of just sticking an bar and shield medalion over the holes but im not sure how well that will stick because of the curve of the fender. Any ideas?
 it isn't bad either, at around $30.
Last edited by Ron "Gunner" Retzlaff; 09-26-2010 at 05:45 PM. Reason: My link didn't work so I put a picture of the 3 hole cover in instead.
#656
09-13-2010, 02:56 PM
Just got through reading this forum. Damn it's long, but full of good info. So anyway i really dig the ideas for building cheap effective bag holders.
I went and bought a package of those clear rubber bumpers (small) with tape on the one side and placed one on each corner at the bottom of the hard case. This way when I pull them off I can place them on the ground and not worry about scratches.
I went and bought a package of those clear rubber bumpers (small) with tape on the one side and placed one on each corner at the bottom of the hard case. This way when I pull them off I can place them on the ground and not worry about scratches.
#657
09-14-2010, 09:41 PM
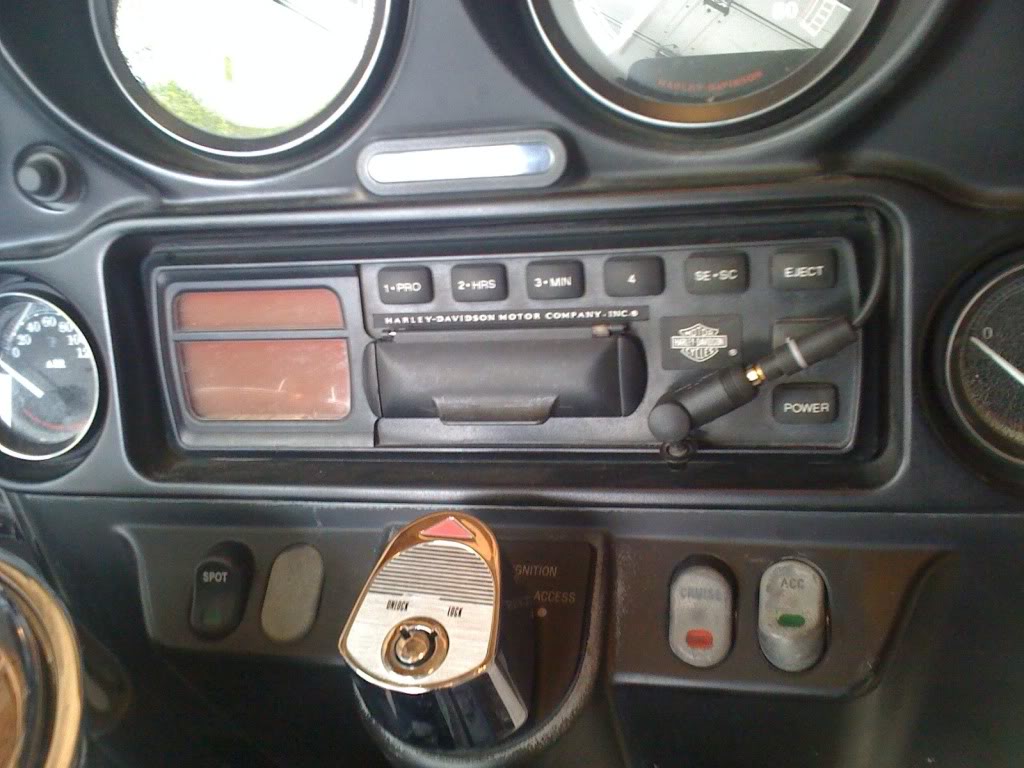
Well after I wired my tour pak for sound and power by running a patch cable from the tour pak to the stereo aux plug and wiring in a 12V power source, I needed a way to hold my iPhone in place. I also needed a way to hold my SPOT satellite tracker in place. I didn't want these things to be sliding around in the tour pak and wanted them to be convenient to deal with.
So I bought a RAM holder for each unit, cut a piece of plywood to the shape of the tourpak bottom and mounted the RAM mounts out of the way in the corners.
Aux cable at radio.....
Everything test mounted.....

Phone plugged in and pak loaded up again......
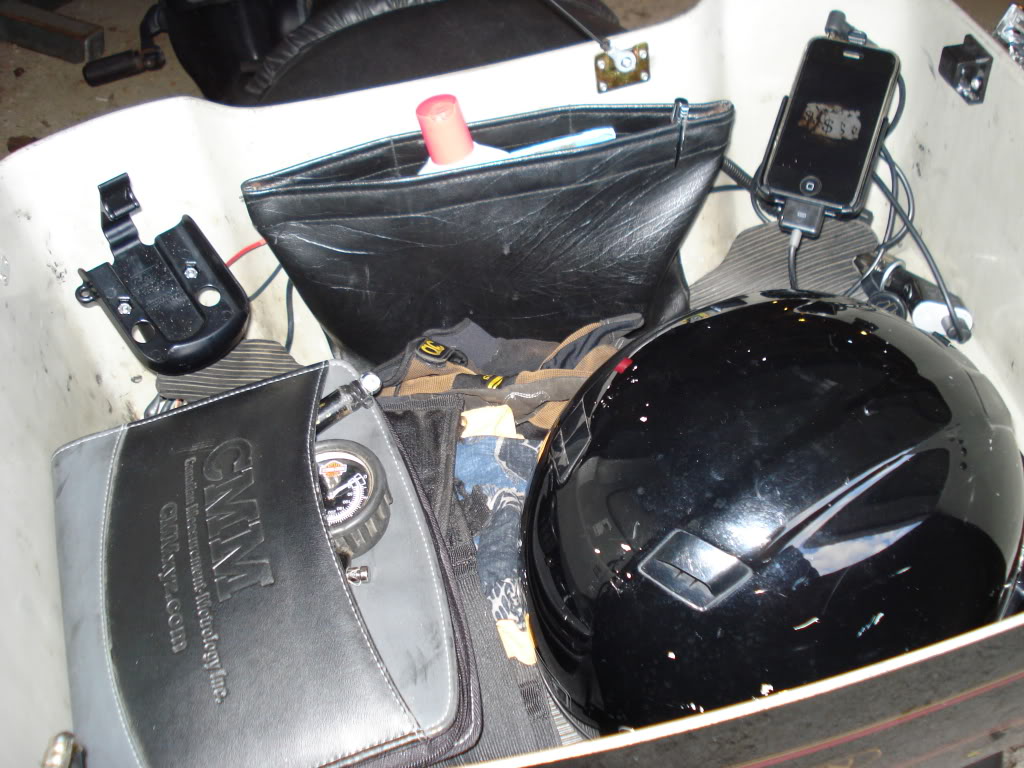
So far, testing it on a 300 mile ride, it worked great and it was so much easier to deal with the phone and playlists at stops.
I'll try it like this for a while to work out any bugs that may happen, and then clean it up a little. I'll cover the plywood with a piece of vinyl or lowpile grey carpet and clean up the the rest of the inside of the tour pak and clean up a few wiring issues in there too.
So I bought a RAM holder for each unit, cut a piece of plywood to the shape of the tourpak bottom and mounted the RAM mounts out of the way in the corners.
Aux cable at radio.....
Everything test mounted.....
Phone plugged in and pak loaded up again......
So far, testing it on a 300 mile ride, it worked great and it was so much easier to deal with the phone and playlists at stops.
I'll try it like this for a while to work out any bugs that may happen, and then clean it up a little. I'll cover the plywood with a piece of vinyl or lowpile grey carpet and clean up the the rest of the inside of the tour pak and clean up a few wiring issues in there too.
#658
09-22-2010, 01:36 PM

Here's a cheap and easy way to shorten your windshield. All you need is a sabre saw, duct tape, and a $2.00 scroll blade. You will be cutting the bottom of the windshield so a clean and super accurate cut is not needed as no one will ever see it. Woks on all fairing style windshields and aftermarket fairings as well.
Remove the 3 top screws in your fairing and slide the windshield out. Place 3 or 4 strips of duct tape across the windshield, side by side to protect it from scratches from the bottom of your saw.
Trace the bottom pattern and copy it to the duct tape to give you the height you want. This is easiest if you have an old windshield to trace the pattern or borrow one. You can also make one with thin cardboard and scissors.
Cut the windshield with your sabre saw using a narrow scroll blade made for cutting thin wood. The curves are easy to follow and accuracy is not very important. I use a 12" x 12" cardboard box to support the windshield off my bench when I cut it.
Remove the tape, wash the windshield, reinstall it and you're done. I've done a number of these and can do it start to finish in less than 15 minutes.
Good luck!!!!
Woman inspires us to great things, and prevents us from achieving them.
Last edited by HDnutcase; 09-24-2010 at 09:13 AM.
#659
09-23-2010, 09:53 AM
Here's a cheap and easy way to shorten your windshield. All you need is a sabre saw, duct tape, and a $2.00 scroll blade. You will be cutting the bottom of the windshield so a clean and super accurate cut is not needed as no one will ever see it.
Remove the 3 top screws in your fairing and slide the windshield out. Place 3 or 4 strips of duct tape across the windshield, side by side to protect it from scratches from the bottom of your saw.
Trace the bottom pattern and copy it to the duct tape to give you the height you want. This is easiest if you have an old windshield to trace the pattern or borrow one. You can also make one with thin cardboard and scissors.
Cut the windshield with your sabre saw using a narrow scroll blade made for cutting thin wood. The curves are easy to follow and accuracy is not very important. I use a 12" x 12" cardboard box to support the windshield off my bench when I cut it.
Remove the tape, wash the windshield, reinstall it and you're done. I've done a number of these and can do it start to finish in less than 15 minutes.
Good luck!!!!
Woman inspires us to great things, and prevents us from achieving them.
#660
09-24-2010, 08:49 AM
There are no holes in a Harley windshield, only 3 slots which are easy to cut. The slots are shaped to allow you to center the windshield and make minor position changes. That reminds me, you don't have to remove the 3 fairing screws to remove your windshield, just loosen them and slide it out.
Last edited by HDnutcase; 09-24-2010 at 08:54 AM.