
DK Custom DIY Head Breather on 2009 Ultra with SE Air Filter (pics)
#1
 05-24-2017, 09:00 PM


I recently installed the DK Custom DIY Head Breather System on my 2009 FLHTCU Ultra Classic (with a Screaming Eagle Stage 1 air cleaner installed) and took some pics of the process. I also have the DK Custom "Deluxe" 1.5 inch tank lift installed on this bike.
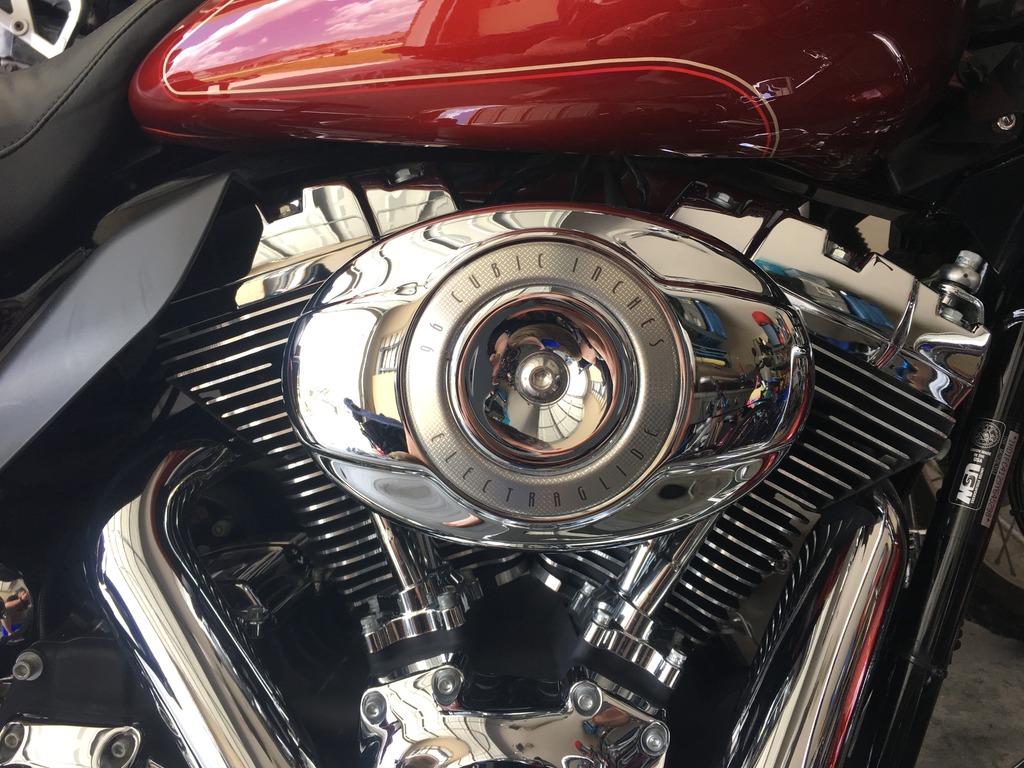
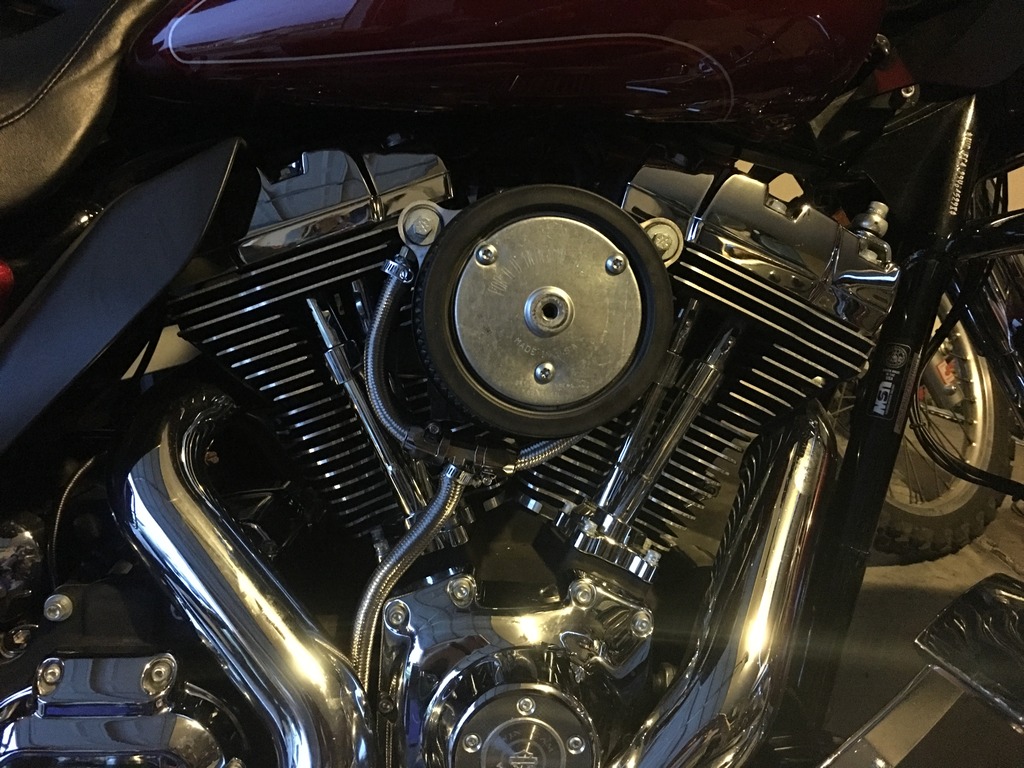
Here's the stock air cleaner cover over the Screaming Eagle air filter:
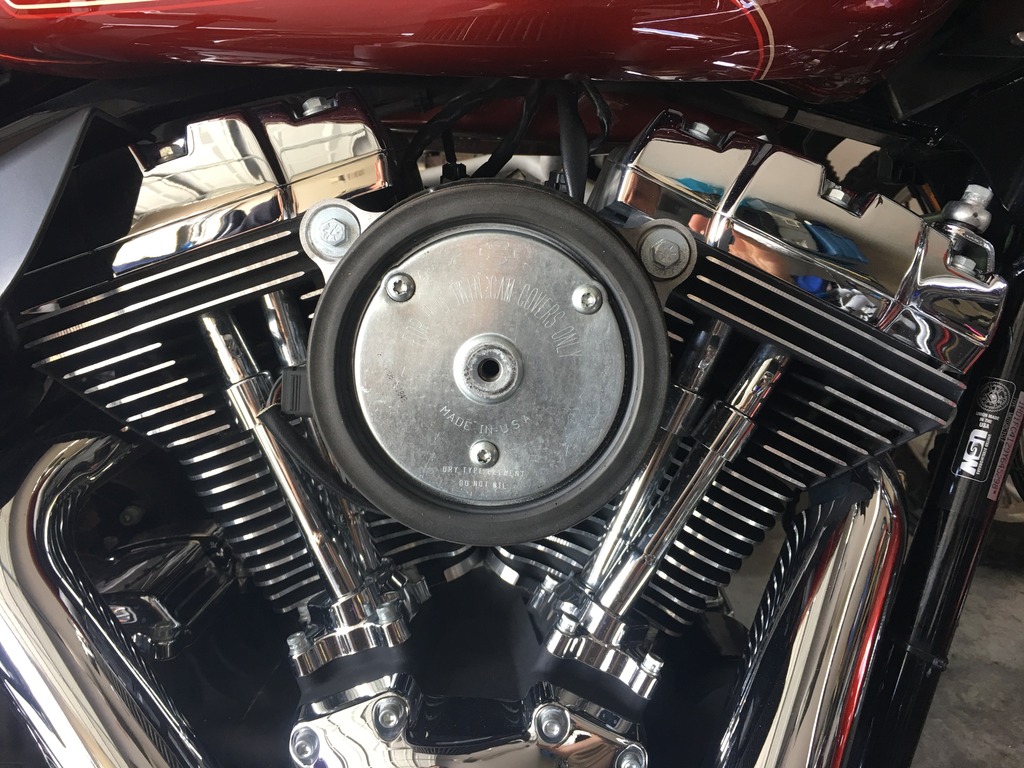
Air cleaner cover removed:
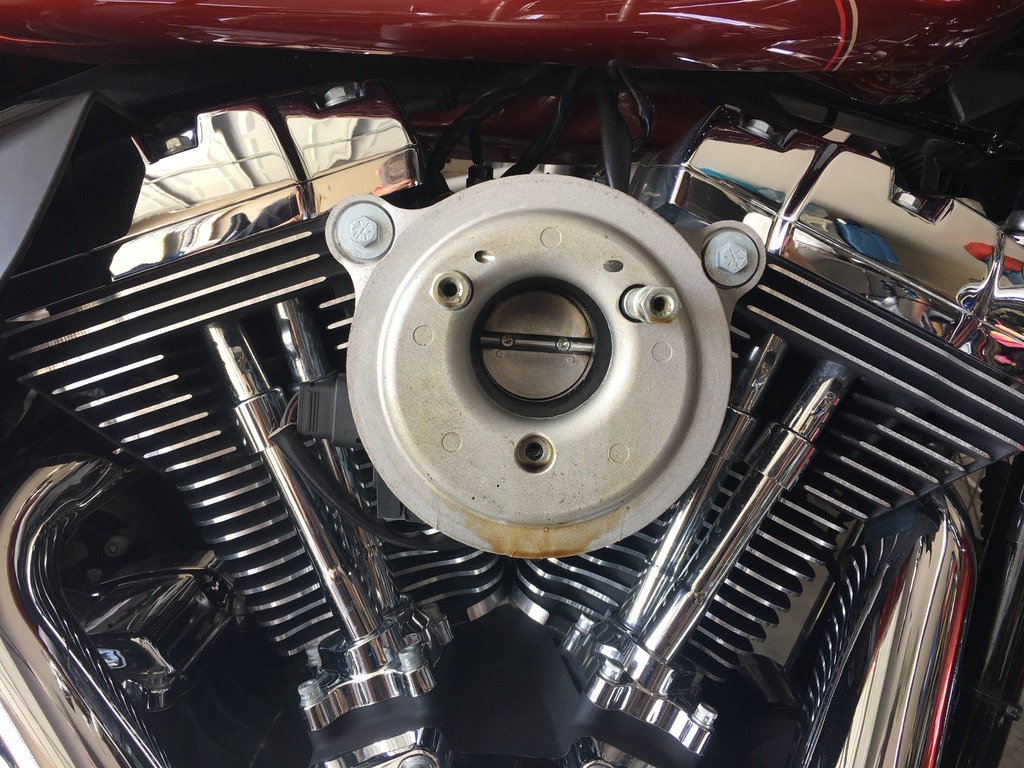
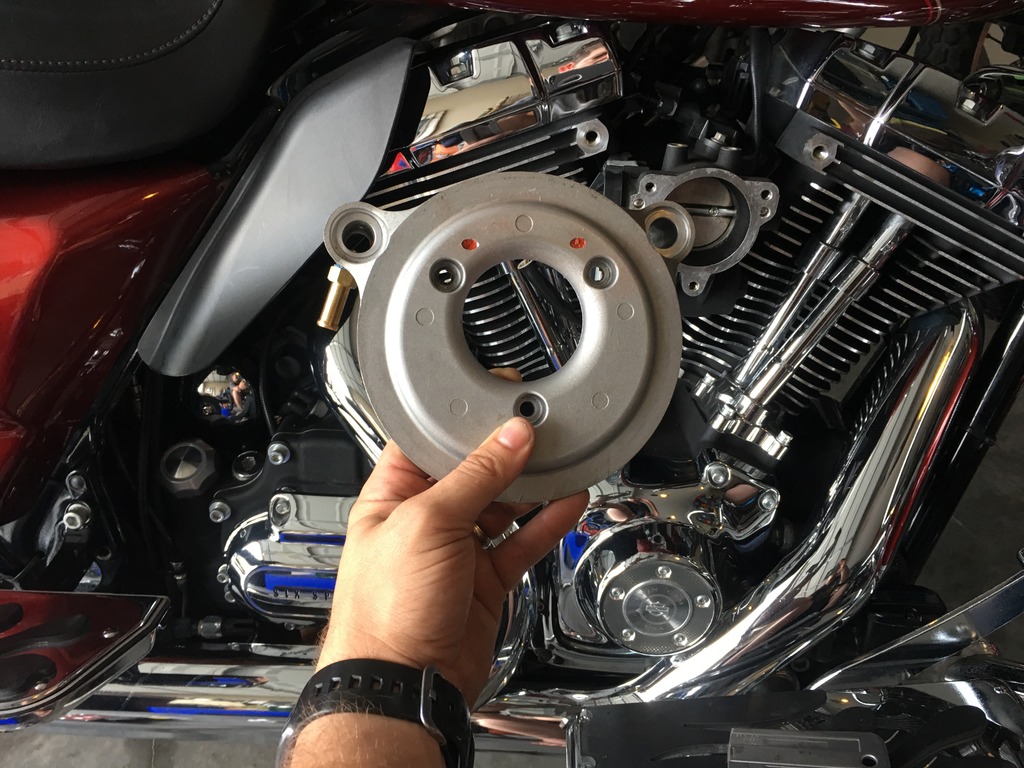
Air filter removed. You can see that oil was being fed back into the air filter, and ultimately back into the motor:
You'll need to figure out where to drill your holes for the external vents. Keep in mind that the external breather hoses will have to clear the intake body once you're done, so make sure you leave yourself enough room to work.
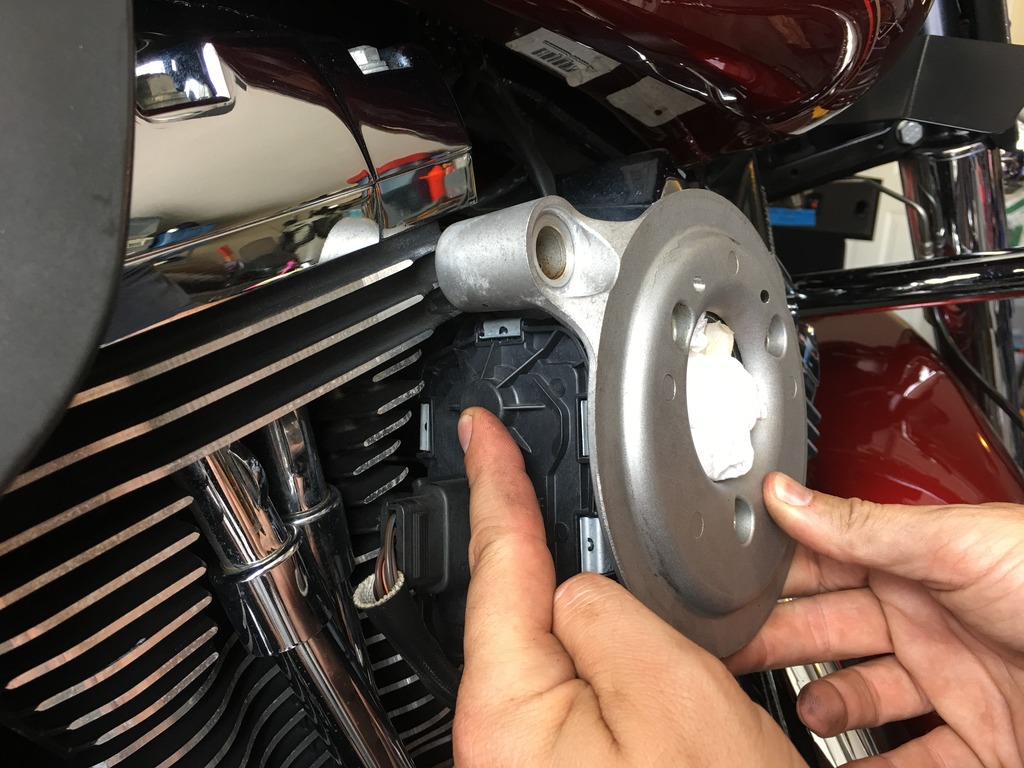
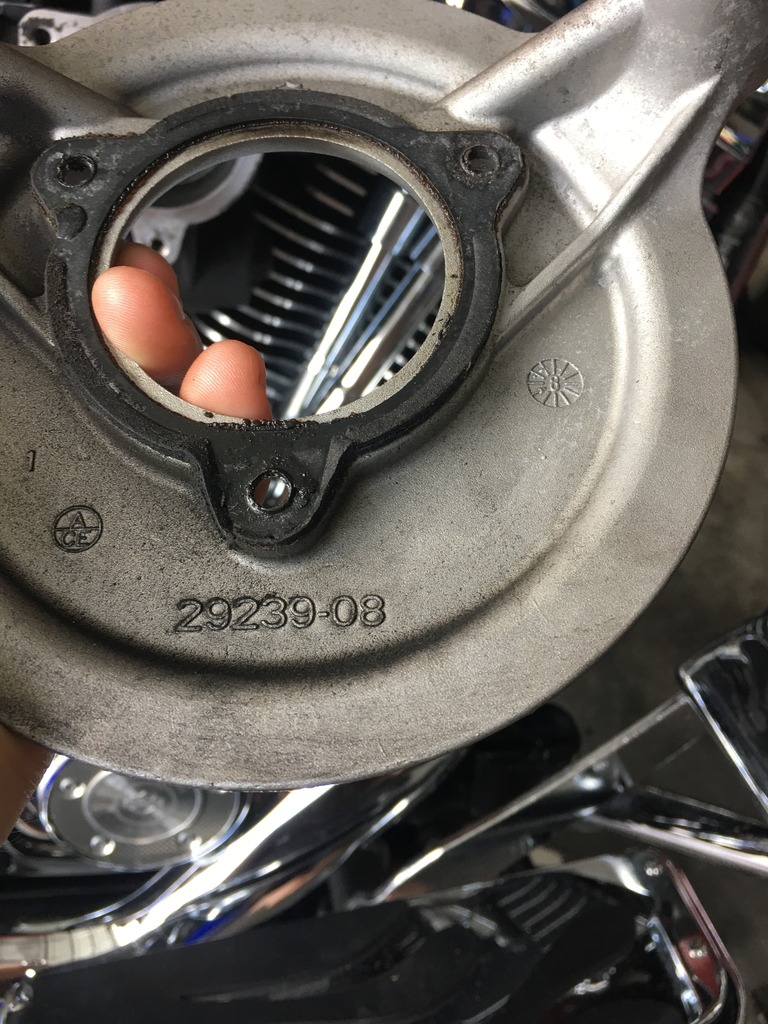
I pulled the breather bolts from the heads, but the SE backplate didn't come free. I had to gently wiggle/pry the SE backplate. As you can see, the gasket had stuck to both the intake and the back of the backplate. It needed to be scraped off with a razor blade.

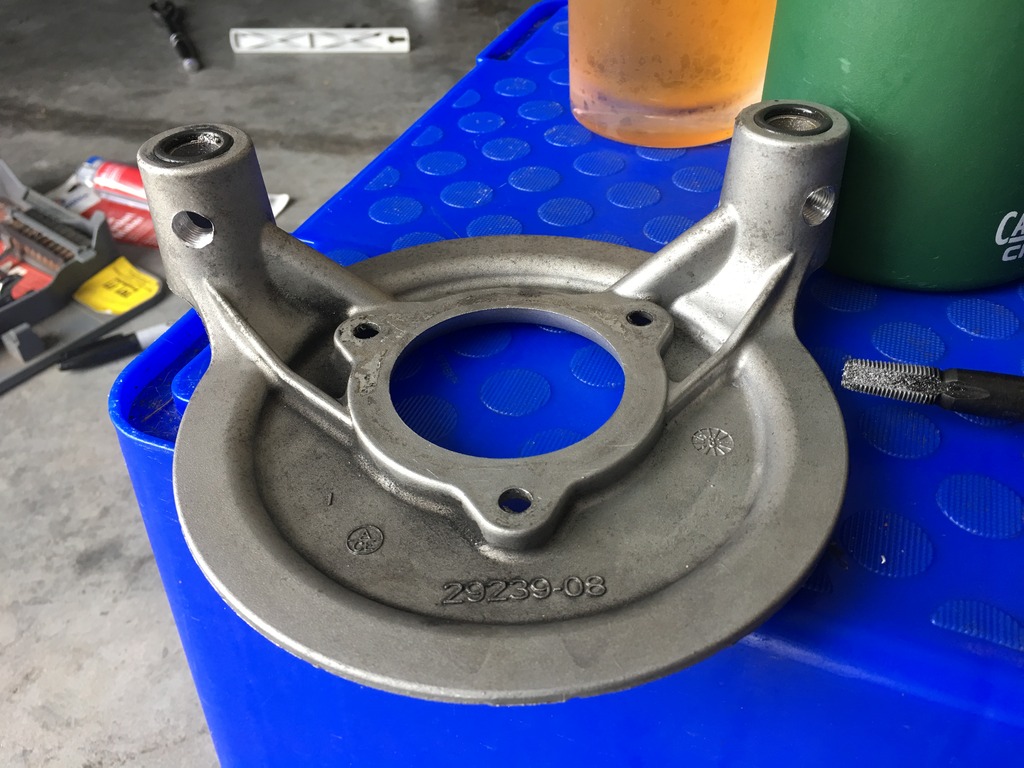
Now that the backplate was off, I marked the spot I wanted my vents with a sharpie. I used a center punch to start the hole, and then drilled a small pilot hole. I then enlarged the hole by gradually increased the drill bit size. The final drill bit I used was a 11/32 inch bit. Next, I used a 1/8" NPT tap to thread the holes.
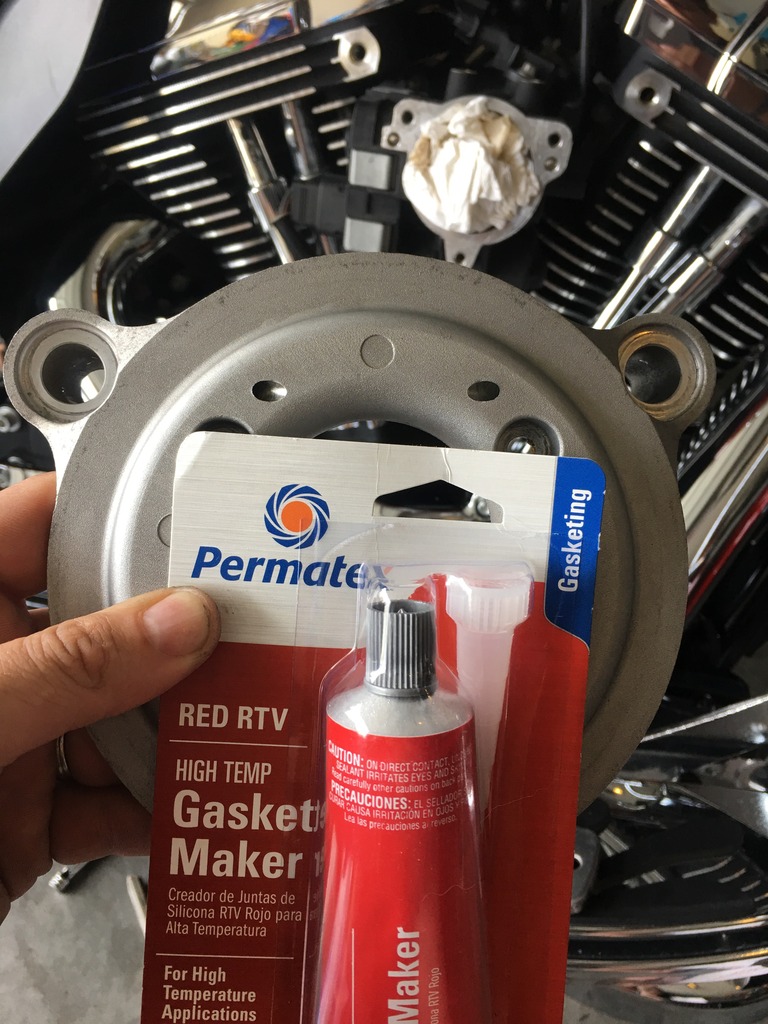
Now it was time to plug the passageways in the backplate (the ones that route breather gases back into the air filter assembly). I used high temp RTV.
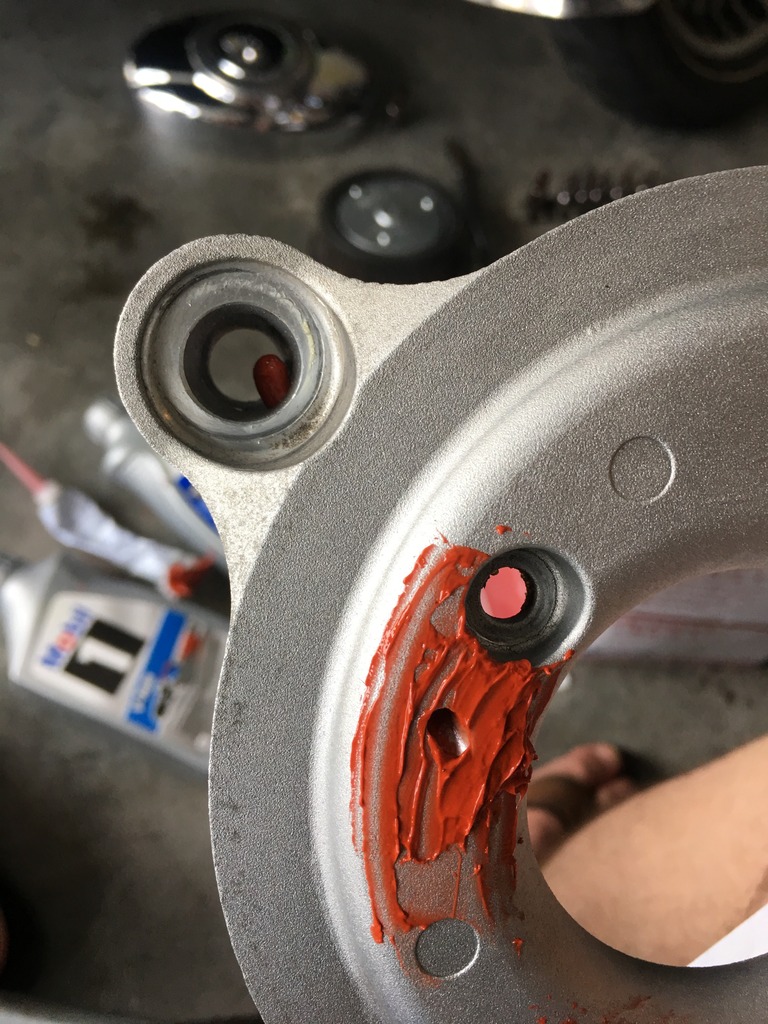
I used a razor blade like a putty knife to work the RTV into the hole, and then pushed the RTV further into the passageway with a punch (until the entire passageway was full with RTV). In the picture you can see RTV in the area where the breather bolts will need to pass through. Obviously that has to be cleaned up prior to the RTV drying up.
All cleaned up. Make sure you use locktite when you tighten down your new external vents.
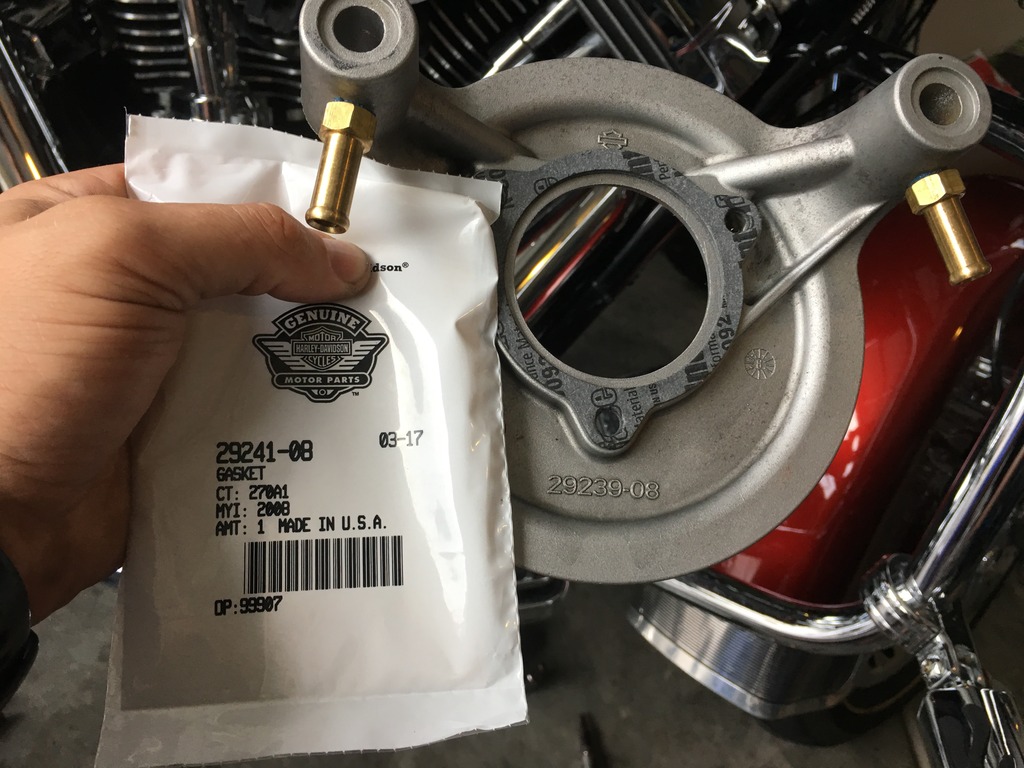
I installed a new gasket. The Harley part number is 29241-08.
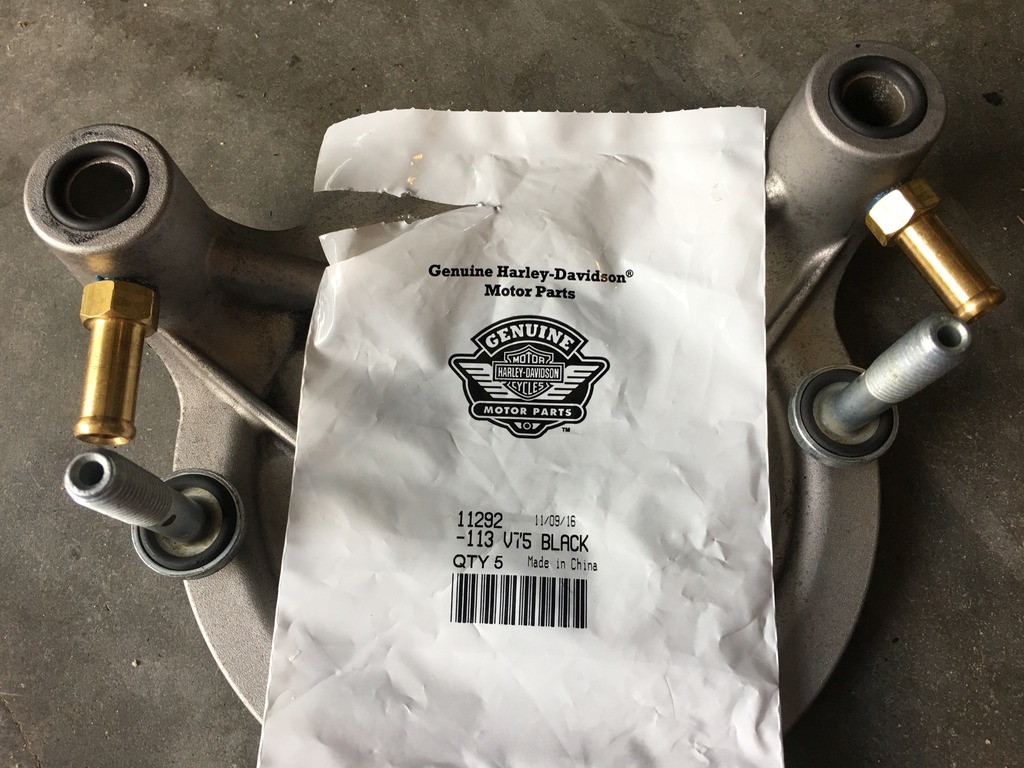
When I took the SE air cleaner apart I noticed that I was missing one of the o-rings that helped seal the breather bolts against the backplate. Since I had to replace one o-ring anyways, I decided to swap all of them out. I probably could have reused the old o-rings, but they were cheap. The Harley part number is 11292.
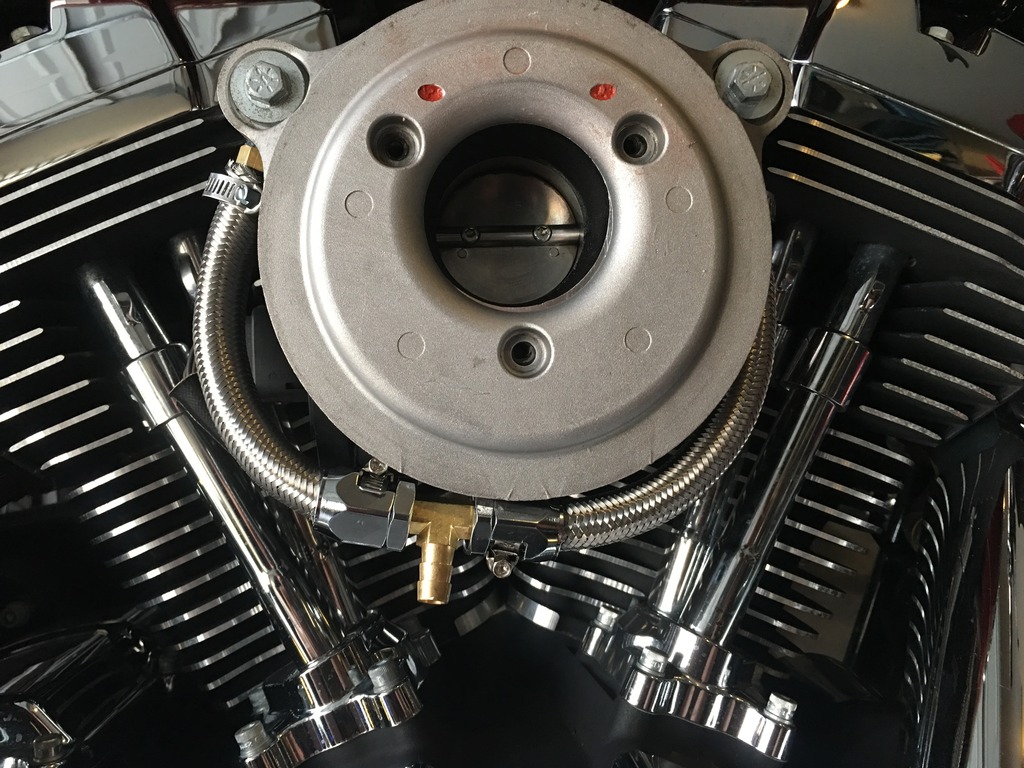
Now it's time to bolt the backplate up. You can see here how slightly angling where you place the vents leaves plenty of room for your breather hoses. Per the Screaming Eagle Stage One Air Filter install instructions the breather bolts should be torqued to 120-144 inch-lbs.

Hook up hoses to your external vents. They connect together via a t-connector. DK Custom includes both a brass and a black plastic t-connector. I opted for brass.
The other end of the connector goes to a filter.

I routed the hose down and zip-tied the filter to the frame (making sure the filter element doesn't touch the exhaust pipe).
Finally, the football air cleaner cover goes back on. It does a great job of covering everything up.
Here's the stock air cleaner cover over the Screaming Eagle air filter:
Air cleaner cover removed:
Air filter removed. You can see that oil was being fed back into the air filter, and ultimately back into the motor:
You'll need to figure out where to drill your holes for the external vents. Keep in mind that the external breather hoses will have to clear the intake body once you're done, so make sure you leave yourself enough room to work.
I pulled the breather bolts from the heads, but the SE backplate didn't come free. I had to gently wiggle/pry the SE backplate. As you can see, the gasket had stuck to both the intake and the back of the backplate. It needed to be scraped off with a razor blade.
Now that the backplate was off, I marked the spot I wanted my vents with a sharpie. I used a center punch to start the hole, and then drilled a small pilot hole. I then enlarged the hole by gradually increased the drill bit size. The final drill bit I used was a 11/32 inch bit. Next, I used a 1/8" NPT tap to thread the holes.
Now it was time to plug the passageways in the backplate (the ones that route breather gases back into the air filter assembly). I used high temp RTV.
I used a razor blade like a putty knife to work the RTV into the hole, and then pushed the RTV further into the passageway with a punch (until the entire passageway was full with RTV). In the picture you can see RTV in the area where the breather bolts will need to pass through. Obviously that has to be cleaned up prior to the RTV drying up.
All cleaned up. Make sure you use locktite when you tighten down your new external vents.
I installed a new gasket. The Harley part number is 29241-08.
When I took the SE air cleaner apart I noticed that I was missing one of the o-rings that helped seal the breather bolts against the backplate. Since I had to replace one o-ring anyways, I decided to swap all of them out. I probably could have reused the old o-rings, but they were cheap. The Harley part number is 11292.
Now it's time to bolt the backplate up. You can see here how slightly angling where you place the vents leaves plenty of room for your breather hoses. Per the Screaming Eagle Stage One Air Filter install instructions the breather bolts should be torqued to 120-144 inch-lbs.
Hook up hoses to your external vents. They connect together via a t-connector. DK Custom includes both a brass and a black plastic t-connector. I opted for brass.
The other end of the connector goes to a filter.
I routed the hose down and zip-tied the filter to the frame (making sure the filter element doesn't touch the exhaust pipe).
Finally, the football air cleaner cover goes back on. It does a great job of covering everything up.
The following users liked this post:
DK Custom (10-18-2017)
#3
05-25-2017, 03:57 AM
Cruiser
very nice. i got tired of my k&n filters turning black at the bottom and finally done this mod on the SE (i assume) breather backing plate. I didn't get the holes perfectly straight, but most of it is hidden anyway. ran the hose to the end of the frame. now i can hear all the "leaking horsepower" jokes when i park somewhere. i think dk customs makes a vented catch can that i'm planning on getting in the future. i'm really excited to ride it again soon if it ever stops raining...
#4
05-26-2017, 02:05 PM
Sponsor
Very Clean Install! If you need anything else at all, give me a call.
__________________
www.DKCustom.com
662-252-8828 Voice
662-420-4891 Text & Voice
Support@DKCustomProducts.com

www.DKCustom.com
662-252-8828 Voice
662-420-4891 Text & Voice
Support@DKCustomProducts.com
#5
05-27-2017, 08:06 AM
The following users liked this post:
electra_boogaloo (06-03-2017)
#6
01-18-2021, 08:48 AM

Cruiser
The finished project looks great, I have this Filter, OEM does not show this (I guess its screamin eagle)
filter and housing, so I've had to shop around and try to figure out part numbers for my filter;
looks to be 29244-08 641223.
This does need to be cleaned and oiled right? (people told me the filter does not need cleaning,
but they might have assumed I had a stock filter)
I have a couple drops of oil collecting at the bottom of the air filter too, where does it come from?
(Yes, I see this is an old OP/Topic, but so am I, as well as my bike)
#7
01-18-2021, 09:09 AM
Seasoned HDF Member
Trending Topics
#8
01-18-2021, 11:51 AM
I think I'm still kicking around. 
If you have a K&N style filter, yes, you'll want to periodically clean an re-oil for max efficiency. I generally do so around 5k, but a 10k interval is just fine.
The stock breather bolts routes excess gasses from your heads back into your air intake. The factory does this to try and force your engine to suck that hot oily mess back in your engine so it can be reburned, instead of venting to atmosphere (to meet EPA mandates). The oil you're seeing accumulating on your filter is where some of that oily mist failed to get sucked in to your motor.
The point of this mod is to keep the gasses vented in the head (a natural byproduct of the combustion cycle) from being ingested back in to your motor. This of course means that you no longer have to worry about oil dribbling down your air intake / filter, but the main advantage is keeping nasty used oil from gunking up your combustion chamber with excess carbon and keeping air temps nice and cool prior to coming in to your engine.
The finished project looks great, I have this Filter, OEM does not show this (I guess its screamin eagle)
filter and housing, so I've had to shop around and try to figure out part numbers for my filter; looks to be 29244-08 641223.
This does need to be cleaned and oiled right? (people told me the filter does not need cleaning, but they might have assumed I had a stock filter)
filter and housing, so I've had to shop around and try to figure out part numbers for my filter; looks to be 29244-08 641223.
This does need to be cleaned and oiled right? (people told me the filter does not need cleaning, but they might have assumed I had a stock filter)
If you have a K&N style filter, yes, you'll want to periodically clean an re-oil for max efficiency. I generally do so around 5k, but a 10k interval is just fine.
The point of this mod is to keep the gasses vented in the head (a natural byproduct of the combustion cycle) from being ingested back in to your motor. This of course means that you no longer have to worry about oil dribbling down your air intake / filter, but the main advantage is keeping nasty used oil from gunking up your combustion chamber with excess carbon and keeping air temps nice and cool prior to coming in to your engine.
The following users liked this post:
Stratattack (01-19-2021)
#9
01-18-2021, 11:52 AM

Thread
Thread Starter
Forum
Replies
Last Post
mreed
Sportster Models
748
03-30-2017 12:08 PM
californiafatbob2013
Dyna Glide Models
6
04-11-2015 10:23 AM
californiafatbob2013
Multi-Fit Parts and Accessories
2
12-30-2014 01:24 PM
LarryLives
Multi-Fit Parts and Accessories
0
09-30-2011 07:03 AM