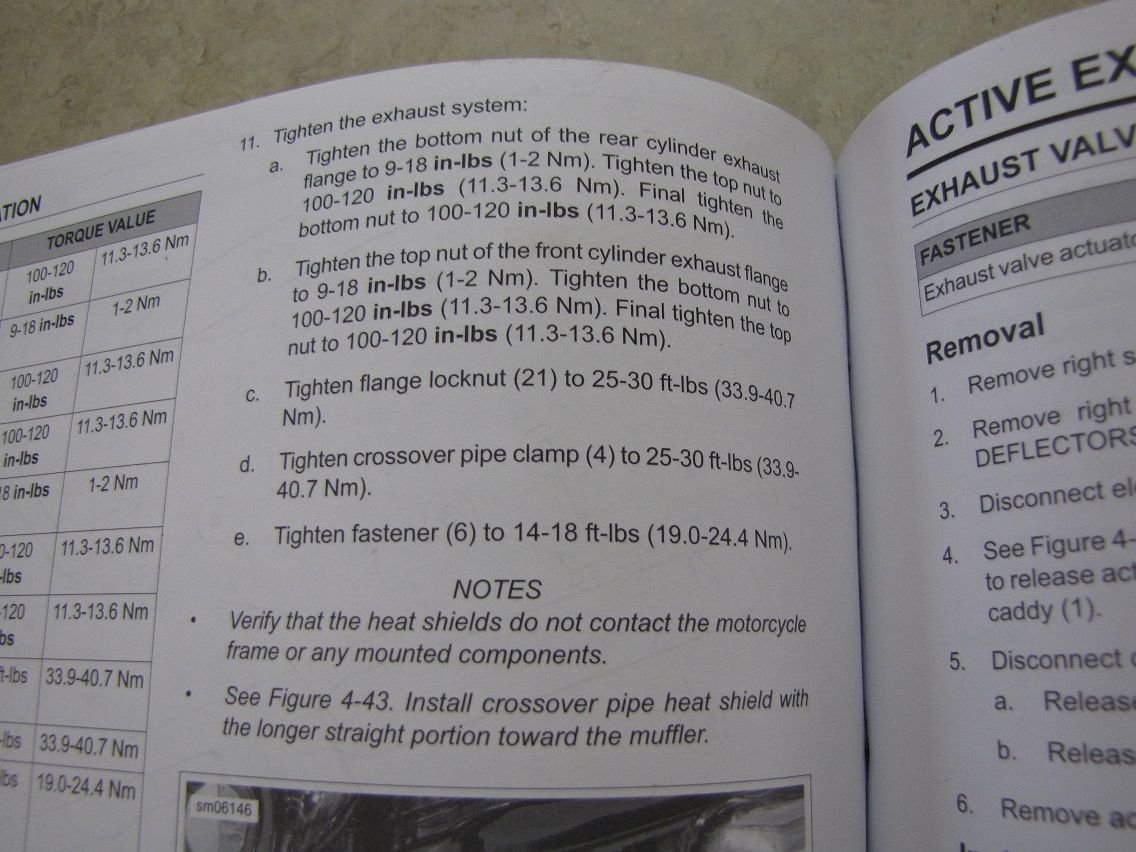
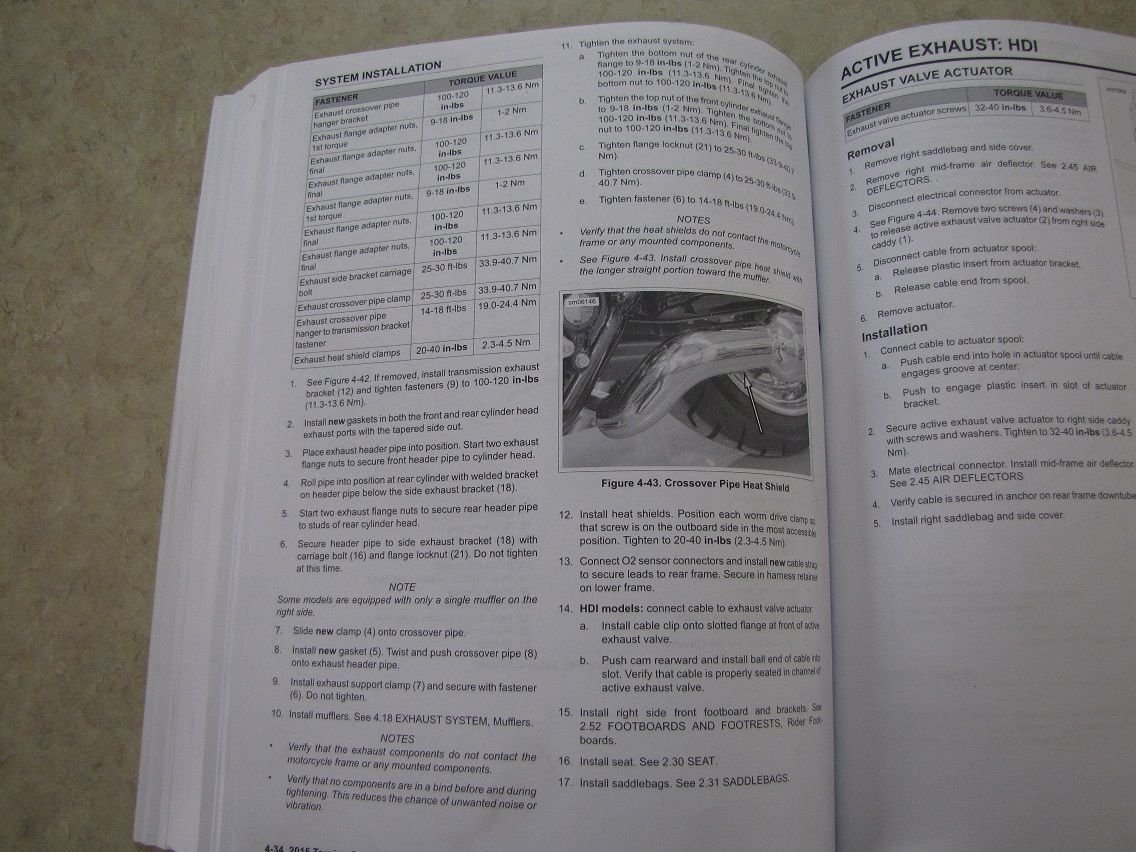
header pipe question
#1
#2
#3
JT,
That's norman in that headers usually don't come with the attachment items.
If i were doing it, especially if adding a brand new header, i would go to the dealer parts desk, ask for two new oem exhaust gaskets, 2 exhaust manifold clamps, 4 new exhaust stud nuts, and two new exhaust gasket retaining rings.
The retaining rings are a bitch to get off and a little easier to get on. i like to use new ones cause after several heat cycles, the old ones from the previous header start warping and rusting.
Put everything on with loose hardware until you are sure the header is aligned correctly. Then don't just tightenen the exhaust flange bolts until you are satisifed. If you ***** this part up, you will break off a stud and then my friend, you have really screwed the damn pooch. i also recommend some silver permatex antisieze available at any auto parts store to be rubbed on the exhaust studs before you screw on the nut. i apply this antisieze to the muffler clamps as well, just anywhere there will be high temps and a fastener is involved. Makes disassembly much easier.
Always use a known calibrated torque wrench on these studs, and remember to re-torque about abt 500 miles or so. After the second re-torque, they will usually stay put.
Get a service manual while you are at the dealer. Trust me, you are going to need it if you like to do some of your own service and wrenching.
http://images.imagessite.com/OEM_IMA...D10FLHR074.gif
Good luck.
#4
Then reverse the process using the old rings and flanges on your new pipes.
#5
item 17 (flange) you bring over from your old pipe. item 16 is the spring to keep the flange on and press the pipe into the exhaust gasket, you can either use new or bring over from old pipe. runs about a buck from the dealer and will get stretched out after you remove/reinstall a couple of times.
Last edited by skratch; 06-06-2015 at 08:16 AM.
#6
#7
First, let me say that I never use old parts on new parts where heat cycles are involved. That's why I make it a point to install new ****. The old stuff can crack and fail in other ways, causing you piles of grief down the road. The new parts are cheap, so why not treat your new header to new attachment/connection hardware? Anyhow, that's how I do it. As you have read, many owners will re-use whatever appears not to be broke. That can work, but it can also bite you in the ***.
Using your ft lb torque wrench will not be a good solution. It won't be calibrated to correctly at that low of a torque. You should be able to rent one at the autoparts store (call them all and check)...of course by now you know know you need an inch pound wrench. Don't be tempted to take the shortcut of using the wrong tool....if things go wrong....you will be sorry....ask me how I know! The beam type of torque wrench is surprisingly accurate and inexpensive. Sears has those if you strike out on the rental option.
Another thing you need in the tool box is a set of wobble extensions and/or wobble sockets. Two of the exaust flange nuts are easy to get to, two are not. The worst one is the front-left side. Access it from the front-left side of the bike. At the end of the day, it's all about having the proper tools for the job. Removing the old nuts is made easier if you spray them with liquid wrench or some other penetrating lubricant and allow that to soak over night. The key is to avoid damaging those studs.(ie, avoid twisting them off with a rusted-on nut)
By the way, there are 12 inch pounds per ft pound.
Last edited by Lowcountry Joe; 06-06-2015 at 08:38 AM.
Trending Topics
#8
I agree with lowcountry_joe - a ft lbs torque is not sufficient for a few things on our bikes. They are simply not adept at such low torque values. I did not have an inch lbs torque, but borrowed one and will now be adding one to my toolbox, although the beam type as mentioned is also a good choice for those nuts/bolts that need very little torque.
#9


