
Custom to Low Speedo Change Guide (with part numbers and photos)
#51
 08-01-2019, 11:33 AM


Wire harness should not be required for your '05. The snag was the bezel. The old stand-alone bezel, with its individual part #, was terminated. The bezel's part # went obsolete, so it became difficult to get the bezel for the Low-style speedo housing/handlebar clamp (unless you talk to the right person in the Parts Department). Mother Harley then integrated the bezel into a "kit" (or assembly) that contains the bezel. The new assembly part #, that entails the dummy-lights' bezel, can be found here:
https://www.hdforums.com/forum/sport...l#post16729731
Let us know how it goes for you.
https://www.hdforums.com/forum/sport...l#post16729731
Let us know how it goes for you.
#52
09-18-2019, 02:46 AM
Advanced
Correct me if i'm wrong, but it looks like the bezel assembly part # 68382-96 that you referenced is the same one that fits the 1200C speedo housing, not the longer, narrower one that is required for the low housing. Looks like some others are ordering part 68513-07B. Wondering if I ordered the same size bezel that I already have in my '99 custom...
#53
03-08-2021, 10:16 AM

Quite an old thread. But I'm just before the start of the mod of my 2018 Custom and as many others I really don't like that riser and speedo location. So I'm planning to relocate it (on the left fork and I want to keep the indicators in front of me). One idea came into my mind: Maybe Dyna Low Rider's handlebar clamp would work for the indicators of the Custom. So I was looking for 59786-06, but there is none for sale on the internet and not even orderable at HD. Do you have an idea where to get it from?


#55
04-11-2021, 04:25 PM

5th Gear
If mods would be kind enough to sticky this, that'd be great!
So as promised here is a short part list and guide to changing the custom speedo mount to a low style one... follow at your own risk...
Cost: ~$250
Performed on: 2007 EFI XL1200C
Frustration level: Low
Time Required: 3-4 Hours
Part List:
55846-05A - Chrome Speedo Housing

67089-05 - Chrome Speedo Back Cover

67104-95 - Speedo Cushion
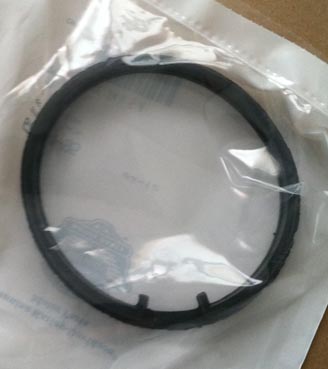
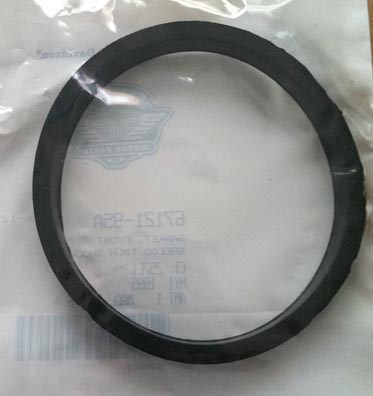
67121-95A - Front Speedo Gasket
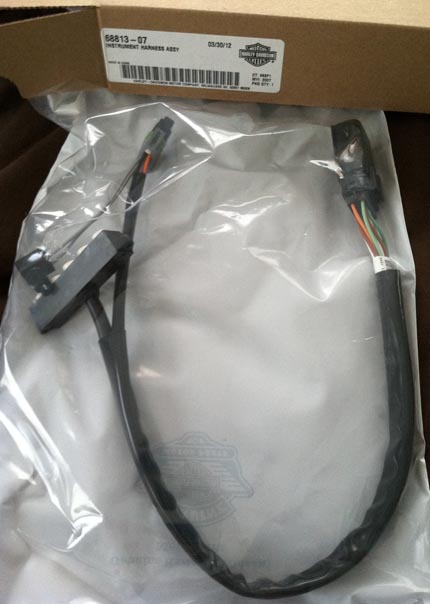
68813-07 - Wire Harness
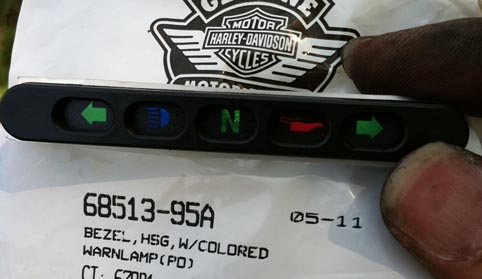
68513-95A - Warning Lamp Bezel
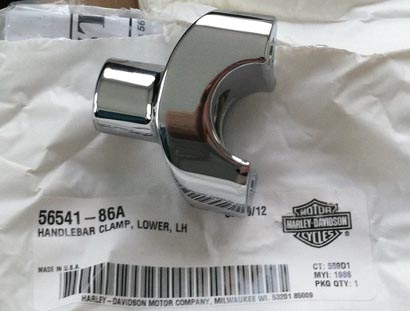
56541-86A - L Handlebar Clamp
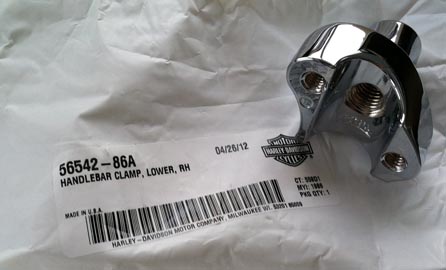
56542-86A - R Handlebar Clamp
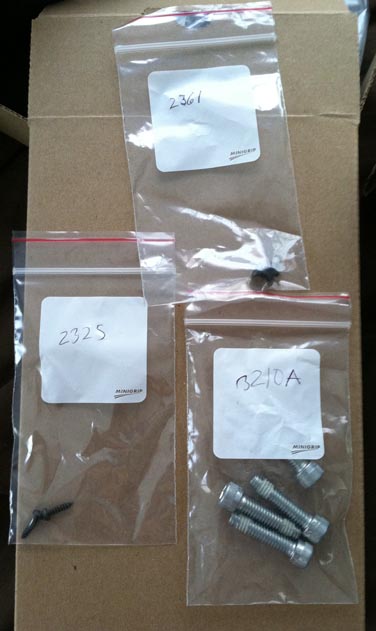
2325 - Screw x2 - For Lamp Bezel
2361 - Screw x2 - For Speedo
3210A - Screw x4 - For Speedo Bracket
Guide:
Start by removing the riser cover. It's just these two torx screws:
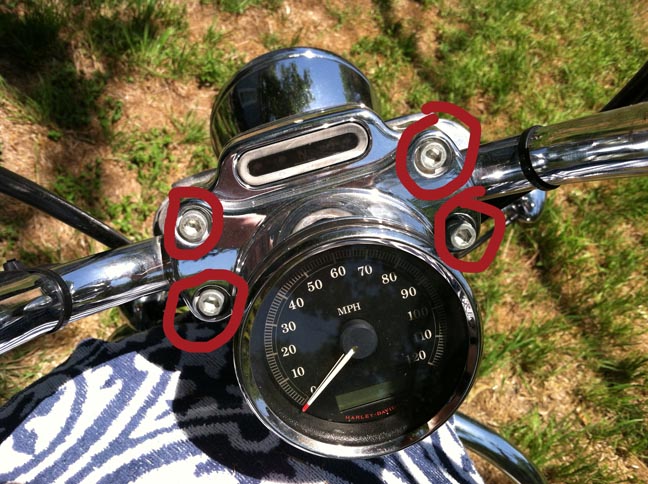
With that cover off, loosen the alan screws holding the current speedometer mount on:
I just leaned my bars forward and left everything attached to them.
At this point I unscrewed the two alan screws on the back of the speedo, took the rubber cover off the button, unscrewed the plastic ring from the button (save the ring and the rubber), disconnected everything from it, and set it (along with the new gaskets) in the new housing.
The next step was a little tricky just because I couldn't figure out where the wire harness went to. Luckily I decided to and realized I needed to remove the tank. If you don't know how to remove the tank properly then RTFM or Google it. It was very easy.
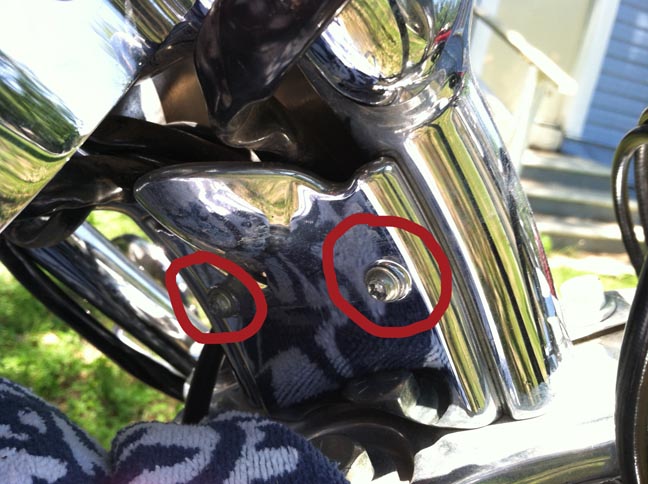
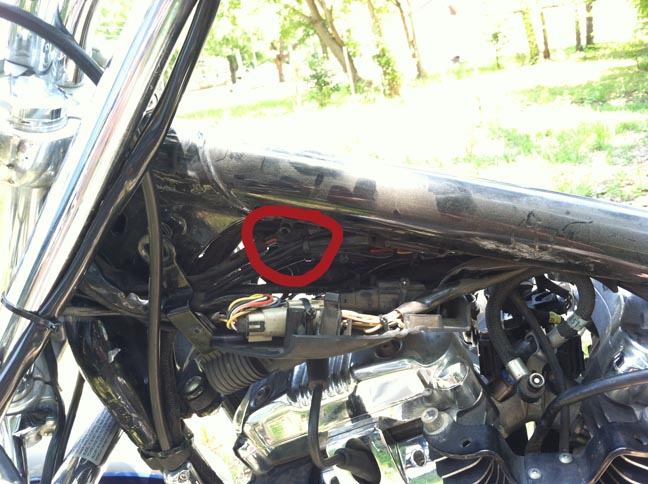
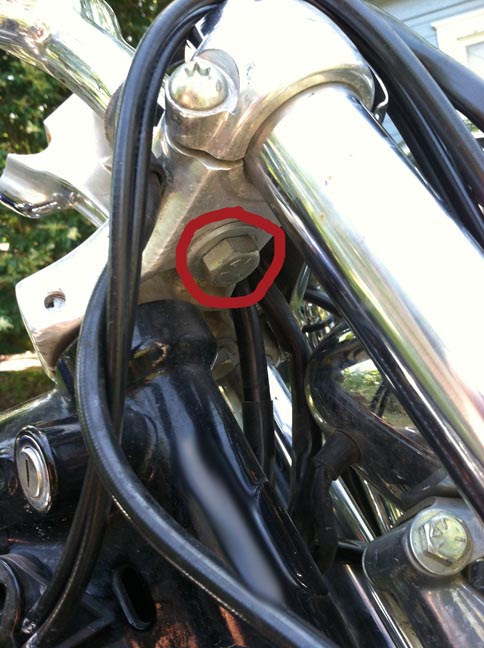
So remove the tank and look for the plastic part where all the wires run to:
Note that it is held on by a torx screw! I don't have a picture of that (sorry) but in the next photo you can see the harness connector and the hole where the torx screw screws into circled:
Getting closer:
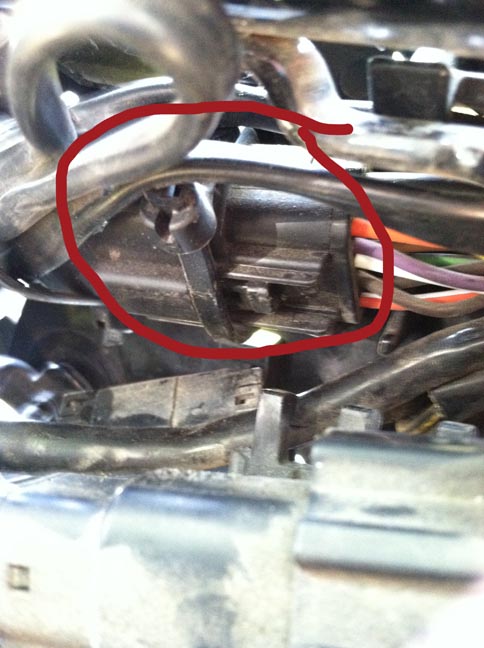
I had to cut one of the zip ties that held the connector in place but after that it came right out.
Now just route the new harness where the old one was, connect it, zip tie it back, and put the plastic back together. Also worth doing is connecting the speedo to the new harness and making sure all the lights work.
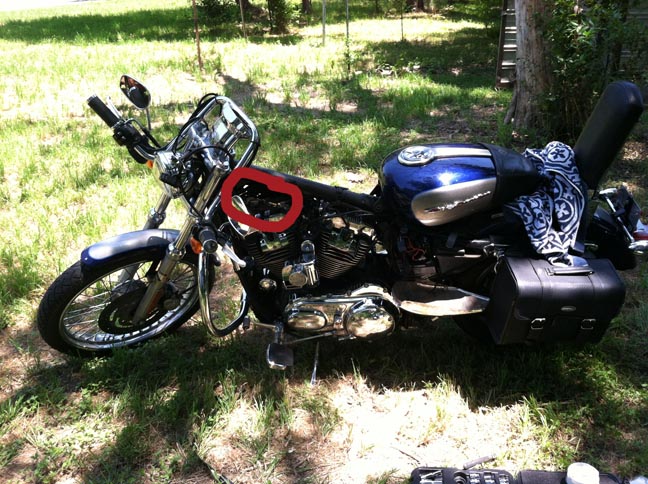
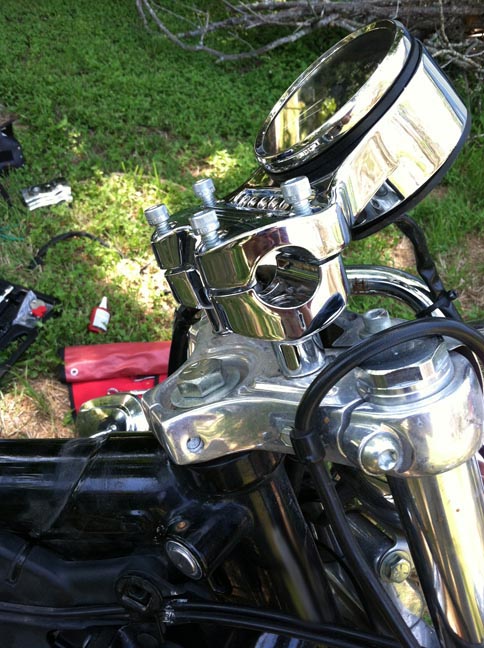
Next thing to do is remove the stock riser. Here you can see one of the bolts that keeps it on. There is one on each side:
I applied a little Loctite the riser bolts and then loosely screwed them into the new risers. (As seen above also)
Attach the bezel to the speedo bracket (making sure it is the correct orientation) and then screw in the lights from the harness (again, making sure it is the correct orientation... it says 'Top' and has an arrow) using the 2325 screws.
Next step is to loosely attach the speedo bracket to the risers and get the risers almost snug. I did this to make sure they wouldn't spin around while I was screwing them in.
After that just replace the handlebars and snug everything up. Then plug in the speedometer, align the button, and screw on the backplate. Replace the plastic ring and rubber cover on the button. Check and make sure everything works.
Once everything is aligned and to you liking go back and tighten the bolts holding the risers on and then the alan screws holding the speedo bracket on.
After all that is done replace the tank/seat.
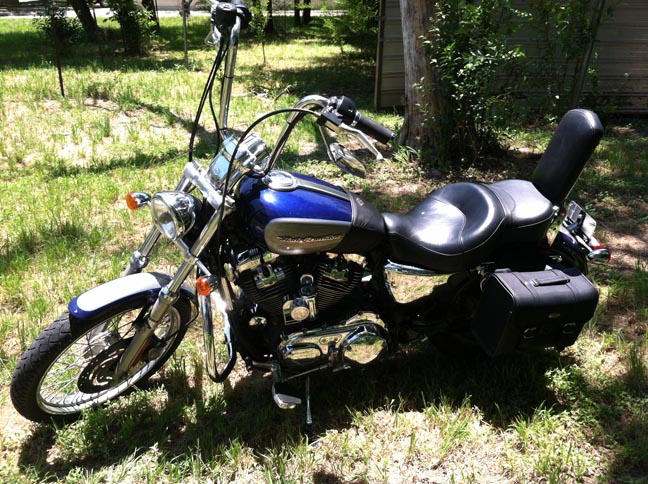
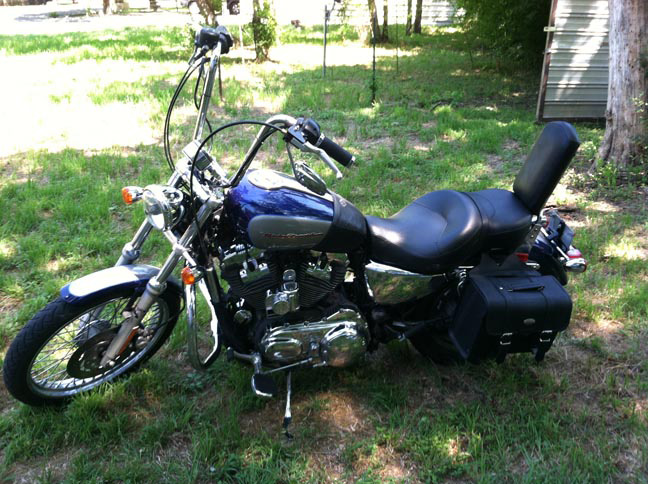
Before:
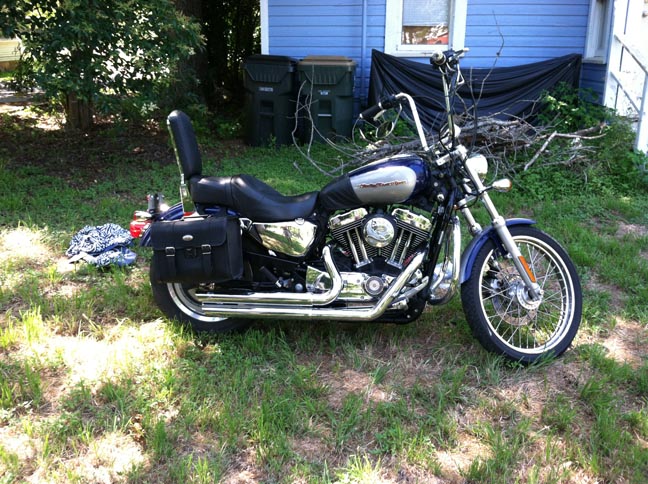
After:
So as promised here is a short part list and guide to changing the custom speedo mount to a low style one... follow at your own risk...
Cost: ~$250
Performed on: 2007 EFI XL1200C
Frustration level: Low
Time Required: 3-4 Hours
Part List:
55846-05A - Chrome Speedo Housing
67089-05 - Chrome Speedo Back Cover
67104-95 - Speedo Cushion
67121-95A - Front Speedo Gasket
68813-07 - Wire Harness
68513-95A - Warning Lamp Bezel
56541-86A - L Handlebar Clamp
56542-86A - R Handlebar Clamp
2325 - Screw x2 - For Lamp Bezel
2361 - Screw x2 - For Speedo
3210A - Screw x4 - For Speedo Bracket
Guide:
Start by removing the riser cover. It's just these two torx screws:
With that cover off, loosen the alan screws holding the current speedometer mount on:
I just leaned my bars forward and left everything attached to them.
At this point I unscrewed the two alan screws on the back of the speedo, took the rubber cover off the button, unscrewed the plastic ring from the button (save the ring and the rubber), disconnected everything from it, and set it (along with the new gaskets) in the new housing.
The next step was a little tricky just because I couldn't figure out where the wire harness went to. Luckily I decided to
So remove the tank and look for the plastic part where all the wires run to:
Note that it is held on by a torx screw! I don't have a picture of that (sorry) but in the next photo you can see the harness connector and the hole where the torx screw screws into circled:
Getting closer:
I had to cut one of the zip ties that held the connector in place but after that it came right out.
Now just route the new harness where the old one was, connect it, zip tie it back, and put the plastic back together. Also worth doing is connecting the speedo to the new harness and making sure all the lights work.
Next thing to do is remove the stock riser. Here you can see one of the bolts that keeps it on. There is one on each side:
I applied a little Loctite the riser bolts and then loosely screwed them into the new risers. (As seen above also)
Attach the bezel to the speedo bracket (making sure it is the correct orientation) and then screw in the lights from the harness (again, making sure it is the correct orientation... it says 'Top' and has an arrow) using the 2325 screws.
Next step is to loosely attach the speedo bracket to the risers and get the risers almost snug. I did this to make sure they wouldn't spin around while I was screwing them in.
After that just replace the handlebars and snug everything up. Then plug in the speedometer, align the button, and screw on the backplate. Replace the plastic ring and rubber cover on the button. Check and make sure everything works.
Once everything is aligned and to you liking go back and tighten the bolts holding the risers on and then the alan screws holding the speedo bracket on.
After all that is done replace the tank/seat.
Before:
After:

Thread
Thread Starter
Forum
Replies
Last Post
erbilabuc
Sportster Models
12
03-24-2020 12:35 AM
128auto
Sportster Models
0
11-11-2006 12:23 AM