
Turn Signal relocation instructions Nightster
#11
 09-29-2010, 07:37 PM

What I was thinking though is that by shaving those things down an inch or so and attaching some of those really cool HID bullet style driving lights from Arlen Ness, etc.. I could get a lot more light out on the road. Turn signals aren't required in Maryland, this would may be a cool mod, eh?
#12
09-29-2010, 09:29 PM

Grand HDF Member
Nice write-up, Mr. Blaze.
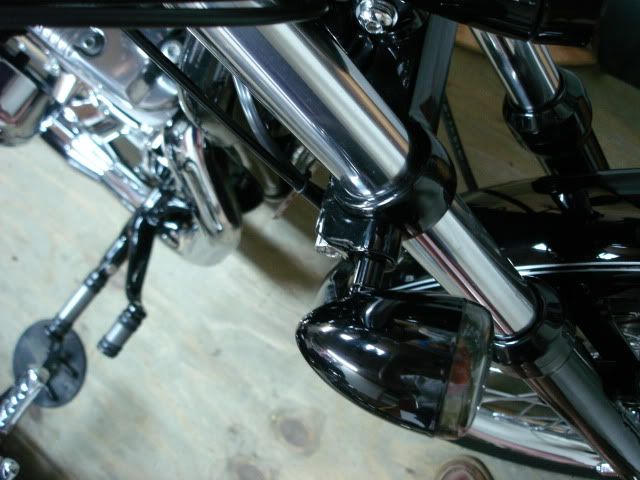
Because of the way they're cast, it's difficult to cut them down and still mount something to 'em. With some patience, epoxy and a washer I've seen it done. I think it's easier/cleaner to get the other. These (from Dennis Kirk) were shaved down for a tight fit then powder coated. I used a powdered spacer, too:
I'm not sayin' don't use the Harley ones. They look great on the OL's bike with a windshield. Her's have not cracked in 7 years.
The tiniest of zip-ties on the triple clamp bolt makes it neat.
Harley version cracked
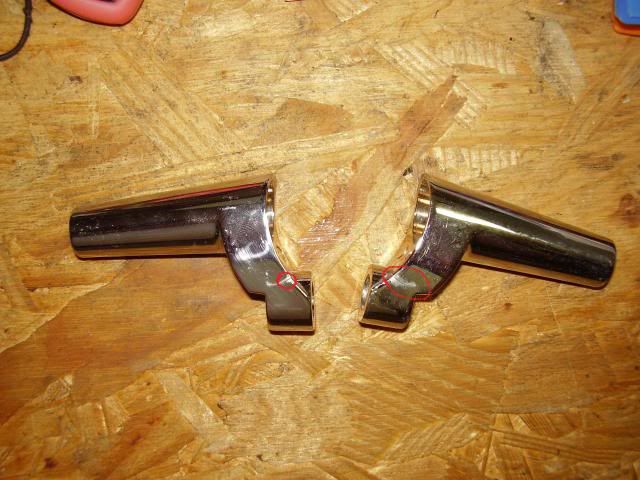
Last edited by HarleyScuba; 09-29-2010 at 09:57 PM. Reason: nice write up
#13
09-30-2010, 07:21 AM
Road Warrior
#14
09-30-2010, 07:38 AM
Yeah I did not cut my wires and I had the HD kit and they did stick out too far and the one cracked. Now I have the clamp style ones from J&P and they look much bette and you can pu them kinds where you want. I have mine up high by the top tree so they are like even with the headlight-looks killer!
#15
09-30-2010, 08:59 AM
#16
09-05-2013, 08:35 PM

5th Gear
Join Date: May 2013
Location: cincinnati, ohio
Posts: 9
Likes: 0
Received 0 Likes
on
0 Posts
Nice write-up, Mr. Blaze.
Because of the way they're cast, it's difficult to cut them down and still mount something to 'em. With some patience, epoxy and a washer I've seen it done. I think it's easier/cleaner to get the other. These (from Dennis Kirk) were shaved down for a tight fit then powder coated. I used a powdered spacer, too:
I'm not sayin' don't use the Harley ones. They look great on the OL's bike with a windshield. Her's have not cracked in 7 years.
The tiniest of zip-ties on the triple clamp bolt makes it neat.
Harley version cracked
#17
09-07-2013, 03:03 PM
Grand HDF Member
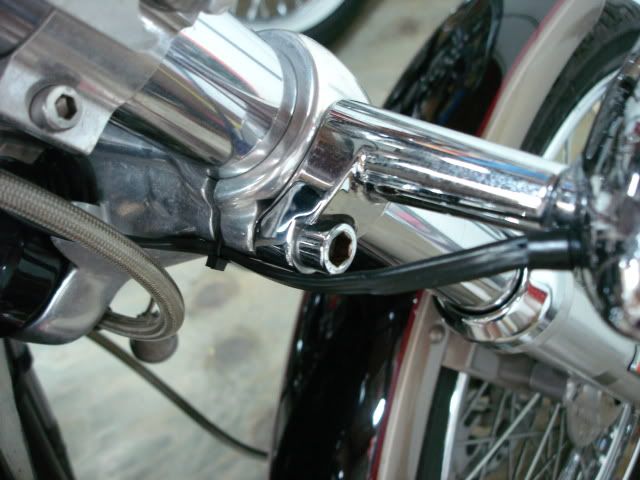
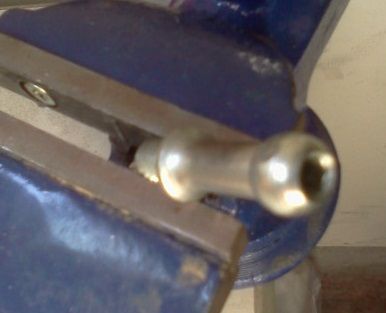
As far as I remember, the ball stud (part #68265-04) un-screwed from the turnsignal housing using a pair of pliers with a combination of brute force and ignorance. Hardware is included with the kit to mount the housings to the new brackets. Use blue Loctite (medium strength) during re-assembly.
Easy peasy.
Easy peasy.

#19
09-07-2013, 04:56 PM
5th Gear
Join Date: May 2013
Location: cincinnati, ohio
Posts: 9
Likes: 0
Received 0 Likes
on
0 Posts
#20
01-17-2014, 05:26 PM


Thread
Thread Starter
Forum
Replies
Last Post
blacksportster05
Sportster Models
22
01-18-2014 01:36 PM