
Tank Lift and Coil/ignition relocation on the 48
#1
 07-12-2010, 07:41 AM

Join Date: Jun 2010
Posts: 132
Likes: 0
Received 0 Likes
on
0 Posts
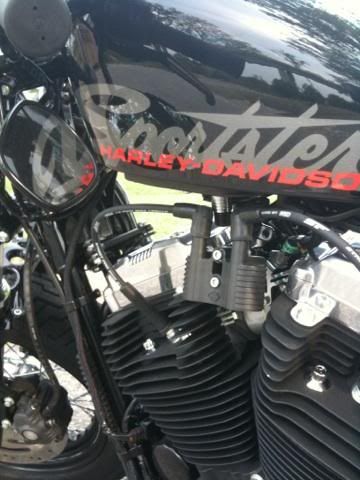
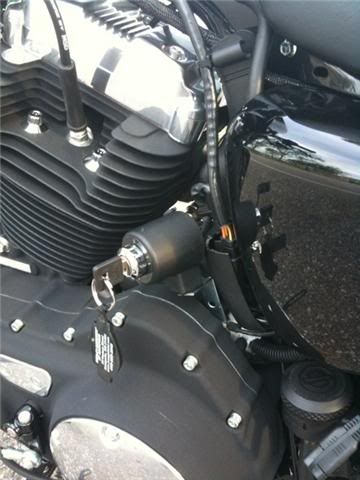
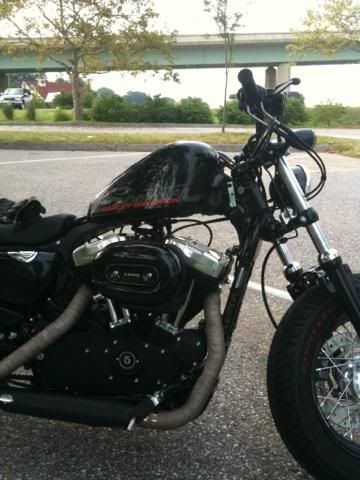
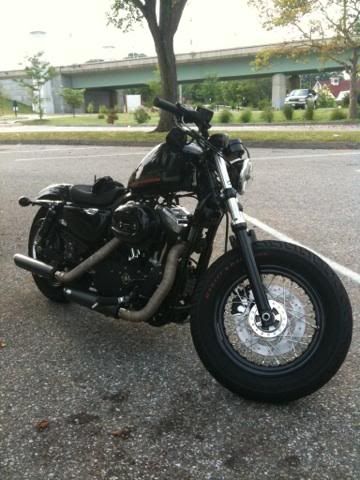
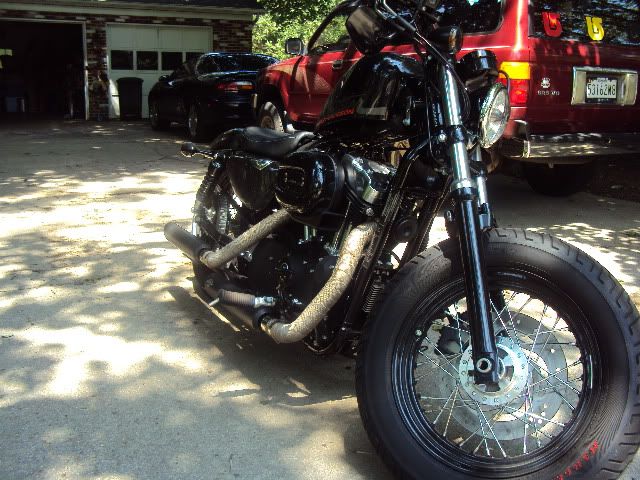
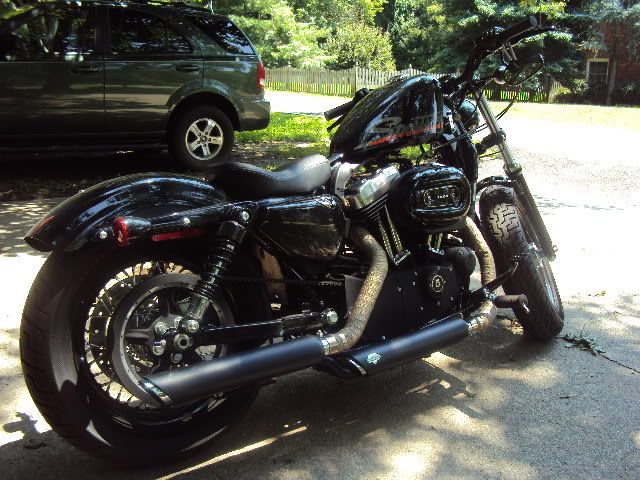
Spent my entire Saturday afternoon relocating the coil/ignition and lifting the tank 2" on my 48. I followed Joebotics writeup relocating the coil to the frams and not the engine. This way the coil is not effected by engine vibration.
The tank was also lifted 2-2 1/2" with some metal brackets i found at HD (Home Depot)
Question for the wire tuck guys, did you really fit all of those wires and connectors under the tank? My wires wrapped around the frame and had some very large connectors on them making the wire tuck very difficult
Pics:
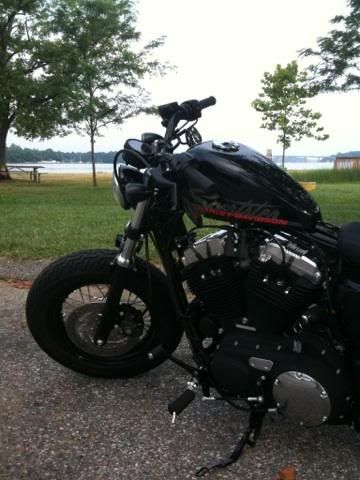
To anyone thinking about doing this mod, the most difficult part was building the new ignition wires. Everything else was fairly simple as long as your familiar with tools and using your hands
Thanks for looking!
The tank was also lifted 2-2 1/2" with some metal brackets i found at HD (Home Depot)
Question for the wire tuck guys, did you really fit all of those wires and connectors under the tank? My wires wrapped around the frame and had some very large connectors on them making the wire tuck very difficult
Pics:
To anyone thinking about doing this mod, the most difficult part was building the new ignition wires. Everything else was fairly simple as long as your familiar with tools and using your hands
Thanks for looking!
#6
07-12-2010, 12:53 PM
Join Date: Jun 2010
Posts: 132
Likes: 0
Received 0 Likes
on
0 Posts
#7
07-12-2010, 01:38 PM
Join Date: Jun 2010
Posts: 132
Likes: 0
Received 0 Likes
on
0 Posts
Trending Topics
#8
07-12-2010, 03:23 PM
Hey Moustache... what I did was to remove all the unnecessary cable protecting covers and remove any ties that kept the cables attached to the chassis, then try to gain some slack by pulling from the cables, then align them on top of the chassis, next wrap the cables around the chassis tubing by using good quality black electric tape... the electric tape really conceals the cables and it is really hard to tell there is electric tape going around the tubing.... good quality electric tape is important so weather and engine heat doesn't damage it...
#9
07-15-2010, 03:28 PM
Join Date: Jun 2010
Posts: 132
Likes: 0
Received 0 Likes
on
0 Posts
Hey Moustache... what I did was to remove all the unnecessary cable protecting covers and remove any ties that kept the cables attached to the chassis, then try to gain some slack by pulling from the cables, then align them on top of the chassis, next wrap the cables around the chassis tubing by using good quality black electric tape... the electric tape really conceals the cables and it is really hard to tell there is electric tape going around the tubing.... good quality electric tape is important so weather and engine heat doesn't damage it...
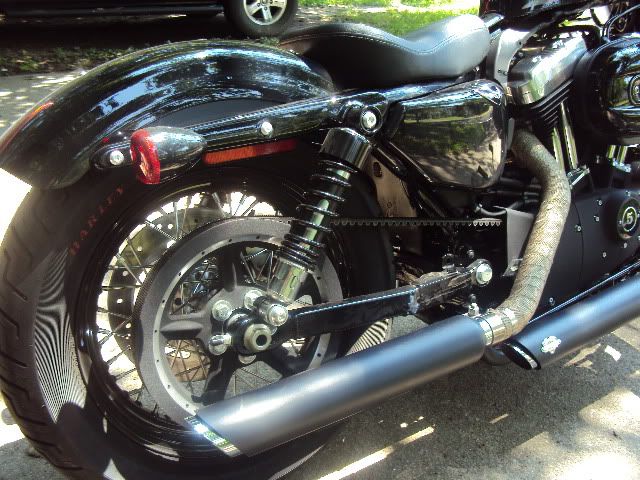
Germdog Heres a photo of the bracket i made for the coil so that it would not rub the fuel line. Its basically an extension down from the bracket in Joebotics thread
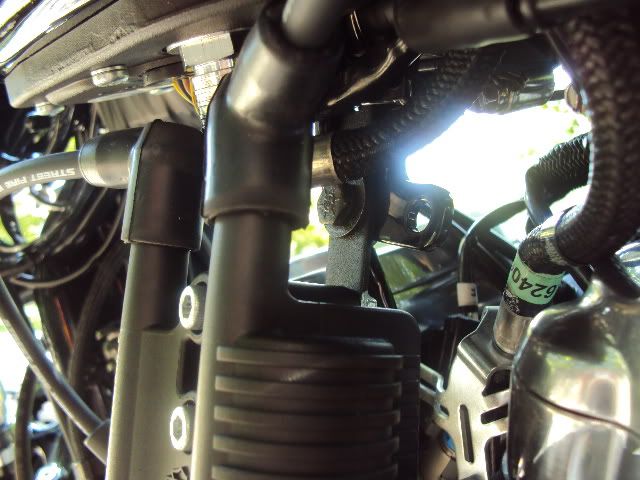
The new gap
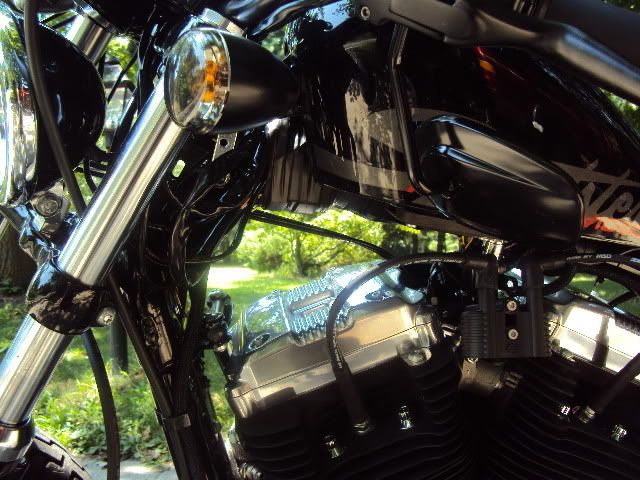
And a few randoms with the upper and lower belt guards removed. The pulley cover is coming off tonight.
#10
07-15-2010, 04:16 PM
Tourer
Join Date: Jun 2010
Location: Joliet, IL
Posts: 255
Likes: 0
Received 0 Likes
on
0 Posts