
Speedo Relocation Instructions (My Version)
#41
 06-02-2009, 09:01 AM


Here are three photos that I took after the cut. Again, I used a portable bandsaw. This created a clean cut.

^^^ When you cut the piece, the metal needs to be grinded smooth to remove any rough and jagged pieces. I tried to leave as much meat above the indicator lights as possible.

^^ Get a better idea of the final result. I have already started to grind down the corners and rear of the bracket but did not have time to take pics. I will continue to work on it tonight.
#42
06-02-2009, 11:19 AM
Hey guys, Great thread!
In efforts to figuring out yet another way to mount the indicator lights, I am entertaining the idea of simply modyfing the stock handlebar/gauge mount. More over, I want to cut off the donut that holds the gauge with a band saw. I believe that there is enough "meat" between the bottom of the donut and the indicator holder for this to work.
Once cut, I would grind the bracket to a nice finish and paint or powdercoat it.
Water tight and stock looking.
So what do you think?
#43
06-02-2009, 11:58 AM

Banned
I wondered if that could be done, I just do not want something that looks cobbed up on the front of my bike. take some pics of the finished product so we can see,
So far Fishboy has the best idea
To add my own fix to the speedo relocate. Everyone has problems not seeing it under the tank. I went to ace hardware and got a longer bolt for the tank mount and a bushing, I cut the bushing about an inch long and put it behind the speedo to push it out a bit. works great and I can see it now.
Last edited by midnight2005; 06-02-2009 at 12:01 PM.
#44
06-02-2009, 09:34 PM
Sorry for the late post... just got in from a long ride! Anyway, take a look at the latest pictures.

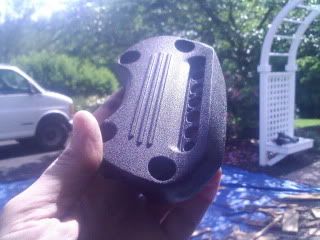
^^^ This is the unit after the grinding. I used a grind wheel and a steel file to get the shape I thought was best.

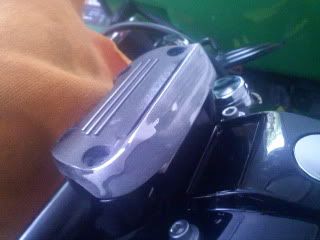
^^^ Another image from the front angle. At this point I am ready to use 100 grit sand paper to smooth even more.

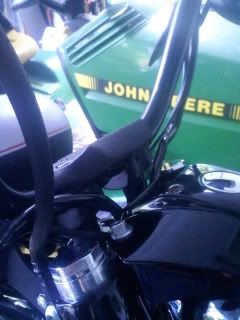
^^^ Here is the bracket placed on the bike... loose as a goose.
^^^ This is the unit after the grinding. I used a grind wheel and a steel file to get the shape I thought was best.
^^^ Another image from the front angle. At this point I am ready to use 100 grit sand paper to smooth even more.
^^^ Here is the bracket placed on the bike... loose as a goose.
#45
06-02-2009, 09:37 PM


#48
06-17-2009, 08:33 AM
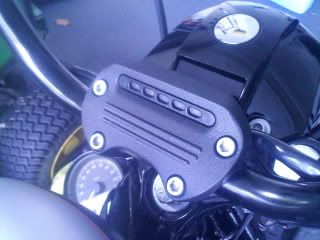
Finally, I had the time to upload the pics of the finished install. Sorry for the delay.
So take a look. I was able to fill the gaps with fiberglass resin, sand it, then use body filler to finish it off. Let me know what you guys think and if you have any questions just ask. Overall, this probably took 3 hours. It was fun and stress free too. I highly recommend.


So take a look. I was able to fill the gaps with fiberglass resin, sand it, then use body filler to finish it off. Let me know what you guys think and if you have any questions just ask. Overall, this probably took 3 hours. It was fun and stress free too. I highly recommend.
#49
06-17-2009, 09:55 AM

#50
06-17-2009, 10:46 AM
Finally, I had the time to upload the pics of the finished install. Sorry for the delay.
So take a look. I was able to fill the gaps with fiberglass resin, sand it, then use body filler to finish it off. Let me know what you guys think and if you have any questions just ask. Overall, this probably took 3 hours. It was fun and stress free too. I highly recommend.

So take a look. I was able to fill the gaps with fiberglass resin, sand it, then use body filler to finish it off. Let me know what you guys think and if you have any questions just ask. Overall, this probably took 3 hours. It was fun and stress free too. I highly recommend.
Last edited by Gpsjr10; 06-17-2009 at 10:58 AM.