Deluxe Pictures
#1801
 12-30-2007, 04:10 PM


T-Rat,
I am NOT familiar with de-pinning anything...I'm not really familiar with much of anything as far as this bike goes though, so please enlighten me! For Instance, I just found that it's preferable to remove the nut on the front side of the rear shock before the bolt on the rear (despite what the shop manual has to say). Your tips are already easing my mind with this "simple" mod.
Thanks again,
-Shredder
#1802
12-30-2007, 05:52 PM
Here is a link to get the extension kit. There are other suppliers, this was just easy to find.
http://www.jpcycles.com/productgroup...=novello%C2%A0
Now for "de-pinning" or disassembly of your connectors. This next link does not show the Deutsch DT06-6S connector but it is very similar.
http://www.laddinc.com/howto-dtm.aspx
The orange wedge it is referring to is the top cap/lock for your connector. Once that cover is removed (small screwdriver prying straight up) you will look down into the connector and you will see the 2 clips that hold the pins in place. Flex them toward the center of the connector and slide the wire and pins from the backside. BEFORE YOU DO ANYTHING; map the back of the pins. 1-6 and make sure you know what color wire goes where.
Hope that sheds some light on things.
Lemme know if you need anything else.
OH YEAH!!!! Shim your brake lever with some cardboard before you try to put it back on the bars or you will break the plunger switch that activates your rear brake light. Slightly compress your brake lever and place about 1/8" worth of cardboard between the brake fluid reservoir and the face of the brake lever.
#1803
12-30-2007, 06:15 PM
Shred, do yourself a favor; get one of these........
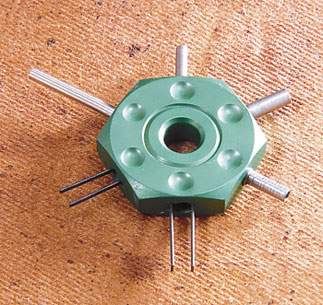
Electrical Pin Removal Tool
Link......
http://www.jpcycles.com/productgroup...ley&page=1
It'll save you a big headache if you're doing it yourself; ........ believe me.
And a bud of mine just got a Cirrus SR22, .......now that my friend is the ticket. And with the Caps system; hell, even my white knuckled wife would go up in it.
Edit//..... Oh, looks like you got there before me T Rat. Good links those.
#1804
12-31-2007, 12:23 PM
Outstanding HDF Member
Join Date: Dec 2007
Location: My Mother
Posts: 2,305
Likes: 0
Received 0 Likes
on
0 Posts
#1805
12-31-2007, 12:25 PM
T-Rat,
That is one fantastic looking Deluxe!
That is one fantastic looking Deluxe!
ORIGINAL: T Rat
Here is a link to get the extension kit. There are other suppliers, this was just easy to find.
http://www.jpcycles.com/productgroup...=novello%C2%A0
Now for "de-pinning" or disassembly of your connectors. This next link does not show the Deutsch DT06-6S connector but it is very similar.
http://www.laddinc.com/howto-dtm.aspx
The orange wedge it is referring to is the top cap/lock for your connector. Once that cover is removed (small screwdriver prying straight up) you will look down into the connector and you will see the 2 clips that hold the pins in place. Flex them toward the center of the connector and slide the wire and pins from the backside. BEFORE YOU DO ANYTHING; map the back of the pins. 1-6 and make sure you know what color wire goes where.
Hope that sheds some light on things.
Lemme know if you need anything else.
OH YEAH!!!! Shim your brake lever with some cardboard before you try to put it back on the bars or you will break the plunger switch that activates your rear brake light. Slightly compress your brake lever and place about 1/8" worth of cardboard between the brake fluid reservoir and the face of the brake lever.

#1809
01-02-2008, 10:46 AM

Hey guys!
I just received the seat retaining nuts from Mark. Outstanding workmanship! this is one product you would be proud of, putting in your bike. Just make sure you keep a very good eye on it. there will be people that will be very jealous of it. If you have not ordered one yet, get on it. It will not last long.
Thanks again, Mark for a quality product.
#1810
01-02-2008, 05:09 PM
Road Master
ORIGINAL: commander112
I just received these today and wanted to thank FLSTNI (Mark) for the speedy service and excellent quality part! Those of you that want some really nice seat nuts (I said nuts!)should contact him and get a set. Not cheap but good quality never is.
Mark
ORIGINAL: FLSTNI
Hey Group,
Sorry, the original pics I posted regarding my billet machined seat retaining nuts were indeed small. Hope this helps. Anyone interested....please contact me at mjdebellis@optonline.net. I've been getting alot of interest and I'm in the midst of another production run. Happy and Safe riding to all....
[IMG]local://upfiles/9797/F2591F4336BD4B8591A9712C44D89F02.jpg[/IMG]
[IMG]local://upfiles/9797/8D66366A32304E53A43218579A7DC9C7.jpg[/IMG]
[IMG]local://upfiles/9797/0A392864F3844DD994DCDC67D08E4AAD.jpg[/IMG]
[IMG]local://upfiles/9797/15F5CC360E134B87BD15644852721FB7.jpg[/IMG]
[IMG]local://upfiles/9797/20F35754F5814B2FA74473C970FCADEA.jpg[/IMG]
Mark