My Softail Build

#22
 06-22-2012 | 12:24 PM
Thread Starter
|
Novice
Joined: May 2012
Posts: 22
Likes: 0
From: Ohio
So figured I would post some of my research that might be helpful to everyone:
For the rear tire I decided to go with a slightly wider tire, mainly for the ability to go to a small side wall. My setup is going to be 9mm taller than stock on the rear
Rear Tire Heights
Width Side Wall % Total Height (mm)
130 - .9 -640.4
150 - .7 - 667.2
150 - .6 - 637.2
160 - .7 - 681.2
160 - .6 - 649.2
160 - .55 - 633.2
Last edited by williegbiker36; 06-22-2012 at 01:09 PM.
#24
06-26-2012 | 04:13 PM
Thread Starter
|
Novice
Joined: May 2012
Posts: 22
Likes: 0
From: Ohio
So the weekend was not as successful as I wanted it to be... i have had some very unfortunate dealings with a particular vendor and they are promising me (for the fourth time ) that all the "RIGHT" parts will be to my door step by this weekend.
and to top it off I forgot the camera at the shop so I cant even post up any pictures. haha
I was able to mess with rear wheel and sprocket spacing and I have decided to go with a 1.375 inch left rear axle spacer and a .625 right rear axle spacer. These were the closest spacers I could find to my actual measurements of 1.4 inches and .69 inches... I hope that this will be close enough??
as for the rear sprocket spacer to align with the .750" offset front sprocket I decided to go with a .125 inch spacer behind my straight (non-offset) rear sprocket. The actual measurement was .1181 inch so once again I hope this works?
**Keep in mind I have a hub made for a 2000 and up softail not a 1992 so this hub is considerably wider than a stock softail. I will get the shots of this uploaded next weeked.
Last edited by williegbiker36; 06-26-2012 at 04:17 PM.
#25
07-02-2012 | 07:20 PM
Thread Starter
|
Novice
Joined: May 2012
Posts: 22
Likes: 0
From: Ohio
All I can say is thank God for generators. Most of Ohio was (still is) without power and of course where I am working on my bike was without power too....
So as you can guess this weekend started out just as bad if not worse than last weekend... but after 2 hours of tinkering with a damn generator I got to work on the bike...The results to follow:
So as you can guess this weekend started out just as bad if not worse than last weekend... but after 2 hours of tinkering with a damn generator I got to work on the bike...The results to follow:
#26
07-02-2012 | 07:54 PM
Thread Starter
|
Novice
Joined: May 2012
Posts: 22
Likes: 0
From: Ohio
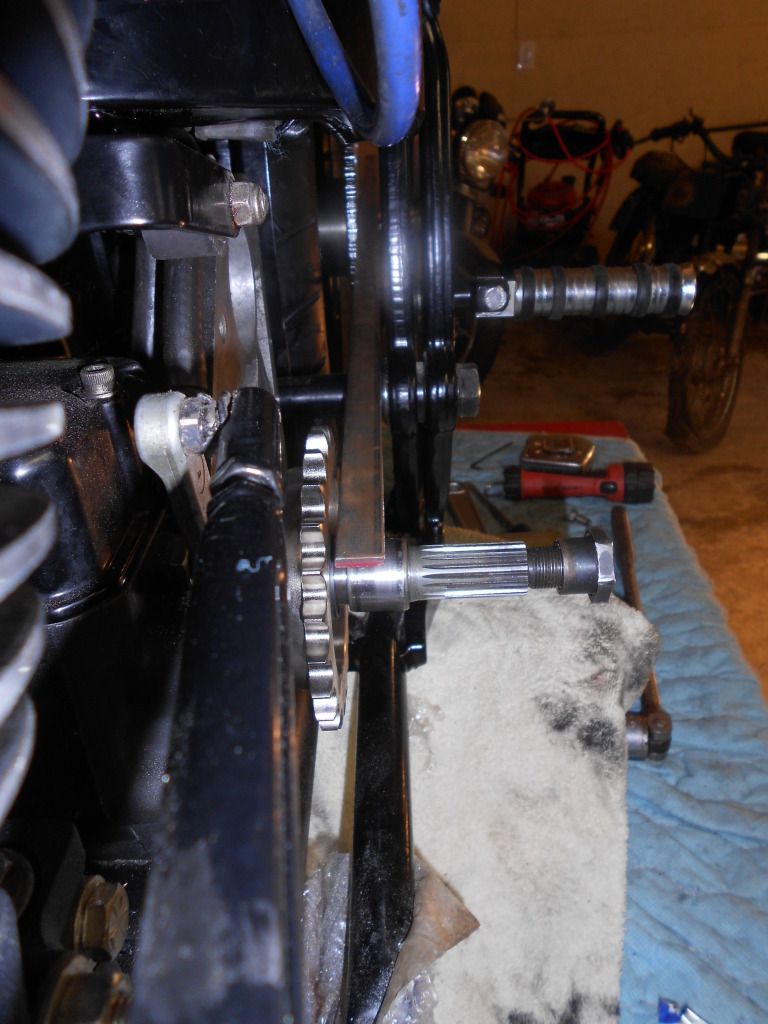
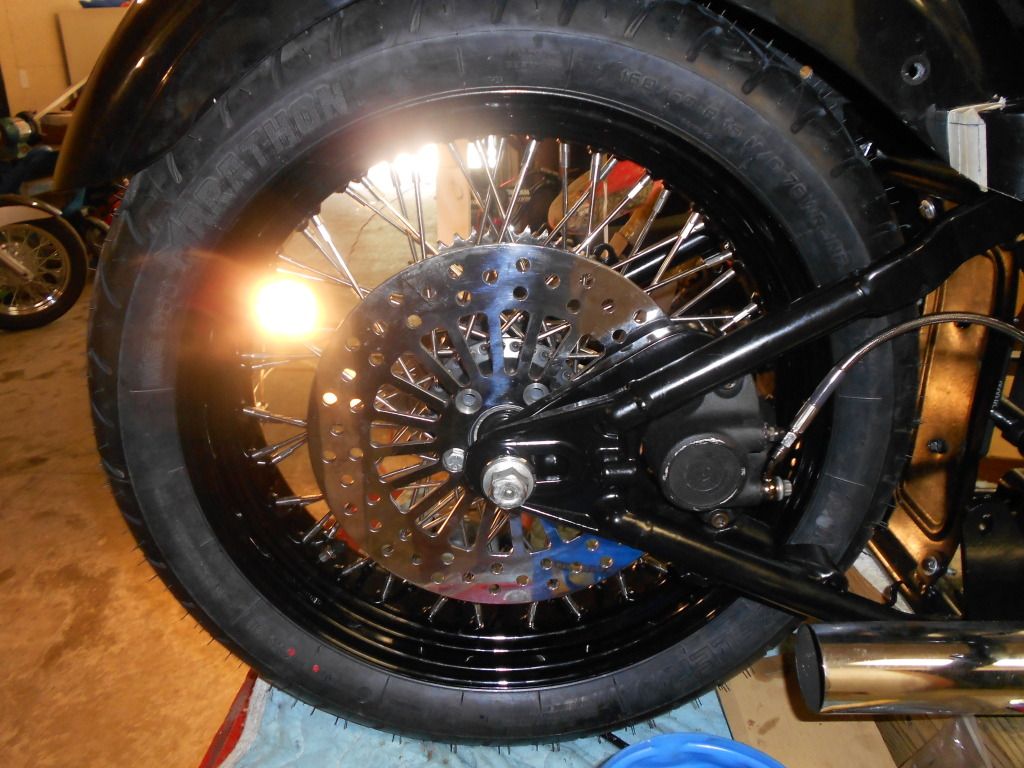
So first starting with the new rear wheel setup I decided to go with a 1.375" left axle spacer and a .625" right axle spacer. This spacing allowed for the rear brake rotor to align nicely with the stock caliper:
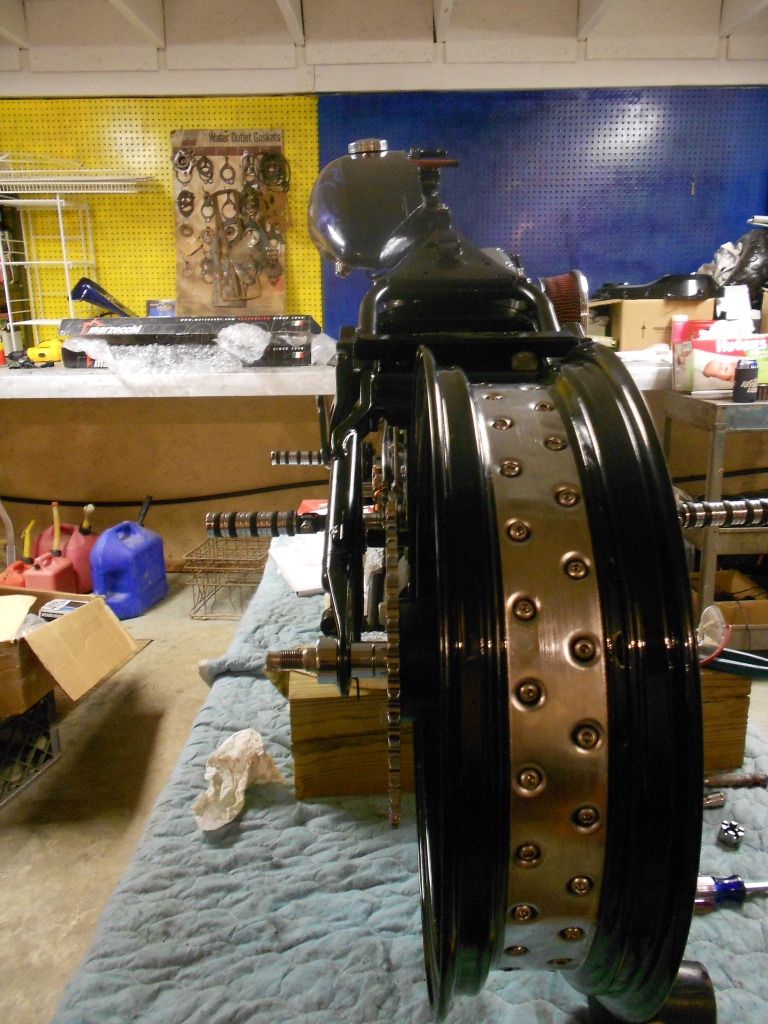
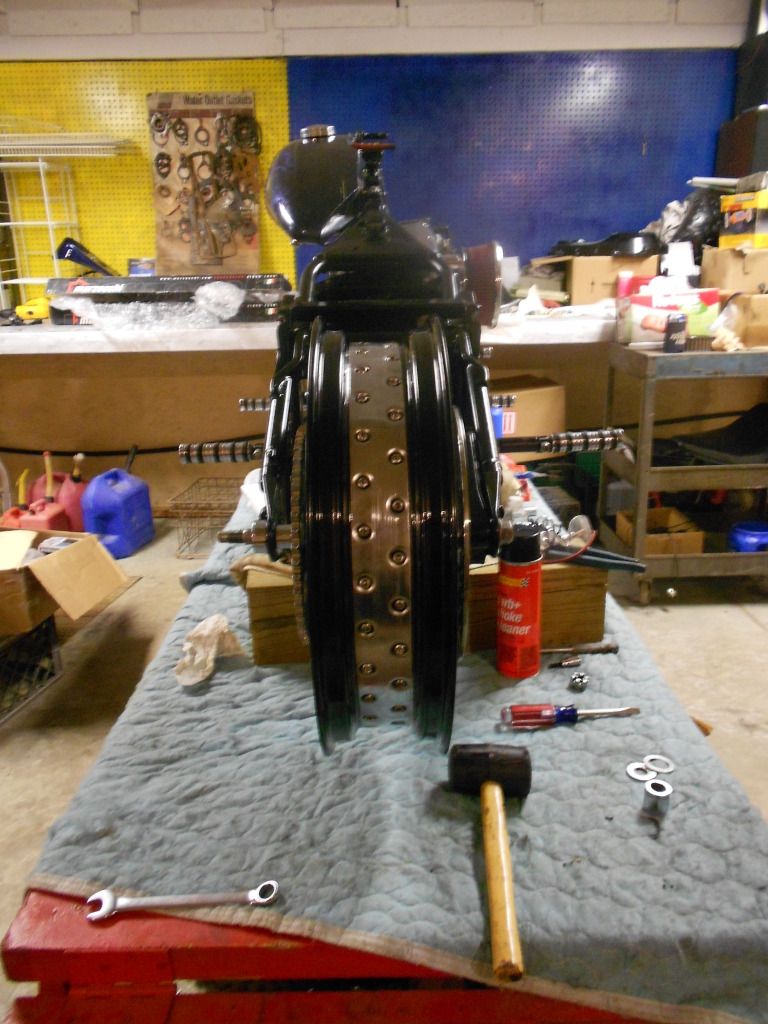
Next after several measurements with a metal straight edge I decided to buy two seperate sprocket spacers and use which everyone worked best, the two available that were closest to my measurments were .125" and .062". My original measurement was .1181" so I decided to try the .125" first. As you can see in the picture below it was a little to far so I switched to the .062 spacer and the sprockets line up perfect now.
(with the .125 rear sprocket spacer)
#27
07-02-2012 | 08:04 PM
Thread Starter
|
Novice
Joined: May 2012
Posts: 22
Likes: 0
From: Ohio
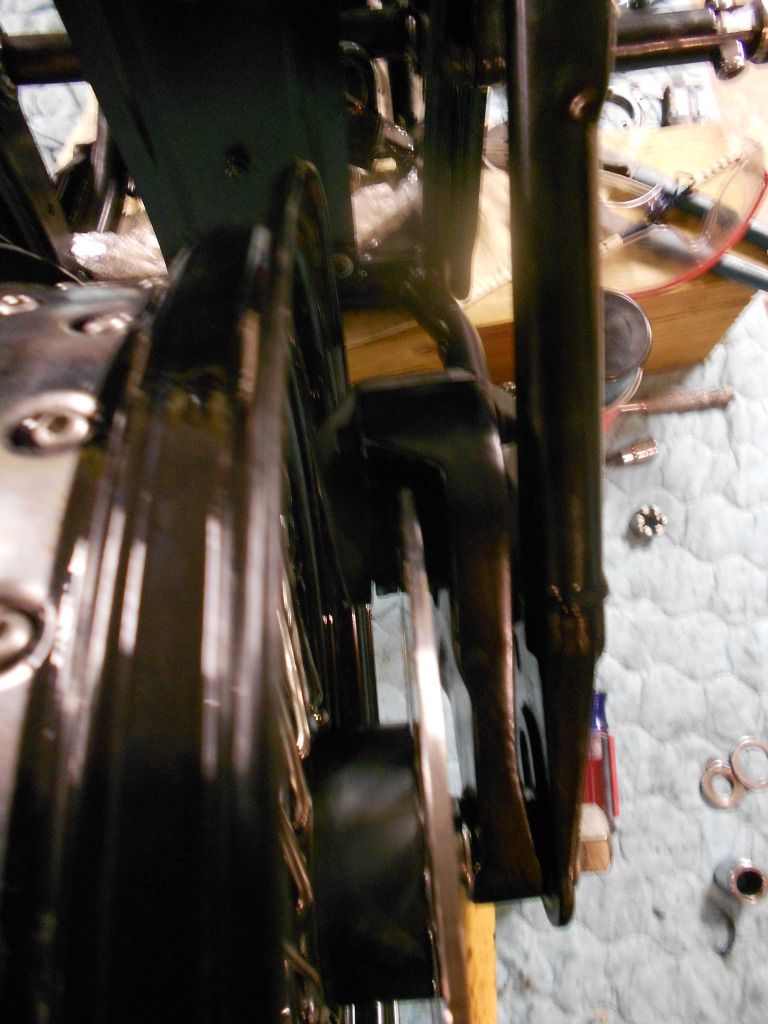
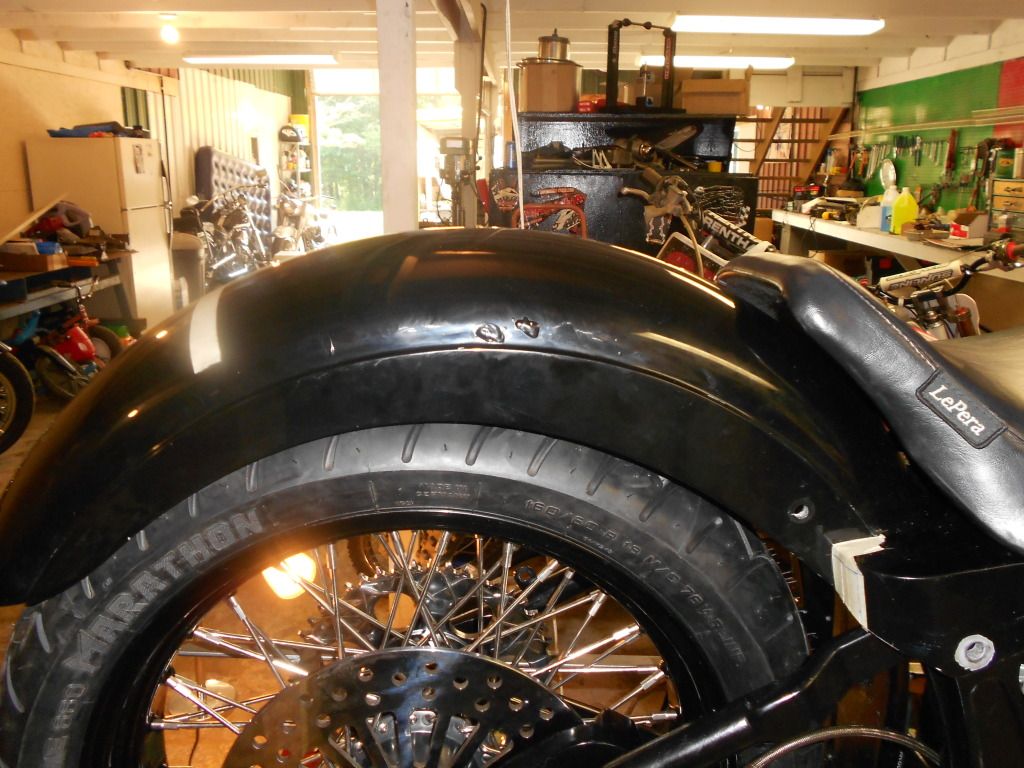
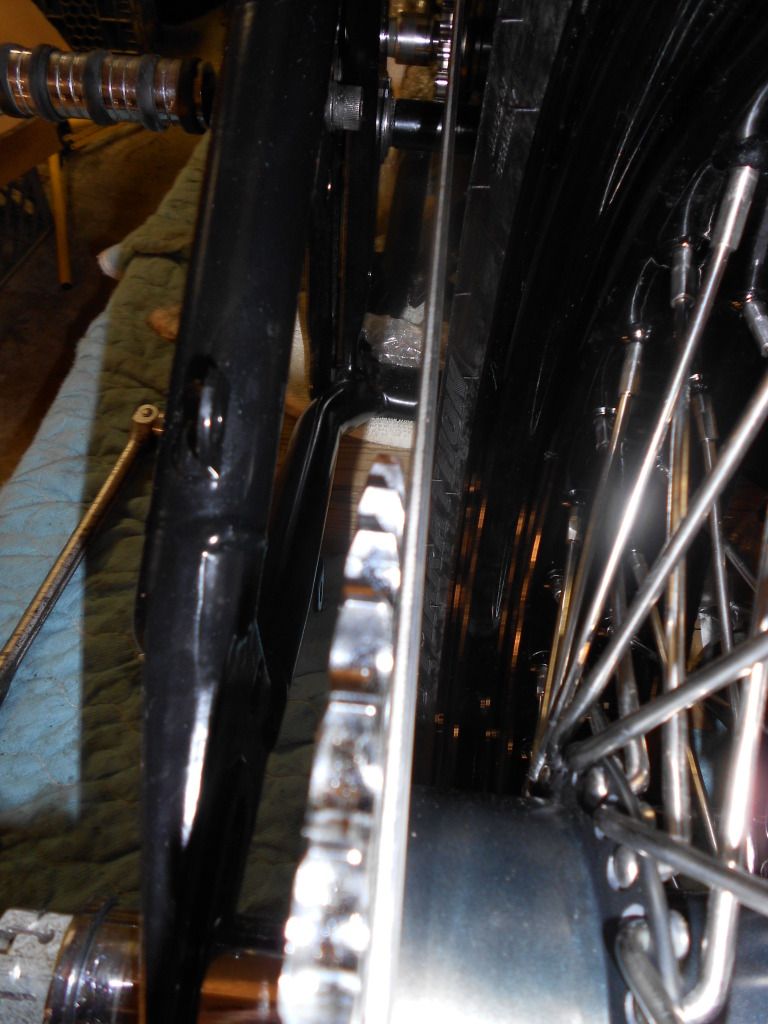
Next on the rear wheel I had to mount the rear fendor and make adjustments to the rear rim to fit centered in the fender... In order to do this I trued the rear rim with about .5" offset so that it would do two things, 1st pull the tire away from the chain for clearance and 2nd allow the 160mm tire to fit in a "150 max" rated rear fendor. The tire I went with is a 160/60/18 Metzeler
Chain to tire clearance:
Chain to tire clearance:
#29
07-02-2012 | 08:11 PM
Thread Starter
|
Novice
Joined: May 2012
Posts: 22
Likes: 0
From: Ohio
In case you guys are wondering what the masking tape is on the rear fendor there are three different cuts I plan to make. one across the rear to give me better tire clearance and a cooler look and the other two are where the swingarm is coming up and hitting the fendor.
I ran this strutless fendor before and it was stock height (not lowered) and there were signs of where the swingarm had been hitting... now the bike is lowered 1 1/4 inches so I am imaging it will only hit worse unless I make these releive cuts;
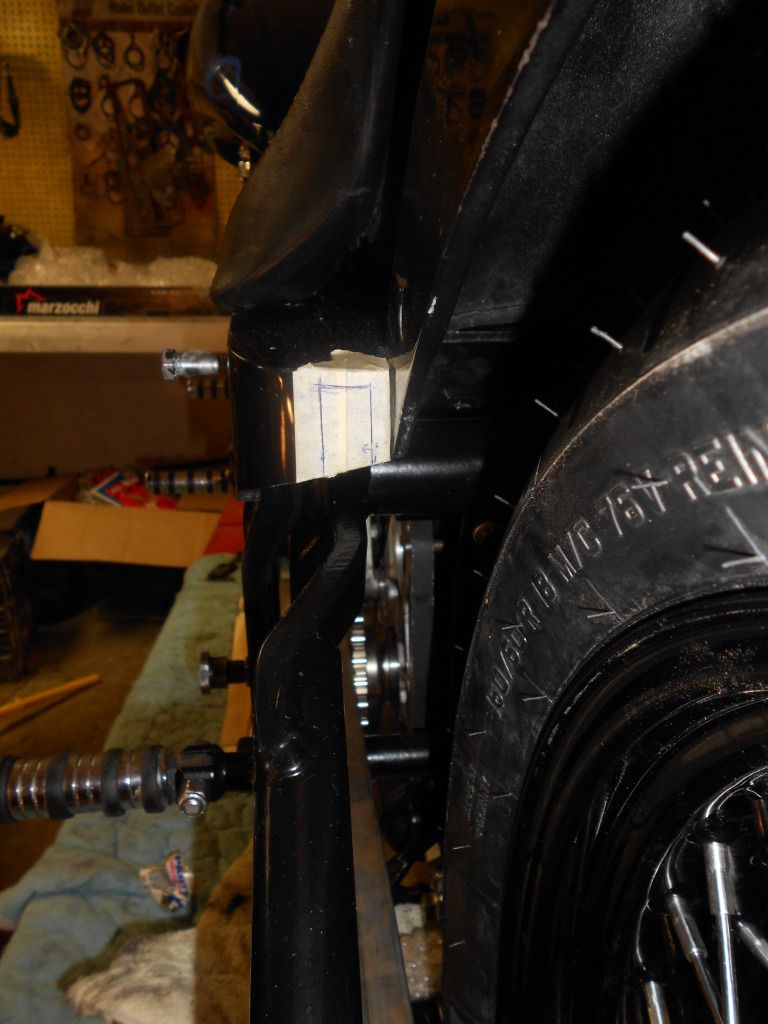
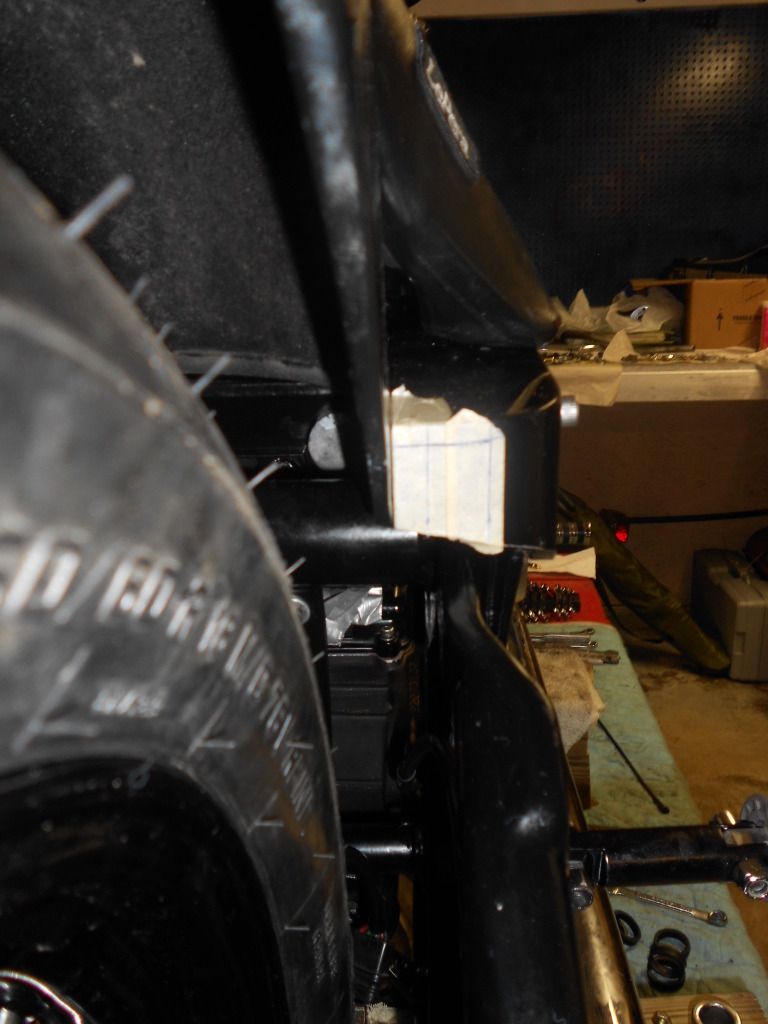
I ran this strutless fendor before and it was stock height (not lowered) and there were signs of where the swingarm had been hitting... now the bike is lowered 1 1/4 inches so I am imaging it will only hit worse unless I make these releive cuts;
Last edited by williegbiker36; 07-02-2012 at 08:13 PM.
#30
07-06-2012 | 11:15 AM
Thread Starter
|
Novice
Joined: May 2012
Posts: 22
Likes: 0
From: Ohio
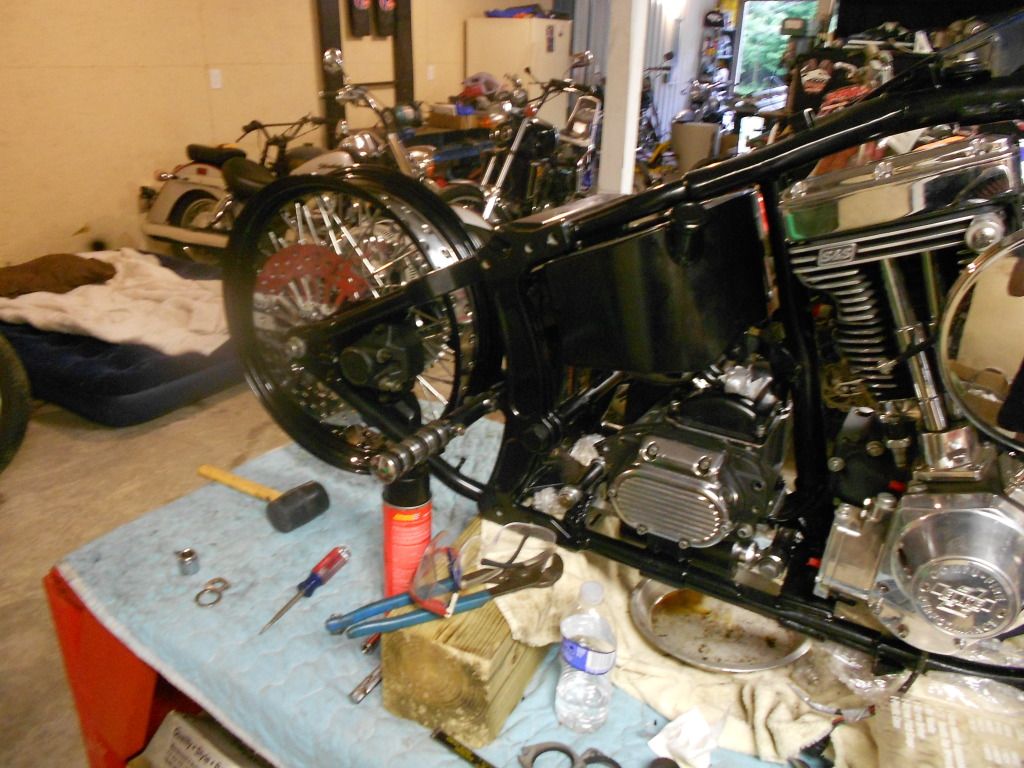
I didn't get the pictures posted but last weekend I was able to install the Barnnet Scoriopn Clutch, new Diamond primary chain and the inner and out primary cases. (will post pics later).
I was also able to get the triple clamps, forks, risers handle bars, headlight and hand controls on as well.
This weekend I hope to tie up a bunch of little things... cut dive chain, mount license plate, brake light, bolt rotor and sprocket on, bleed rear brakes and have the rear end completly ready to go.
I also hope to cut custom oil lines and mount them. Mount the horn, ignition, and oil cooler (all to be custom mounted). Wrap the exhaust and mount. Put together the carb parts that were missing and mount the carb and then begin wiring.
I am really really hoping to fire this thing up and do some heat cycles next weekend and possibly even get her on the road for some test and tuning.
Ambitious ... but possible