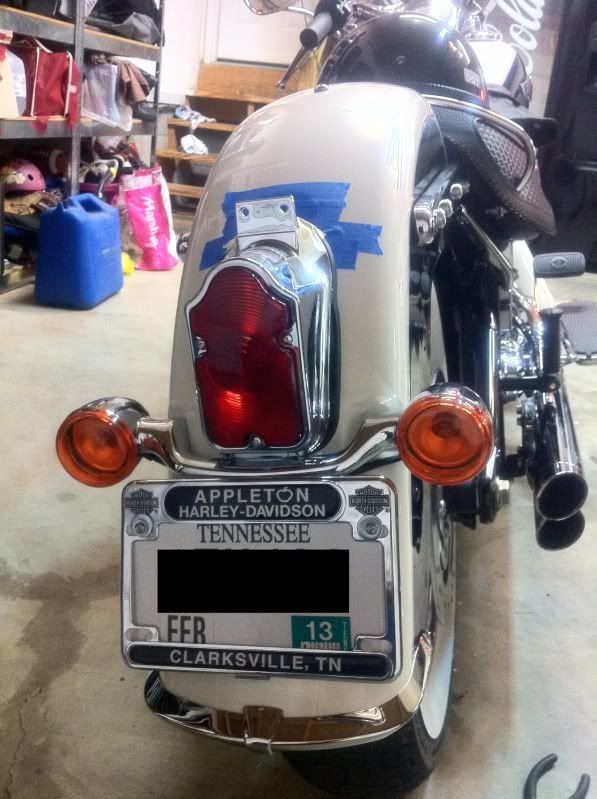
Free low plate mount!
#1
 02-29-2012, 09:29 PM


Join Date: Jan 2012
Location: TN
Posts: 21
Likes: 0
Received 0 Likes
on
0 Posts
Hey guys, I just got a new Deluxe and the top mount plate looked like ***. I was able to use the stock plate mount and make a new low mount for the grand total of free.
The step by step.
1. Remove the license plate.
2. remove three allen screws that hold the tail light cover on.
3. Remove tail light cover (you might have to loosen the two bolts inside the rear fender and wiggle the bliker mount to get it off)
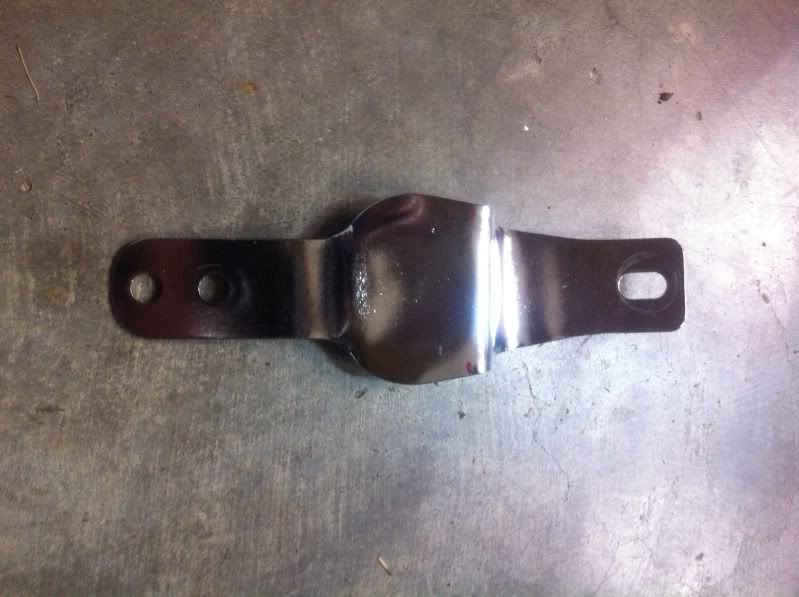
4. Above the tail light is two bolts that hold on the stock license plate bracket to the rear fender. Remove these two bolts and the bracket. Keep this bracket as it will be our new mount!
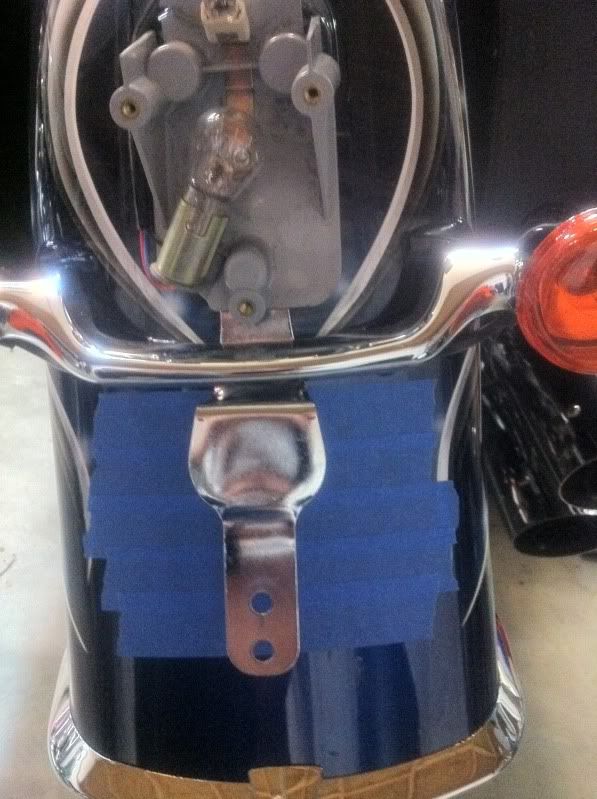
5. Reach up inside the rear fender, and remove the single bolt retaining the bottom of the weather proof cover for the back side of the tail light.
6. Pull down on the weather proof cover to remove it.
7. Remove the three nuts on the studs that hold the tail light assembly to the fender.
8. Carefully slide the tail light out of the rear fender.
The single lower stud is the new mount for the low mount plate.
Take the stock license plate bracket, and wrap it in masking tape to protect the finish, also mask the rear fender below the blinker assembly to protect your paint while working in this area.
We used a bench vise with some inner tube rubber to flateen the stock license plate mount completely. When you are done it should be perfectly flat, with a slight concave shape on one end. This concave end is the end that mounts under the lower tail light stud.
9. Slide the flat bracket between the blinker assembly and hold in place with the lower tail light stud.
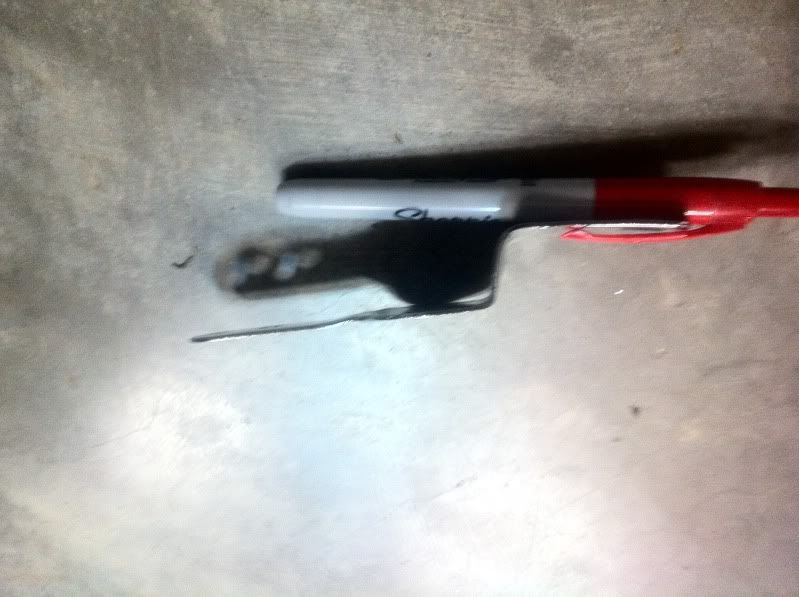
10. Mark the bracket approximatley 1/8 inch below the blinker assembly.
11. Remove the bracket.
12. Place the bracket in the vise ensuring it is square, at the mark you made.
13. Bend the bracket away from the concave side(or toward the convex side) approximatley 80 degree. Go slow, its very important to make this bend completly square and no over bend. The more bending and rebending you do the worse the finish will be and the more likely you are to crack it.
14. Repeat step 9.
15. Mark the bracket flush with the trailing edge of the blinker assembly.
16. Remove the bracket.
17. Place the bracket in the vise square with the new mark.
18. Bend the bracket until it is almost parrallel with the concave mounting section.
19. Reinstall bracket and check all bends to make sure they are where you want them,
20. Drink a beer.
21. Tighten lower mount bolt to hold bracket securely in place. Make sure bracket is vertical and plumb before tightening.
Here you can use a little creativity in how you want to proceed. This is what I did.
I removed the reflector from the stock license plate mount, and removed the two screws behind it. Then I bolted the license plate frame to the stock plate mount and centered it on the new low mount bracket, and marked when the two screw holes behind the old reflector were on the new bracket. I removed the bracket and drilled the two new holes. Then I bolted it all together. Centerd and secured plate into backside of frame using 3m double sided tape. I had to drill new holes in my plate as it didnt match the frame or the stock plate mount.
Then simply reverse the order of disassembly. The two screws that held the original plate mount, also hold the clip for the top of the weather proof cover up under the rear fender. Make sure you put that back in before installing the tail light, its a little easier then. Also getting the cover back under that clip was a bit of a PITA.
Took about a hour to do this whole thing.
The step by step.
1. Remove the license plate.
2. remove three allen screws that hold the tail light cover on.
3. Remove tail light cover (you might have to loosen the two bolts inside the rear fender and wiggle the bliker mount to get it off)
4. Above the tail light is two bolts that hold on the stock license plate bracket to the rear fender. Remove these two bolts and the bracket. Keep this bracket as it will be our new mount!
5. Reach up inside the rear fender, and remove the single bolt retaining the bottom of the weather proof cover for the back side of the tail light.
6. Pull down on the weather proof cover to remove it.
7. Remove the three nuts on the studs that hold the tail light assembly to the fender.
8. Carefully slide the tail light out of the rear fender.
The single lower stud is the new mount for the low mount plate.
Take the stock license plate bracket, and wrap it in masking tape to protect the finish, also mask the rear fender below the blinker assembly to protect your paint while working in this area.
We used a bench vise with some inner tube rubber to flateen the stock license plate mount completely. When you are done it should be perfectly flat, with a slight concave shape on one end. This concave end is the end that mounts under the lower tail light stud.
9. Slide the flat bracket between the blinker assembly and hold in place with the lower tail light stud.
10. Mark the bracket approximatley 1/8 inch below the blinker assembly.
11. Remove the bracket.
12. Place the bracket in the vise ensuring it is square, at the mark you made.
13. Bend the bracket away from the concave side(or toward the convex side) approximatley 80 degree. Go slow, its very important to make this bend completly square and no over bend. The more bending and rebending you do the worse the finish will be and the more likely you are to crack it.
14. Repeat step 9.
15. Mark the bracket flush with the trailing edge of the blinker assembly.
16. Remove the bracket.
17. Place the bracket in the vise square with the new mark.
18. Bend the bracket until it is almost parrallel with the concave mounting section.
19. Reinstall bracket and check all bends to make sure they are where you want them,
20. Drink a beer.
21. Tighten lower mount bolt to hold bracket securely in place. Make sure bracket is vertical and plumb before tightening.
Here you can use a little creativity in how you want to proceed. This is what I did.
I removed the reflector from the stock license plate mount, and removed the two screws behind it. Then I bolted the license plate frame to the stock plate mount and centered it on the new low mount bracket, and marked when the two screw holes behind the old reflector were on the new bracket. I removed the bracket and drilled the two new holes. Then I bolted it all together. Centerd and secured plate into backside of frame using 3m double sided tape. I had to drill new holes in my plate as it didnt match the frame or the stock plate mount.
Then simply reverse the order of disassembly. The two screws that held the original plate mount, also hold the clip for the top of the weather proof cover up under the rear fender. Make sure you put that back in before installing the tail light, its a little easier then. Also getting the cover back under that clip was a bit of a PITA.
Took about a hour to do this whole thing.

#3
02-29-2012, 10:34 PM
This here Raiantz plate light will help you out if you need it for inspections or whatever.
What are you going to do about the housing now, with the plate light at the top?
Props for a great free mod!
What are you going to do about the housing now, with the plate light at the top?
Props for a great free mod!
#5
03-01-2012, 09:36 AM
#6
03-01-2012, 10:22 AM
#7
03-01-2012, 10:46 AM
Trending Topics
#8
03-01-2012, 11:08 AM
I noticed that the ones in the link are from Hong Kong. How long did it take for you to get them? Are there any US sellers selling them on ebay?
#10
03-01-2012, 03:00 PM
you can also get them in most auto parts stores, but if i remember correctly they might be plastic.