Fatbones fender swap
#1
 04-20-2009, 10:29 AM

Hi Guys, just a rundown on swapping out the rear fender of a crossbones for a new style fatboy one if you are of a mind.
It is a relatively easy job if you know your way round a toolbox. The only thing you need to be careful of is the rear backing plates inside the fender (the ones which hold the rearmost nuts for the side-struts). These backing plates are quite deep on the XB where the fixings go to hold the combined tag plate and rear light assembly, and the tops of these plates need trimming off a tad or they won’t bolt up flat against the inside faces of the fender.
There is enough ‘meat’ on these backing plates to allow trimming them down to clear the fender whilst still saving all the holes, just in case you would ever feel the need to go back to standard. Although I would suggest a lie down in a darkened room would be enough to make any such feelings go away!
Removing the seat and unhooking the ECU connection and the lighting harness connector sees you ready to take off the standard fender. Be careful, the four torx bolts to the main frame will release the whole fender assembly in one foul swoop, but you may find it a good idea to slack off all the other screws holding the side-struts on before you attack these. It’s a lot easier doing this on the bike than rolling around on the floor fighting loctited screws with an allen wrench, take my word for it.
Get someone to help with the weight of the fender whilst you remove the four main screws - if you’re not careful you could end up scratching the top of your oil tank, don’t ask me how I know!
With the fender off it’s mainly just a case swapping over all the ancillary parts except for: a/ you need to carefully strip off the rubber cable tube with the harness inside; the glue stays on the old fender. You will also need something to stick it back on to the new fender with, we used some strong double sided tape (the foam rubber core type, not the paper or plastic type). and b/, as I said before, you need to trial fit the rearmost backing plates to see where they catch at the top of the fender radius inside and relieve them. We sawed off the corners and filed off the burrs.
If you aren’t simultaneously butchering the wiring harness and torturing (sorry! I forgot we don’t torture) stressing the steel to change the rear light out as well, the refit should be fairly straightforward, although for some reason I can’t plug the ECU back in now whilst it is mounted on its plate! I now need to whip it off its posts to plug it in and then screw it down after. I can only assume the fixing holes on the FB fender are slightly lower down than on the XB?
I’m also not quite sure how you would get on turning the rear lamp upside down to suit because I didn’t have to and I don’t care! But I understand it’s a breeze.
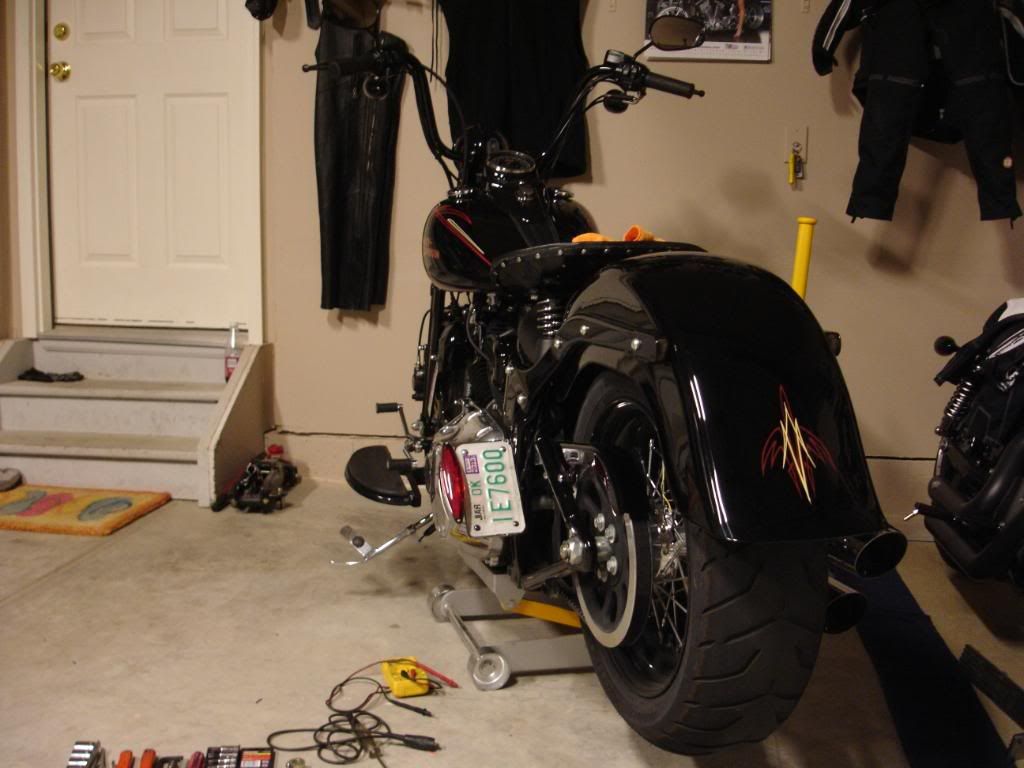
So there you go, by and large - easy peasy lemon squeezy. It cost me about 400 of your earth dollars plus 3-4 hours labour and the assistance of my handsome friend (no, I’m not an uphill gardener, he’s a shooting buddy). So as we say over here – dip your bread in!!
Before you start shouting - I do have some pictures, I just need to work out how to post them. Be patient.
All the best. Walt.
P.S. Did you know that surveys reveal that the last words said by drivers in fatal accidents the world over are “Oh sh**t” in 99% of all cases. EXCEPT for Arkansas, where apparently it is “Just hold my beer a second - I think I’ve got an idea”!
P.P.S. How do you like that 5 1/2" Horn? Oo-er missis!
It is a relatively easy job if you know your way round a toolbox. The only thing you need to be careful of is the rear backing plates inside the fender (the ones which hold the rearmost nuts for the side-struts). These backing plates are quite deep on the XB where the fixings go to hold the combined tag plate and rear light assembly, and the tops of these plates need trimming off a tad or they won’t bolt up flat against the inside faces of the fender.
There is enough ‘meat’ on these backing plates to allow trimming them down to clear the fender whilst still saving all the holes, just in case you would ever feel the need to go back to standard. Although I would suggest a lie down in a darkened room would be enough to make any such feelings go away!
Removing the seat and unhooking the ECU connection and the lighting harness connector sees you ready to take off the standard fender. Be careful, the four torx bolts to the main frame will release the whole fender assembly in one foul swoop, but you may find it a good idea to slack off all the other screws holding the side-struts on before you attack these. It’s a lot easier doing this on the bike than rolling around on the floor fighting loctited screws with an allen wrench, take my word for it.
Get someone to help with the weight of the fender whilst you remove the four main screws - if you’re not careful you could end up scratching the top of your oil tank, don’t ask me how I know!
With the fender off it’s mainly just a case swapping over all the ancillary parts except for: a/ you need to carefully strip off the rubber cable tube with the harness inside; the glue stays on the old fender. You will also need something to stick it back on to the new fender with, we used some strong double sided tape (the foam rubber core type, not the paper or plastic type). and b/, as I said before, you need to trial fit the rearmost backing plates to see where they catch at the top of the fender radius inside and relieve them. We sawed off the corners and filed off the burrs.
If you aren’t simultaneously butchering the wiring harness and torturing (sorry! I forgot we don’t torture) stressing the steel to change the rear light out as well, the refit should be fairly straightforward, although for some reason I can’t plug the ECU back in now whilst it is mounted on its plate! I now need to whip it off its posts to plug it in and then screw it down after. I can only assume the fixing holes on the FB fender are slightly lower down than on the XB?
I’m also not quite sure how you would get on turning the rear lamp upside down to suit because I didn’t have to and I don’t care! But I understand it’s a breeze.
So there you go, by and large - easy peasy lemon squeezy. It cost me about 400 of your earth dollars plus 3-4 hours labour and the assistance of my handsome friend (no, I’m not an uphill gardener, he’s a shooting buddy). So as we say over here – dip your bread in!!
Before you start shouting - I do have some pictures, I just need to work out how to post them. Be patient.
All the best. Walt.
P.S. Did you know that surveys reveal that the last words said by drivers in fatal accidents the world over are “Oh sh**t” in 99% of all cases. EXCEPT for Arkansas, where apparently it is “Just hold my beer a second - I think I’ve got an idea”!
P.P.S. How do you like that 5 1/2" Horn? Oo-er missis!
Last edited by walterwindbag; 04-21-2009 at 02:39 AM.
#2
04-21-2009, 02:41 AM

#5
04-21-2009, 10:14 AM
I just picked up a bog standard one from Fleabay. Prob a chinese copy - 43 Great British pounds for black (cheaper for chrome - go figure!).
The major prob is it doesn't cover the giant hole the fatty guard has for the standard HD light. I had to beat out a plate (or at least watch it being beaten!), stitch weld it in (or watch etc) then finish with filler etc.
It is by far the hardest/most demanding bit of the project. I guess most people will stick with the standard light.
All the best. walt.
Last edited by walterwindbag; 04-21-2009 at 10:19 AM.
#6
04-21-2009, 10:23 AM
Outstanding HDF Member
#7
09-03-2009, 08:07 AM
Cruiser
Join Date: Mar 2009
Location: Colorado
Posts: 161
Likes: 0
Received 0 Likes
on
0 Posts
I did this swap also. The major problem is with the stock seat plate whole, it does not line up right. I cut out the fatboy fender ecm section and welded in the crossbones section so it all fit like the stock fender. Also Filling the rear whole is not hard but if you want to keep it for a frenched light, it would be the perfect time to do it. Also after installing the rear fender I lowered the rea to give it a cleaner look. Will post pick of that later.
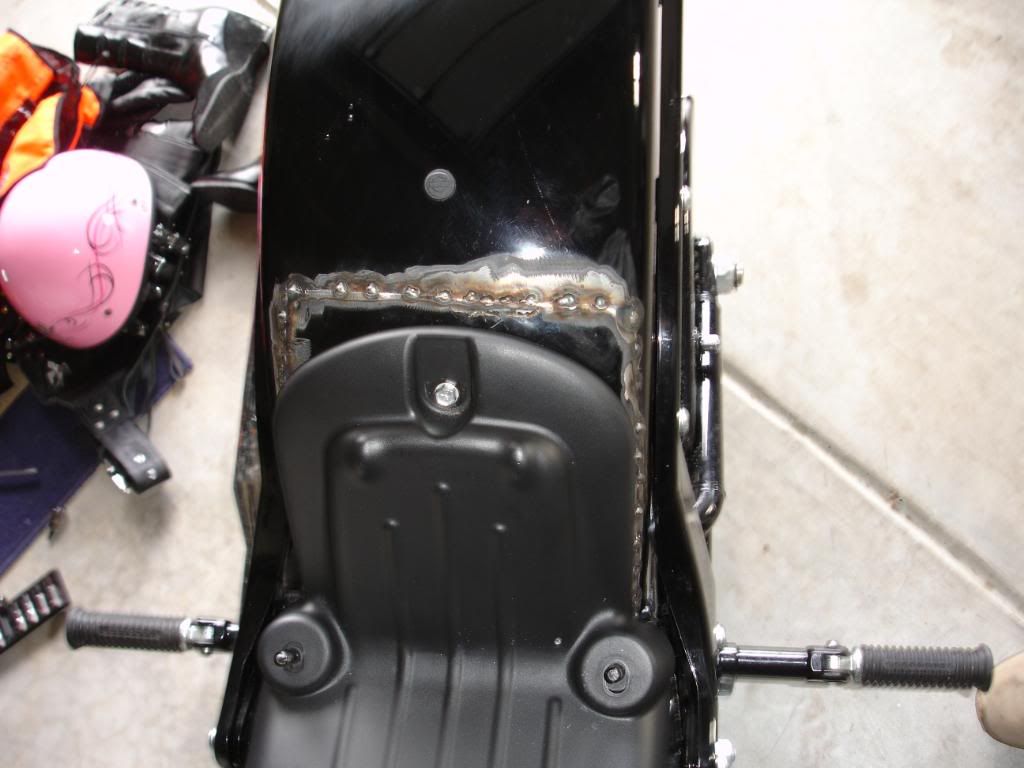
spot welded in for test fit.
finished project till winter when I spend more time on the paint and give is a show job.
spot welded in for test fit.
finished project till winter when I spend more time on the paint and give is a show job.
Last edited by elvis8310; 09-03-2009 at 08:10 AM.
Trending Topics
#8
04-09-2010, 05:21 AM
Novice
Join Date: Apr 2010
Location: Ft. Lewis, WA
Posts: 24
Likes: 0
Received 0 Likes
on
0 Posts
#9
04-09-2010, 06:37 AM
Road Master

Thread
Thread Starter
Forum
Replies
Last Post
crossbones, fatbone, fatbones, fender, fixing, harlet, harley, hd, holes, motorcycle, motorcylce, pics, rocker, seatplate, swop