I bought my 107 Fat Bob back in September of 2017. I walked into Harley and when I saw her – my peripheral vision faded, Barry White music started playing in the background, and all I could see was that beautiful Vivid Black beast sitting there just waiting for me. It was the first one to hit the showroom floor at my local dealership and when I saw it, I fell in love. Without hesitation, I traded in my ‘13 Softail Slim and rode the new Fat Bob home. I didn’t even test ride it! I sat on it for a solid two minutes and said “Yep. She’s the one. Where do I sign?” My first impression after pulling out of the parking lot was “Oh man … this thing is a f*ckin rocket.” It was fast, nimble, and just felt amazing. I still maintain that it is the best Harley I’ve ever ridden. I’m glad I wear a full face helmet because I’m sure that I had the dumbest looking sh*t eating grin plastered on my face the whole way home. Anyhow, I’ve done a few things to the bike since I got it and just wanted to share them with y’all.
Day 1
The first purchases I made were a new seat and backrest. I ride two up about 80% of the time, so I wanted to ensure my passenger’s comfort. I went with the HD Sundowner Seat and the tall HD HoldFast Backrest. It was a very simple and straight forward install with a great fit and finish. The styling of both the seat and backrest blend with the bike well. The seat is awesome for me and I’ve heard zero complaints from my ol’ lady.
My next round of modifications was the parts to get me to Stage 1. I opted for the Bassani 2-into-1 Exhaust System, S&S Stealth Air Cleaner, and DynoJet Power Vision Tuner. I got an excellent deal from Fuel Moto on Black Friday. When I received my parts, I got right to work. The Bassani system came packaged nicely in foam and arrived without any dents, scratches, etc. All of the components were wrapped in plastic or foam and secured with tape. The air cleaner and Power Vision were safely packed in a separate box.
The exhaust went on without any issues at all. It took me longer to remove the awful stock exhaust than it did to install the Bassani. The S&S air cleaner was the same way. Very quick and simple install. Both the exhaust and air cleaner came with EVERYTHING needed to complete each install. After buttoning up the installs, I connected the Power Vision and flashed the base map which was supplied by Fuel Moto. I did a couple of auto tune sessions and sent my map to Jamie @ Fuel Moto. He made some minor tweaks and sent me a final map within an hour (talk about customer service!). The bike runs so well – lots of torque, smooth power delivery throughout the RPMs, good gas mileage, no popping or pinging, etc. I’m 100% happy with how the bike runs.
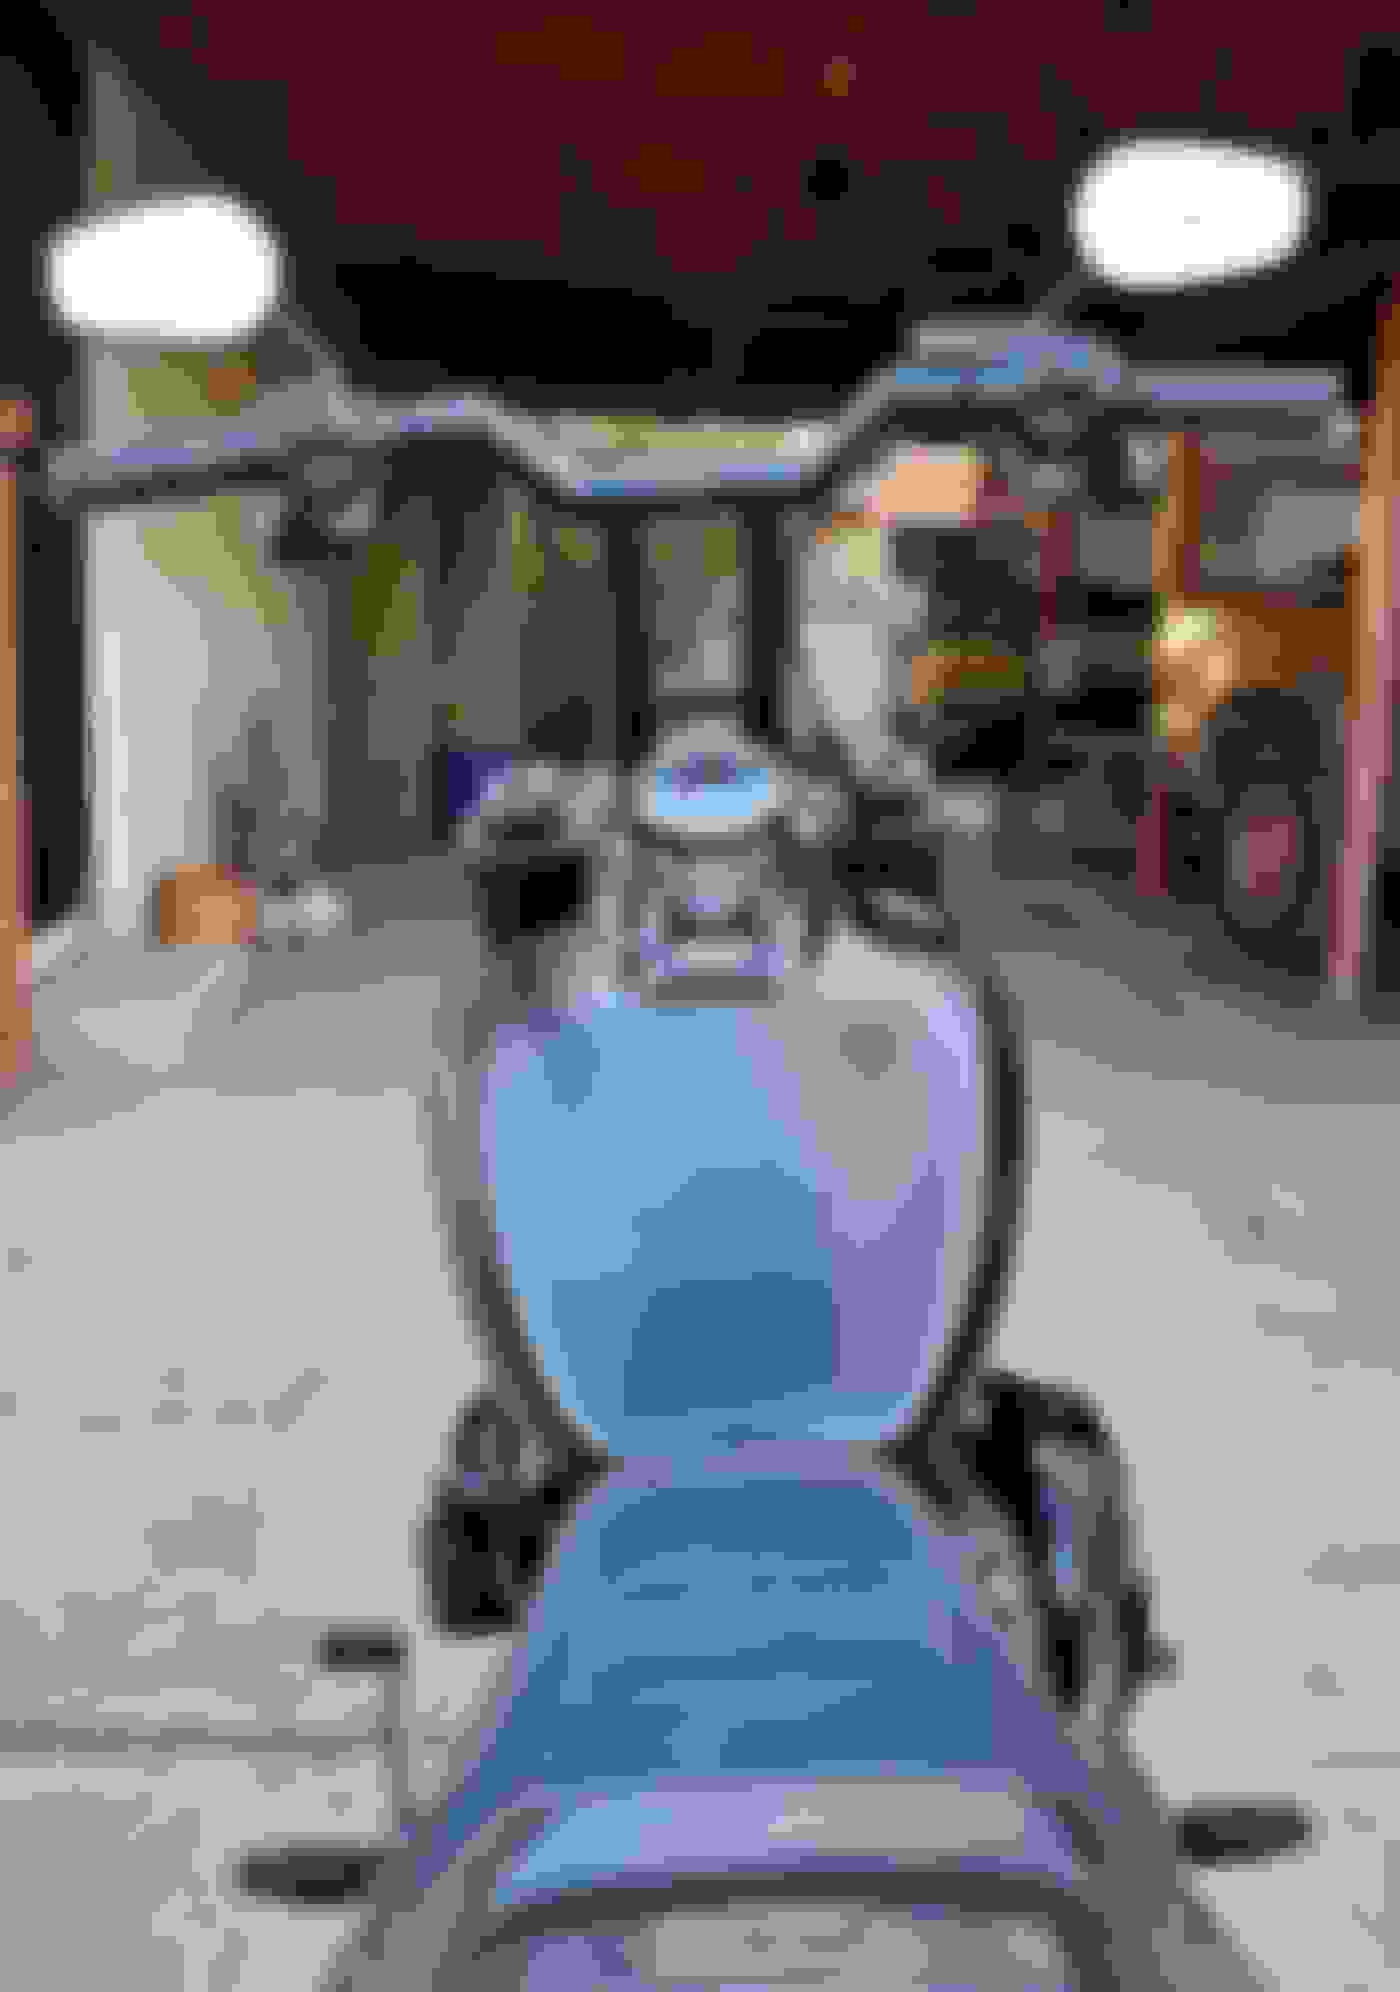
My most recent round of upgrades included new risers, riser bushings, handlebars, saddlebags and some other minor aesthetic mods (turn signal switch extenders, tank pads, front turn signal delete, grips). For the risers, I went with Hard Case Performance 9.5” HCP Risers. They took a little while to receive, but the wait was totally worth it. These things are BEEFY. I checked out a few other companies who make risers and HCP was, in my opinion, the best quality for the price I paid. For the handlebars, I chose the Fly Racing moto bars. I like the bend profile of these and they’re priced right. They’re 1-1/8” thick at the clamping area, 1” at the grips (so they work with Harley stuff), and they’re throttle-by-wire compatible. They’re also pre-drilled for internal wiring with ports at the center of the bar as well as at each individual riser location. As for the installation, this round was more of a pain. De-pinning and running the wiring through the bars and down through the risers was tight, so I had to do as much woosah-ing as possible. Patience is not my strong suit. After I mounted the bars, I measured for the brake line and the clutch cable. Harley makes it super easy to upgrade these on the 2018 Softails. The clutch cable is two pieces so you only have to replace the upper section and the brake line couples to a manifold bolted to the underside of the triple tree.
The saddlebags were a super simple install as well. Changed out a few bolts, made some adjustments to the bag locks, and I was good to go. These LeatherPros bags are super high quality, look great and offer more function than I could ask for. I've never had more than a small tool bag or swing arm bag on a bike before.
Right now, I've got the bike exactly how I want it and couldn't be happier. Looking forward, I think if someone makes a decent looking fairing for it, I'd jump on it. Other than that, I'm 100% happy with my Fat Bob.
Well when I sat on this bike, it fit me perfectly with the stock bars. About the only thing I would do right away is put on the two up seat with a backrest like you did. Probably going to test ride one today. I got the green light from the better half on a new HD. LOL.
She likes to ride on the back. She also has a Honda Rebel and I let her ride my Honda CTX 700 DCT yesterday and I think she wants my CTX now. LOL. I will go with that deal. She can have my CTX and I get a new HD.
Did you have to buy new cables? If so, what cables did you use? What about the brake line? Was that extended as well? I love my fat bob but I hate low drag bars. I need either apes or 10" t-bars.
updated Blackmill license plate mount design will now work with the bag hardware. new design fits between inner fender support and fender, uses shorter fasteners without locking nuts, new black Torx hardware now included for stock bike and H-D accessory mount setups.
Dang! Just got my plate holder the other day. I think I ended up with the older version (I have the hex drive screws, not the torx) - and the nylock nuts.
I was trying to figure out what I was supposed to do with my inner fender supports.
if you want the new black Torx hardware from the new black kits, I'm happy to send you a set, you would need to open up the bracket to allow the inner fender support to pass thru it. this does make for quicker adjustment of HoldFast mounts as needed. PM me.
Did you have to buy new cables? If so, what cables did you use? What about the brake line? Was that extended as well? I love my fat bob but I hate low drag bars. I need either apes or 10" t-bars.
Thanks for the help!
Yep yep. Got clutch cable and upper brake line from Harley. They have everything you need to upgrade and they make it fairly easy to do.
hey man the bike looks great! I’m about to do the same riser sett up and I’m wondering if the handlebar wiring needed to be extended or if the stock lengths worked other than the brake and clutch cable?
Last edited by Fatboy21; 08-14-2018 at 06:43 PM.
Reason: Spelling
hey man the bike looks great! I’m about to do the same riser sett up and I’m wondering if the handlebar wiring needed to be extended or if the stock lengths worked other than the brake and clutch cable?
Thanks man! Yes, there is some fairly short extending that you need to do to the wires.
Would Anyone be able to tell me who makes these bars?
I just repainted and installed these bars on my Fat Bob. Thank you to Decker72 for his information on bleeding the brakes after swapping the upper brake line.
hey man the bike looks great! I’m about to do the same riser sett up and I’m wondering if the handlebar wiring needed to be extended or if the stock lengths worked other than the brake and clutch cable?
has someone already asked you how much the cables from Harley cost? I’m thinking about raising my bars.
 06-11-2018, 05:49 AM