Yup, I stayed with a 46T basket too. For the same reasons - 75MPH speed limits out in CO means the average highway speed is 85 to just keep up with the flow. I didn't want the increase in RPMs at highway speeds.
Plus the 49T set up is nice for getting a bump down low. I figured I'd already addressed that issue with the 128" build!
I did all this for 'safety' - it's a running joke with my wife!
Jamie, what is your opinion of the primary tensioner? I have read about a Screamin' Eagle tensioner that is available, but have not been able to get any concrete opinions from guys like you. Mixed reviews of the Hayden that is available
Just figured while Mchad and I were in there, and all that...
While some have had good luck, in most cases we've had less than desirable results with aftermarket tensioners. The OEM tensioner in the M8's hold up much better than earlier models, even in high power applications. We do have a manual tensioner that we are currently testing supplied by one of our vendors, we will see how this one holds up.
While some have had good luck, in most cases we've had less than desirable results with aftermarket tensioners. The OEM tensioner in the M8's hold up much better than earlier models, even in high power applications. We do have a manual tensioner that we are currently testing supplied by one of our vendors, we will see how this one holds up.
Yay! Saves me money.
Question, how important is it to replace the compensator bolt 10500031? None of the “useless for **** parts departments who never keep any inventory” around me have any in stock. Redbeard719 mentioned it was a replace part in his excellent write up.
Question, how important is it to replace the compensator bolt 10500031? None of the “useless for **** parts departments who never keep any inventory” around me have any in stock. Redbeard719 mentioned it was a replace part in his excellent write up.
shop.newcastlehd.com says they have it in stock on their inventory sheet. It's early enough in the week, you might be able to get it by the weekend.
$4.15, but shipping will probably be that much too.
shop.newcastlehd.com says they have it in stock on their inventory sheet. It's early enough in the week, you might be able to get it by the weekend.
$4.15, but shipping will probably be that much too.
Try three times that! $12 shipping for a $4 part. Too bad I don’t need anything else. I already have a half dozen of both the new M8 and standard Twin Cam oil filters or I would have stuck a couple more in the order.
Oh well, we’ll see if it is actually in stock. I’ll take a $16 gamble.
Where did you find a real-time inventory check? Edit: never mind, it’s right there on their home page. Duh...
While some have had good luck, in most cases we've had less than desirable results with aftermarket tensioners. The OEM tensioner in the M8's hold up much better than earlier models, even in high power applications. We do have a manual tensioner that we are currently testing supplied by one of our vendors, we will see how this one holds up.
It may seem overwhelming/daunting, but removing the primary drive is really not an overly complicated procedure.
I know you said you have the tools, but there are a few uncommon ones that I'll mention, just in case.
T-70 Torx bit (for the compensator bolt)
1 3/16" socket (for the clutch assemble retaining nut)
Benzomatic gas torch (like the kind plumber's use to sweat pipes, they're cheap at Lowes/Home Depot)
9/16-12 Bottoming Tap (available at McMaster-Carr)
Torque Wrench capable of 175 ft/lbs
Red Loctite
Snap-ring Pliers (good ones)
The compensator bolt is torqued to 175 ft/lbs, which isn't a problem. The red loctite on that bolt will be the problem. If you use an impact, you risk popping magnets in the stator/rotor. This is where the Benzomatic torch comes into play - put the flame on the head of the T70 bolt, and hold it there a few minutes. You won't damage anything, and the heat will make the Loctite a non-issue. It's almost amazing how well the heat works. The bolt will back out like it's in sludge, but it'll come out without great effort once the heat has done it's job.
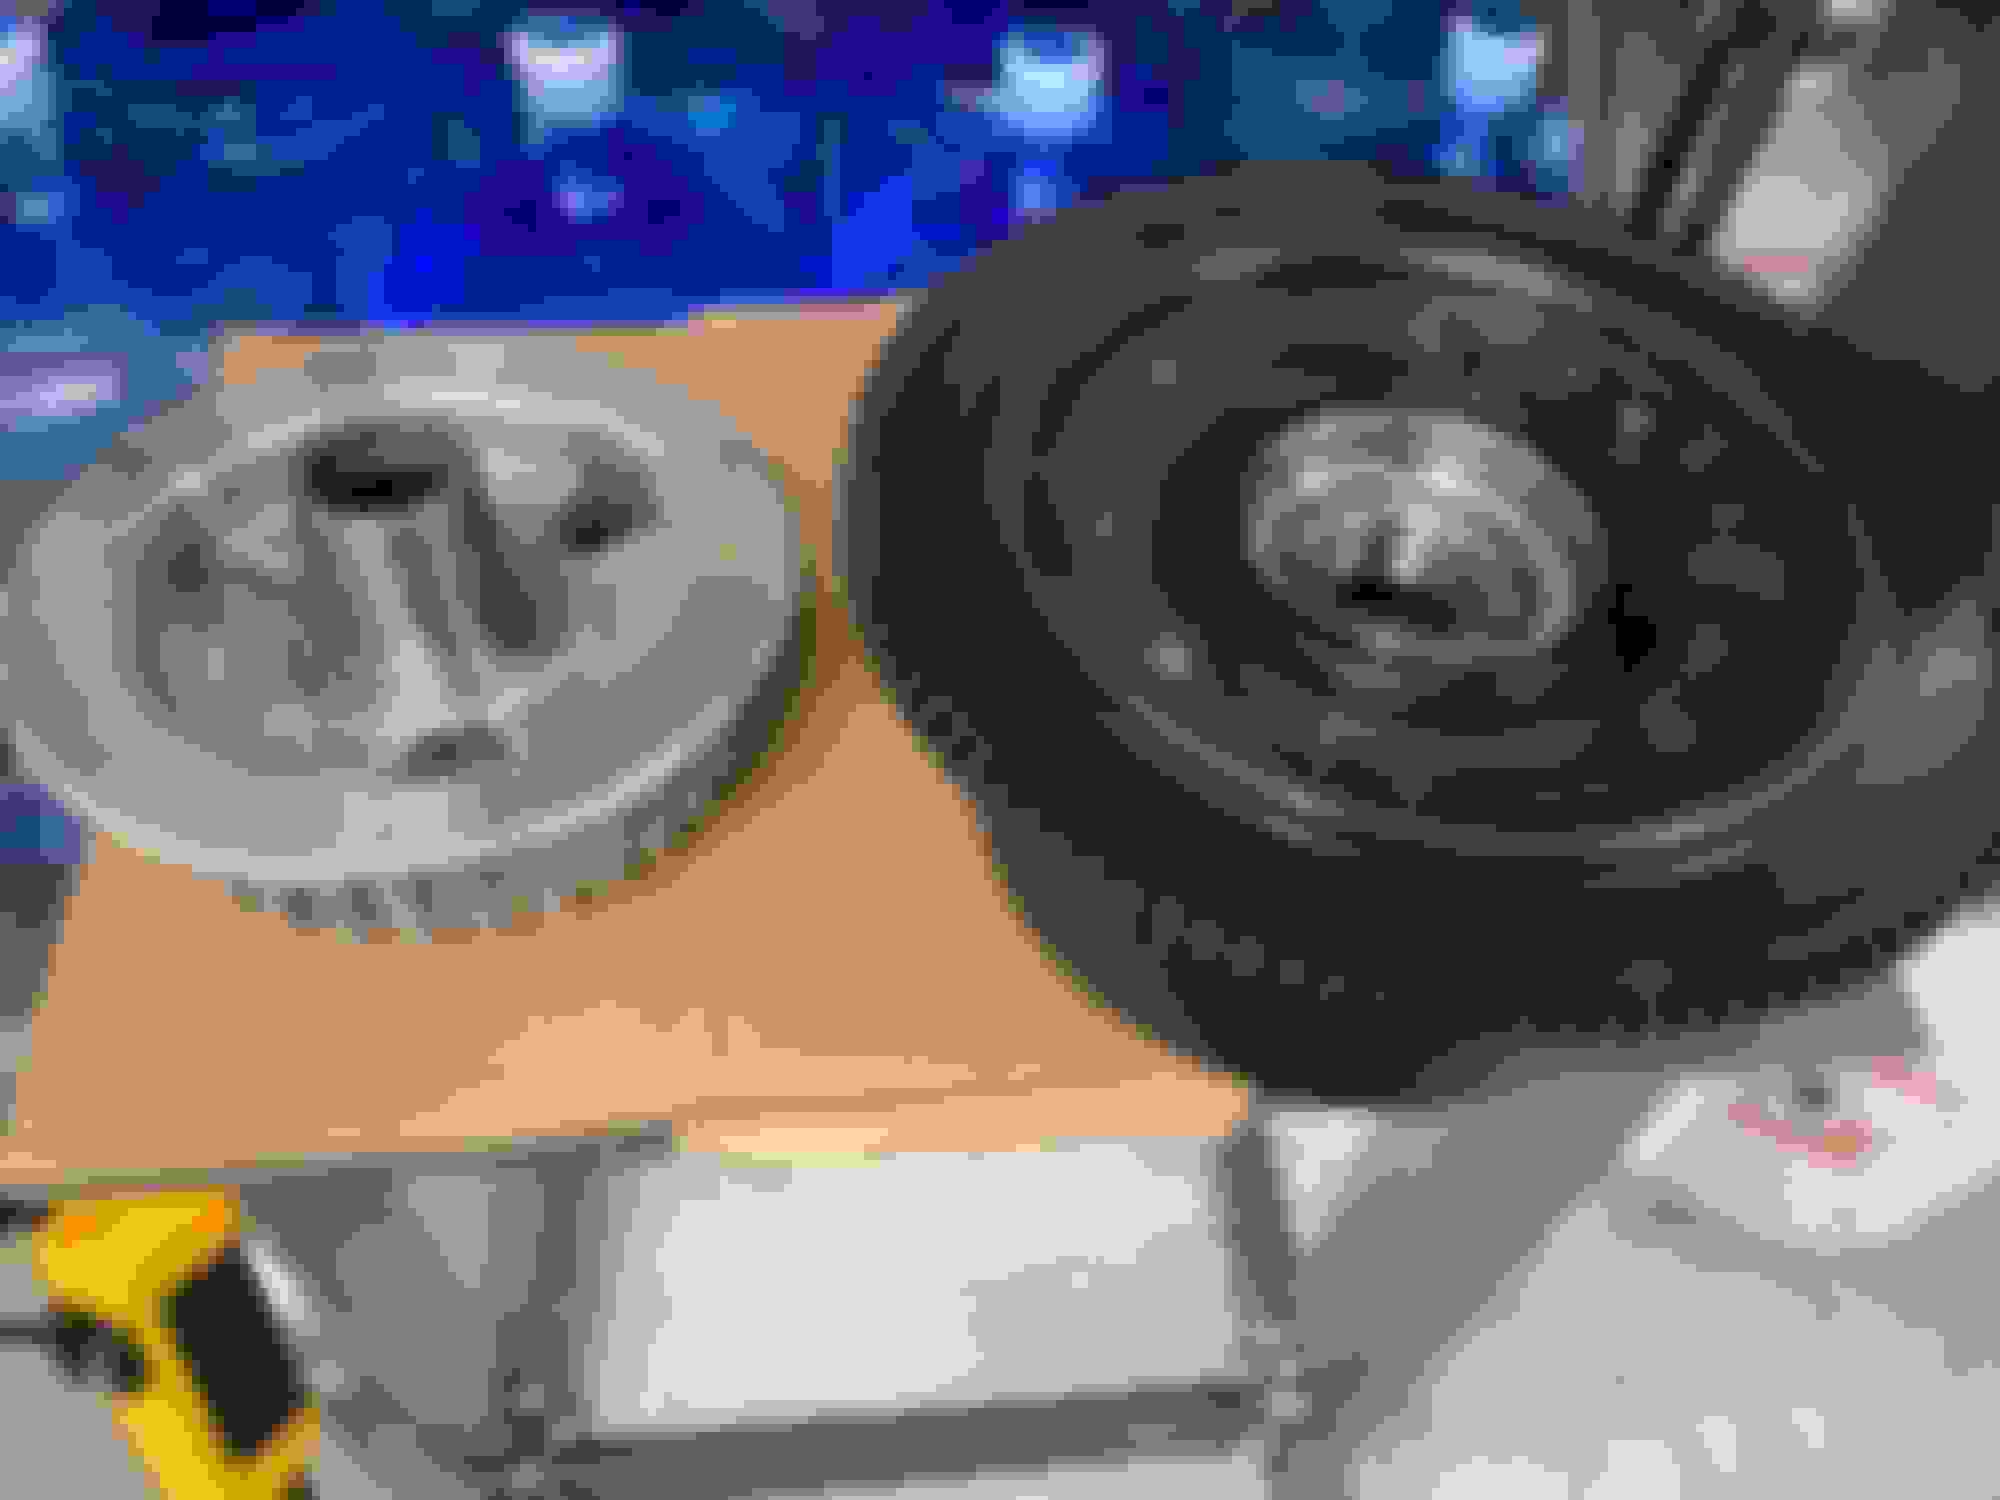
For the clutch basket assembly - you'll need to remove the three bolts that hold on the pressure plate (and AIM/Rekluse/Etc) weighted plate. Go about 2 turns and then move to the next bolt, repeating until it's off. The key is to keep the tension even on each of the three bolts until they're off.
From there, you can remove the entire pressure plate, and clutch discs at this time to set aside. It's easy to stack them on some old cardboard to keep them in the same order for reassembly.
THE CLUTCH BASKET RETAINING NUT IS A LEFT-HANDED THREAD!!!
The 1 3/16" nut turns right (clockwise) to loosen/remove it. I usually use an impact on this because once you remove the pressure plate and clutch discs, there is nothing to keep the internal clutch hub from spinning (unless if the bike is in gear and the rear tire is grounded, maybe). It's catch 22 - because with a weighted pressure plate retainer (like the AIM), it covers the hole in the pressure plate where you would typically access the clutch basket retaining nut through.
Once the compensator bolt and clutch retaining nut are off, you can slide both off at the same time. Don't worry about the chain tensioner, you can reset it to the lowest setting later and zip tie it in place for reassembly. It's recommended to keep the primary drive chain oriented in the same direction for reassembly. You won't be able to remove the chain before removing the comp & basket, so pull them out as one. Same goes for reassembly - put the chain on the comp and basket, and install them as one. If you put either the comp or basket in place first, you won't be able to get the side to side flex needed in the chain to put it over the sprockets - they have to go in as one.
As for the clutch hub/basket pressing - you don't need press plugs as you can use an appropriately sized socket to press out the clutch hub. If you have a couple scrap pieces of 2x4 wood, you can use that under the assembly for the press. Once you're doing it, it'll make better sense and you can see where you need to support things to allow clearance for the hub to be removed.
There is a retaining ring on the backside of the clutch hub shaft that has to be removed, and then you can press the hub right out.
Pressing it into the Evo Industries hub is easy - press it in from the front and it will bottom out. When it bottoms out, it should be exactly deep enough to reinstall the retaining snap-ring on the back side of the clutch hub shaft. I'd suggest a light coating of grease or assembly lube, even a film of oil would suffice on the clutch hub shaft/basket bearing to make things slide together nicely.
It's also recommended that you use a new compensator bolt - you're local dealer should have them in stock.
Before putting anything back together, Baker's instructions suggested a 9/16-12 bottoming tap be run into the crankshaft a few threads at a time to clean out the old threadlocker junk. I did a few turns, removed it, and blew out the hole with compressed air. Repeat until it's cleaned out, and you're all set. If you choose to do this step, go gently and don't force things.
Installation is obviously the reverse of the above, but it's not hard either. The service manual has the specific torque sequence for the compensator bolt - basically torque to 100 ft/lbs, back off 1/2 turn, and retorque to 175 ft/lbs. I install all the big stuff, then the last piece I put in is the chain tensioner, and then cut off the zip ties from it and measure initial chain tension, and then put the cover on.
I like Bel-Ray Primary Chaincase fluid, and I really love the clutch engagement - it's smooth, not choppy or jerky. Personal preference though, as we all have our go-to oils.
As always, if you hit any snags just hit up the forum. I just did this whole thing a couple weeks ago, so it's still fresh for me!
I just happen to read this thread out of curiosity. That is some great explanation.
It is my understanding that some automotive applications use a shrink fit band around the automatic transmission clutch basket. I don't know first hand. Does anyone here have info ?
So, I need some help. Got the primary disassembled, pressed out the inner clutch hub and now that I am ready to press in the hub into the evolution basket, I stupidly forgot to source a cylinder to support the inner bearing race. This being my first hydraulic press, I don’t have anything other then sockets, and since the clutch hub protrudes through the bearing the support has to be the same I.d (slightly bigger so I don’t press the hub into the support actually).

 06-29-2021, 08:46 AM