
3" tank lift wide glide - before and after
#1
 05-25-2010, 09:57 AM


Join Date: Apr 2010
Location: Lafayette, CO
Posts: 241
Likes: 0
Received 0 Likes
on
0 Posts
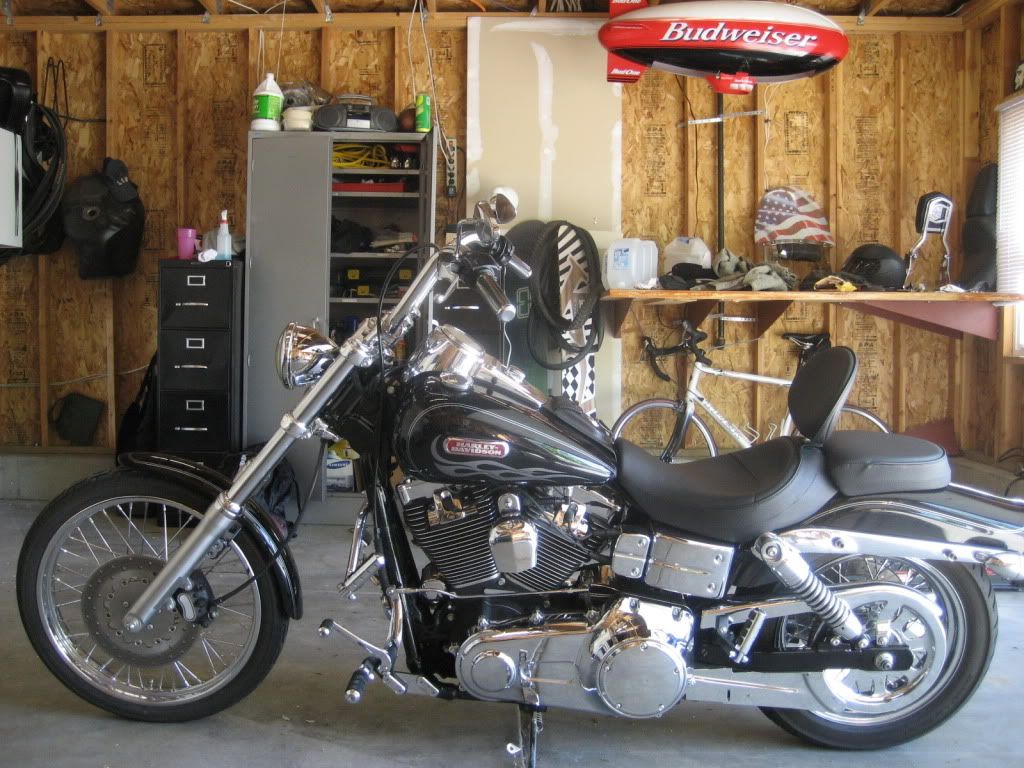
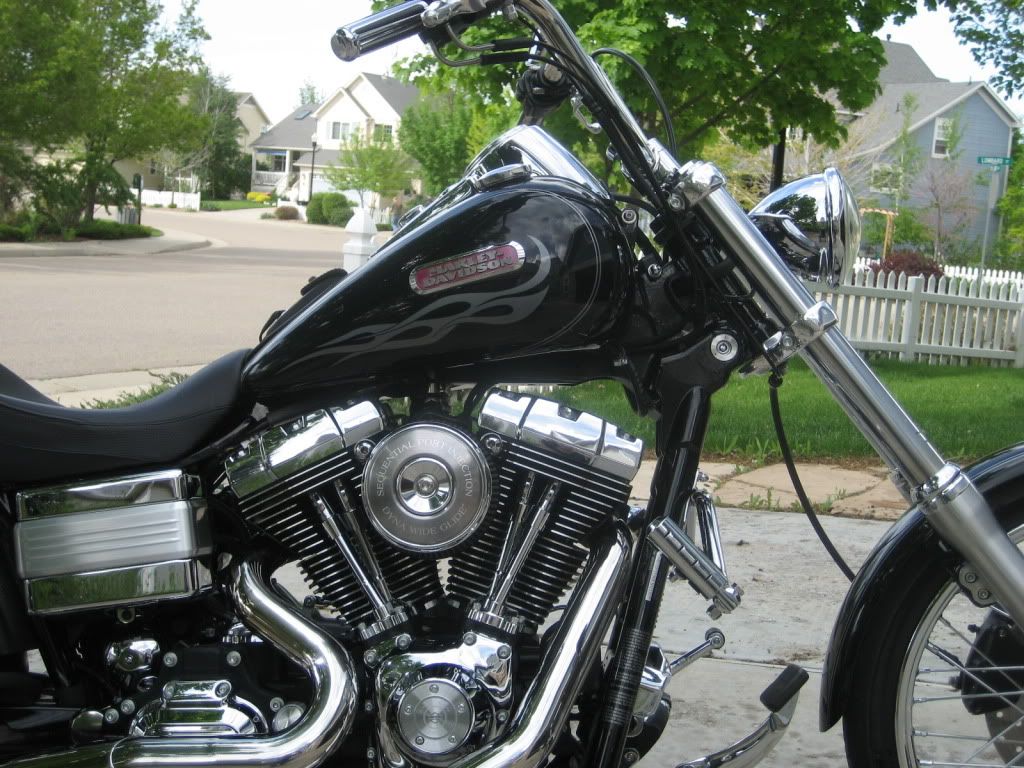
2006 wide glide - 3" tank lift from Jackle
Before and After pics first. How to write-up at end.
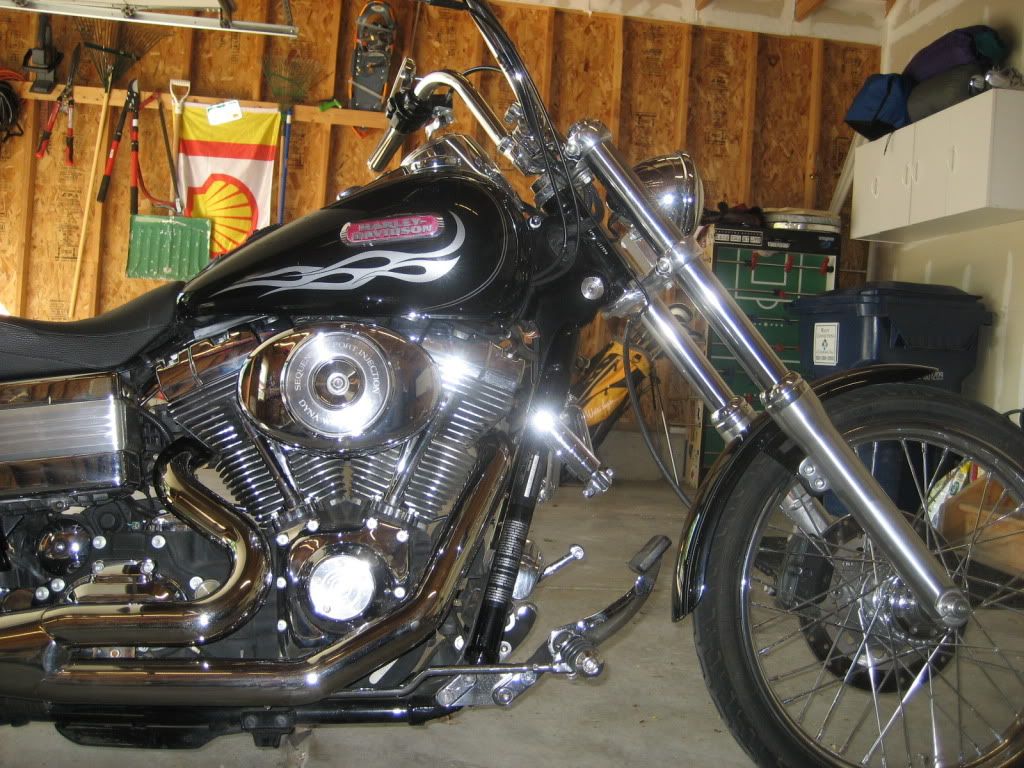
--Before--


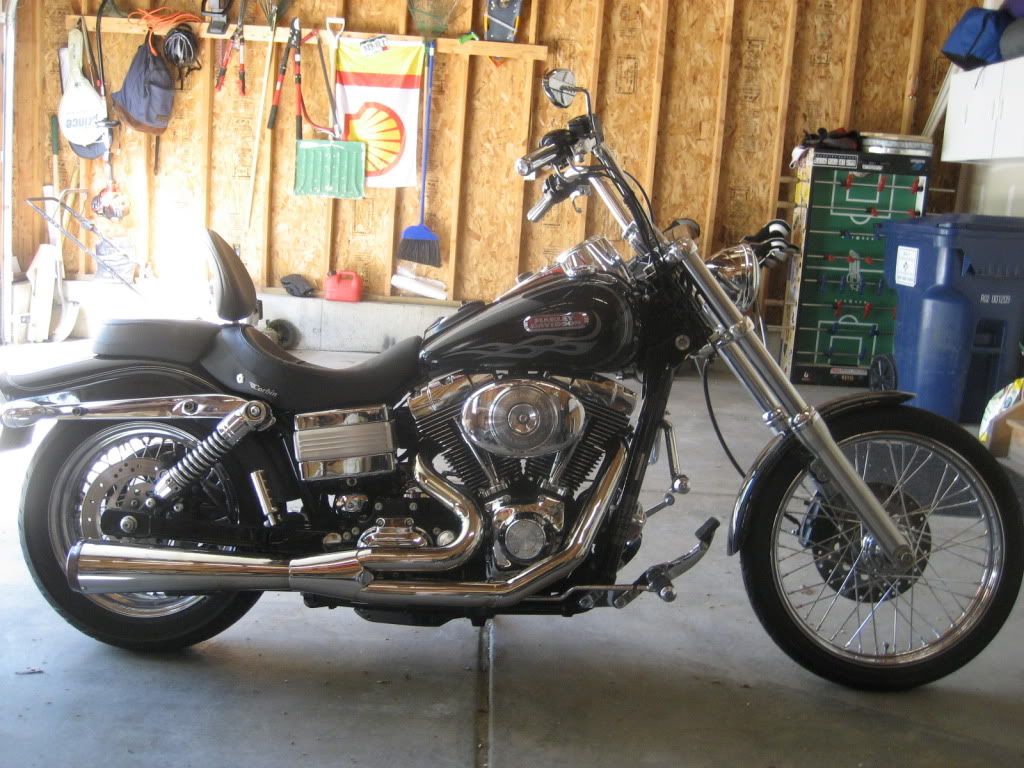
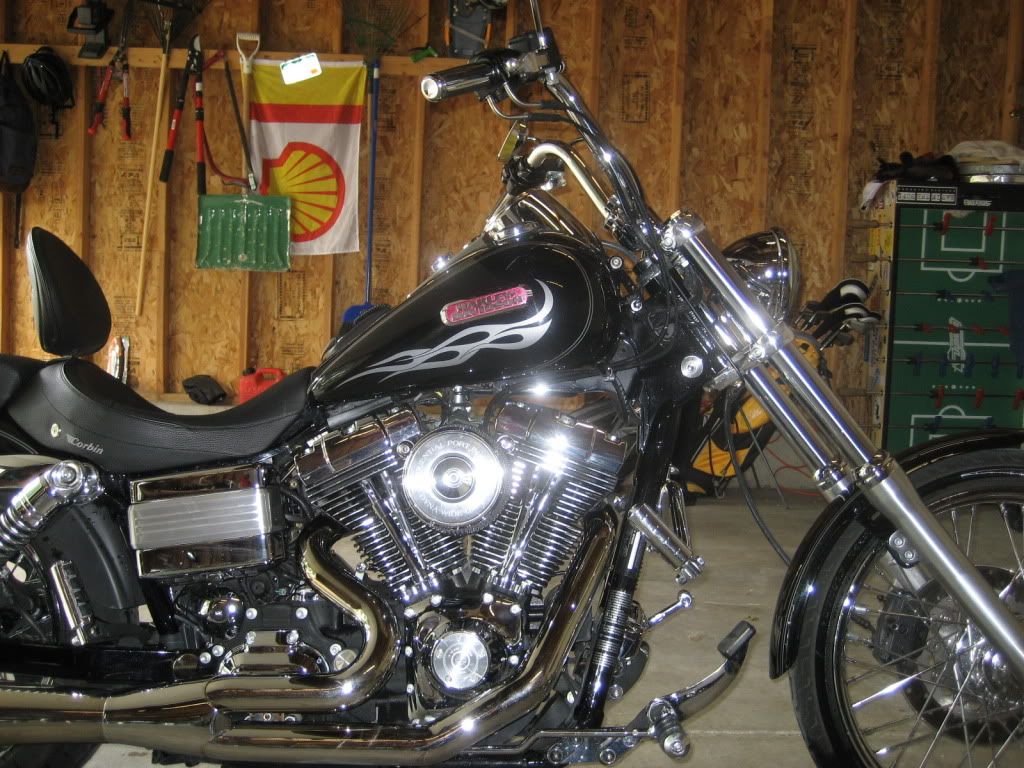
--After--


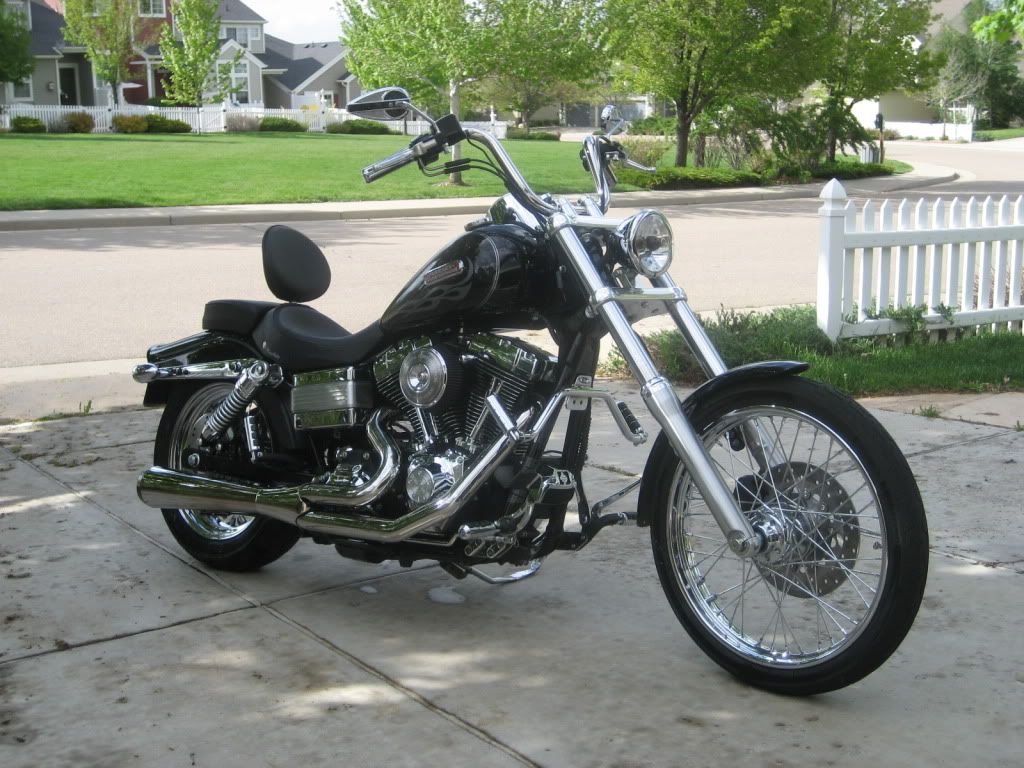
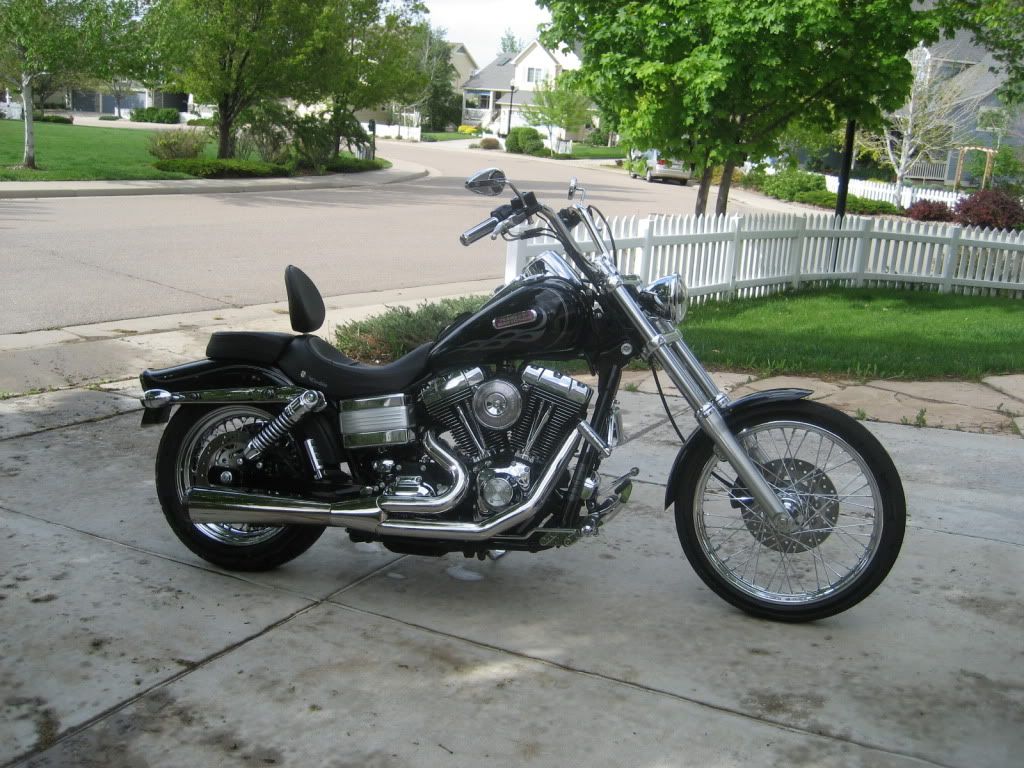
One more: Before & After
Before:
After:
This lift was easy to install but here are a few things to keep in mind.
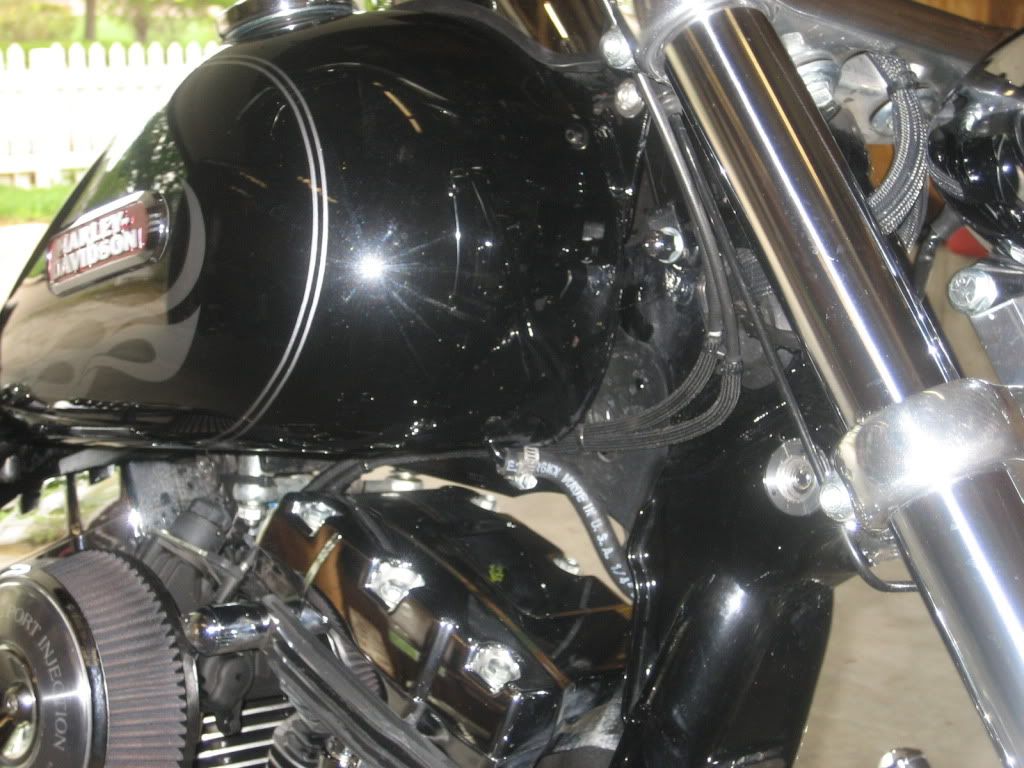
I started by taking out the bolt on the front of the tank and seeing how much I could lift the tank. However, my vacuum hose was too short and was keeping me from lifting the tank enough to slide the lift bracket in. You'll need to take off the speedo gauge and replace the existing hose w/ the one jackle provides.
Pic of gauge removed and vacuum hose:
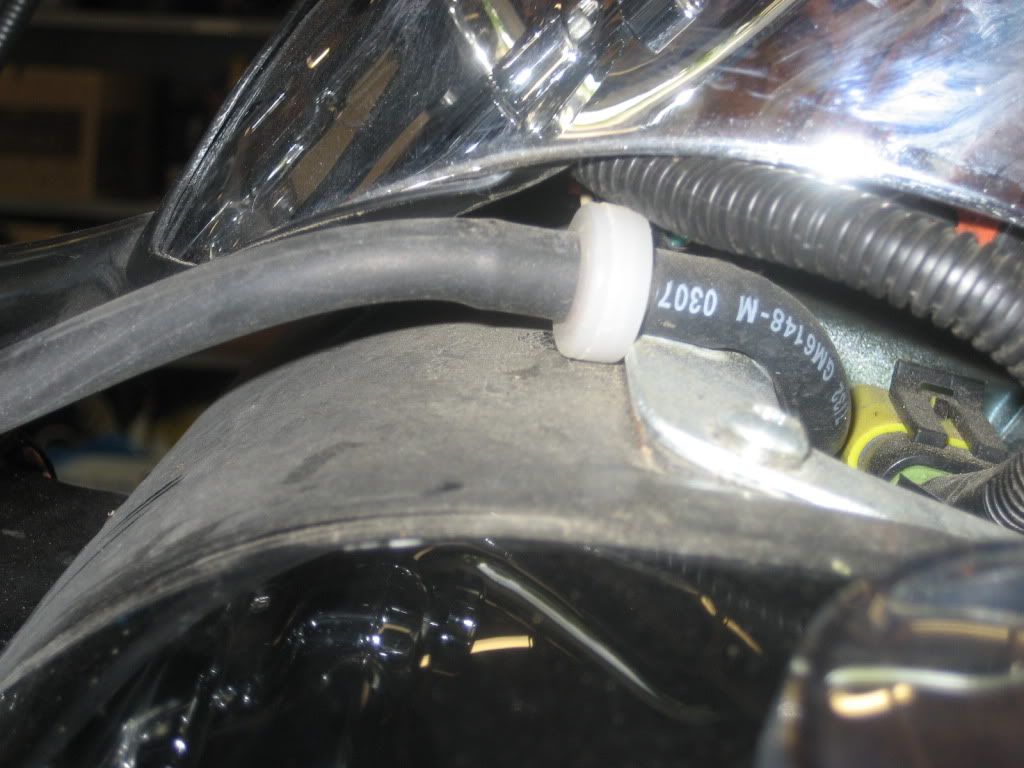
I removed the hose starting to the left of that white connector (between the hose w/ lettering and the plain black hose) Remove that end and follow it down to the next connection.
Also, the fuel crossover line was too short to allow the 3" lift. I'd recommend running the bike to as close to empty as possible before doing this.
I lifted the tank as much as i could w/ the existing line and covered the twins w/ a few towels (just in case a little leaked). Now i'm not sure how everyone else did this... But I clamped down the original hose and removed it from one end, the quickly plugged the open end w/ my finger then i plugged in the provided longer fuel hose and drained that side, then unclamped the first side and drained it. Then simple plug in provided longer hose and clamp down both ends. Sorry, no pics... But pretty straight forward.
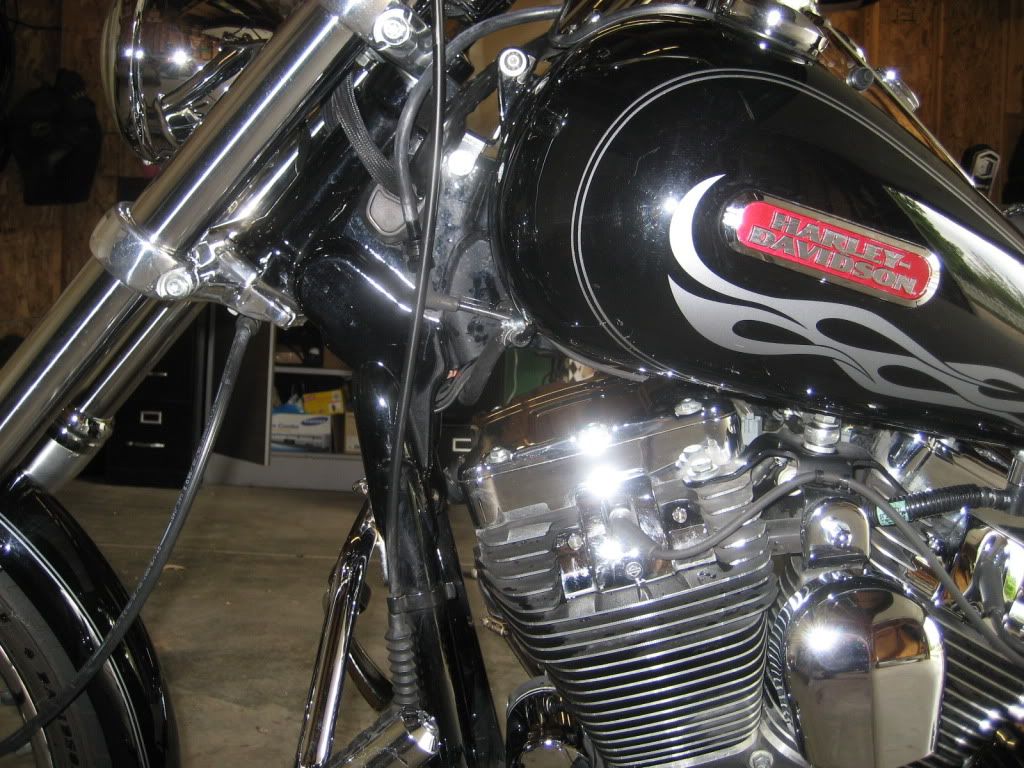
Now, i could lift the tank high enough to install the lift. However the trip trees would be hitting the tank if i left it as is. So heres what i had to do for my 2006 wide glide, w/ 3" lift. You'll need loosen the bolts on the tank lift, then remove the rear tank bolt. Then you'll need to grind/dremel the bolt holes on the tank to allow it to slide back (toward the rider) a bit, to provide enough clearance for the trees in the front.
I propped up the tank w/ a bit of wood...

Before grinding:
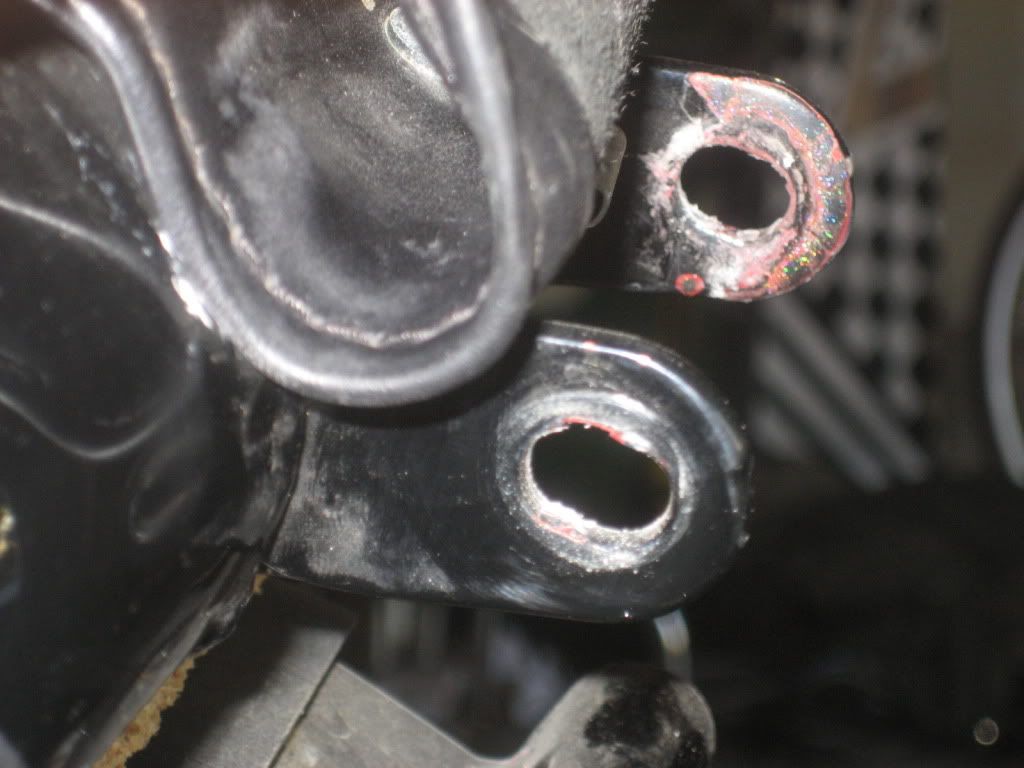
After grinding:
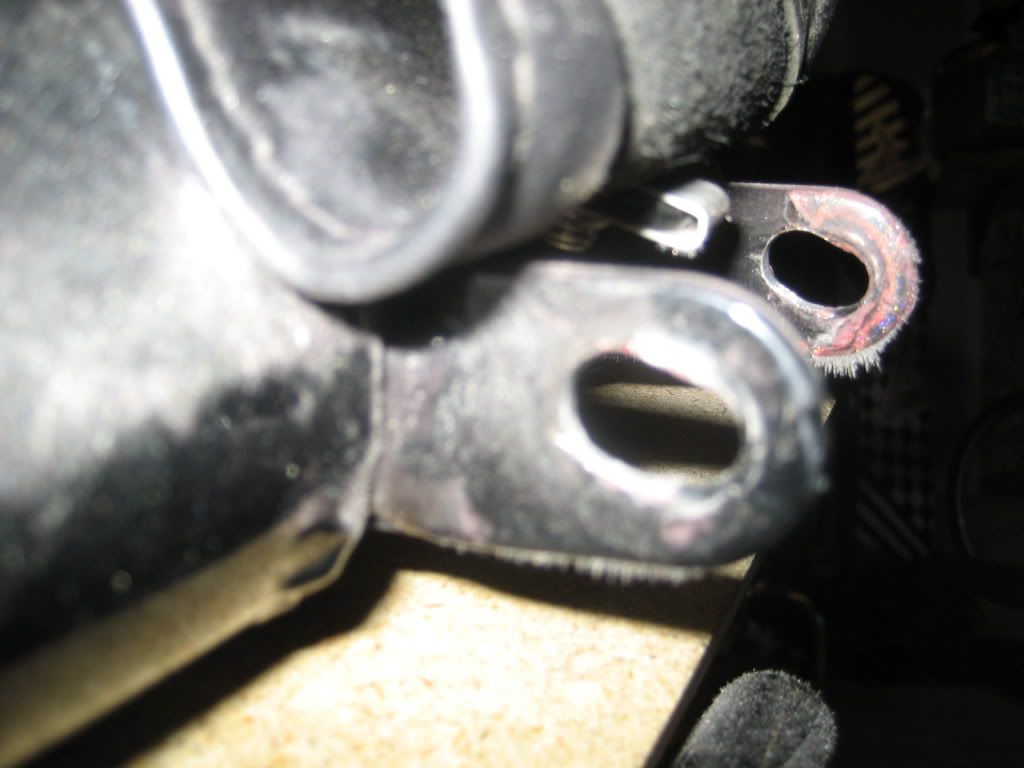
Next, bolt everything back together and check for clearance issues and check all the hoses you just installed. Then you're done!
In combination with a 1.75" lowered rear, this is my favorite cheap mod. Matches the lines of the seat and really shows off the twins!
Before and After pics first. How to write-up at end.
--Before--
--After--
One more: Before & After
Before:
After:
This lift was easy to install but here are a few things to keep in mind.
I started by taking out the bolt on the front of the tank and seeing how much I could lift the tank. However, my vacuum hose was too short and was keeping me from lifting the tank enough to slide the lift bracket in. You'll need to take off the speedo gauge and replace the existing hose w/ the one jackle provides.
Pic of gauge removed and vacuum hose:
I removed the hose starting to the left of that white connector (between the hose w/ lettering and the plain black hose) Remove that end and follow it down to the next connection.
Also, the fuel crossover line was too short to allow the 3" lift. I'd recommend running the bike to as close to empty as possible before doing this.
I lifted the tank as much as i could w/ the existing line and covered the twins w/ a few towels (just in case a little leaked). Now i'm not sure how everyone else did this... But I clamped down the original hose and removed it from one end, the quickly plugged the open end w/ my finger then i plugged in the provided longer fuel hose and drained that side, then unclamped the first side and drained it. Then simple plug in provided longer hose and clamp down both ends. Sorry, no pics... But pretty straight forward.
Now, i could lift the tank high enough to install the lift. However the trip trees would be hitting the tank if i left it as is. So heres what i had to do for my 2006 wide glide, w/ 3" lift. You'll need loosen the bolts on the tank lift, then remove the rear tank bolt. Then you'll need to grind/dremel the bolt holes on the tank to allow it to slide back (toward the rider) a bit, to provide enough clearance for the trees in the front.
I propped up the tank w/ a bit of wood...
Before grinding:
After grinding:
Next, bolt everything back together and check for clearance issues and check all the hoses you just installed. Then you're done!
In combination with a 1.75" lowered rear, this is my favorite cheap mod. Matches the lines of the seat and really shows off the twins!
Last edited by escherWG; 05-25-2010 at 10:00 AM.
#2
05-25-2010, 10:15 AM
Join Date: Apr 2010
Location: Lafayette, CO
Posts: 241
Likes: 0
Received 0 Likes
on
0 Posts
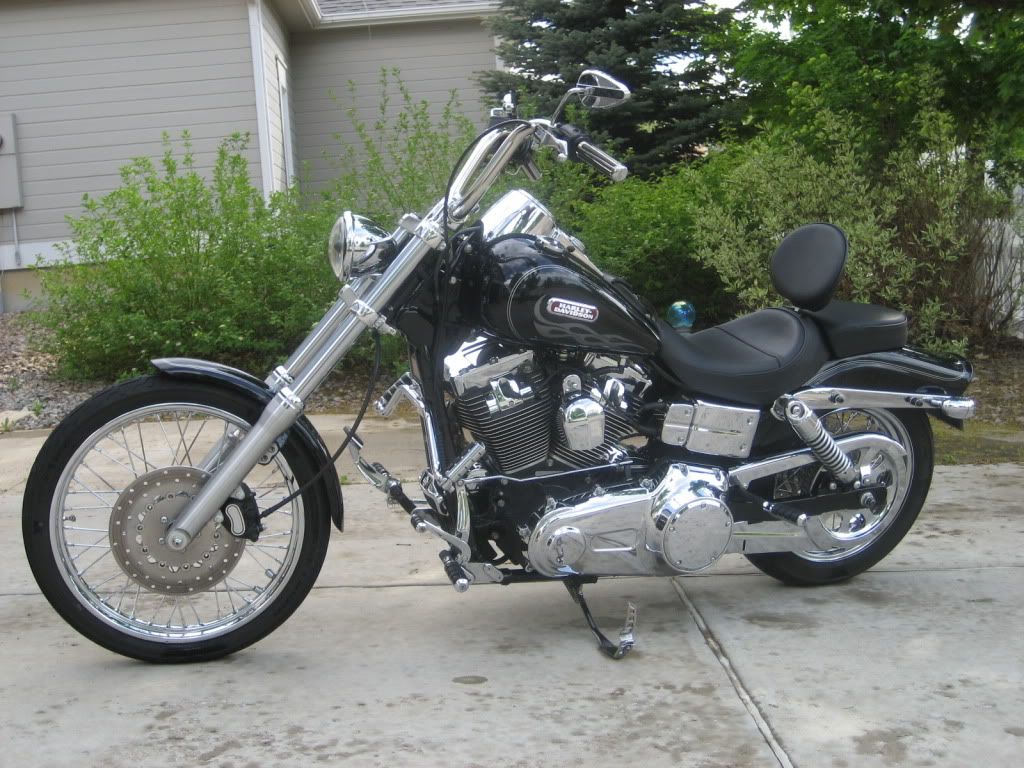
oh yeah, i may have modded the cleaner cover at the same time...
I couldn't help myself! Again, easy and awesome! I'd recommend to anyone on a budget w/ a high flow filter.
I couldn't help myself! Again, easy and awesome! I'd recommend to anyone on a budget w/ a high flow filter.
#3
05-25-2010, 10:37 AM
Road Master
Looks good, How did you dress up the mounting bolts going in to the engine instead of having the rubber breather tubes showing?
#4
05-25-2010, 03:37 PM
Join Date: Apr 2010
Location: Lafayette, CO
Posts: 241
Likes: 0
Received 0 Likes
on
0 Posts
the mounting bolts for the air cleaner? guess i'm not sure which rubber tubes you're asking about.

Thread
Thread Starter
Forum
Replies
Last Post
Luckster
Sportster Models
7
03-17-2012 04:13 PM