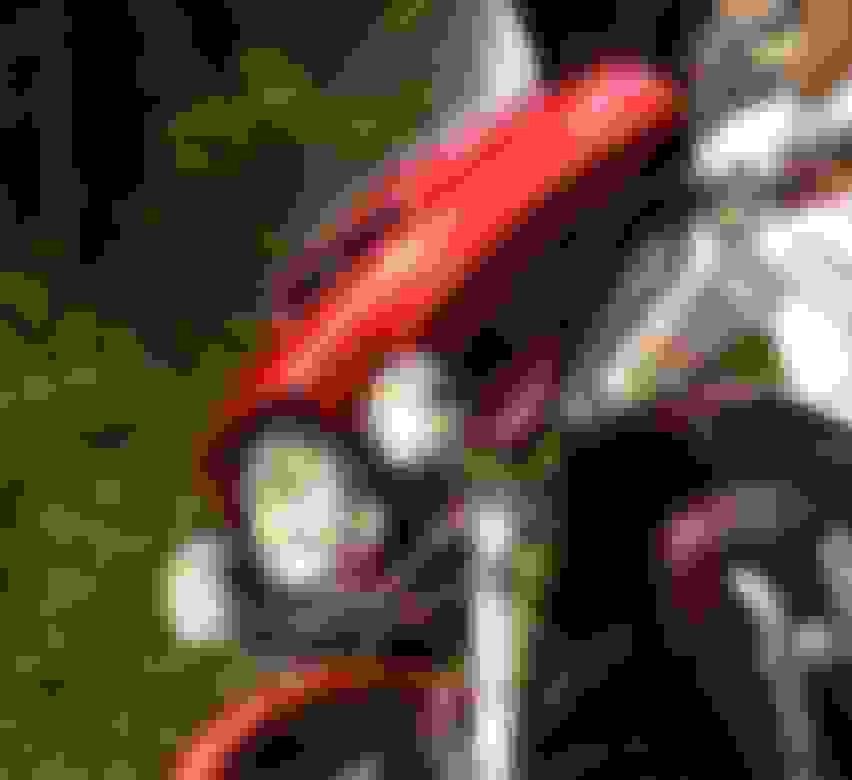
I bought a Klock Works "Wrapper" front fender for my 2014 CVO Limited.
It is currently at very reputable paint shop that has replicated, with excellent results several other CVO paint schemes in the past.
The painter said that he hasn't done a stripe exactly like this before but is confident he'll figure it out. He's currently testing various techniques to see what works the best.
Of course the MoCo is of no help what-so-ever. They won't even share codes any more.
Can any of you paint experts share what technique you believe is used here to get the effect of the stripe? (FWIW, it is definitely paint and not a decal)
Sorry for the dirty bike. This was on the tail of the dragon in summer after about 500 miles.
I've done something similar to this, with the design taped off, I used a soft bristle hand broom and just dipped it in a bit of paint run the excess off on a piece of paper and drag it across the part you are working on. Takes a bit of clear to bury but looks cool.
my buddy changed out the front fender on his '14 CVO breakout and painted it himself, he's not a painter but incredibly talented. the lace pattern doesn't match but you have to be pretty close to it to notice. he used actual lace, laid it on the fender and somehow imprinted it into the paint. I would imagine that's how it's done at the factory, just have to find the material with the same pattern...?
my buddy changed out the front fender on his '14 CVO breakout and painted it himself, he's not a painter but incredibly talented. the lace pattern doesn't match but you have to be pretty close to it to notice. he used actual lace, laid it on the fender and somehow imprinted it into the paint. I would imagine that's how it's done at the factory, just have to find the material with the same pattern...?
Goddamn! That is outstanding work your friend did there. I'm saving those photos for my personal file.
Now he just needs to take those reflectors off the front fork sliders.
Can't see the fine detail but, once the base is sprayed, a design is drafted on whatever program system and such file is sent to a vinyl cutter, (plotter) where the design or layout is cut according to the specs.
The vinyl, (masking) is applied to the exiting surface and the section(s) which are going to be sprayed will be weeded out, (removed) and additional color(s) are then sprayed and blended in various stages to acquire the final result.
Once all colors have been sprayed & allowed to cure to the point to where the masking can be removed w/o, damaging, (lifting) the added paint, it is then clear coated.
Personally, base coat / clear is the best way to go, especially when spraying multiple colors and blend jobs.
Probably a little more info than you folks want to read but I thought I'ld throw it out there anyways.
Evolution of Automotive Paint and Protectant Technology
History of Automotive Coatings
Ever since the first automobiles were made in the late 1800’s, there have been many changes in paint technologies to protect and beautify these man made transportation devices, from natural products to high tech polymers. In the first part of the 20th century automotive paint technology was based on the same air-dry varnish systems that were used for wooden furniture and horse drawn carriages. The major drawback was that the only choice of color offered was black. In addition, they required tedious brush application of multiple coats and days of drying time, which created a production bottleneck.
In 1923, E.I. DuPont De Nemours developed nitrocellulose lacquer systems, which offered many color choices and easier application using spray guns. However, lacquer systems required spray application of 3-4 coats of paint to achieve the desired properties. Lacquers also by their very nature have poor resistance to certain chemical solvents. Repeated exposures to gasoline spills could stain and damage lacquer finishes. In fact, in the 1960’s some cars had their gas tank filler located under the license plate to avoid spilling gasoline on the lacquer paint. Nitrocellulose lacquers were used on some passenger cars until about 1957, when solution acrylic lacquers were introduced. Acrylic lacquers offered much improved durability and a wider range of bright, pleasing colors – especially metallics.
Another major development in paint technology came with “alkyd” enamel paints that were introduced on some car and truck models in the early 30’s. Enamels formed a very durable film through a chemical reaction after they were sprayed on the vehicle and baked in an oven. The cured paint film was about 2 mils thick (1 mil = 0.001”), and it was very resistant to chemicals and solvents. Enamel paints had shorter application times also. Typically, they were applied in 2-3 steps versus 3-4 steps for lacquers. The advent of organic pigments also added many different choices of colors to consumers. However, the alkyd enamel paint oxidized in sunlight fairly quickly, which caused the colors to begin to show fading and/or dulling in a matter of several weeks. The durability of enamel finishes was improved considerably with the introduction of “acrylic” enamels in the early 60’s.
To provide further improvements in appearance and durability, a new type of finish, called “Basecoat/Clearcoat,” was developed and introduced in the late 70’s. The topcoat paint system was split into a pigmented enamel basecoat, followed by a clear enamel finish. The key to this technology was the development of a clearcoat material with superior durability in all climates. Initially, the cost of the Basecoat/Clearcoat paint system was prohibitive and it was only used on some high-end automobile finishes. However, refinements in the material technology and processing helped to reduce costs, and by the late 80’s this paint system had become widespread. In fact, only a small percentage of cars manufactured today do not use this Basecoat/Clearcoat paint system.
The benefits of this two-layer system were many. It increased the gloss of paint considerably, which was unsurpassed by any other paint system. It also allowed the paint formulators to incorporate UV absorbers to protect the clearcoat and the pigments in the basecoat from oxidation. Therefore, it could take years to show any dulling effect.
A typical basecoat paint system after the two components are mixed is shown in Table I.
Table I: General Basecoat Formula
Petroleum –Based Solvents
Resins and Binders
Pigments & Colorants
Silicone Polymers & Other Additives (Catalysts, etc.) 40-60%
30-50%
5-10%
1-2% A typical clearcoat paint system after the two components are mixed is shown in Table II.
Table II: General Clearcoat Formula
Petroleum –Based Solvents
Resins and Binders
UV Absorbers
Silicone Polymers & Other Additives (Catalysts, etc.) 20-40%
50-70%
1-2%
1-2% In some cases, the clearcoat has two components that react and form a hard polymeric network. The two components may be premixed or mixed right before it is sprayed on the surfaces, depending on the polymer technology used.
While the Basecoat/Clearcoat paint system is far superior to conventional one-coat enamel paints in many respects, it has a few disadvantages. The clearcoat has a greater tendency to show marring when rubbed by foreign materials; in fact even terry towels leave visible wiping marks or streaks on the surface. Furthermore, the high reflectivity of clearcoat makes any imperfection highly visible; therefore swirl marks from buffing are much more pronounced. Finally, removing clearcoat by using polishing products removes UV protectants, which can lead to loss of gloss and clarity and ultimate failure of the paint system.
History of Paint Protectants
The history of paint protectants goes back to the days of horse drawn carriages also. The coatings were mainly protected by applying animal fats. Later, waxes and oils were used. The fats and oils helped seal the coatings from moisture and kept the wood frame from drying out. They also helped increase the gloss and the beauty of the finish. These materials had to be applied frequently to maintain their protective properties.
This method of protecting and beautifying the finish was carried over to automobiles, which replaced carriages. The early automobiles also had a wood frame and had very similar coatings as well. Natural waxes and oils were mostly used for protecting the original varnish finishes. These waxes did not contain any chemical solvents, since they could have dissolved the paint away. The oils offered ease of application while waxes offered longevity. Of the natural waxes, Brazilian Carnauba (Copernica Cerifera) was one of the hardest and most durable and offered excellent gloss.
As the car industry shifted to lacquer and enamel paint technologies, the protectant technology improved drastically. Petroleum distillates comprised a large portion of the new protectant materials. In some cases, abrasives were used to remove oxidized pigments and colorants on the paint surface. This was very visible since the polishing towel ended up being the same color as the car. As the solvents evaporated, the abrasives dried to a powdery residue that was wiped off, leaving some waxes and oils behind to protect the finish from the elements. The paint was restored to its original showroom color and shine, and waxes and oils also offered some depth of gloss.
After a few weeks in severe climates, however, the paint became somewhat dull again and there was a need to repeat the waxing/polishing process. The acrylic paint systems were much more forgiving and the process of polishing the finish did not cause as much harm. Also, the swirl marks created by applying these polishing products were not very visible even after the waxes wore off. Table III shows the general formula for these wax/polishing products.
A significant portion of these conventional waxes/polishes is composed of abrasive materials. Abrasives serve several purposes in these products; they act as cheap fillers, they help spread the wax evenly and minimize streaking, and they help remove oxidized colorants and pigments of older enamel paints.
However, the auto industry switched to the new Basecoat/Clearcoat paint technology in the 80’s and 90’s. The traditional waxes/polishes are much more damaging to the surface of the clearcoat. These abrasive containing products create swirl marks that become highly visible after the waxes and oils wear off. Also, extensive polishing can remove significant thickness of the clearcoat, thus removing the UV protectants and causing loss of gloss and clarity. Finally, after several applications, enough paint can be removed to cause premature failure of the clearcoat. These are some of the reasons most car manufacturers recommend against applying abrasive containing waxes/polishes on Clearcoat finishes.
Below are pictures of the surface of panels coated with a black basecoat and a 2- component urethane clearcoat. The panels were subjected to a typical waxing procedure with a common commercial standard wax (Mequiar’s Mirror Glaze� #7) and a new generation type wax (Optimum Car Wax�). The first two pictures show the impact of the cloth used in the procedures. It is obvious that terry towels can create heavy swirl marks on the Clearcoat finish. Even with microfiber towels the finish can get scratched with improper use; such as rubbing the stitching or the tag on the car finish. For this reason, most detailing specialists remove the tag and fold the edges inward before use.
1. Dry Terry Towel (8x)
2. Dry Microfibre Towel (8x) 3. Leading brand per label directions(8x)4. Optimum Car Wax per label directions (8x)
The next set of pictures shows the impact of the different car waxes. The industry standard, applied as directed on its label, leaves many small scratches in the surface compared to the new generation wax. Once these scratches are created on the finish, they cannot be completely removed; however, they can be filled with wax to minimize their visible effect in the sun.
Reconditioning of clearcoat paint therefore depends on the finish. For paint that is in good condition or the new car inventory, non-abrasive products such as Optimum Car Wax will offer maximum protection without damaging the paint. Abrasive containing products should only be used if the finish is heavily soiled or scratched. In these cases, true compounds such as Pro-Polish, Malco Tru-Grit, Auto Magic XP-Compound, or the like will do the best job of feathering out scratches with the least amount of effort. After removing enough clearcoat to minimize the scratches, using Optimum Car Wax will enhance the gloss and protect the finish in the least amount of time. In all these cases, the best results are achieved by using random orbitals or highspeed polishers with foam bonnet. Dr. David Ghodoussi is the President and CEO at Optimum Polymer Technologies, Inc. Dr. Ghodoussi has over 12 years of experience as an Organic Chemist overseeing research and development focused in polymers and manufacturing automotive paint for Dupont and PPG. He received his Ph.D. and Master's degrees in Polymer and Organic Chemistry from Oregon State University and an MBA from University of Memphis. He also holds Bachelor's of Science degrees in Chemical Engineering and in Chemistry from the University of California in Santa Barbara.
Gene Praschan is presently consulting with the major automobile manufacturers in the United States. Gene graduated from the University of Michigan with a BS degree in Chemical Engineering. After working several years on paint materials development for Dupont Automotive Finishes, he joined General Motors Corporation at the Technical Center in Warren, Michigan. He served in several GM divisions in managerial positions focused on development of coating materials, and paint processing technology before retiring in 1991.
I have no experience in painting, but I find it quite amazing that painters can do some of the sick things I've seen over the years from bikes to cars to trucks and everything in between. I'll be following this as well.
1) Common sense
2) Knowledge
3) Experience
4) Artistic ability
5) Patience (A lot of it)
6) Pride
&
7) A little brain damage helps, left field thinking, outside the box.

 01-09-2015, 11:49 AM


 1. Dry Terry Towel (8x)
 3. Leading brand per label directions(8x)4. Optimum Car Wax per label directions (8x)