For the pivot I installed the Sta-bo kit. I called up the dude that owns the company. (nice guy, I think his name was Keith or Kevin or something like that) He said be sure to warm up the swingarm (make sure no burrs inside), put the bushings in the freezer overnight and use a press to install with WD40 on the outside of bushings. Also, there should only be .005" to .007 inch between the transmission housing and the bushings. I measured my transmission width, and made an aluminum spacer jig that was .007" wider than the transmission. I pressed the bushings in equally from each side until the spacer jig was a tight fit between the bushings. Now my pivot is solid side to side, but swings freely up and down.
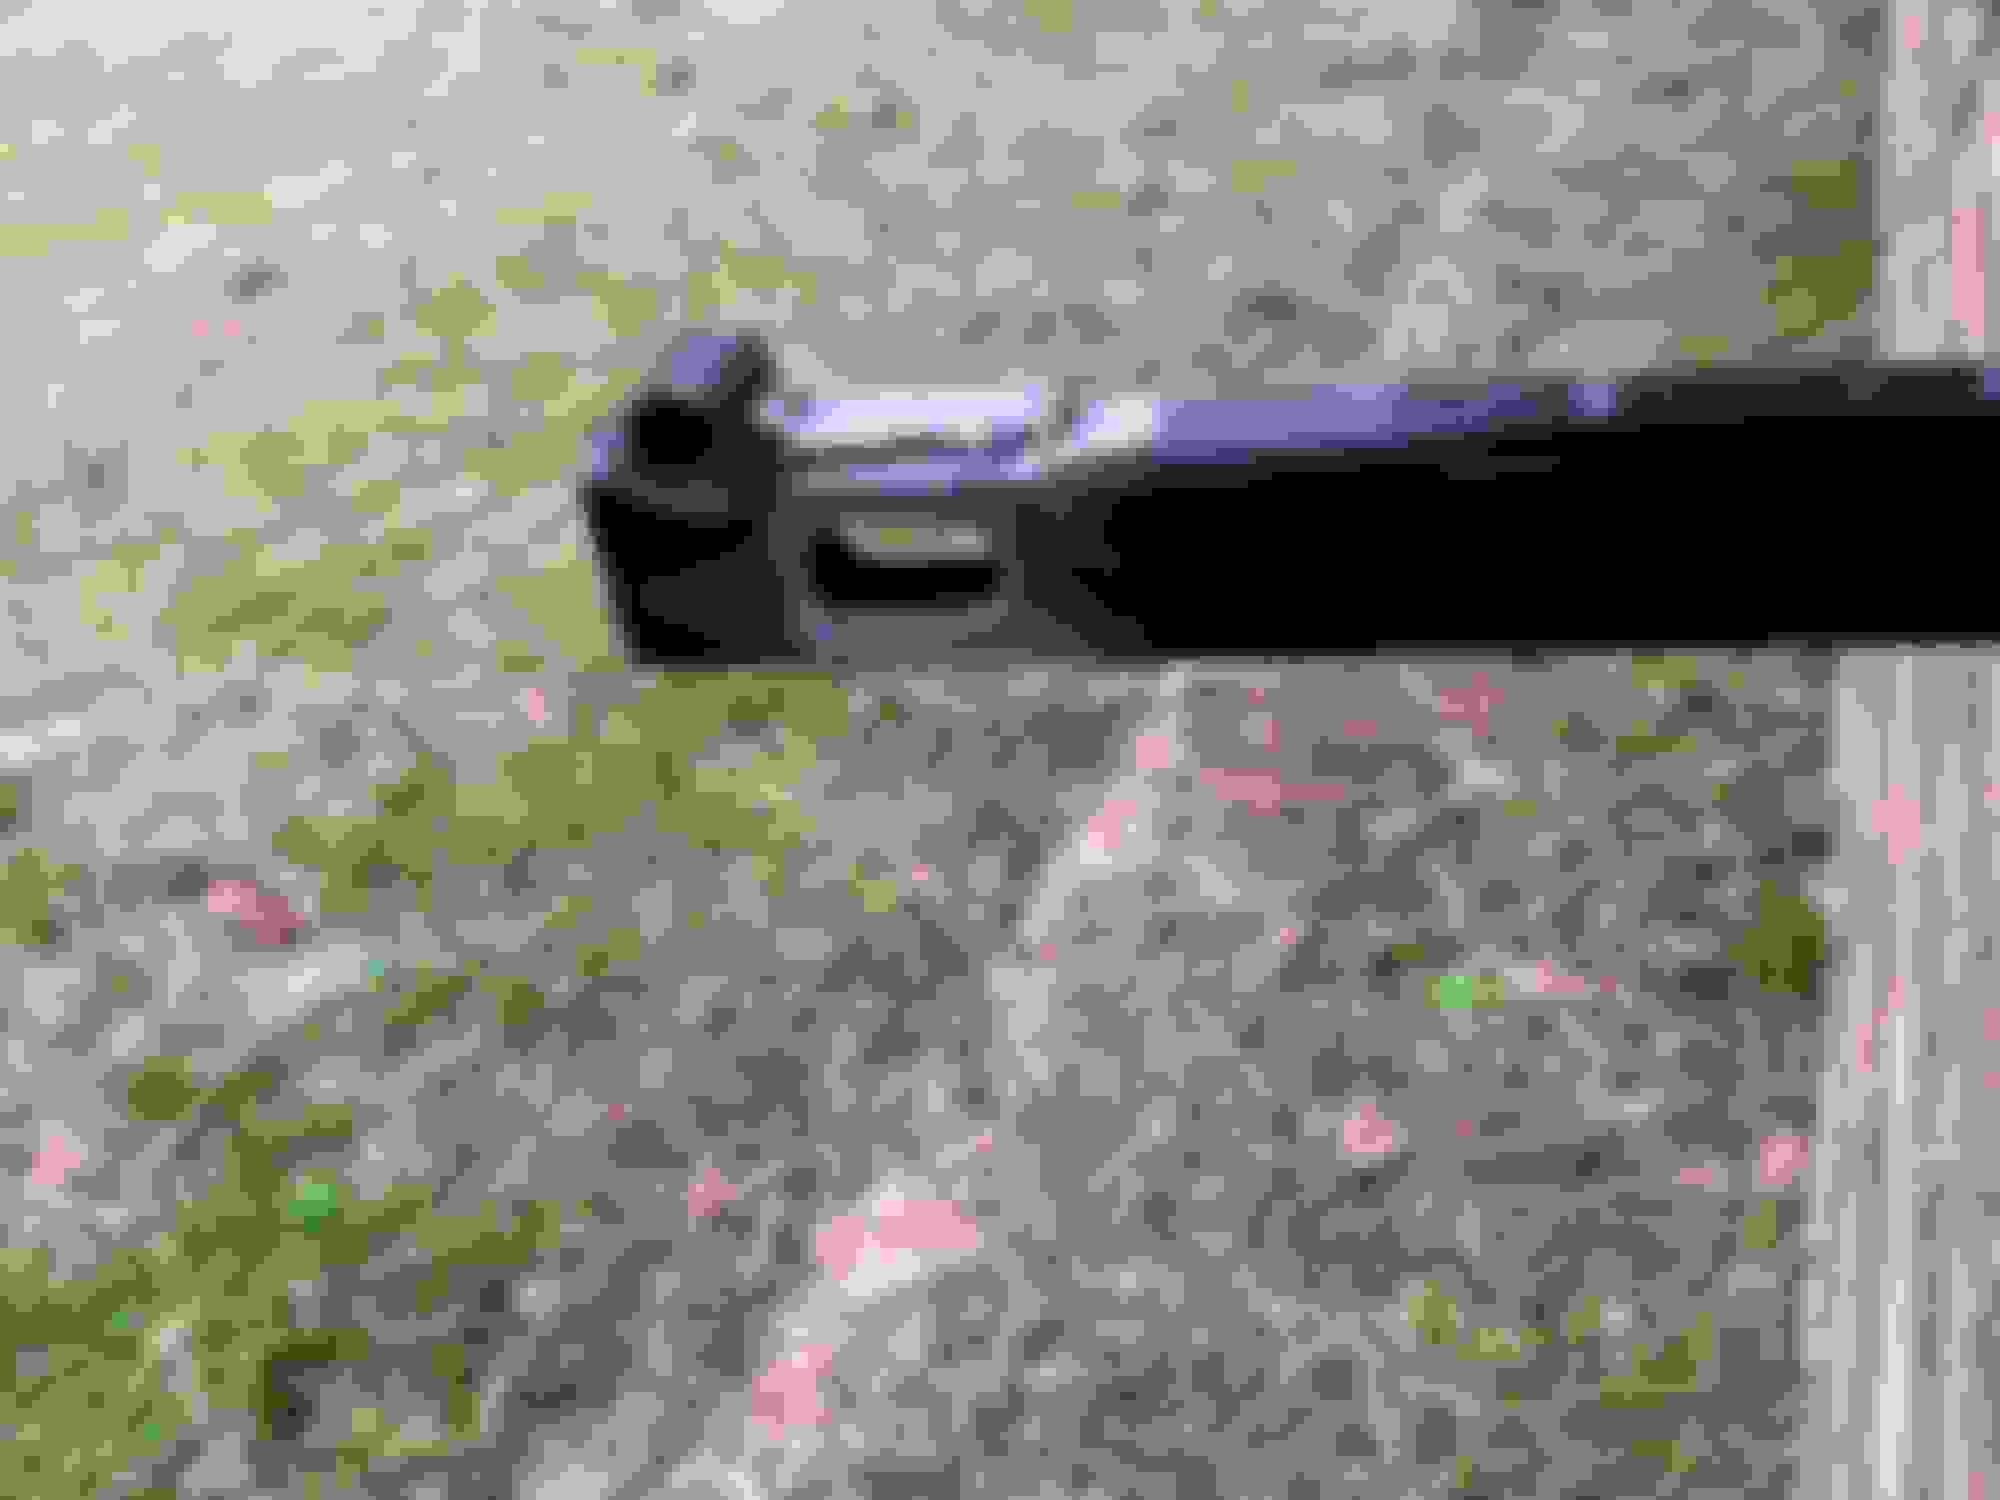
For the axle hole, my brake side was OK. You can see how much contact area there is where the caliper hits the swingarm. On the belt side (side I had issue with) the spacer is tapered against the swingarm, and the contact area at swingarm is small. My spacer had eaten into the swingarm, and I'm sure it would eventually lead to breakage if left alone. (bike has ~33K miles on it) Also note the geometry of where the bike weight is supported by the tire/axle, and where the shocks are pushing down on the swingarm. Stress is right above axle hole. Moving the shock mounting point rearward (aka lowering kit) will make it worse. (more leverage)
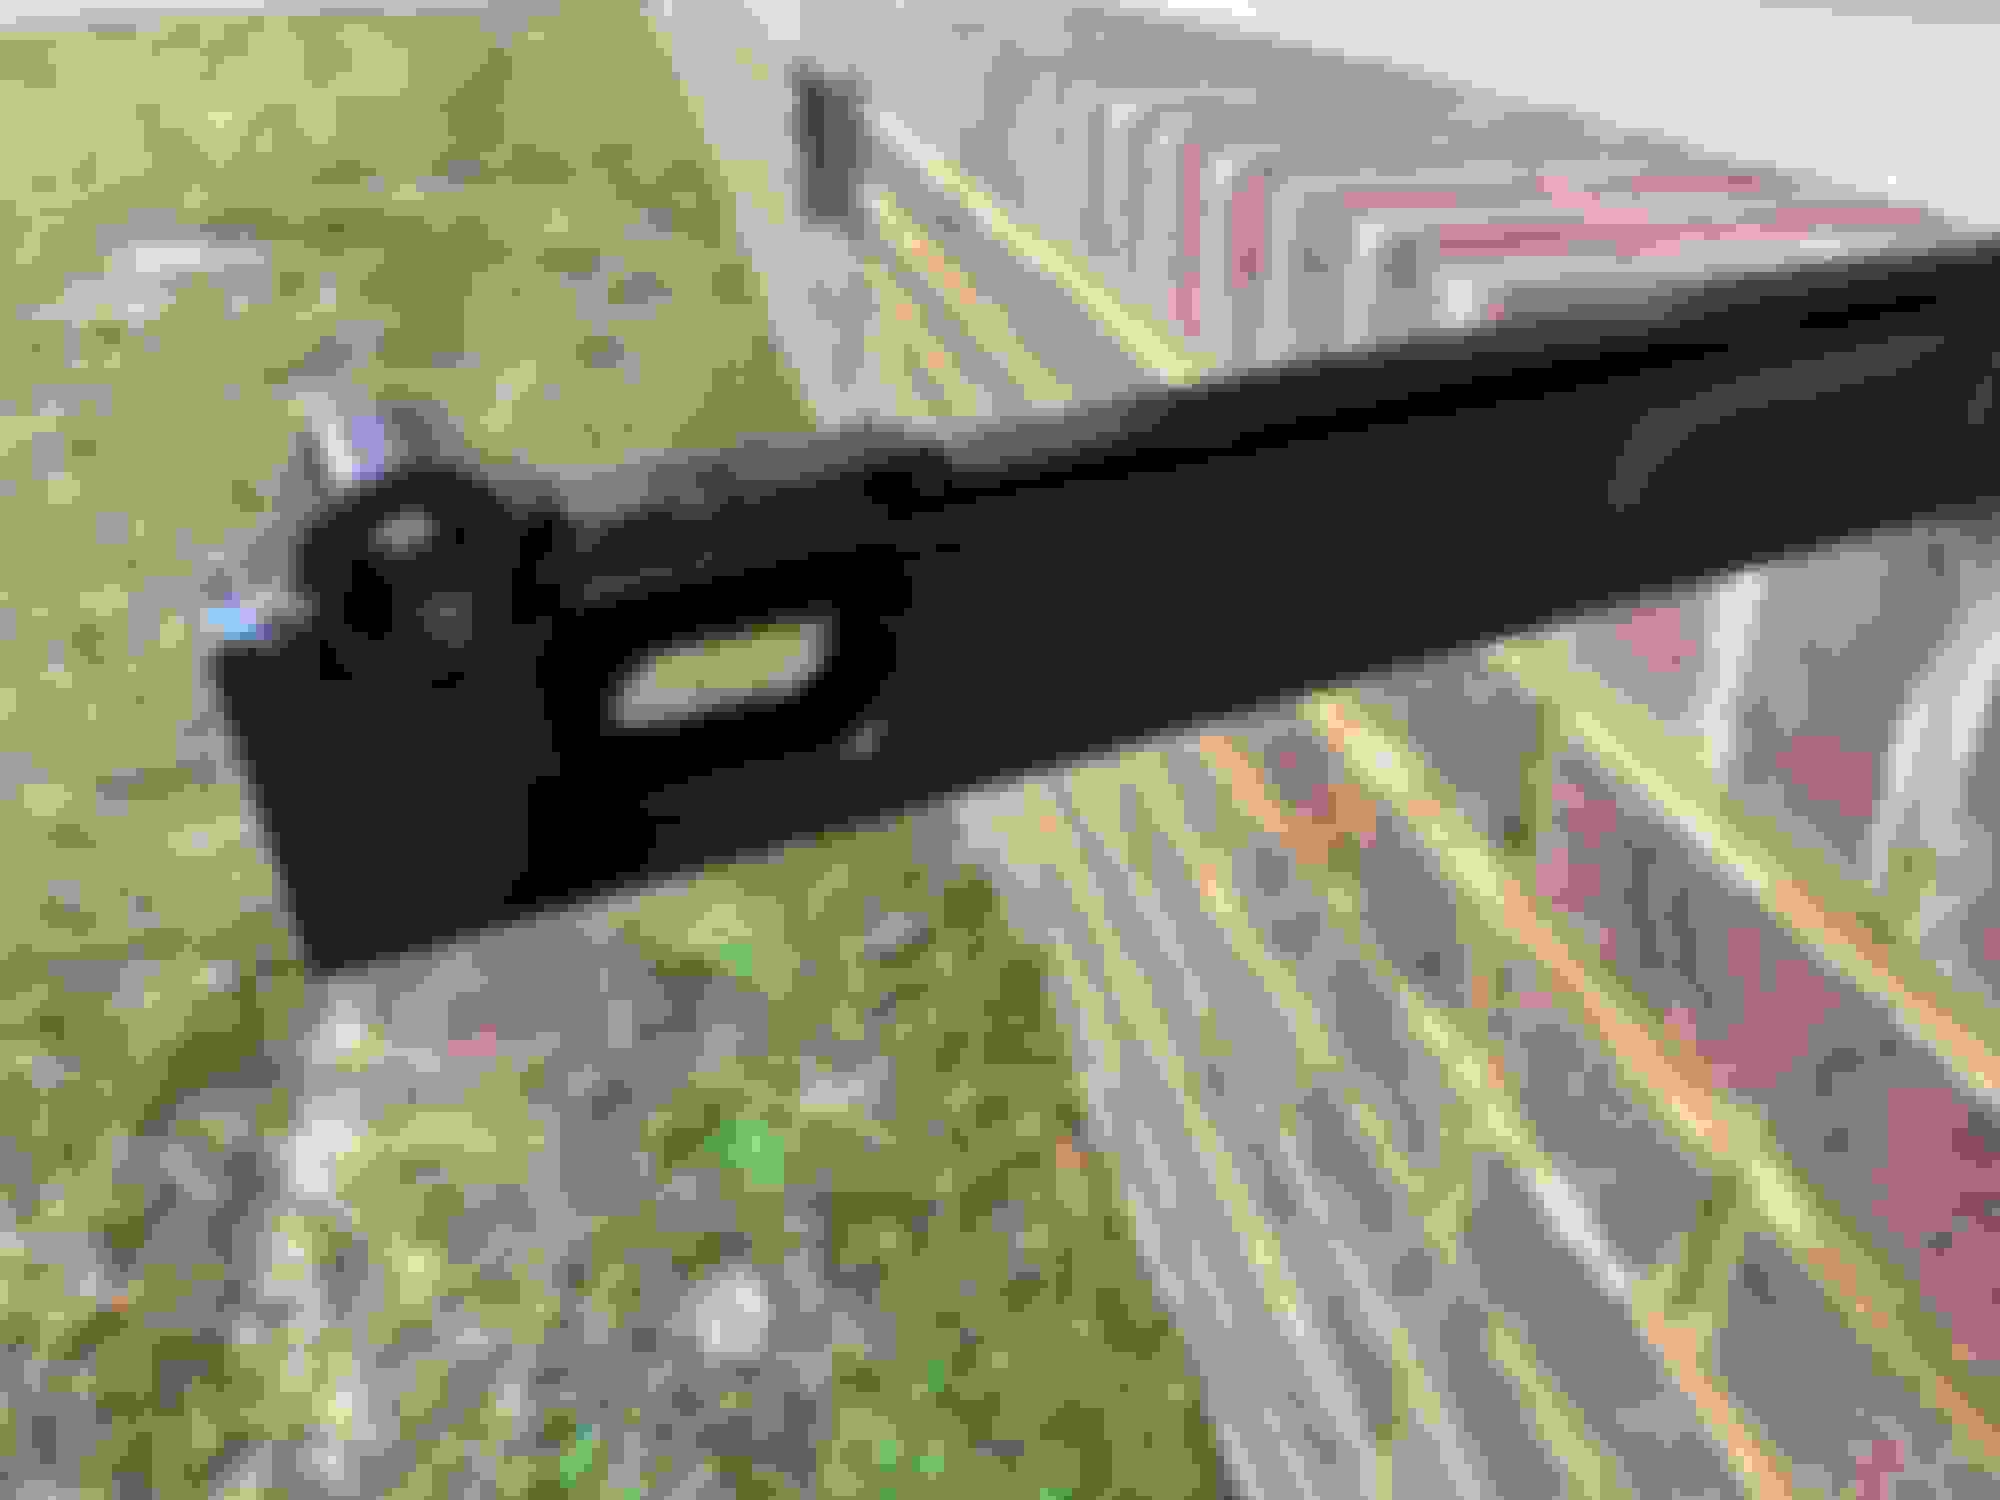
I milled .125" off the axle spacer and added a .125" thick large washer to better distribute the load on the swingarm. Side note, I ate lunch with Scooter Tramp Scotty last month and he does this same thing. He puts 100's of thousands on old Evo bikes. Check him on YouTube if you don't know him. I also welded a small metal strap to the top of the swingarm above the axle hole to reinforce it. Some people have changed out the axle adjusting "lollipops" for more solid rectangle units, but I couldn't find them on-line. This would minimize the tubular swingarm distortion even more. Also, be sure your rear tire alignment is good, belt tension is good and don't over-torque the axle nut.
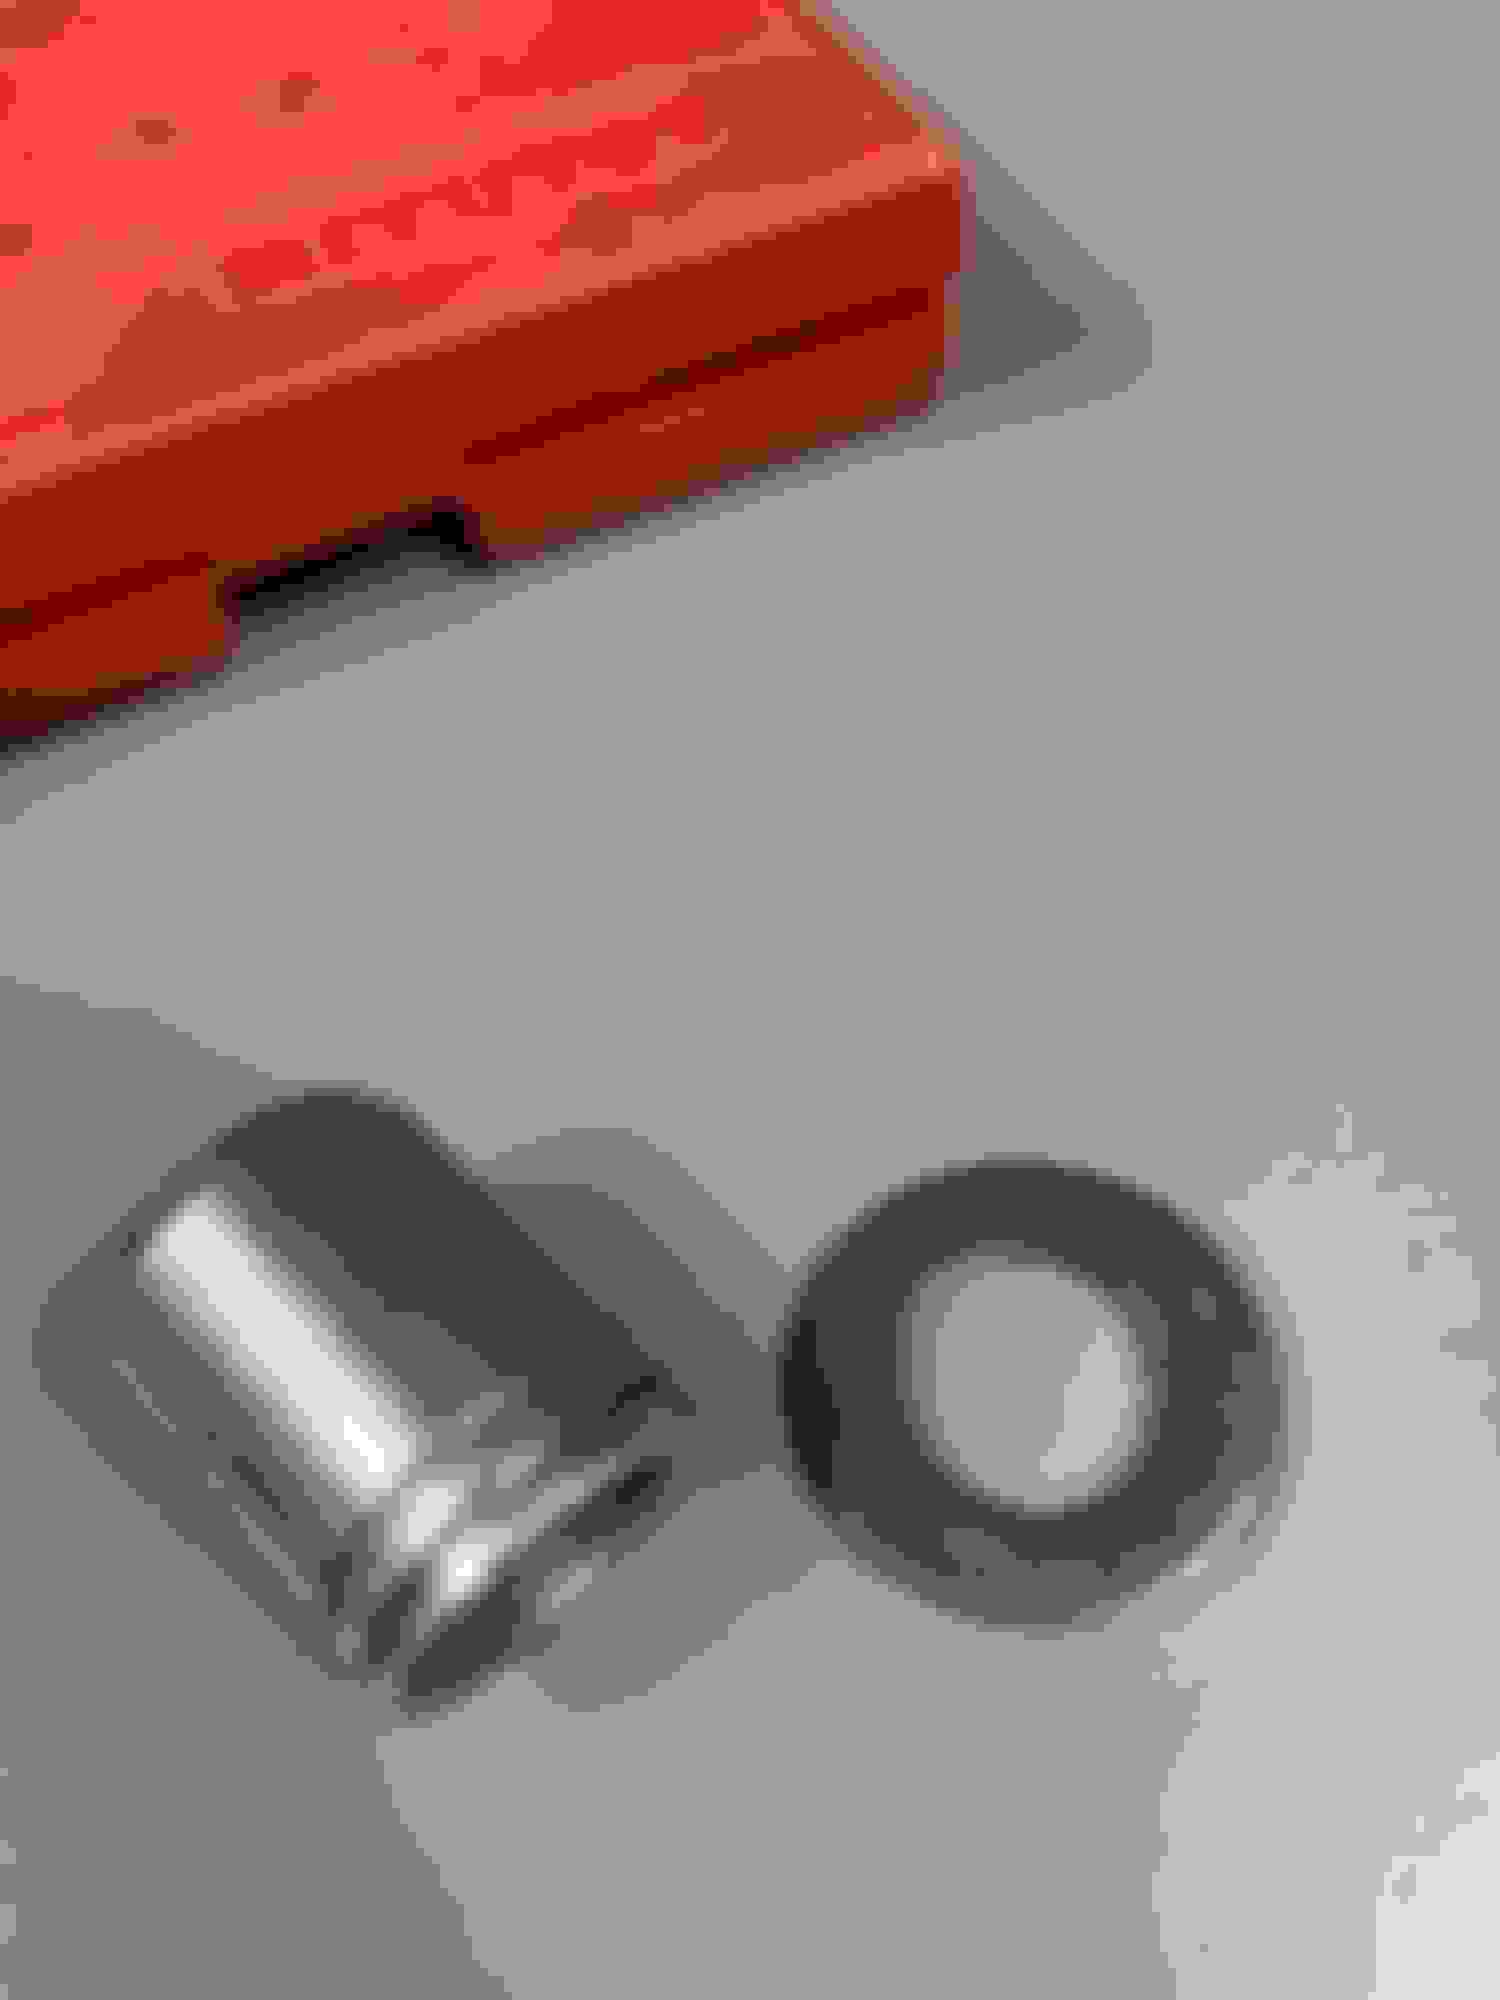
You'll probably want to change the big rubber/metal isolators while you got things apart. The new style "slot" isolators that are available don't exactly match up with the old "pin" style brackets. To account for the difference, I got some key stock, drilled a hole and ground to fit. Then epoxied them in place. In the pic, the small silver things are what I made. This was Sta-bo dude's recommendation.
Good Luck! Damage from spacer eating into swingarm Welded up and reinforced Painted Axle spacer milled off .125" and adding .125" washer against swingarm New style isolators, modified the holder with key stock
Thanks for the detailed response!
I really like what you've done and would love to attempt it myself.
What grade steel did you use to weld the reinforced areas? And how exactly did you repair the damaged area at the axle spacer?
I just need to get it all worked out in my head with a complete list of parts and what needs doing before I start. Also need to get hold of a workshop press....
I'll be starting a thread once I get started, because I'm sure I'm going to need all the help I can get.
Thanks again.
Did you feel the swingarm crack or notice handling? I got 90k on mine and have heard stories, but so far so good.
My swingarm didn't crack, but I accelerated and hit a bump and the belt broke and left me on the side of the road. I had installed new rear tire about 1,500 miles prior. I was irritated to say the least. Got her home and pushed the bike to the back of the garage and didn't work on it for two months. Then got my head together and dug in. Found the rear tire misaligned, and spacer eaten into swingarm. And cleve blocks getting squishy. Got the old girl back together in May and been riding all summer. The rear tire alignment and belt tension have not changed one bit during that time. Fingers crossed. I couldn't stay mad at my garage queen.
Last edited by Rob Harper; 09-05-2024 at 10:30 AM.
Reason: clarify
Thanks for the detailed response!
I really like what you've done and would love to attempt it myself.
What grade steel did you use to weld the reinforced areas? And how exactly did you repair the damaged area at the axle spacer?
I just need to get it all worked out in my head with a complete list of parts and what needs doing before I start. Also need to get hold of a workshop press....
I'll be starting a thread once I get started, because I'm sure I'm going to need all the help I can get.
Thanks again.
I just used some flat mild steel I had in the garage to reinforce. I filled in the divits with MIG welder then used a dremel and small hand grinder to re-shape everthing like original. I have several tools in my garage that help. MIG, cutoff wheel, grinders, 20 ton press etc.. And have access to a machine shop at work with Bridgeport mill, sheetmetal shear and brake, etc.. That helps for sure.
I just used some flat mild steel I had in the garage to reinforce. I filled in the divits with MIG welder then used a dremel and small hand grinder to re-shape everthing like original. I have several tools in my garage that help. MIG, cutoff wheel, grinders, 20 ton press etc.. And have access to a machine shop at work with Bridgeport mill, sheetmetal shear and brake, etc.. That helps for sure.
Thanks, you did a great job. And very nice ride you have there.
The Sta-Bo 1 kit replaces the swingarm cleve blocks that are installed in 2001 and down. The 2002 and up uses spherical bearings instead of cleve blocks. So I don't have any swingarm bearings, only the Sta-Bo solid bushings.
 09-04-2024, 09:04 PM