Guys, I have an 1992 Dyna FXDC with dual brakes on the front, so 11?16" bore. My master cylinder bracket broke so i bought a used one which i was told should fit my bike. I am trying to rebuild it but I've been struggling with 2 things:
1. I understand that the replacement is Drag Specialties 11/16 Master Cylinder rebuild kit part no. 45006-87A-PELB1 which looks quite different but from another thread I see that this is an "upgraded" version with a single piece plunger (cos it doesn't look like the one i took out).
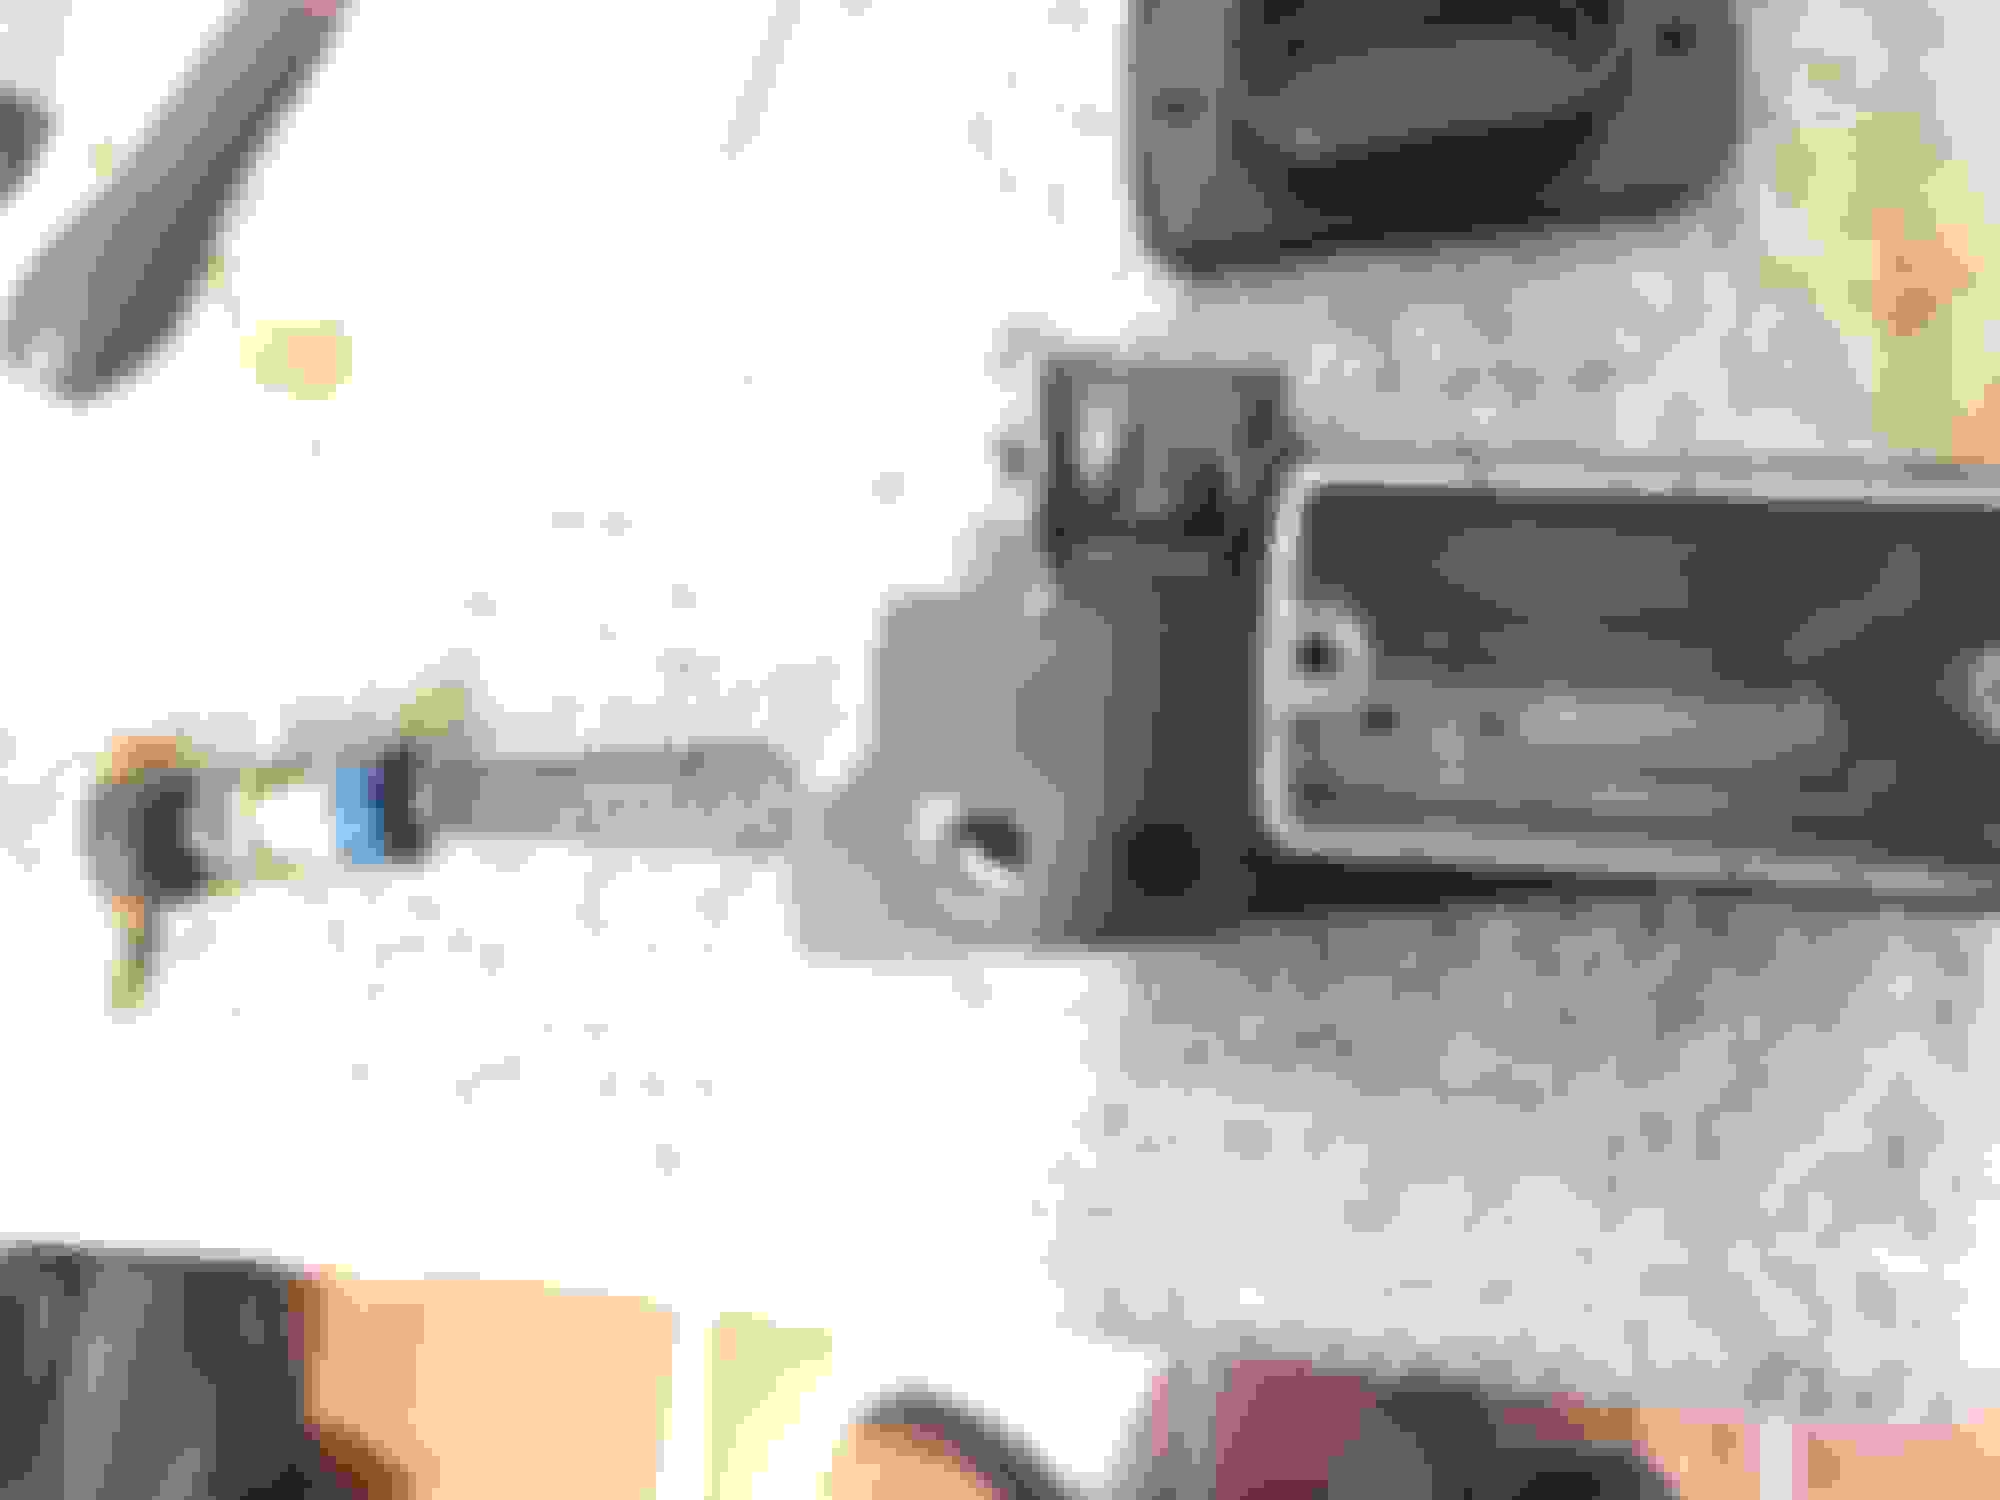
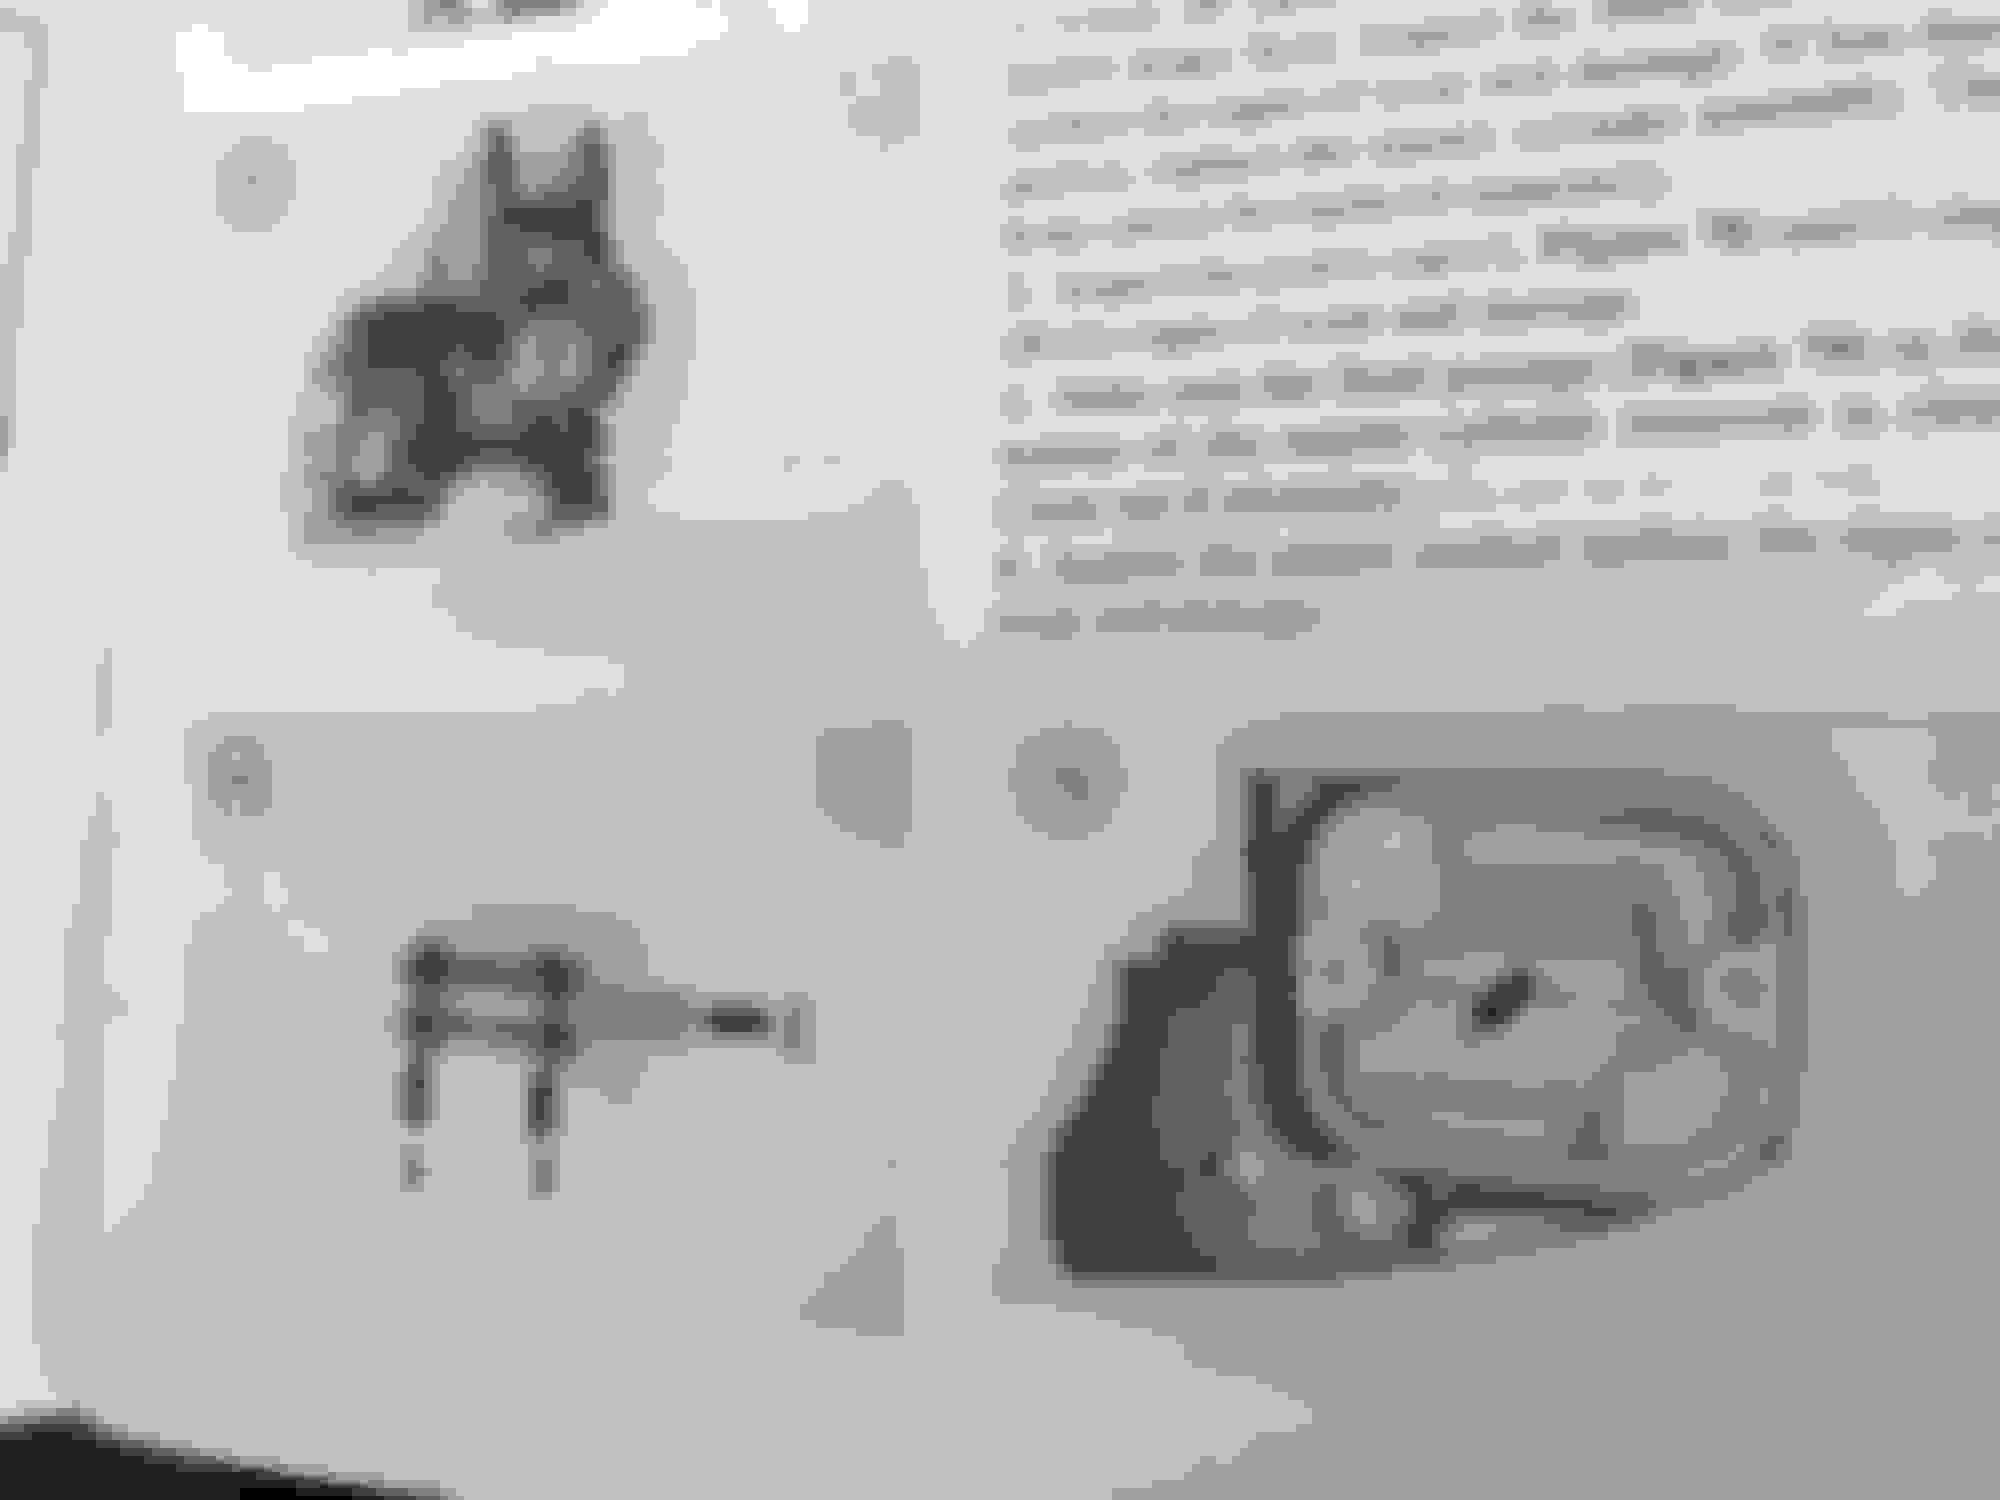
2. In the photos you can see there are 2 holes inside the master cylinder....the smaller one is nearly fully closed, there is a pin ***** of light coming through (using a torch you can see it in the image). In my manual it only points to a single hole (see photo). Should this 2nd hole be cleared, is this build up or should it actually be sealed, in which case it may not work? I rebuilt the rear master cylinder and that clearly had 2 holes, but that had quite a different type of plunger. "old" p2 part plunger and tiny 2nd hole The small pin ***** of light can be seen Different looking plunger and Manual only points to one hole?
I think the first question Ive answered myself (thanks to an old post I found here) but would appreciate confirmation on my 2nd question.
Thanks
As long as the smaller hole is clear and NOT enlarging it to the size of the other, I�d say put it together and try it. The length of the replacement plunger piston should be closely checked and be the same as the old one.
Looks like you�ve cleaned the inside well enough to make it work. That�s important. Use brake fluid to assemble it.
Thanks Taggs, I take it from tour reply that it should really only ha e one hole ideally?
To be honest, the best answer I can give is what I�ve seen on the front brake master cylinders, two rotors set ups. Only one hole. That�s not to say there could be variants out there.
The manual pic you posted looks like a generic version imo.
My guess is what you have should work fine if it worked before. By design the sweep of the piston rubber shouldn�t be a factor over the smaller hole.
The manual shows the second hole, but you have to look close at the photo to see it.
The second small hole is just to allows any air that is coming back up the line, to escape out up in to the fluid on the initial lever pull, instead of allowing it to pressure lock in the plunger assembly and its channel.
Once the front plunger clears both holes inwards from the lever press, it will build pressure up in the line. So most of the time, it not so much the plunger the problem, but someone not power bleeding the fluid enough, allows for too much water in the fluid, and this can cause the cylinder bore surfaces to water corrosion pit instead.
So take the time to use some brake cleaner and Q tips in the master cylinder plunger channel, and if you find the walls too pitted to even clean up with a small hone, its time to replace the master cylinder, since the plunger is never going to seal off good enough to the cylinder walls to created great pressure on the initial pull of the lever.
Thanks Dano, Appreciate the reasoning - wow, looking at the photo in the manual, I can't un-see it now! The plunger channel does actually have some water corrosion at the outlet end to the banjo bolt. Nice call on the Q tips. I think...and hope I can clean it off well enough, its not too much and its only at that end so should be good. Thanks!
 04-18-2021 | 01:15 AM