Engine Mechanical TopicsDiscussion for motor builds, cams, head work, stripped bolts and other engine related issues. The good and the bad. If it goes round and around or up and down, post it here.
I always hated those tank mounts I had them on my 77 fxe. You know they make kits to mount flat side tanks if you're ever interested in changing them out..
I always hated those tank mounts I had them on my 77 fxe. You know they make kits to mount flat side tanks if you're ever interested in changing them out..
Oh, cool, thanks. I'm not familiar with the 'flat side' style tank. Any chance you could point me to a website so I could see a picture or two?
I mulled over a fork bag and may add one later on--and maybe a chrome fender rack to hold a bedroll, tent, stove, and all that jazz--but I was so pleasantly surprised at what the OEM style toolbox held that I stuck it on the opposite side from where it ordinarily goes (my pipes are in the way). No welding or drilling of the frame (aluminum P-clamps), so I'll try it out and see how I like it.
I notice in looking at the last pic that I need a second 1/2" wrench and a square-shank screwdriver or little lever (to hold down the pushrod tube springs) to do valve adjustments, but can do the normal maintenance with this array--oil change, valve adjustment, R&R points and condenser.
I was also musing that I may weld up a light, removable center stand (from small box section) for longer trips, so I could pack a pump and irons in case of a flat. The rear drop-outs have the eyelets to mount one, and I could use quick-release pins and stash it on the fender rack...
I found a video where a professional fixes motorcycle tanks with MIG welder, which is all that I have.
So, I dialed down the MIG welder to its lowest setting and gave it a shot. The guy's suggestion to use the stitching method to accumulate metal didn't work well, perhaps because I didn't have a bracket to work as a heat sink like he did--and bolting something onto the stud made it too difficult to get the torch in there.
The job gave me fits but what I finally figured out was that the thin metal was stretching and pulling away from the weld as it built up around the sleeve, and of course getting even thinner in the process. As a result, it kept creating an infinitesimal gap at the outer border of the stitching bead--something less than a full-blown burn-through, but when I filled the tank with water and added a little pressure, drip, drip, drip...
I then started doing little crescent-shaped welds, allowed them to cool for a minute, hit the sheet metal briefly with the bench torch, and made another crescent, etc. Looks like the remnants of the Wicked Witch after hit with the bucket 'o water, but no leaky!
Also, didn't blister the paint at all. So, I'll sand it down (grinding might be too percussive for that thin, stressed sheet metal), give it some paint, and she'll be good to go.
Oil pump parts get here today, so hoping to get her ready for another pressure trial this week. With luck, I won't have to R&R the pump, which requires removing the timing cover...
Close to resolving the oil pressure issues, as discussed in this thread. Looks like the (brand new) gauge sender is defective, as the gauge jumped up to ~25 psi on startup, but the light never went out.
At any rate, I brought the engine up to operating temperature, and it sounded to me like it had a lean miss. Also, the front pipe just began to turn color during the initial run up to temp.
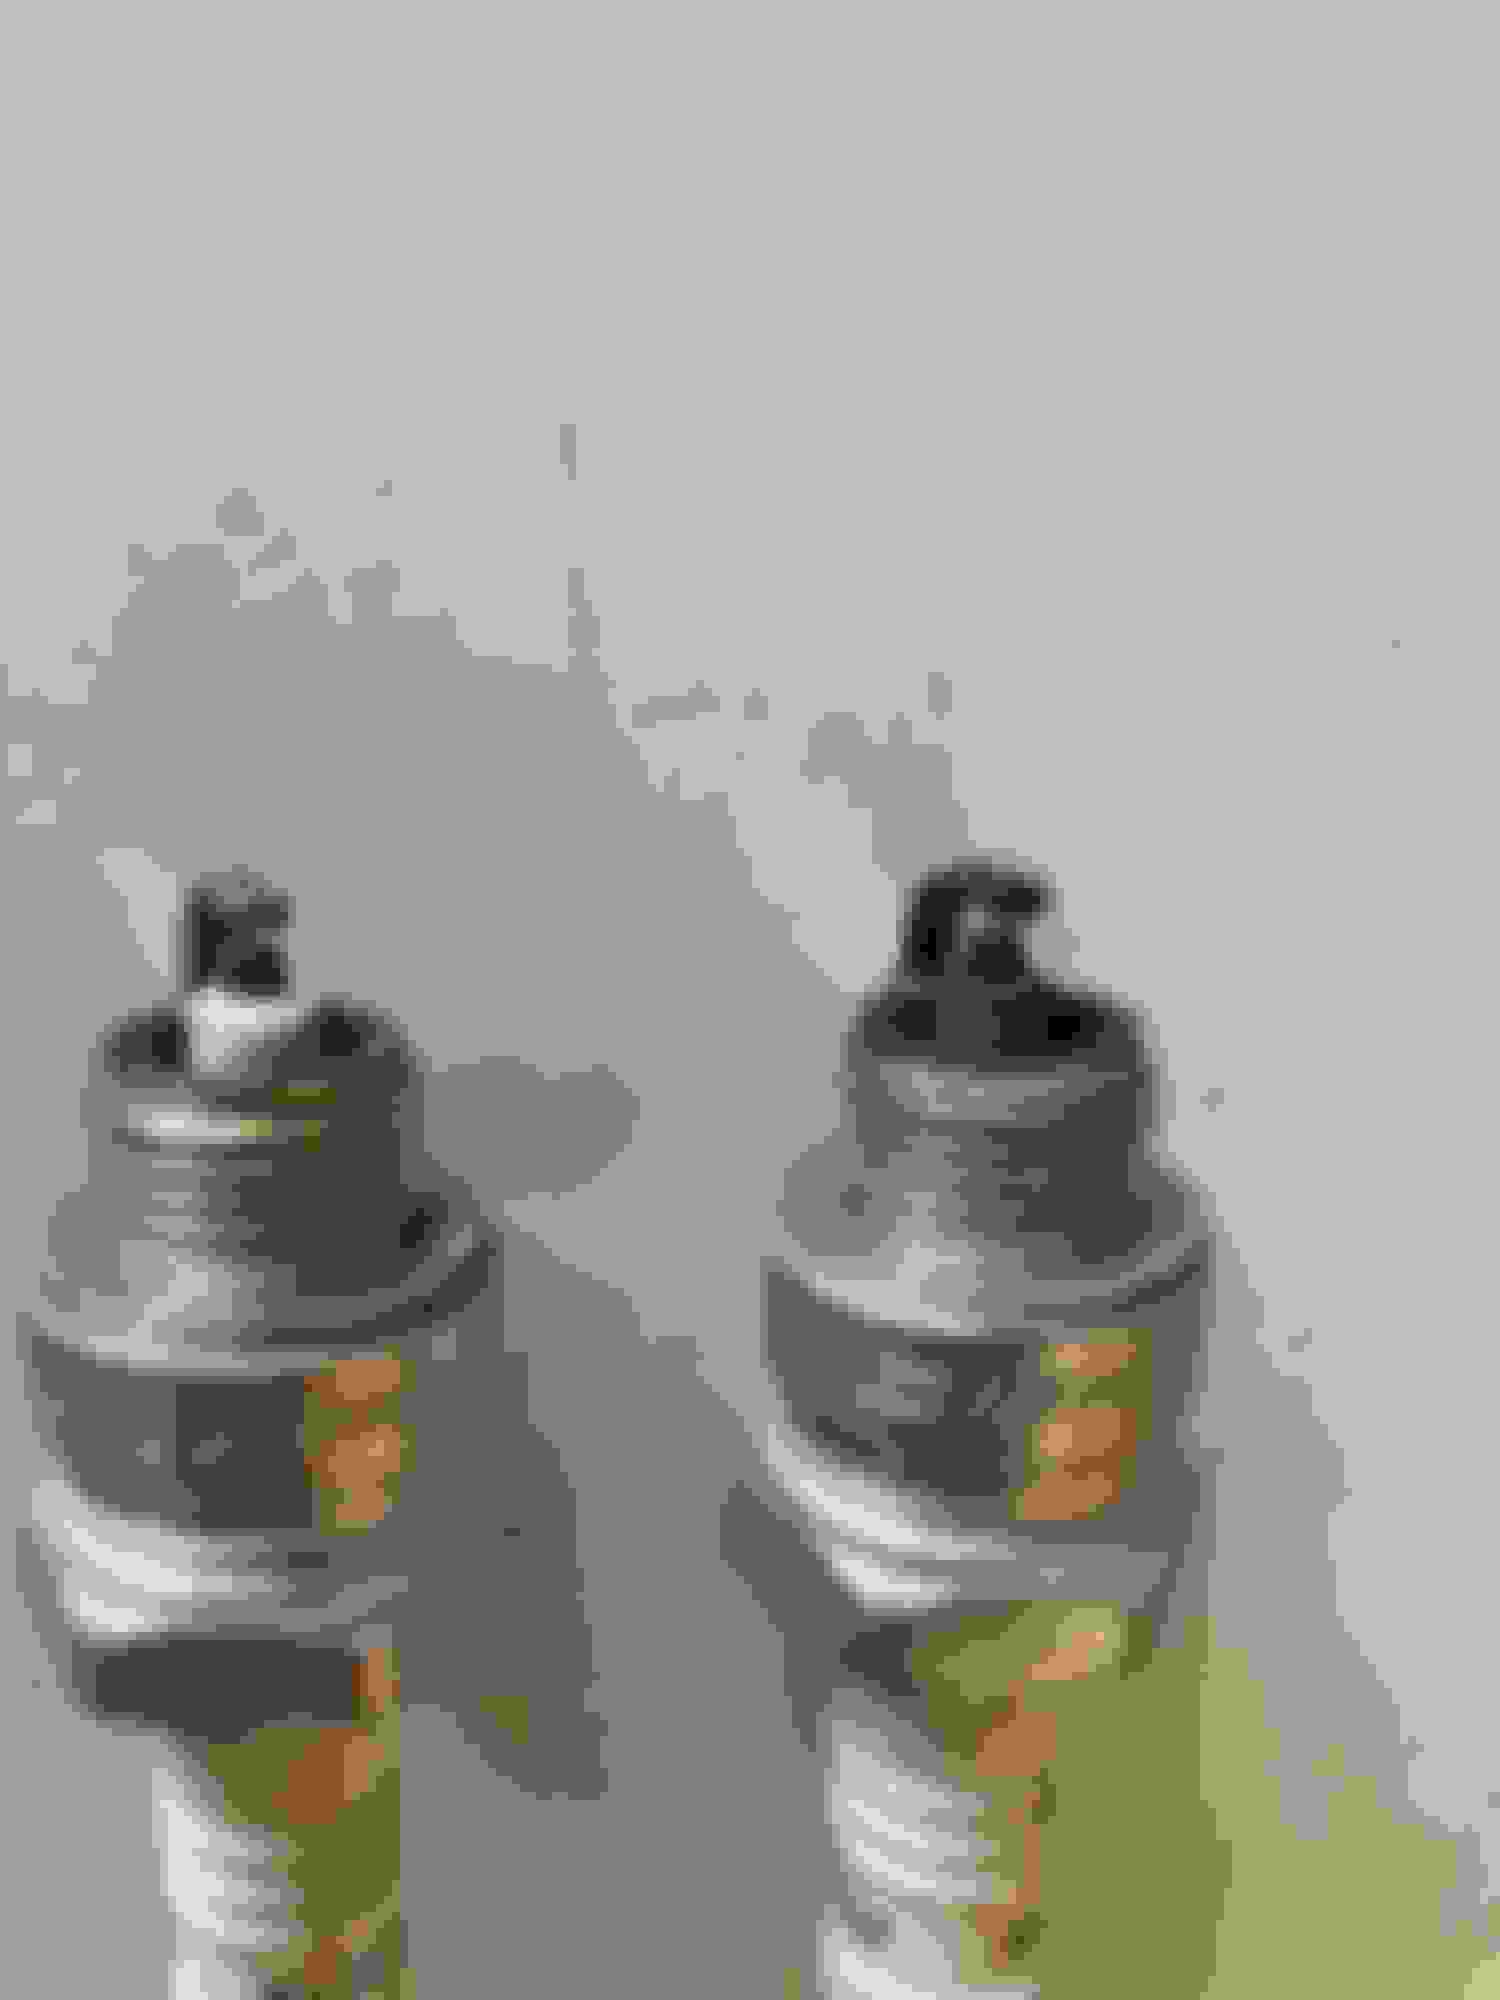
I pulled the plugs and the front cylinder is running quite lean, as you can see. Seems odd that they'd be this different... has anyone experienced this?
I tightened down the clamps on the S&S 'Y' manifold a bit more, but all the rubber is new and the manifold aligned quite closely when installing the heads.
At any rate, I will go up one jet richer and also adjust the idle mixture.
I will post a video so folks can hear the exhaust note when I get the miss sorted. But this morning I came up with an apt description of these vintage Sporty mufflers: 'spark arrestors.'
Admittedly, I have only heard her in the garage, near the doorway and with the pipes aimed outward. So, likely some echo/amplification effect going on. But to my ears they sound like drag pipes, or darned close...
So, folks wanted to hear the Paughco side-by-side shotguns fitted with vintage Sportster mufflers. Here's a little clip, albeit in the echo chamber of the garage. (And, yes, this is after the first heat cycle where I varied the rpms to seat the rings, etc.)
I was worried about it being too loud but it's growing on me...
 04-05-2022, 05:41 PM