H-D LED Auxiliary Lamps on my '10 FXDC
#1
I decided to go all out with the forward lighting on my FXDC. I picked up a couple of auxiliary lamp buckets from a Softail Deluxe, a set of PIAA 1-1/4" bar mounts from Dennis Kirk and a pair of H-D 73396-10A LED auxiliary lamps. I mounted them to my engine guard (with some modifications to the bucket mounting stud and the bar mounts). With the headlamp, the lights form a triangle that's 21" on all sides. I ran the wires out of the back of the buckets near the mount, through the engine guard, then back out in the middle of the guard where they go up into the harness area under the frame.
I was in hurry to find out how they would work, so I wired them up to power temporarily. I aimed them so that the flat top beam they project fell 2" at 25 ft. That puts the light out 200' to 250' in front of me. Took it for a spin - and holy cow! I light up a path 30' to 50' wide! If they can't see me now, day or night I don't know what to tell ya! And no, no one flashed their high-beams at me.
I'm now in the process of wiring them in permanently. Of course I had to remove the tank. I ran the wiring up into the console and mounted a Judco push-button on/off switch that looks identical to the one used for the odometer/clock/etc. Right in front of it in fact. I should have it done and back together this weekend. I'll post more pictures when I'm done.
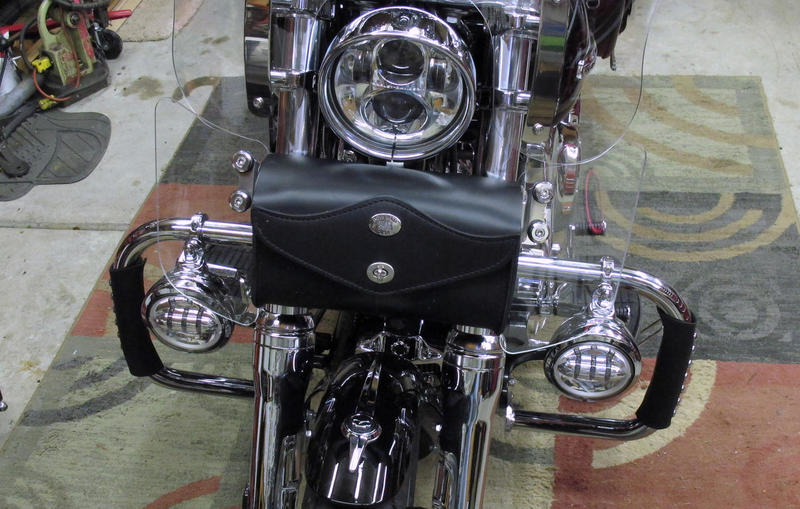
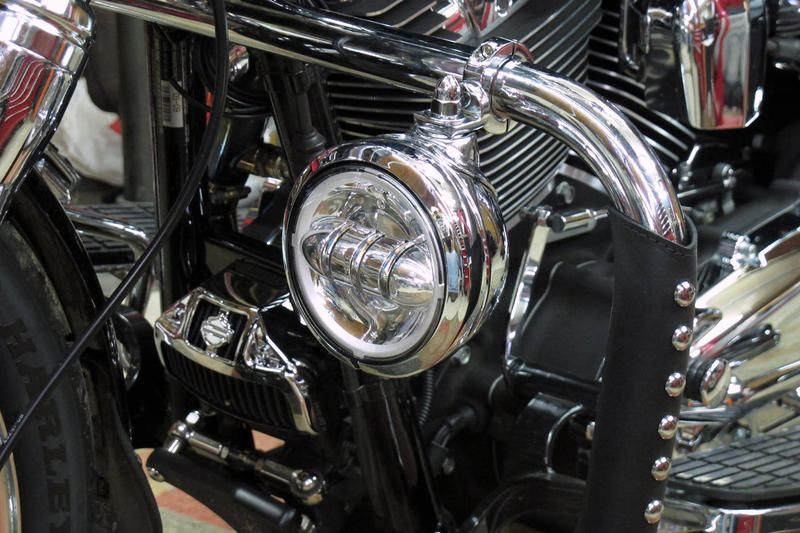


#5
#6
#7
I promised to post some additional pictures after completing the installation. Here they are.
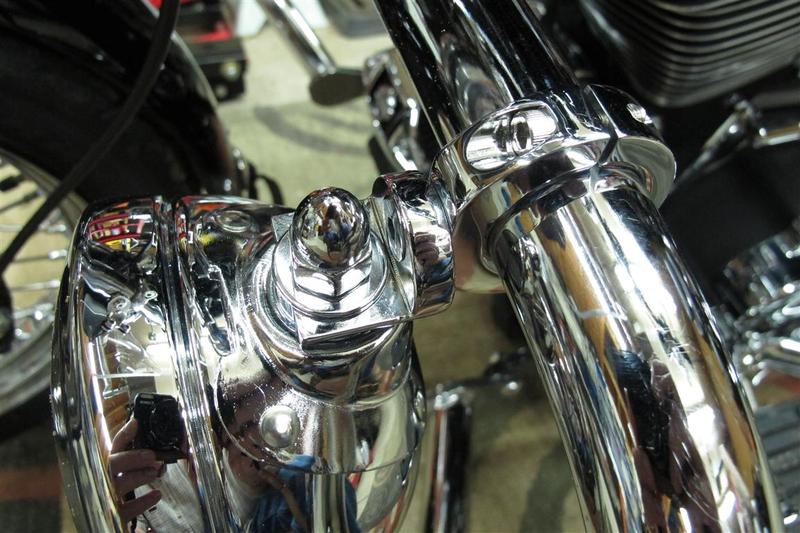
Close-up of the PIAA 1-1/4" brackets that I used. I had to pin the 'L' bracket to the bar ring clamp to keep it from rotating. The .093" hole and spring pin is hidden under the flat head mounting screw. I also had to shorten the mounting stud of the lamp buckets.
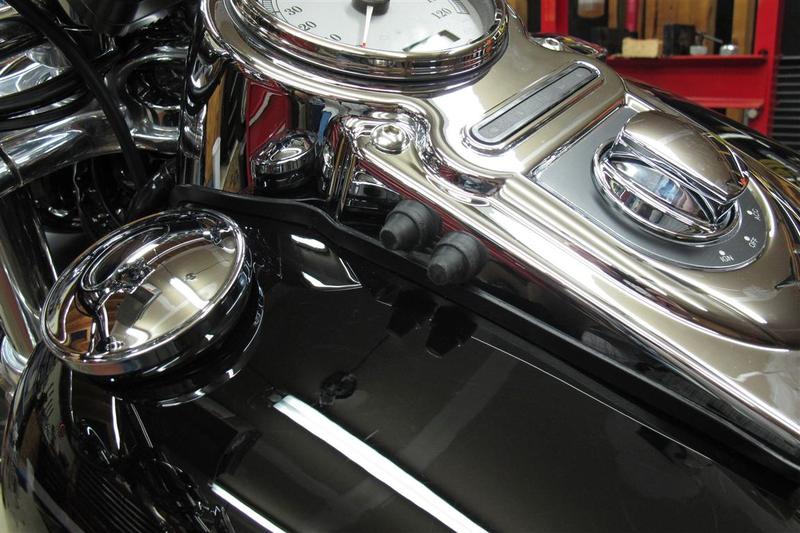
Although it probably wasn't necessary, I installed an on/off switch for the lamps. I managed to find a pushbutton switch that matched the factory odometer reset switch. As it turned out, the switch I bought was made by Judco, the same company that made the H-D odometer reset switch.

The wire for the auxiliary lamp originally passed through the middle of the mounting stud. For this application I had to make a hole in the rear of the bucket mount for the wire. It then goes through a hole into the engine guard. I used #10 wire because it was the smallest wire that was a tight fit through the smallest vinyl grommets that I could find. It's definitely not required for the 1.2 amp draw of the LED lamps. I had to user larger vinyl grommets to accomodate the much thicker material of the engine guard. I slid some sleeves (short pieces of vinyl tubing) around the wire so that I had a tight, waterproof seal at the grommets.
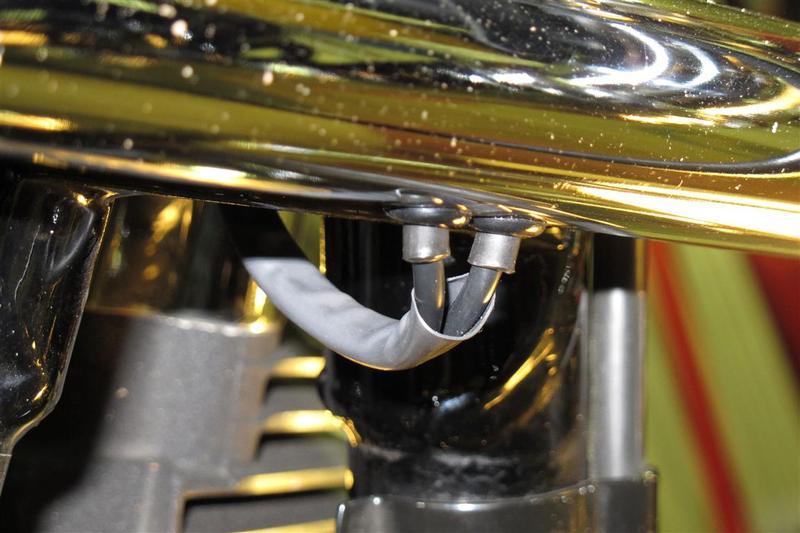
The wires exit from the bottom center of the engine guard, then go up into the frame area where the harness connectors are located (behind the plastic cover).
Close-up of the PIAA 1-1/4" brackets that I used. I had to pin the 'L' bracket to the bar ring clamp to keep it from rotating. The .093" hole and spring pin is hidden under the flat head mounting screw. I also had to shorten the mounting stud of the lamp buckets.
Although it probably wasn't necessary, I installed an on/off switch for the lamps. I managed to find a pushbutton switch that matched the factory odometer reset switch. As it turned out, the switch I bought was made by Judco, the same company that made the H-D odometer reset switch.
The wire for the auxiliary lamp originally passed through the middle of the mounting stud. For this application I had to make a hole in the rear of the bucket mount for the wire. It then goes through a hole into the engine guard. I used #10 wire because it was the smallest wire that was a tight fit through the smallest vinyl grommets that I could find. It's definitely not required for the 1.2 amp draw of the LED lamps. I had to user larger vinyl grommets to accomodate the much thicker material of the engine guard. I slid some sleeves (short pieces of vinyl tubing) around the wire so that I had a tight, waterproof seal at the grommets.
The wires exit from the bottom center of the engine guard, then go up into the frame area where the harness connectors are located (behind the plastic cover).
Trending Topics
#9
#10
I then fed a length of 20 gauge solid copper wire through the outside hole to the center hole, then pulled it through the hole with a thin pair of needle nosed pliers. Next I installed the vinyl grommet around the solid copper wire into the center hole. I stripped some insulation from the end of one of the pieces of 10 gauge stranded wire that I had prepared for the lights and soldered it to the end of the solid copper wire. I soaped the wire up a bit, then pulled it through, being careful not to pull the grommets in or out.
Repeat for the other side.
Once I had the wires through, I slipped a 3/4" length of vinyl tubing over the wires and through the grommets to create a watertight seal. I'm not sure what size the tubing was. It was something that I just happened to have in my parts drawer.

