Dyna Glide ModelsSuper Glide, Super Glide Sport, Super Glide Custom, Dyna Glide Convertible, Super Glide T-Sport, Dyna Glide Police, Dyna Switchback, Low Rider, Street Bob, Fat Bob and Wide Glide.
some of the things i posted earlier have been taken off for powder coating. so when i repost they will have better pic's as i put it back together and embed them in the post.
Page 01 front sig tuck mud post#1 risers JRK5892 post# 4 black exhaust HogGlider post# 5 front signal relocate HOGRIDA post# 7 forward stirrups 74c10sb post# 9 internal bar wires dklozik post# 33 seat mod matkiwi post# 37 rear signal mod XKROME post# 39
Page 02 fender chop SPECIAL ED post# 41
good misc Chipstah post# 42 Tank pocket Zimbob post# 43 front fender mod SPECIAL ED post# 44 tank lift Varmint post# 46
reroute breather x2lee&nbs
Page 01 front sig tuck mud post#1 risers JRK5892 post# 4 black exhaust HogGlider post# 5 front signal relocate HOGRIDA_06 post# 7 forward stirrups 74c10sb post# 9 internal bar wires dklozik post# 33 seat mod matkiwi post# 37 rear signal mod XKROME post# 39
Page 02 fender chop SPECIAL ED post# 41
good misc Chipstah post# 42 Tank pocket Zimbob post# 43 front fender mod SPECIAL ED post# 44 tank lift Varmint post# 46
reroute breather x2lee post# 47
[color=#ff0000]air filter mod 74c10sb &nbs
Dang, Mud, you don't play! I was thinking I would have time this afternoon to help with that index, but you've already got it whooped. Probably just as well- by the time you sorted through somebody else's stuff you could probably have done it yourself.
.
.
Here's a good tank beatin for ya. the violence occurred in December 2006
First picture below, I have welded quarter inch round stock
to each side of the tank to lock in the perimeter shape.
Then I drew a line where the deepest part will be when finished.
In the red outline is the tool I fabricated for the beating.
About six inches long by one and a half by two inches.
Shaped at the end as you see on the left.
The orange clamps are holding the tank fixture
to the table to eliminate moving all over the place.
Started beating along the green line, little by little,
working outward as the depression gets deeper.
.
.
.
.
Next, below, beaten all the way in.
Also you see the rib I welded down the center of the tank,
with the nut welded for the shortened console attachment.
.
.
.
.
Shown below, the fuel injected machines fuel pump
is only one and a quarter inch away from the tank side.
So before I started beating, the original tank profile
is cut into a wooden template for gauging depth of the new cavity.
The gauge mounts to the tank holding fixture the same on both sides.
.
.
.
.
I used a filler called All Metal, similar to Bondo,
it is an aluminum powder type formulation.
.
.
.
.
.
.
.
.
.
.
.
.
.
.
.
.............below, the tank as of Oct 22, 2009.
.
.
below is feb 2007.......
.
.
.
Last edited by mud; 01-18-2020 at 06:57 AM.
Reason: replace missing pix
Mud,
sorry it took so long to do this, but as per your request, theres the
details.........
Back in the early part of 06' before the tanks lift craze really took off here,
RudeDog and jackyl were making a few tank lifts for those who were
interested. I started a dialog with RudeDog (mainly because of his differant
machine shop mods) . I wanted something special in a tank lift design. I
wanted a lift with a brace accross the top ,
RudeDog complied and sent me this..............
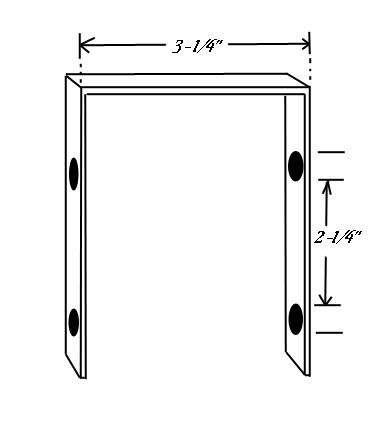
This however, was not what I was looking for, so I sent him a
drawing..........................
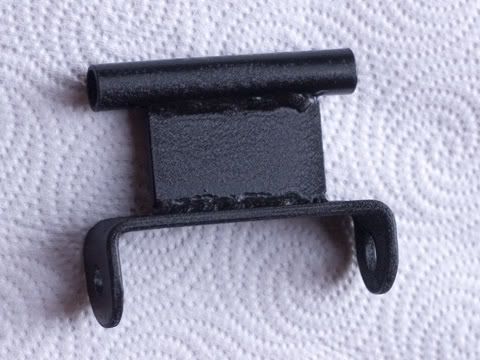
This time he knew what I wanted and sent me this, Heres a shot after I
wrinkle coated it and mounted for fit..........
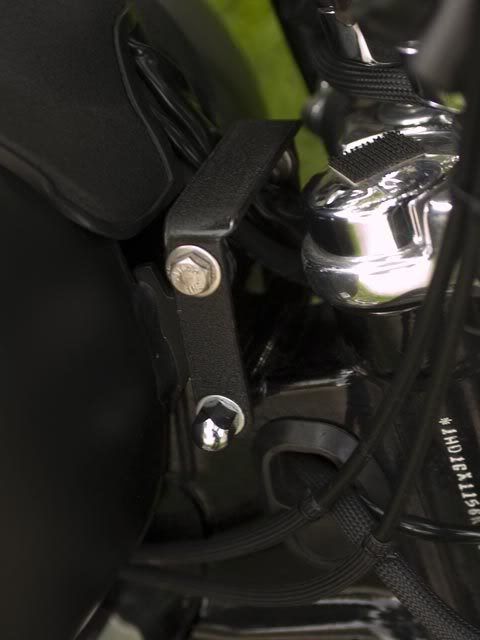
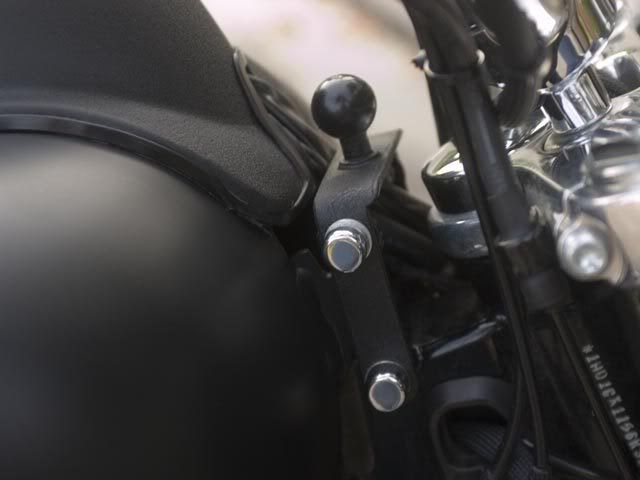
I then removed, center tapped and mounted a Rammount Ball to the top........
My cost was over $50.oo, but only my a little(mainly because of the mis-
comunications between me and RudeDog If I had sent him the drawing in the
first place I would have only invested in one lift from him)
The final lift delivered from RudeDog was $25.00 I believe
The RamMount was another $20.00, But it looks almost like factory and has been
very functional.. All in all very pleased.
Thanks for you help RudeDog..........
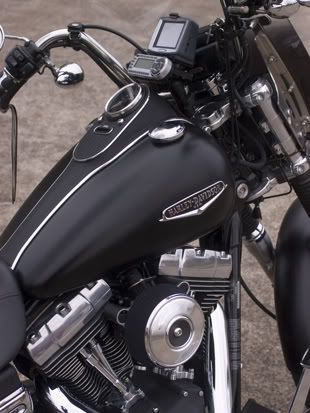
Heres a shot in use... I normally just mount the GPS but this time was from a 1700 mile trip, took the radio as well..

 01-29-2008, 07:16 PM
 ...
...