* HOW TO * under fifty bux *
#601
 02-16-2008, 10:49 PM

.
.
.
.
.
CLICK BELOW for INDEXES
****PAGES*********01-14
****PAGES*************15-20
****PAGES*******************21----
****PAGES*********01-14
****PAGES*************15-20
****PAGES*******************21----
.
.
Last edited by mud; 08-21-2008 at 08:47 AM.
The following users liked this post:
DyNaMc (07-22-2018)
#602
02-16-2008, 11:04 PM
#603
02-16-2008, 11:04 PM
ORIGINAL: HogGlider
Under $50 and worth every singel penny of the $10 it costs!
Another cheap mod...remove the stock fender strut covers if you want the black look;

Under $50 and worth every singel penny of the $10 it costs!
Another cheap mod...remove the stock fender strut covers if you want the black look;
ORIGINAL: HogGlider
Drag Specialties Polyurethene (sp?) Handlebar bushings
Drag Specialties Polyurethene (sp?) Handlebar bushings
https://www.hdforums.com/m_1726526/tm.htm
mud
Last edited by mud; 08-16-2008 at 10:06 AM.
#604
02-17-2008, 02:03 AM

May our Moderator Rest in Peace
I added or changed the plastic covering (conduit) on the wires from my handlebar controls to a mesh covering and it looks much better.So now I wanted to do the same thing to the turn signals and here's what I came up with.
Thanks to Mr. Mud's help I went to FRY.Com and ordered 4 different sizes of the mesh. Its identical to the stuff that Harley uses on the Wideglide and much nicer looking than the smooth plastic junk that the factory uses.
Here's the part numbers and sizes I ordered and all four of them cost about $35 delivered.
2281378 1/8" X 20'
2281388 1/4" X 16'
22813981/2" X 10'
22814083/4" X 8'
Each piece is only $6.99 and all together there's enough to do at least 2 complete bike's.
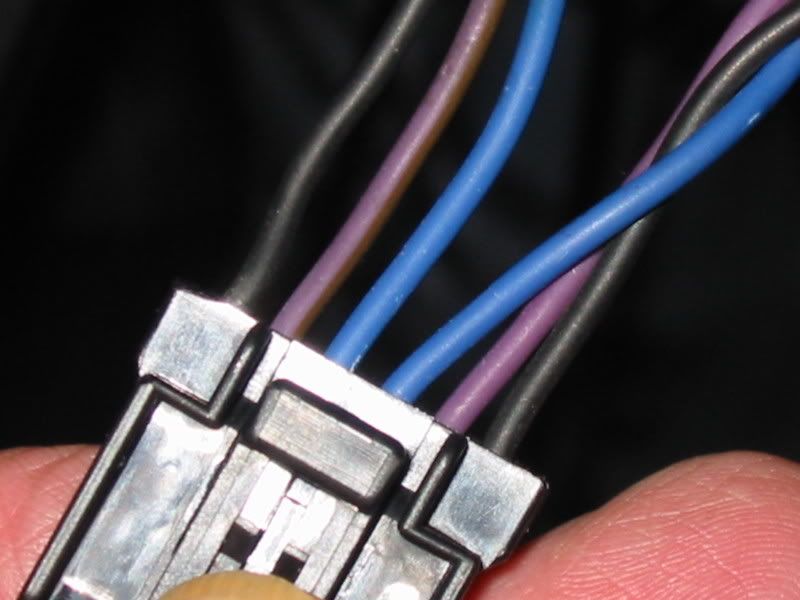
This is the plug that is used on my Softail and its probably the same on the Dyna's.
You'll notice that the pinouts are mirror images and I suggest that you only take the pins out of one side at a time. That will eliminate the possability of itgetting missplaced or lost on you and you'll have a ready guide to putting the pins back in properly. Just remember its exactly oppisite an you won't have a problem.
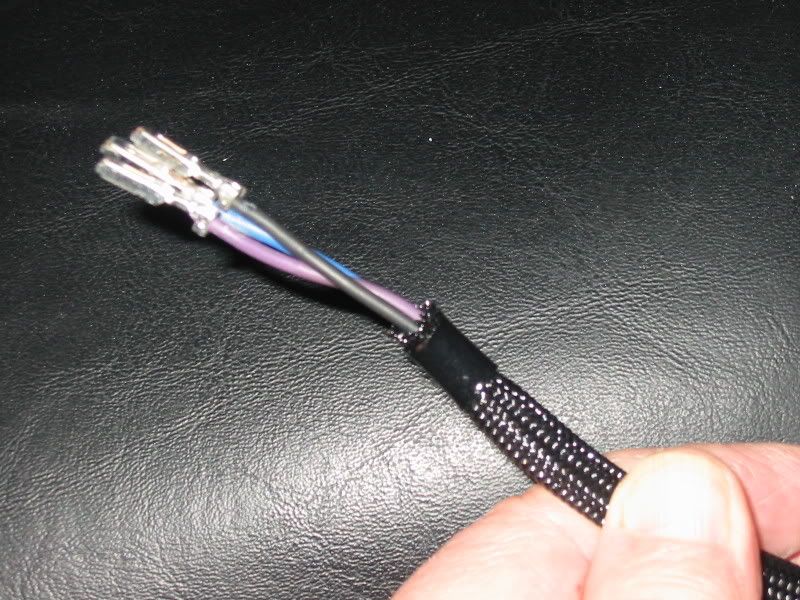
For the turn signals I used the 1/8" stuff so it would fit snugly over the original covering. First thing is to put a piece of tape over the pin plugs. It will make iteasier to slip the mesh over them. Onceyou have enough on so that its about 4" to 6" from the signal cut the mesh about 1" below the pins.
That should be more than enough to cover it and with it not completely on yet it will let you slidetwo short pieces of shrink tubing on much easier.
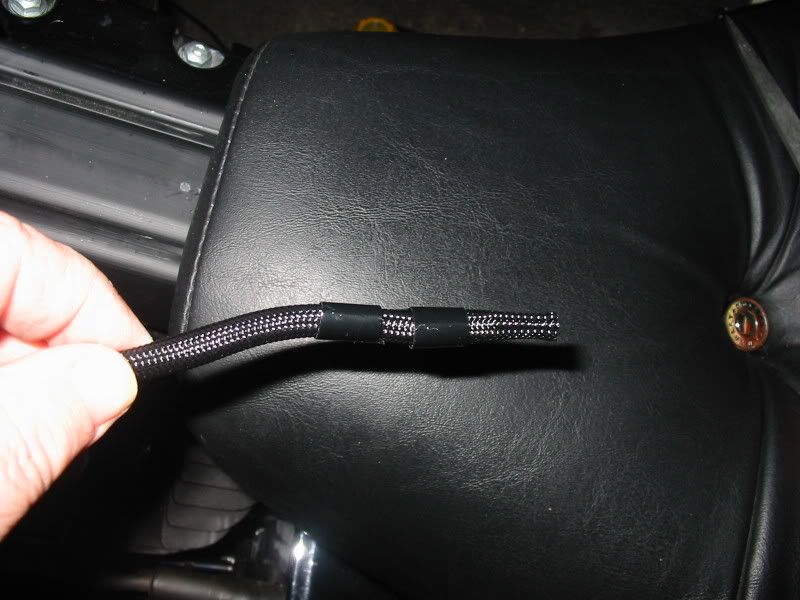
Once its all the way up it will look like this.
Because the mesh has a fairly low melting point you should put a short piece of electrical tape, enough for a little over one wrap around the end first. Then slide one piece of the shrink tube up and shrink it over the end. The shrink tube will keep the mesh from fraying or unraveling and give it a more 'finished' look.

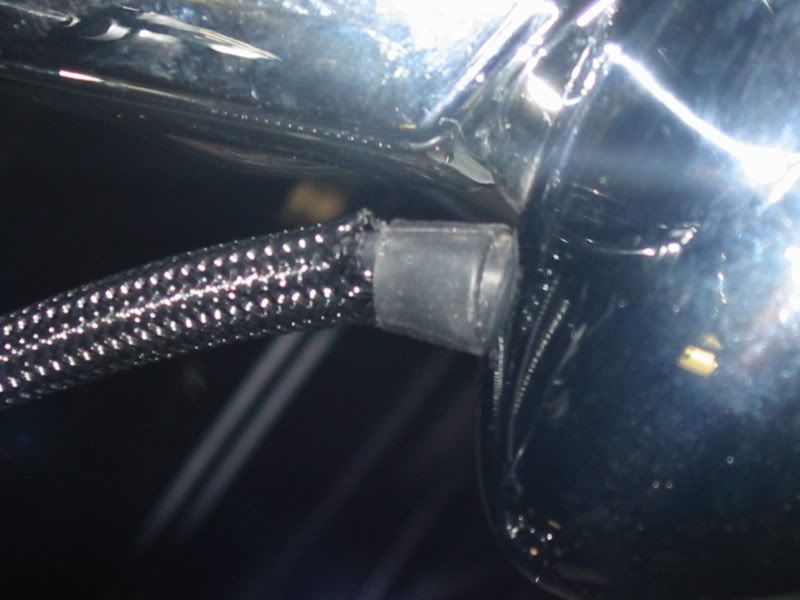
Then do the same to the other end. You don't need the elecrical tape here because its going to be hidden under the tank. But its up to you.
Here's what the cable looks like before on the left, and the after on the right.
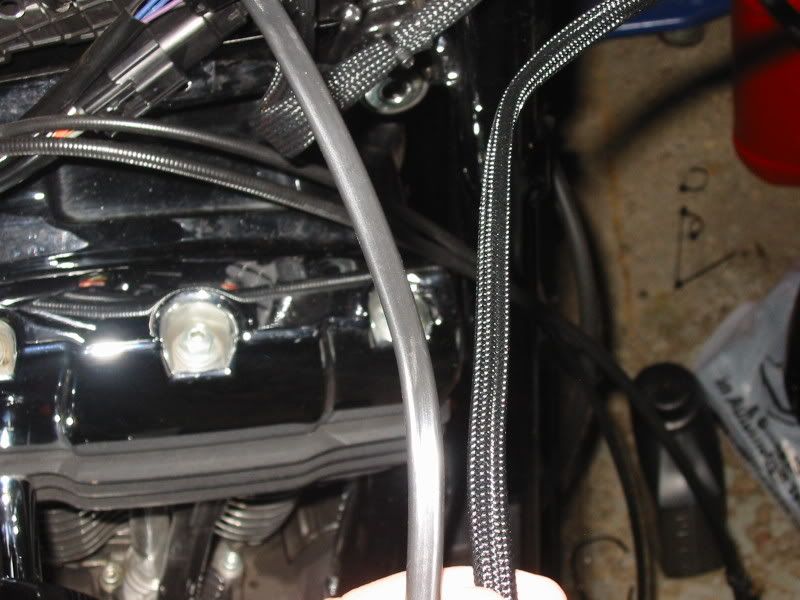
Now for my next trick, the headlight cable.
Good luck and ride safe
Frank
Thanks to Mr. Mud's help I went to FRY.Com and ordered 4 different sizes of the mesh. Its identical to the stuff that Harley uses on the Wideglide and much nicer looking than the smooth plastic junk that the factory uses.
Here's the part numbers and sizes I ordered and all four of them cost about $35 delivered.
2281378 1/8" X 20'
2281388 1/4" X 16'
22813981/2" X 10'
22814083/4" X 8'
Each piece is only $6.99 and all together there's enough to do at least 2 complete bike's.
This is the plug that is used on my Softail and its probably the same on the Dyna's.
You'll notice that the pinouts are mirror images and I suggest that you only take the pins out of one side at a time. That will eliminate the possability of itgetting missplaced or lost on you and you'll have a ready guide to putting the pins back in properly. Just remember its exactly oppisite an you won't have a problem.
For the turn signals I used the 1/8" stuff so it would fit snugly over the original covering. First thing is to put a piece of tape over the pin plugs. It will make iteasier to slip the mesh over them. Onceyou have enough on so that its about 4" to 6" from the signal cut the mesh about 1" below the pins.
That should be more than enough to cover it and with it not completely on yet it will let you slidetwo short pieces of shrink tubing on much easier.
Once its all the way up it will look like this.
Because the mesh has a fairly low melting point you should put a short piece of electrical tape, enough for a little over one wrap around the end first. Then slide one piece of the shrink tube up and shrink it over the end. The shrink tube will keep the mesh from fraying or unraveling and give it a more 'finished' look.
Then do the same to the other end. You don't need the elecrical tape here because its going to be hidden under the tank. But its up to you.
Here's what the cable looks like before on the left, and the after on the right.
Now for my next trick, the headlight cable.
Good luck and ride safe
Frank
#605
02-17-2008, 11:35 PM
Club Member
Ok someone suggested I should put this in here so here you go.
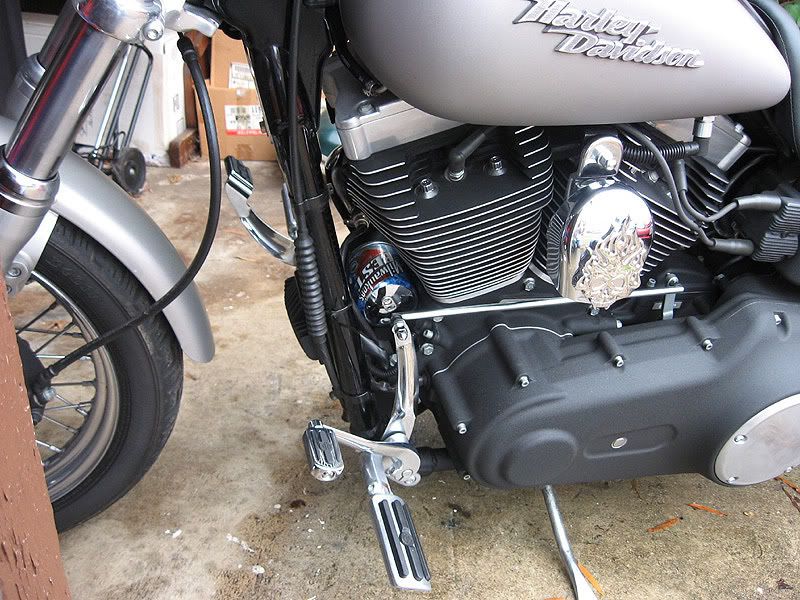
A guy I know calls mybikeThe Beast of Burden so I was thinking why not incorporate The Beast into my bike and I decided to put a can of it over my oil filter.The can would not wrap completely around the filter so I had to cut it and it left about a 1.5 inch gap or so but that will face towards the bottom when I put it on so it shouldn't be that noticable. I also put the little poptop on top of the filter.
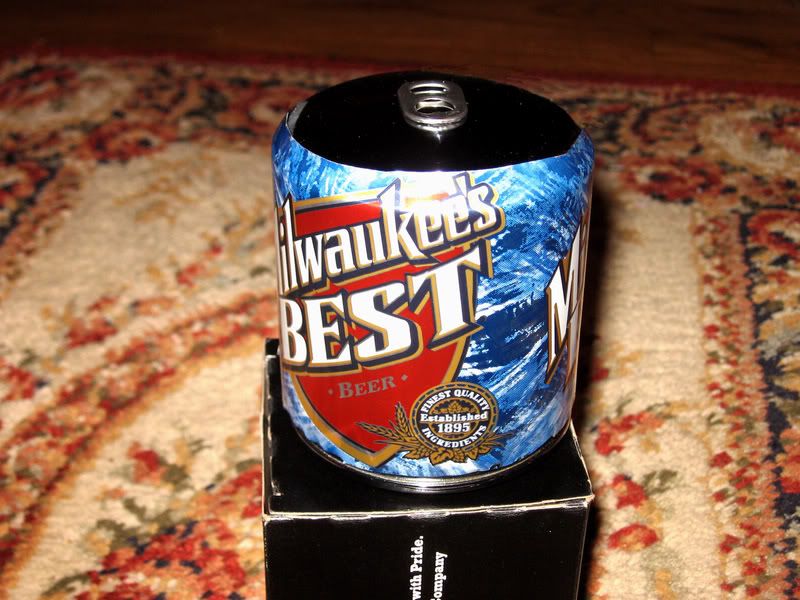
I bought a 12 pack of The Beast so it cost me about $5 something for the mod. You can of course use any other beer you like but the cost will rise from there.
A guy I know calls mybikeThe Beast of Burden so I was thinking why not incorporate The Beast into my bike and I decided to put a can of it over my oil filter.The can would not wrap completely around the filter so I had to cut it and it left about a 1.5 inch gap or so but that will face towards the bottom when I put it on so it shouldn't be that noticable. I also put the little poptop on top of the filter.
I bought a 12 pack of The Beast so it cost me about $5 something for the mod. You can of course use any other beer you like but the cost will rise from there.
#606
02-17-2008, 11:39 PM

Outstanding HDF Member
great idea on the mesh for the headlights. i took mine off my old throttle cable and while i was in the backbone with my wiring for my handlebars slid it on the headlight wires, looks a lot better than the plastic insulation. thanks for the idea.
ORIGINAL: Citoriplus
I added or changed the plastic covering (conduit) on the wires from my handlebar controls to a mesh covering and it looks much better.So now I wanted to do the same thing to the turn signals and here's what I came up with.
Thanks to Mr. Mud's help I went to FRY.Com and ordered 4 different sizes of the mesh. Its identical to the stuff that Harley uses on the Wideglide and much nicer looking than the smooth plastic junk that the factory uses.
Here's the part numbers and sizes I ordered and all four of them cost about $35 delivered.
2281378 1/8" X 20'
2281388 1/4" X 16'
22813981/2" X 10'
22814083/4" X 8'
Each piece is only $6.99 and all together there's enough to do at least 2 complete bike's.
This is the plug that is used on my Softail and its probably the same on the Dyna's.
You'll notice that the pinouts are mirror images and I suggest that you only take the pins out of one side at a time. That will eliminate the possability of itgetting missplaced or lost on you and you'll have a ready guide to putting the pins back in properly. Just remember its exactly oppisite an you won't have a problem.
For the turn signals I used the 1/8" stuff so it would fit snugly over the original covering. First thing is to put a piece of tape over the pin plugs. It will make iteasier to slip the mesh over them. Onceyou have enough on so that its about 4" to 6" from the signal cut the mesh about 1" below the pins.
That should be more than enough to cover it and with it not completely on yet it will let you slidetwo short pieces of shrink tubing on much easier.
Once its all the way up it will look like this.
Because the mesh has a fairly low melting point you should put a short piece of electrical tape, enough for a little over one wrap around the end first. Then slide one piece of the shrink tube up and shrink it over the end. The shrink tube will keep the mesh from fraying or unraveling and give it a more 'finished' look.
Then do the same to the other end. You don't need the elecrical tape here because its going to be hidden under the tank. But its up to you.
Here's what the cable looks like before on the left, and the after on the right.
Now for my next trick, the headlight cable.
Good luck and ride safe
Frank
#607
02-18-2008, 12:38 AM
May our Moderator Rest in Peace
#608
02-18-2008, 12:40 AM
Club Member
#609
02-18-2008, 07:19 AM
Road Captain
Join Date: Sep 2007
Location: NH - Why not Minot, ND
Posts: 539
Likes: 0
Received 0 Likes
on
0 Posts
Good, Inexpensive Side Mount Plate...
I posted this last year, and it's helped some out already. It's been on for 1,000+ miles with no problems...
https://www.hdforums.com/m_2170668/tm.htm
I posted this last year, and it's helped some out already. It's been on for 1,000+ miles with no problems...
https://www.hdforums.com/m_2170668/tm.htm
#610
02-18-2008, 04:38 PM

Cool mod, I know how bad it would suck to waste a beer so how about if you open one from the bottom the old fashioned way then you could mount that can so it looks unopened...
ORIGINAL: PigInaBlanket
I bought a 12 pack of The Beast so it cost me about $5 something for the mod. You can of course use any other beer you like but the cost will rise from there.
I bought a 12 pack of The Beast so it cost me about $5 something for the mod. You can of course use any other beer you like but the cost will rise from there.