* HOW TO * under fifty bux *
#1701
 05-08-2011, 12:42 PM

Elite HDF Member
Join Date: Apr 2008
Location: Back in the Good Ole USA. South Carolina to be exact.
Posts: 4,718
Likes: 0
Received 10 Likes
on
6 Posts
I have an 08 Fat Bob and exactly the same bags. I'm alright with the wide look so I never take the bags off to ride. The issue for me as not being able to clean the bike well in the areas covered by the bags. This makes it much easier to remove the bags when I want.
In my case the font studs were about an eighth of an inch short and I may redo the front.
#1702
05-13-2011, 06:45 PM
I saw a few pictures of what the BCT baffles look like, but did not feel like spending the money for them. Not yet anyway, so I thought of this idea in the mean time. I took out my standard Vance and Hines baffles that come with the Big Shots and attached these eyebolts into the end cap of each pipe to hopefully give about the same amount of back pressure. The bike is up on the lift when I did this, so have not been able to test it yet. Still waiting to get my 21" wheel on the bike. Let me know what you guys think.
#1703
05-14-2011, 07:50 AM
Had a Honda 500 once too- cut off all the pipes and put a rod with washers inside each pipe I could turn as gates. That actually worked, because it was something like a 1-1/8" pipe with a 1" washer or thereabouts.
But tuned: no.
#1704
05-29-2011, 05:59 PM
Tourer
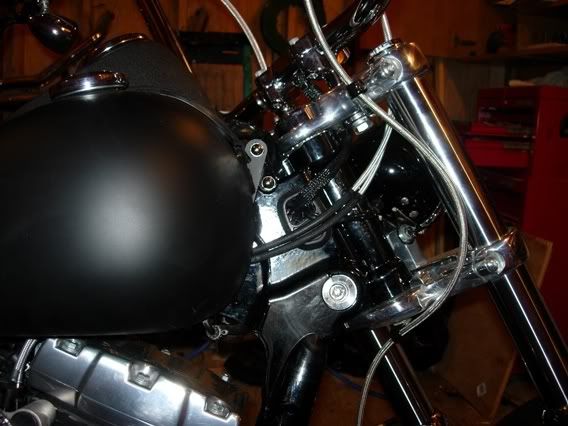
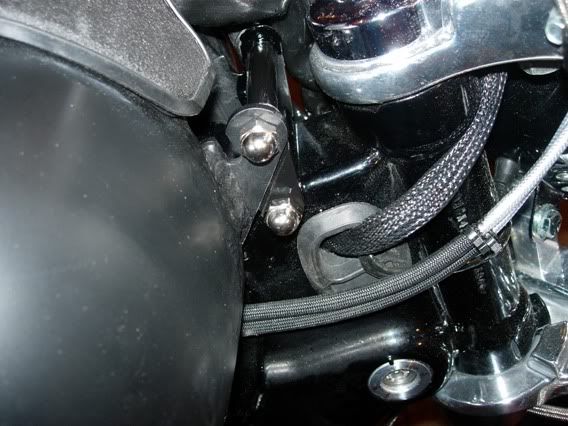
Tank Mod. Pictures aint that clear. Lotsa dust. And my lines in the backround look blue??? Frikin nikkon.
One pic thats not seen is the routingI did to the moddedplate to accomodate for clearance. The battery on mycameradied, and had to finish
'for the old lady threw a tantrum. (She's got me decorating for XMAS)
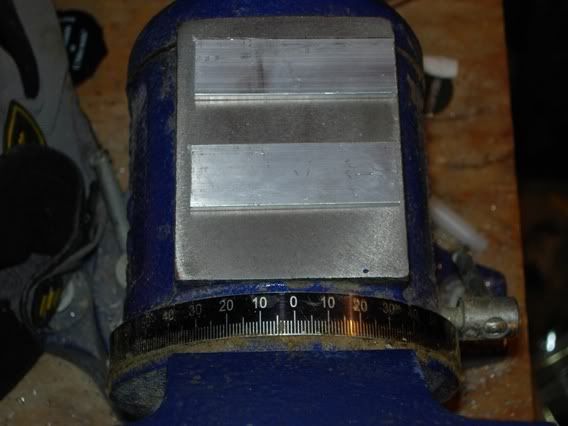
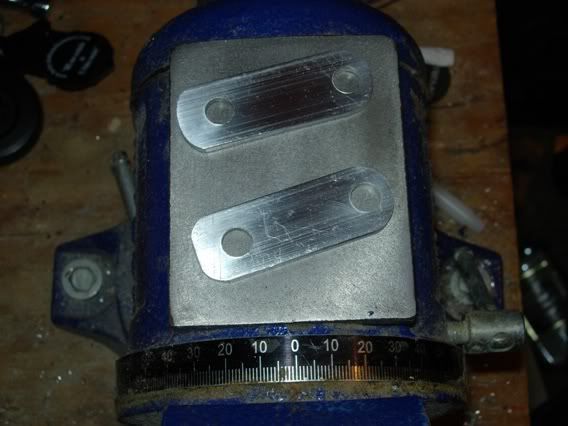
Real cheap mod.Raised the tank up 1 3/4". Took 2 hrs.
Materials:
One piece aluminum flat stock 1" x 3/16" Cost: $.0 (had it laying around in my shop)
One piece 1/2" Aluminun tube stock. Cost: $4.00 (lowes)
One 5/16" x 3 1/2" cap screw. Cost: .69c
Two 5/16" acorn nuts. Cost: $1.10
One can of spray paint. Cost $.0 (had it in my shop. Wish it was flat, not gloss)
Problems/complications...........F UCKIN' VENT HOSE,Wife. Other than that, real smooth Mod.

One pic thats not seen is the routingI did to the moddedplate to accomodate for clearance. The battery on mycameradied, and had to finish
'for the old lady threw a tantrum. (She's got me decorating for XMAS)
Real cheap mod.Raised the tank up 1 3/4". Took 2 hrs.
Materials:
One piece aluminum flat stock 1" x 3/16" Cost: $.0 (had it laying around in my shop)
One piece 1/2" Aluminun tube stock. Cost: $4.00 (lowes)
One 5/16" x 3 1/2" cap screw. Cost: .69c
Two 5/16" acorn nuts. Cost: $1.10
One can of spray paint. Cost $.0 (had it in my shop. Wish it was flat, not gloss)
Problems/complications...........F UCKIN' VENT HOSE,Wife. Other than that, real smooth Mod.
#1705
05-29-2011, 06:48 PM

.
.
here's my solution. link below goes to posting # 1065............
.
.
#1706
05-30-2011, 09:49 PM
I always look for 5 x 8 side mount plate holder but nothing available, yes we do have huge ugly license plate in BC. I decided to make my own, digging around and found the upper belt guard works perfect. I cut the belt guard to length, drill 2 mounting holes and mount it on the swing arm, it looks pretty good to me. I will get some Kury led light bolts tomorrow and complete it. Just wanna share the idea, see picture below.


The following users liked this post:
FREDStr33tbob (01-15-2019)
#1708
05-30-2011, 10:33 PM
Tourer
.
.
.
here's my solution. link below goes to posting # 1065............
.
.
.
.
here's my solution. link below goes to posting # 1065............
.
.
Turns out I was wrong about interference though. Once I got it all together the spacer between the tank tabs hit the steering center knuckle when turning. Took the spacer and long bolt out and used two 3/4" bolts with no spacer. It's all good I hope but the ride to work tomorrow will let me know.
#1710
05-30-2011, 10:48 PM
Club Member