Question for guys with true track
#1
 08-31-2018 | 08:01 PM
Thread Starter
|
Seasoned HDF Member
Joined: Dec 2010
Posts: 6,623
Likes: 1,059
From: Florida
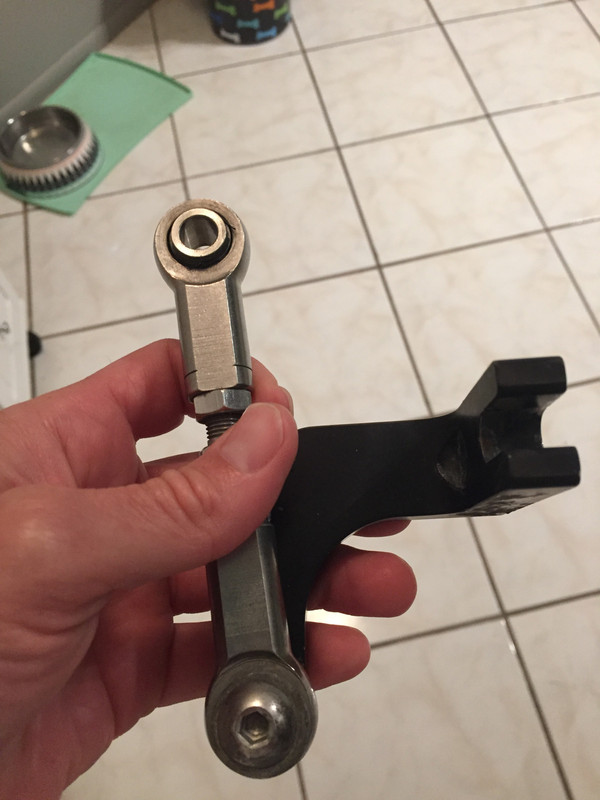
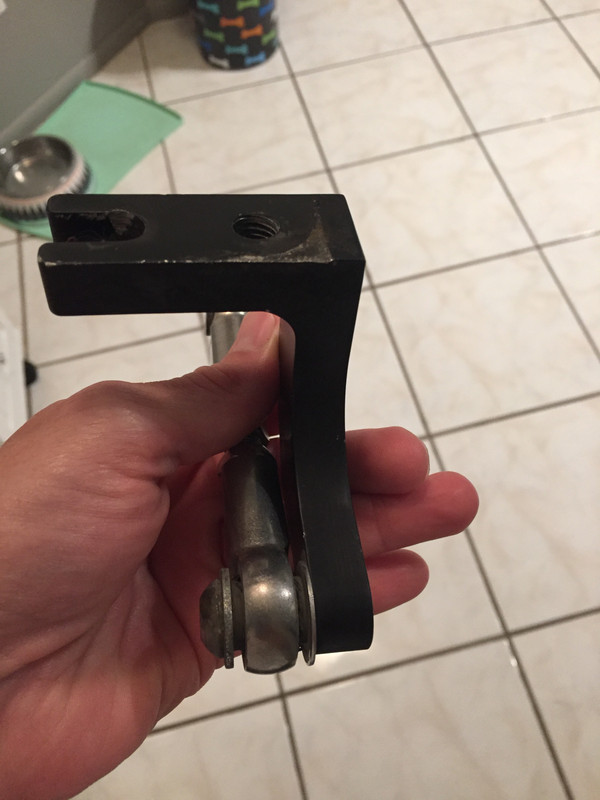
I am wondering how this rear bracket attaches to the other bracket that bolts to the side of the engine isolator. It is just a bolt and a washer or is there something else in between them.
I've had this part and the front part but I was missing the other bracket and ordered it from true track. But now I am wondering if I'm also missing another piece where they go together.
I've had this part and the front part but I was missing the other bracket and ordered it from true track. But now I am wondering if I'm also missing another piece where they go together.

#3
09-01-2018 | 03:04 PM

Road Master
Joined: Aug 2018
Posts: 965
Likes: 296
From: NoVa
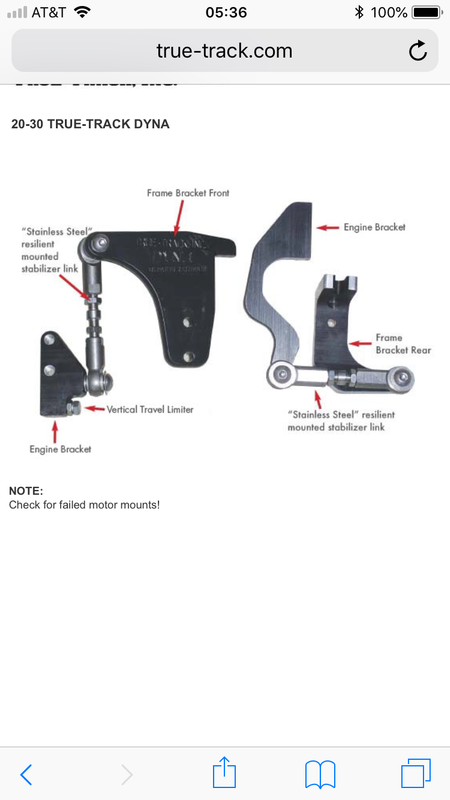
Just installed mine last week. Pretty pricey parts for something you don't really see, but WORTH EVERY PENNY on stabilizing the bike. I did not replace my rubber engine mounts, but the True Track completely cured the wobble my bike was experiencing.
That rear bracket is a pain in the butt to install. Best to have some help to turn the bolts while you hold the engine bracket in place. I had to remove the exhaust pipe support bracket off the engine to get at the forward bolt on the engine. You have to pull both bolts on the engine and flip them over so the bolt heads are on the left and the threads are on the right (do them one at a time to keep the engine from dropping!). It would have been great to remove the rear brake master cylinder, but Harley's design uses the hydraulic line connection to do double duty mounting the master cylinder. I forgot to install the bendable metal clip that holds the wiring harness, but don't think it's a big issue. Very tight in there!
When installing the link with the two Heim joints (according to your pic above), adjust the link so you can get screws on both ends into the bracket on the engine and the bracket on the frame. In your picture, notice that there is a washer both above and below the little spacer tube on the left. The big washers go outside the Heim joint, away from the bracket (just as shown). Use Loctite on the bolts for the link. Screw the bolts for the link in together, a turn on one, then one on the other. Otherwise the link will get diagonal and everything gets tight. Finally, lock down the jam nuts on the link.
Hope some of this helps.

Thread
Thread Starter
Forum
Replies
Last Post