Flush mount gascap/fuel guage on fatbob tank advice
#1
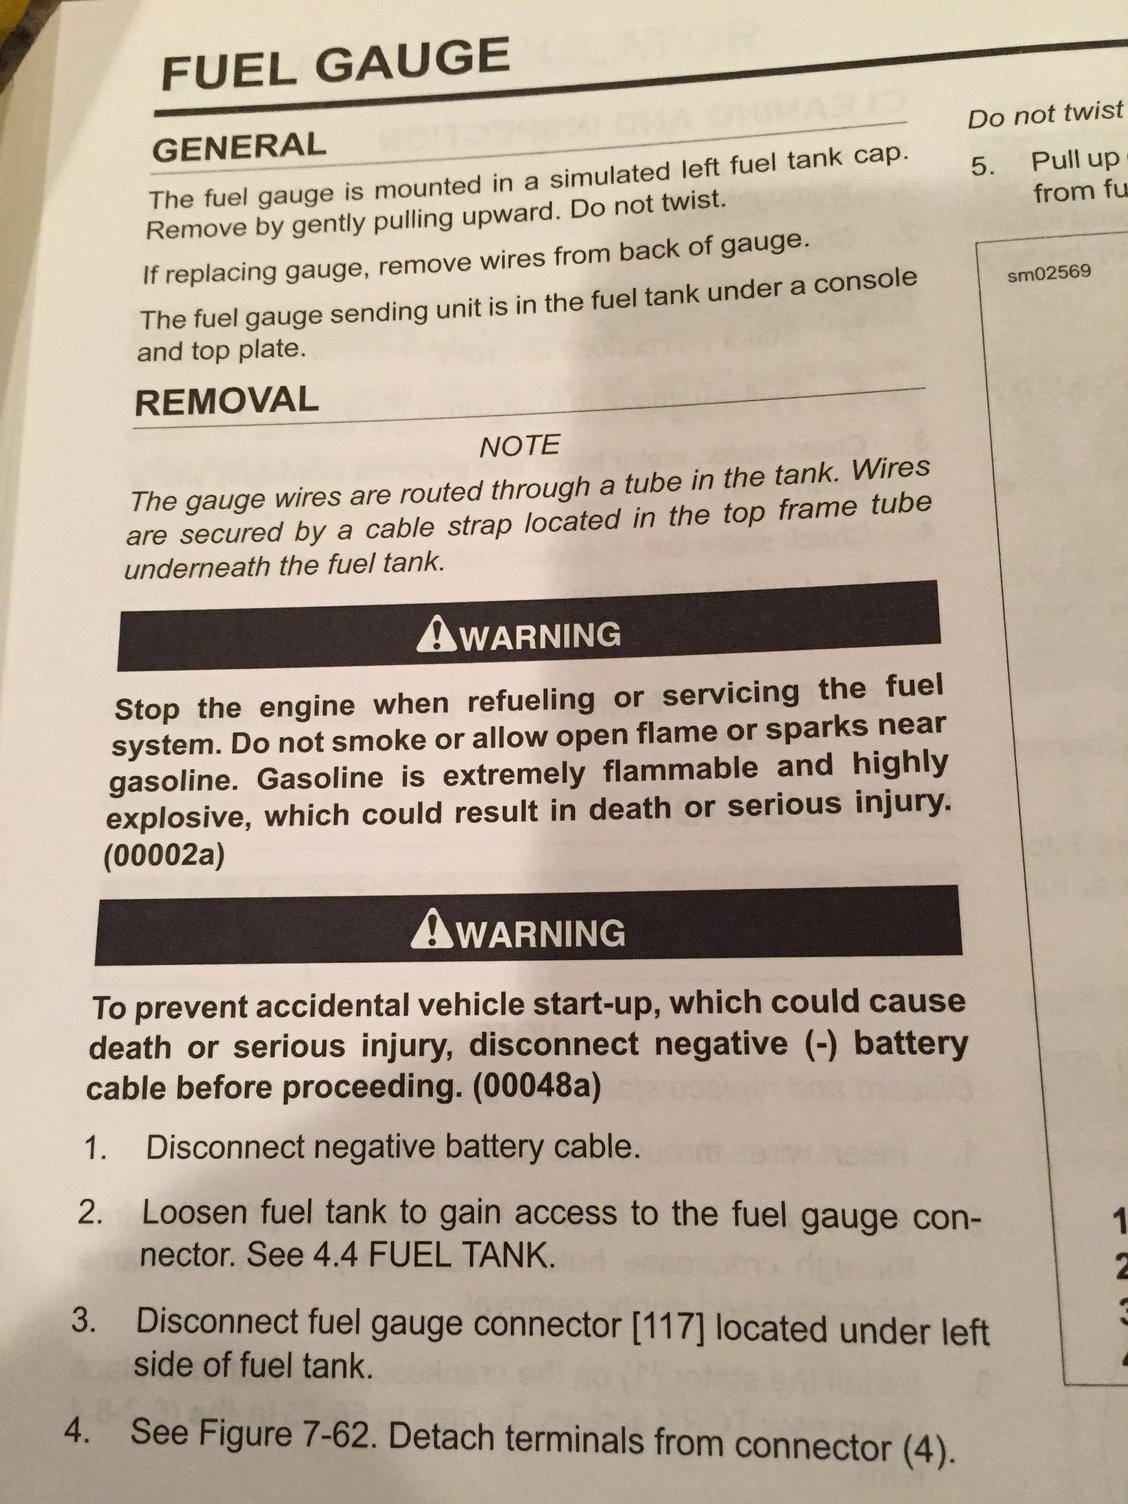
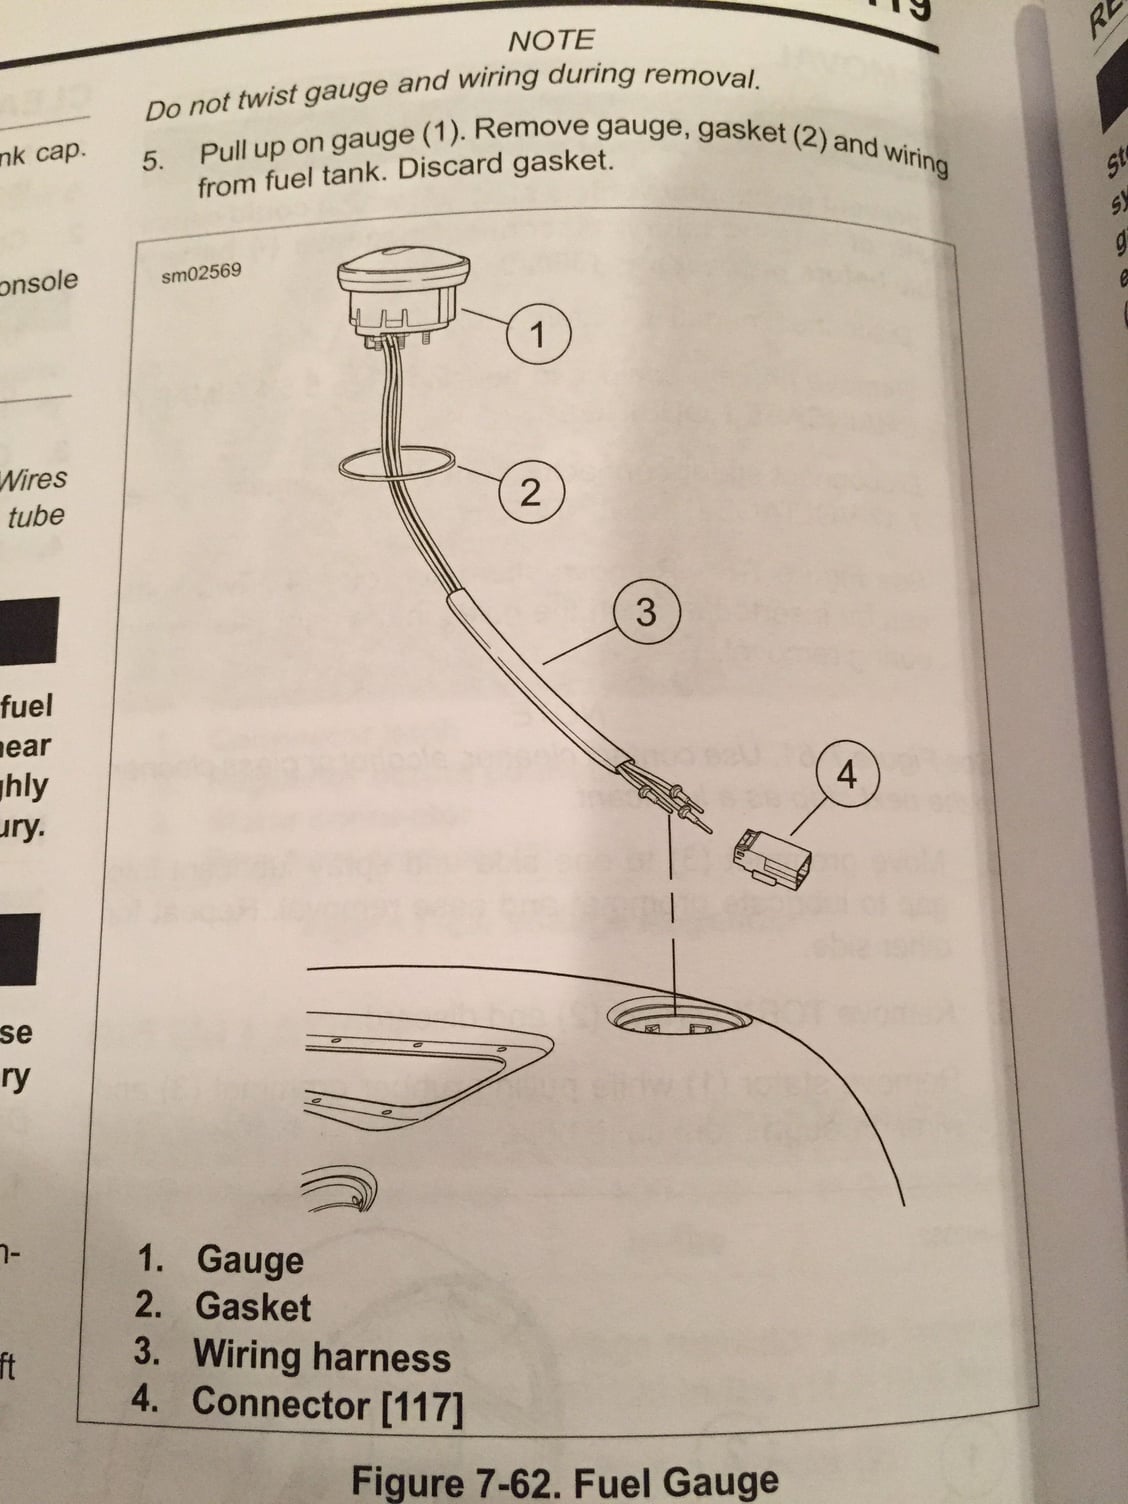
Just picked up a flushmount tank kit for the gas cap and fuel guage for my 2014 fatbob.the instructions call to remove the existing fuel guage with the manual's instructions.I don't yet have a set of service/electrical manuals to refer to.could use some advice on how to remove the existing fuel guage!
#4
You should loosen the fuel tank and remove the front bolt so you can pull it up. You can do it without this, but it's a right old pain in the ****.
You will also need to either cut the wires from the old fuel gauge where it joins the connector as it won't pull through the tube that goes though the tank), or de-pin the connector. Doesn't make much difference as you have to feed the wires from the new gauge through the tank and then put the pins into the connector anyway.
You will also need to either cut the wires from the old fuel gauge where it joins the connector as it won't pull through the tube that goes though the tank), or de-pin the connector. Doesn't make much difference as you have to feed the wires from the new gauge through the tank and then put the pins into the connector anyway.
#6
You do not have to touch the tank. Under the left side of tank there is a wire comming out of tube in tank , follow it to a plug. Unplug and de pin the wires , and mark on a paper or take a pic of what wire came from what slot. Pull old gauge out of tank and pull wire up out of tube. Put new wire down in the tube and then follow directions on gauge install. Put wires in plug . There should be a new plug with the kit. after wires are in new plug plug it into bikes harness and your done. When you install trim around gas cap make sure you clean tank good with rubbing alcohol and let dry. I warmed up tank and tape on ring with a hair dryer then installed trim and it stuck good. Just make sure you get the trim centered and turn it till it seats on the tank all the way around. and mark it so you get it in place before you take tape cover off. When you depin wires take a paper clip and bend it straight and push it in just above wire inside the plug and gently pull wires out the back. And you have to lift a piece of plastic on the plug in the rear for wires to pull out. It just locks wires in the plug
Last edited by clap; 03-20-2015 at 08:32 PM.
#7
thanks guys....I'm a low voltage guru by trade so the wirin aint no biggie,but I didn't know how to remove the guage from the tank...twist it,pull it,punch it,whatever.Didn't take a look at all under the tank just yet so at least I know what I'm gettin into which dont sound complicated.I am worried about gettin that trim ring rightly centered before I get it all stuck on the tank so I'm thinkin of ways to guide it in place with some kind of dowl cuzz my eyes aint as sharp and my hands a wee bit shakey in these over the hump years.
Trending Topics
#8


I hope this helped, basically find the cable below the tank and disconnect then de-pin the connector. pull up on the gauge firmly to release then reverse for install.
To align the trim ring I used a piece of masking tape until I got the trim ring where I wanted it (with the gas cap on and fully depressed), then stuck both down used an exacto knife to seperate the masking tape, pulled the sticker off the back of the trim ring re-aligned the masking tape and pressed firmly.
Good luck!

