What did you do to your Dyna today?
#5502
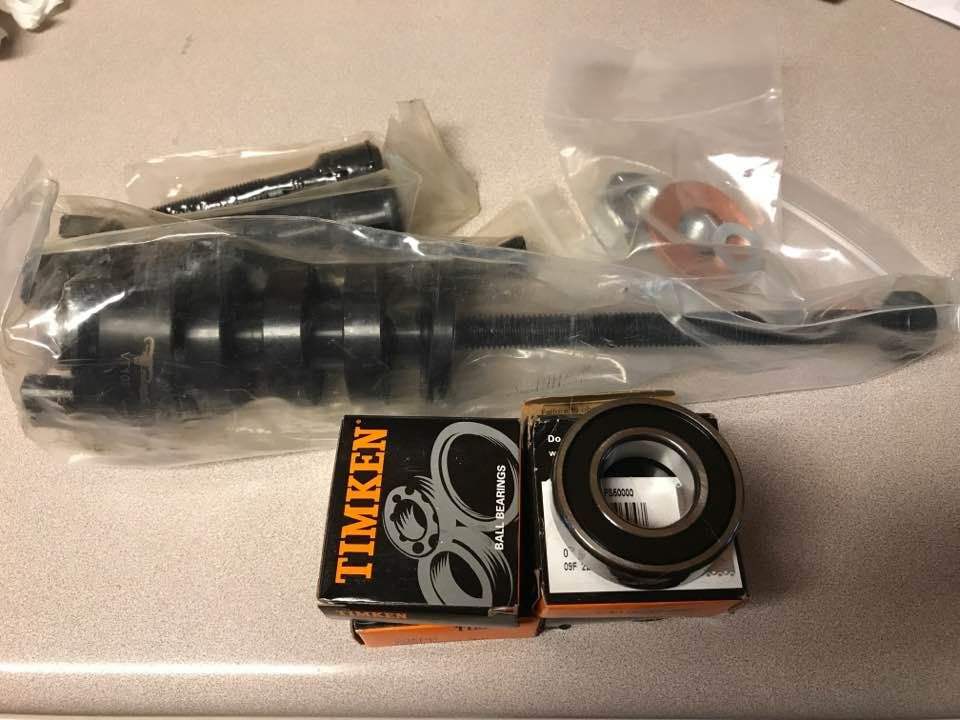
Be Aware of incorrect Pit Posse Instructions (but they may have changed them by now). Their blanket statement to always install the left bearing first "Doesn't fly"  ...unless you have a sportster
It would be better to follow:
- Install the first bearing in the Brake Rotor side of wheel.
- If there are two brake rotors then install first bearing in Left side of wheel
 ...unless you have a sportster
It would be better to follow:
- Install the first bearing in the Brake Rotor side of wheel.
- If there are two brake rotors then install first bearing in Left side of wheel
#5503
Bike has roughly 18k on the clock now. Installed new tires last spring at 15k and 3 of 4 were very very rough. I got layed up with surgery in June so just now recovering enough to get on this task. Bearings weren't in good shape even at 10k when I purchased the bike. No noticeable play but just very rough spinning them with your fingers. This is the first and only bike out of roughly 30 I've owned where the wheel bearings are bad. Little disappointing but not a major repair either. Had a friend nearly get killed in Houston a few years ago when the front bearing on his Goldwing failed. Not something to ignore!
Last edited by tnriverluver; 04-13-2017 at 06:43 PM.
The following users liked this post:
emperor wurm (04-14-2017)
#5504

Yea, I cheated just a bit; I couldn't decide on length and CCE hard chrome tubes are spendy; this seemed like a good way to test out an added 2" to see if I do want to got the full 4" CCE tubes.
https://www.denniskirk.com/cycle-vis...prd/585278.sku
Very well made, no fear running them.
As to the new headlight; when you turn the ignition the engine light and the electrical diagnostic clear, then the electrical comes back on immediately; high beam, low beam, it doesn't care. Annoying.
I'll most likely just live with the little red light glowing back at me; that LED headlight is bright; I understand why people put these things in.
I guess I'll have to spend the long dollar if I want that diagnostic light to go away... I hope, with my luck it'll still be there...

#5505

Yea, I cheated just a bit; I couldn't decide on length and CCE hard chrome tubes are spendy; this seemed like a good way to test out an added 2" to see if I do want to got the full 4" CCE tubes.
https://www.denniskirk.com/cycle-vis...prd/585278.sku
Very well made, no fear running them.
As to the new headlight; when you turn the ignition the engine light and the electrical diagnostic clear, then the electrical comes back on immediately; high beam, low beam, it doesn't care. Annoying.
I'll most likely just live with the little red light glowing back at me; that LED headlight is bright; I understand why people put these things in.
I guess I'll have to spend the long dollar if I want that diagnostic light to go away... I hope, with my luck it'll still be there...

High beam draws 2.63A @ 11.7V = 30.8W
Low beam draws 1.29A @ 11.7V = 15.1W
Unfortunately, I don't have a 14v power supply.
Last edited by cggorman; 04-13-2017 at 06:47 PM.
The following users liked this post:
TinCupChalice (04-14-2017)
#5506
Be Aware of incorrect Pit Posse Instructions (but they may have changed them by now). Their blanket statement to always install the left bearing first "Doesn't fly"  ...unless you have a sportster
It would be better to follow:
- Install the first bearing in the Brake Rotor side of wheel.
- If there are two brake rotors then install first bearing in Left side of wheel
 ...unless you have a sportster
It would be better to follow:
- Install the first bearing in the Brake Rotor side of wheel.
- If there are two brake rotors then install first bearing in Left side of wheel
#5507
Anyways, when removing the bearings, I found it easiest to get the larger pressure nut (Blue arrow) tight and hold it while turning the collet itself out using the flats (Red arrow).
Attachment 519817
Be Aware of incorrect Pit Posse Instructions (but they may have changed them by now). Their blanket statement to always install the left bearing first "Doesn't fly"  ...unless you have a sportster
It would be better to follow:
- Install the first bearing in the Brake Rotor side of wheel.
- If there are two brake rotors then install first bearing in Left side of wheel
 ...unless you have a sportster
It would be better to follow:
- Install the first bearing in the Brake Rotor side of wheel.
- If there are two brake rotors then install first bearing in Left side of wheel
Last edited by soldierbot; 04-02-2021 at 07:46 AM.
The following users liked this post:
izhd (04-14-2017)
#5509
At 34,600 miles my 2010 Dyna SG was due for a trip to my local indy. I had him pull the cover and check the cam chain tensioners and happily he found all was well. The rear brakes were nearing time for new pads so I had him replace the originals and bleed both the front and rear {the front pads were fine}.
Had him drain/flush the front forks and eyeball the rest of the bike for anything he thought might need attention. He pronounced the bike to be in excellent condition needing nothing further.
I'm leaving next week for a 1,000 mile roundtrip across the desert to southern California to attend the Advanced Riders Training seminar and looking forward to a smooth trouble free trip. For the record the ME 888's are new and my fluid changes are current. The bike runs great with the new Vance and Hines Fuelpak FP3 tune to complement the 2 into 1 Propipe and high performance SE AC.
Hoping to learn a lot over the course of the weekend long seminar and looking forward to a great ride... though I might just stop off at the Cocopagh Casino in Yuma to break up the ride home. (o;


