bobber update, day 13 // UPDATED
#1
 07-04-2008, 08:41 AM

day 13,
 \\;\\\\\\;\\\\\\\\\\\\\\;\\\\\\\\\\\\\\\\\\\\ \\\\\\\\\\;
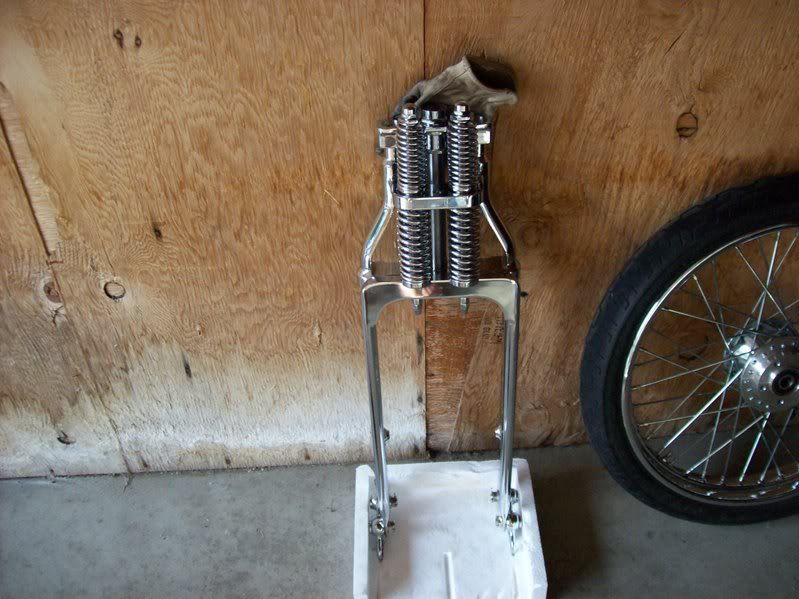
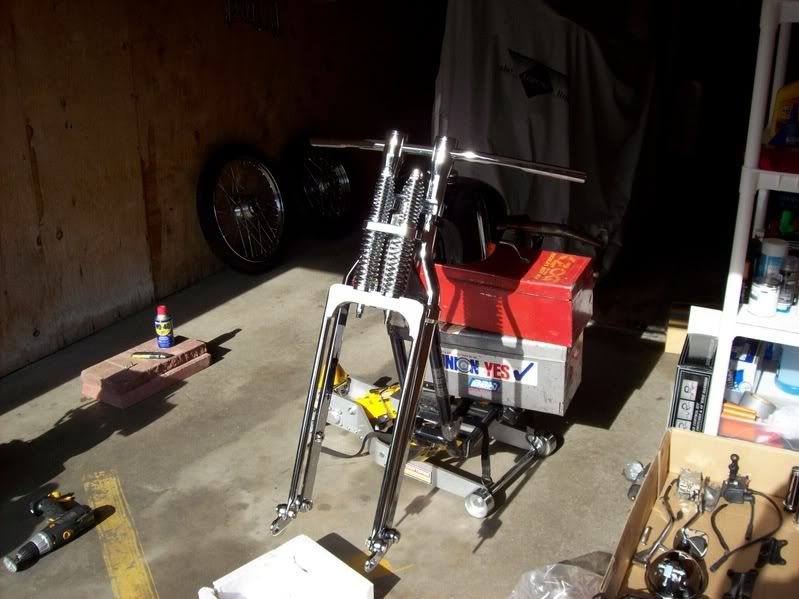
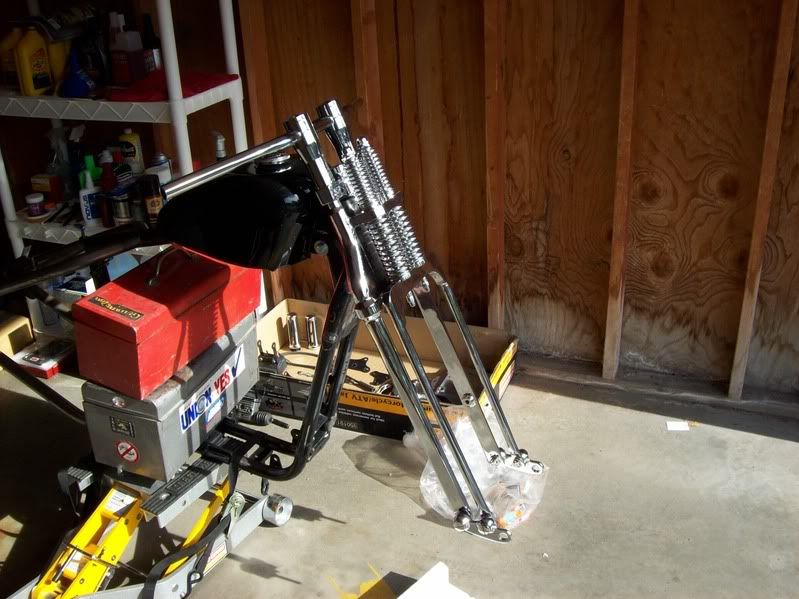
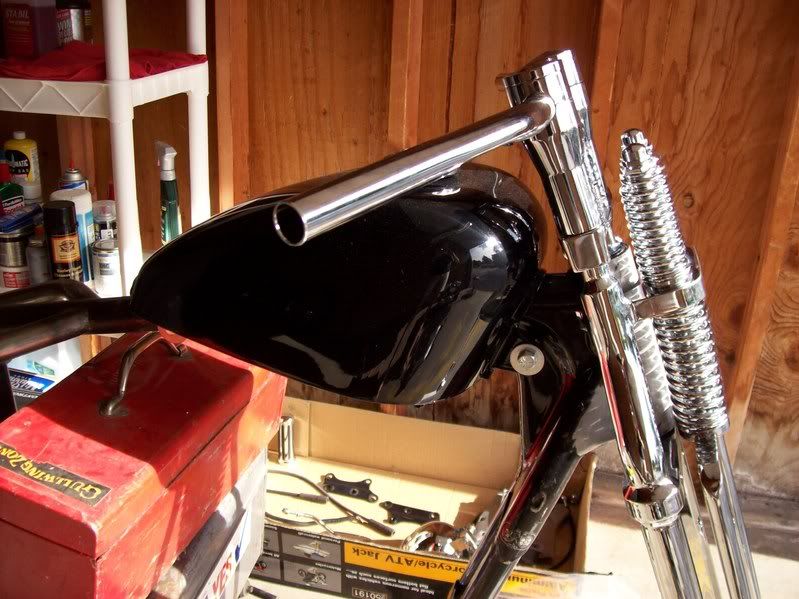
Well, the springer finally came in.
 \\;\\\\\\;\\\\\\\\\\\\\\;\\\\\\\\\\\\\\\\\\\\ \\\\\\\\\\;
 \\;\\\\\\;\\\\\\\\\\\\\\;\\\\\\\\\\\\\\\\\\\\ \\\\\\\\\\;
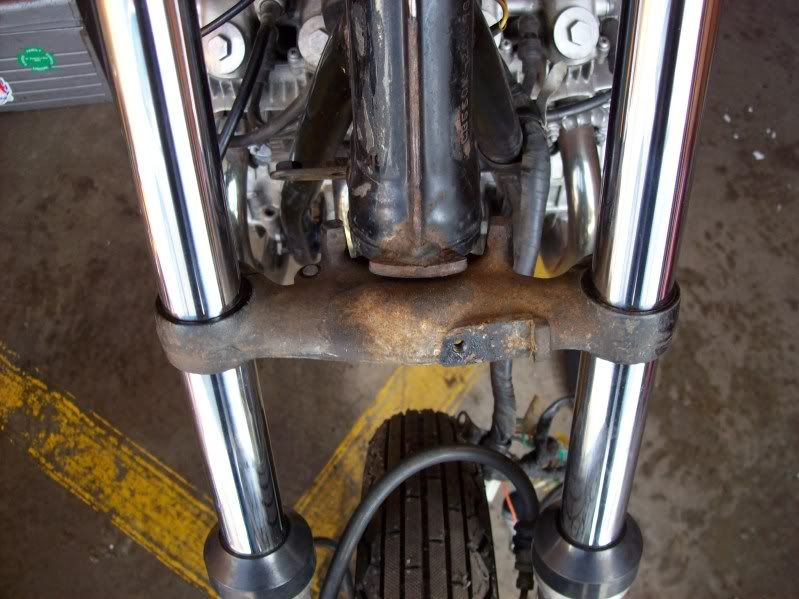
Mounted up. \\;\\\\\\;\\\\\\\\\\\\\\;\\\\\\\\\\\\\\\\\ \\\\\\\\\\\\\; Sorry I forgot to take pics, but what I did was marked the spots on the frame where the fork stops hit, and then sat the freshly painted tank on there and measured how close I could get to the tank. \\;\\\\\\;\\\\\\\\\\\\\\;\\\\\\\\\\\\\\\ \\\\\\\\\\\\\\\; From there I determined that I needed to weld on 3/8 inch nuts as a spacer. \\;\\\\\\;\\\\\\\\\\\\\\;\\\\\\\\\\\\\ \\\\\\\\\\\\\\\\\; I used stainless steel nuts, and If I can get away with it, I will run in some button head chrome plated bolts. \\;\\\\\\;\\\\\\\\\\\\\\;\\\\\\\\\\\\\\ \\\\\\\\\\\\\\\\; If it takes away too much travel, then they will have to come out.
 \\;\\\\\\;\\\\\\\\\\\\\\;\\\\\\\\\\\\\\\\\\\\ \\\\\\\\\\;
 \\;\\\\\\;\\\\\\\\\\\\\\;\\\\\\\\\\\\\\\\\\\\ \\\\\\\\\\;
 \\;\\\\\\;\\\\\\\\\\\\\\;\\\\\\\\\\\\\\\\\\\\ \\\\\\\\\\;
 \\;\\\\\\;\\\\\\\\\\\\\\;\\\\\\\\\\\\\\\\\\\\ \\\\\\\\\\;
 \\;\\\\\\;\\\\\\\\\\\\\\;\\\\\\\\\\\\\\\\\\\\ \\\\\\\\\\;
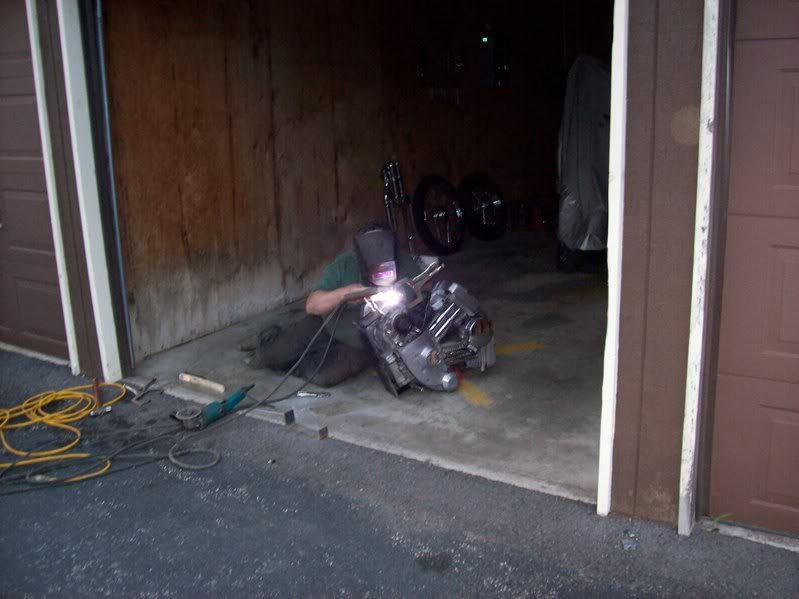
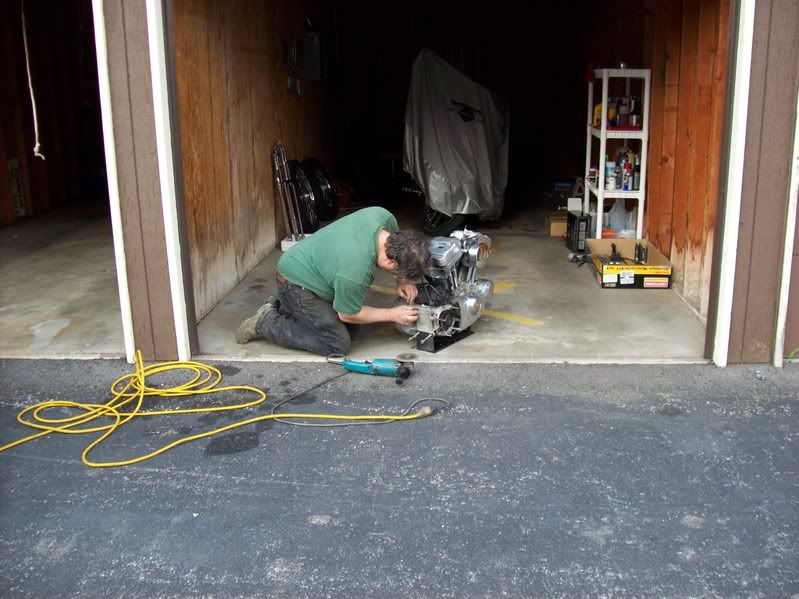
Okay, the engine. \\;\\\\\\;\\\\\\\\\\\\\\;\\\\\\\\\\\\\ \\\\\\\\\\\\\\\\\; As I had mentioned earlier, It had a broken ear. \\;\\\\\\;\\\\\\\\\\\\\\;\\\\\\\\\\\\\\\\ \\\\\\\\\\\\\\; Well, here is a welder putting it back on with a TIG welder. \\;\\\\\\;\\\\\\\\\\\\\\;\\\\\\\\\\\\\ \\\\\\\\\\\\\\\\\; I noticed while he was doing it that the other top rear ear had a crack![&o] \\;\\\\\\;\\\\\\\\\\\\\\;\\\\\\\\\\\\\\\\\\\\ \\\\\\\\\\; LUCKY. \\;\\\\\\;\\\\\\\\\\\\\\;\\\\\\\\\\\\\\ \\\\\\\\\\\\\\\\; He welded it up and grinded it down as well. \\;\\\\\\;\\\\\\\\\\\\\\;\\\\\\\\\\\\\\\ \\\\\\\\\\\\\\\; I will post pics later, as I have to go out and take the finished pic.
 \\;\\\\\\;\\\\\\\\\\\\\\;\\\\\\\\\\\\\\\\\\\\ \\\\\\\\\\;

 \\;\\\\\\;\\\\\\\\\\\\\\;\\\\\\\\\\\\\\\\\\\\ \\\\\\\\\\;
 \\;\\\\\\;\\\\\\\\\\\\\\;\\\\\\\\\\\\\\\\\\\\ \\\\\\\\\\;
 \\;\\\\\\;\\\\\\\\\\\\\\;\\\\\\\\\\\\\\\\\\\\ \\\\\\\\\\;
 \\;\\\\\\;
I have ordered 95% of the parts necessary to finish the build. \\;\\\\\\;\\\\\\\\\\\\\\;\\\\\\\\\\\\\\ \\\\\\\\\\\\\\\\; It will be a bit more money than I had hoped, but I was unwilling to put some of the rusted and corroded parts back on. \\;\\\\\\;\\\\\\\\\\\\\\;\\\\\\\\\\\\\\\\\ \\\\\\\\\\\\\; With such a pretty frame, tins, etc. I just could not put "junk" back on. \\;\\\\\\;\\\\\\\\\\\\\\;\\\\\\\\\\\\\\\\\ \\\\\\\\\\\\\; I am sure I will be glad when it is finished.
 \\;\\\\\\;\\\\\\\\\\\\\\;\\\\\\\\\\\\\\\\\\\\ \\\\\\\\\\;
~Joe
 \\;\\\\\\;\\\\\\\\\\\\\\;\\\\\\\\\\\\\\\\\\\\ \\\\\\\\\\;
 \\;\\\\\\;\\\\\\\\\\\\\\;\\\\\\\\\\\\\\\\\\\\ \\\\\\\\\\;
Well, the springer finally came in.
 \\;\\\\\\;\\\\\\\\\\\\\\;\\\\\\\\\\\\\\\\\\\\ \\\\\\\\\\;
 \\;\\\\\\;\\\\\\\\\\\\\\;\\\\\\\\\\\\\\\\\\\\ \\\\\\\\\\;
Mounted up. \\;\\\\\\;\\\\\\\\\\\\\\;\\\\\\\\\\\\\\\\\ \\\\\\\\\\\\\; Sorry I forgot to take pics, but what I did was marked the spots on the frame where the fork stops hit, and then sat the freshly painted tank on there and measured how close I could get to the tank. \\;\\\\\\;\\\\\\\\\\\\\\;\\\\\\\\\\\\\\\ \\\\\\\\\\\\\\\; From there I determined that I needed to weld on 3/8 inch nuts as a spacer. \\;\\\\\\;\\\\\\\\\\\\\\;\\\\\\\\\\\\\ \\\\\\\\\\\\\\\\\; I used stainless steel nuts, and If I can get away with it, I will run in some button head chrome plated bolts. \\;\\\\\\;\\\\\\\\\\\\\\;\\\\\\\\\\\\\\ \\\\\\\\\\\\\\\\; If it takes away too much travel, then they will have to come out.
 \\;\\\\\\;\\\\\\\\\\\\\\;\\\\\\\\\\\\\\\\\\\\ \\\\\\\\\\;
 \\;\\\\\\;\\\\\\\\\\\\\\;\\\\\\\\\\\\\\\\\\\\ \\\\\\\\\\;
 \\;\\\\\\;\\\\\\\\\\\\\\;\\\\\\\\\\\\\\\\\\\\ \\\\\\\\\\;
 \\;\\\\\\;\\\\\\\\\\\\\\;\\\\\\\\\\\\\\\\\\\\ \\\\\\\\\\;
 \\;\\\\\\;\\\\\\\\\\\\\\;\\\\\\\\\\\\\\\\\\\\ \\\\\\\\\\;
Okay, the engine. \\;\\\\\\;\\\\\\\\\\\\\\;\\\\\\\\\\\\\ \\\\\\\\\\\\\\\\\; As I had mentioned earlier, It had a broken ear. \\;\\\\\\;\\\\\\\\\\\\\\;\\\\\\\\\\\\\\\\ \\\\\\\\\\\\\\; Well, here is a welder putting it back on with a TIG welder. \\;\\\\\\;\\\\\\\\\\\\\\;\\\\\\\\\\\\\ \\\\\\\\\\\\\\\\\; I noticed while he was doing it that the other top rear ear had a crack![&o] \\;\\\\\\;\\\\\\\\\\\\\\;\\\\\\\\\\\\\\\\\\\\ \\\\\\\\\\; LUCKY. \\;\\\\\\;\\\\\\\\\\\\\\;\\\\\\\\\\\\\\ \\\\\\\\\\\\\\\\; He welded it up and grinded it down as well. \\;\\\\\\;\\\\\\\\\\\\\\;\\\\\\\\\\\\\\\ \\\\\\\\\\\\\\\; I will post pics later, as I have to go out and take the finished pic.
 \\;\\\\\\;\\\\\\\\\\\\\\;\\\\\\\\\\\\\\\\\\\\ \\\\\\\\\\;
 \\;\\\\\\;\\\\\\\\\\\\\\;\\\\\\\\\\\\\\\\\\\\ \\\\\\\\\\;
 \\;\\\\\\;\\\\\\\\\\\\\\;\\\\\\\\\\\\\\\\\\\\ \\\\\\\\\\;
 \\;\\\\\\;\\\\\\\\\\\\\\;\\\\\\\\\\\\\\\\\\\\ \\\\\\\\\\;
 \\;\\\\\\;
I have ordered 95% of the parts necessary to finish the build. \\;\\\\\\;\\\\\\\\\\\\\\;\\\\\\\\\\\\\\ \\\\\\\\\\\\\\\\; It will be a bit more money than I had hoped, but I was unwilling to put some of the rusted and corroded parts back on. \\;\\\\\\;\\\\\\\\\\\\\\;\\\\\\\\\\\\\\\\\ \\\\\\\\\\\\\; With such a pretty frame, tins, etc. I just could not put "junk" back on. \\;\\\\\\;\\\\\\\\\\\\\\;\\\\\\\\\\\\\\\\\ \\\\\\\\\\\\\; I am sure I will be glad when it is finished.
 \\;\\\\\\;\\\\\\\\\\\\\\;\\\\\\\\\\\\\\\\\\\\ \\\\\\\\\\;
~Joe
 \\;\\\\\\;\\\\\\\\\\\\\\;\\\\\\\\\\\\\\\\\\\\ \\\\\\\\\\;
#3
07-04-2008, 09:00 AM
#4
07-04-2008, 04:47 PM
Road Master
Join Date: Mar 2008
Location: Spokane, WA
Posts: 1,070
Likes: 0
Received 0 Likes
on
0 Posts
#7
07-05-2008, 01:50 AM
Trending Topics
#8
07-06-2008, 10:08 AM
Thanks guys....it IS nice to get an "atta boy" once in a blue moon, I guess.[ ]
]
 \\;
Today, I'll take a pic of the finished motor mount, all welded up. \\; You have no idea how much weight that takes off of me...that all went well with that.[]
 \\;
~Joe
] \\;
Today, I'll take a pic of the finished motor mount, all welded up. \\; You have no idea how much weight that takes off of me...that all went well with that.[
] \\;
~Joe

#10
07-06-2008, 04:51 PM