
Install done but uhh ohh what happened?
#1
 04-03-2013, 07:33 PM


Join Date: Sep 2012
Location: Mississippi
Posts: 203
Likes: 0
Received 0 Likes
on
0 Posts
Okay finished install 2012 Street Glide fairing speakers and Amp Soundtream PN 4.520D amplifier and a set of Biketronics Titan II 6.5 inch speakers this morning here's the run down of this whole thing
1. I took everything off bike I had to ran power wire through tray put my inline fuse at battery hooked up left fuse out.
2. Installed my speakers and adapter rings and grills per provided instructions
3. Now I hooked my speaker wire to RCA adapter up per provided instructions paying attention to make sure my polaritys were correct. No one had the scorsche loc 80 or the PAC sin 35 but I found a unit at hoopers electronics 5 wires 4 for speaker inputs 1 ground to output RCA collars of RCA leads were red and black I hooked my RCA y adapters to these using red for right black for left.
4. Now I hooked my power wire and ground wire to the amp slid it on top of hu and then wired my RCA leads to the RCA inputs my y adapters outputs also red and black and my RCA cables same color I took the red lead off of the speaker to RCA adapter to the right input of amp and plugged the red lead to right and black lead to left of the front input now I take black lead to the rear input and plug red to right and black to left.
5. Now I go back to the other side and hook my remot e line up to the orange white wire on headlight harness and hook it to the remote in terminal.
6. Now I take the provided wiring leads that came withe the Titan 2 speakers and hook them to my speakers the I connect my speaker wire using a red wire for positive and a gray wire for negative to run to my out put of my ss pn 4.520d amp I connected the speaker wire to Titan harness using but splices I repeated this process on the other side I now take my wiresand hook them to the bridged position for each side of the amp.
6. Now I check all my connections and wiring 4 times to make sure everything is right and it all was right every time. I then wrap the speakers with poly fill 1 inch thick.
7. Now I go to fuse holder put my fuse in I get a good arc on the fuse so I know I have a good ground connection to my amp. I turn the ignition on and my amp starts up great now I set my radio bass and treble to middle position and pop a good rock cd in and turn it up I get distortion e at 3 bars from wide open ( backtrack here I set my crossovers to middle position full pass and made sure my gain controls were both at 0 all this was done before I fired the amp up) now I back my volume down a little till I hear distortion clear I turn my gains up to around the 10 1030 position and hear distortion I back them down to right at 9 930 and then turn my bass and treble back up and Wow these things will blow you away loud I mean loud crisp and crystal clear sound. Now I shut it all down and finish tying my wires and stuff in place test fitting the fairing to make sure it would go I had to adjust some wiring a couple times and finally I get it right and button her up its a tight fit getting fairing on but patience is the key here.
8. got it all buttoned up and I thought it sounded good. Without the fairing on now the bass response is amazing.
All done now comes the uhh ohh took her for a spin this morning got exactly a mile from the house and I smell that rotten smell any electronics person would know the smell of either a resistor or capacitor having the smoke let out of it. Well all know what went through my head at this point ( **** what did I screw up) went back home pulled faring off and started looking right speaker burnt by the way so I check my wiring again and then I look at the left speaker wires coming from voice coil black white stripe goes to negative side on board mounted to speaker red goes to positive side with capacitor look at right uhh ohh red goes to negative and black goes to positive I think we'll here is my culprit.
Contacted biietronics a while ago left a message and Bill called me back shortly after I left the message I tell him what happened how I hooked it all up and what I found wrong. He says man I'm sorry that happened I said its alright stuff just happens they are shipping me a replacement out tomorrow with a label to return defective unit I will say he was extremely nice and professional and their customer service is best I've ever seen get a result in ten minutes and apology that's what I'm talking about. Stuff happens just my luck it happened to me ain't the first time nor will it be the last.
Sorry for the long post but I just said ill go ahead and throw all the info up before a hundred questions get asked about this or that I've got pictures of a lot of the stuff ill try and get them up as I can hard to do it here at work but I going to try to throw a few up tonight. Any thoughts on this questions or whatever will be appreciated and ill try to answer any questions the best I can.
Thanks for reading this book... Hope it will help someone.
Last edited by Strait; 04-04-2013 at 01:43 AM.
#2
04-03-2013, 07:34 PM
Join Date: Sep 2012
Location: Mississippi
Posts: 203
Likes: 0
Received 0 Likes
on
0 Posts
Pictures to come here shortly.
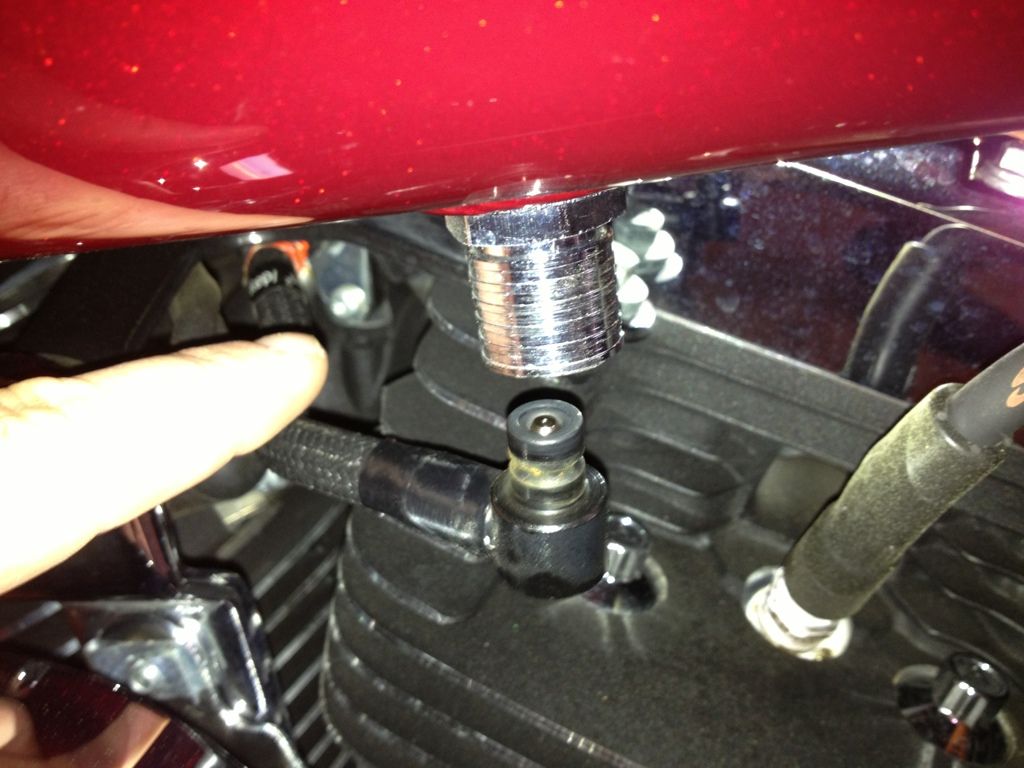
First take off seat then pop off quick connect on fuel line under tank by pushing up on silver part and the wiggle line and it should pop free will get a few drops of gas on your hand.
Next remove gas tank two bolts in front two in the rear to expose wiring tray

Snap off top of wire tray
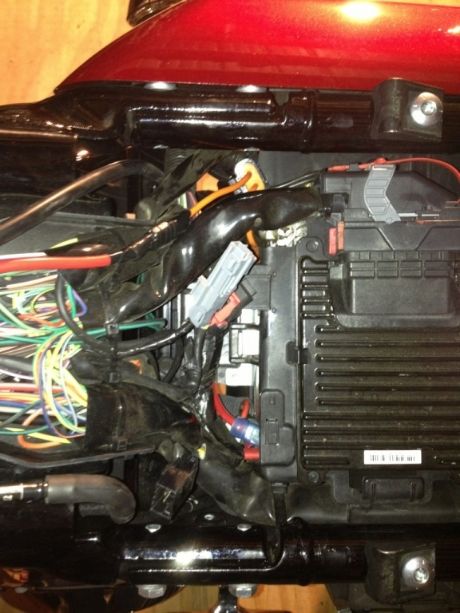
Next push wire through lume on right side make sure to cut zip tie on lume before pushing wire through run though tray down to battery notice I put my fuse holder where it woul be accessible from right side cover and hook to battery you have to remove ECM and mount bracket to hook up power wire to battery using a ring terminal I used 8 gauge wire.
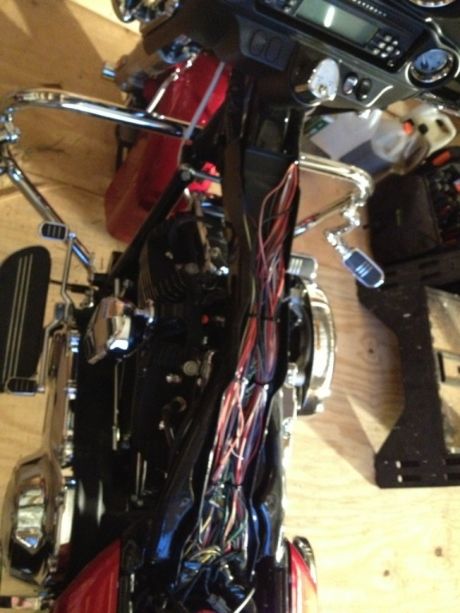
Here's a picture of the fairing its not great but only one I have after power wire is ran find your ground spot either by using the threaded hole in the triple clamps or grind a place on the fairing mount inside and bolt it down install new speakers adapter rings and grills and begin the wiring process for your amp you will have to relocate the two plugs over the radio and then you can slide your amp in I secured mine using heavy duty 3m Velcro I picked up at napa after you get all you wiring done secure amp down to radio it will be a tight fit with the faring going back on but this is an easy job. For anyone to do.

Will try and get a few more pics up as I get them uploaded but this should help to get going everyone is different with there wiring but use good but splices and ring terminals and connectors I used a pair of Klein sta con crimpers that I have channel lock makes a pair that is good you can get them at lowes or you can use the multi stripper crimper cutters that are out there just make sure your connections are good and crimps are tight.
Please ask any questions if I can help I will if not there are many great members here willing to help as they have helped me a big thank you to all you Guys that helped me.
First take off seat then pop off quick connect on fuel line under tank by pushing up on silver part and the wiggle line and it should pop free will get a few drops of gas on your hand.
Next remove gas tank two bolts in front two in the rear to expose wiring tray
Snap off top of wire tray
Next push wire through lume on right side make sure to cut zip tie on lume before pushing wire through run though tray down to battery notice I put my fuse holder where it woul be accessible from right side cover and hook to battery you have to remove ECM and mount bracket to hook up power wire to battery using a ring terminal I used 8 gauge wire.
Here's a picture of the fairing its not great but only one I have after power wire is ran find your ground spot either by using the threaded hole in the triple clamps or grind a place on the fairing mount inside and bolt it down install new speakers adapter rings and grills and begin the wiring process for your amp you will have to relocate the two plugs over the radio and then you can slide your amp in I secured mine using heavy duty 3m Velcro I picked up at napa after you get all you wiring done secure amp down to radio it will be a tight fit with the faring going back on but this is an easy job. For anyone to do.
Will try and get a few more pics up as I get them uploaded but this should help to get going everyone is different with there wiring but use good but splices and ring terminals and connectors I used a pair of Klein sta con crimpers that I have channel lock makes a pair that is good you can get them at lowes or you can use the multi stripper crimper cutters that are out there just make sure your connections are good and crimps are tight.
Please ask any questions if I can help I will if not there are many great members here willing to help as they have helped me a big thank you to all you Guys that helped me.
Last edited by Strait; 04-03-2013 at 08:42 PM.
#3
04-03-2013, 07:37 PM


#6
04-03-2013, 09:14 PM
Join Date: Sep 2012
Location: Mississippi
Posts: 203
Likes: 0
Received 0 Likes
on
0 Posts
After talking with UltraNutz he informed me I should bridge the amp so I could get full use out of the amp until I get the money up to do my rear speakers so to bridge it I had to have 4 inputs into the amp 1 for each channel I used that because the factory hu doesn't have RCA jacks so to achieve this I had to use the wire to RCA adapter to be able to achieve bridging the amp was my understanding.
#7
04-04-2013, 07:16 AM
the line converter was needed in this case because we need all 4 channels of input for the amp to be bridged. Using the line converter is less expensive than buying the 35 pin ampseal connector, the metal pins, and then seal pins to make your own connection to the rear radio outputs, not to mention the headache of putting it together. Since it's only a 2 speaker setup, this was the way to go for ease of installation.
Strait, good job sir and yes by all means Biketronics has the some of the most impeccable customer service in the motorcycle world.
Strait, good job sir and yes by all means Biketronics has the some of the most impeccable customer service in the motorcycle world.
Trending Topics
#8
04-04-2013, 12:06 PM
Cruiser
#9
04-04-2013, 05:32 PM
Join Date: Sep 2012
Location: Mississippi
Posts: 203
Likes: 0
Received 0 Likes
on
0 Posts
Thank you sir for every piece of knowledge and the effort to help folks like me who can do the job but just need a little guidance. And you will never hear anything but positive from me about biketronics as I finish my upgrades as time goes there will be several more purchases from those folks everyone I talked to was extremely nice and trying to help and as I'm sure they are busy they still take the time to help YOU at the time. And as stated in OP those things freaking rock should have my replacement Saturday going to try to pick it up at PO before it goes on route where I can have it and get her buttoned back up seeing as my carrier doesn't make it to my house till after lunch on Saturday I'm ready to make a good ride and listen to them for a while I'm still amazed at the quality of sound truly a nice setup in my opinion Im chomping at the bit to get my bag lids and order there 6x9s then I should have more audio than I know what to do with.
#10
04-05-2013, 03:07 PM
Tourer
Join Date: Mar 2012
Location: Land of OZ
Posts: 380
Likes: 0
Received 0 Likes
on
0 Posts